Paper Bag Scrapbook Album
/Hello my friends! I am so excited to share this project with you as it is another throwback to an album I used to make about 8 years ago! Way back when It was easier to find large or oversized paper bags and then our society went to full on plastic bags and I couldn’t find these paper bags anymore. Well, its a new time and we are all about paper bags again! I got this at my grocery store and asked for a few extras to craft with! I decided to create a Paper Bag Travel Album to hold mementos and postcards from our recent SU Incentive Trip to Greece (my favourite out of all the places I have been blessed to travel to with Stampin’ Up!). I am a collector, so when I do go on trips I always buy postcards, and keep tickets and receipts and stuff so all of this was perfect to add into this album!
I used the Tropical Oasis and Ornate Gardens DSP as they have complimentary tones and colors as the basis for my album. And then I blended in embellishments from both suites. Some of the stamps are old favorites and some are new additions to the SU lineup.
This album came together pretty easily, as you can tell its not that complicated! I think they would also make great school memory albums (which was what I was making them into 8 years ago!), or gifts of friendship or family memories! The storage pockets are a great way to add in memorabilia without needing a lot of 'pages’.
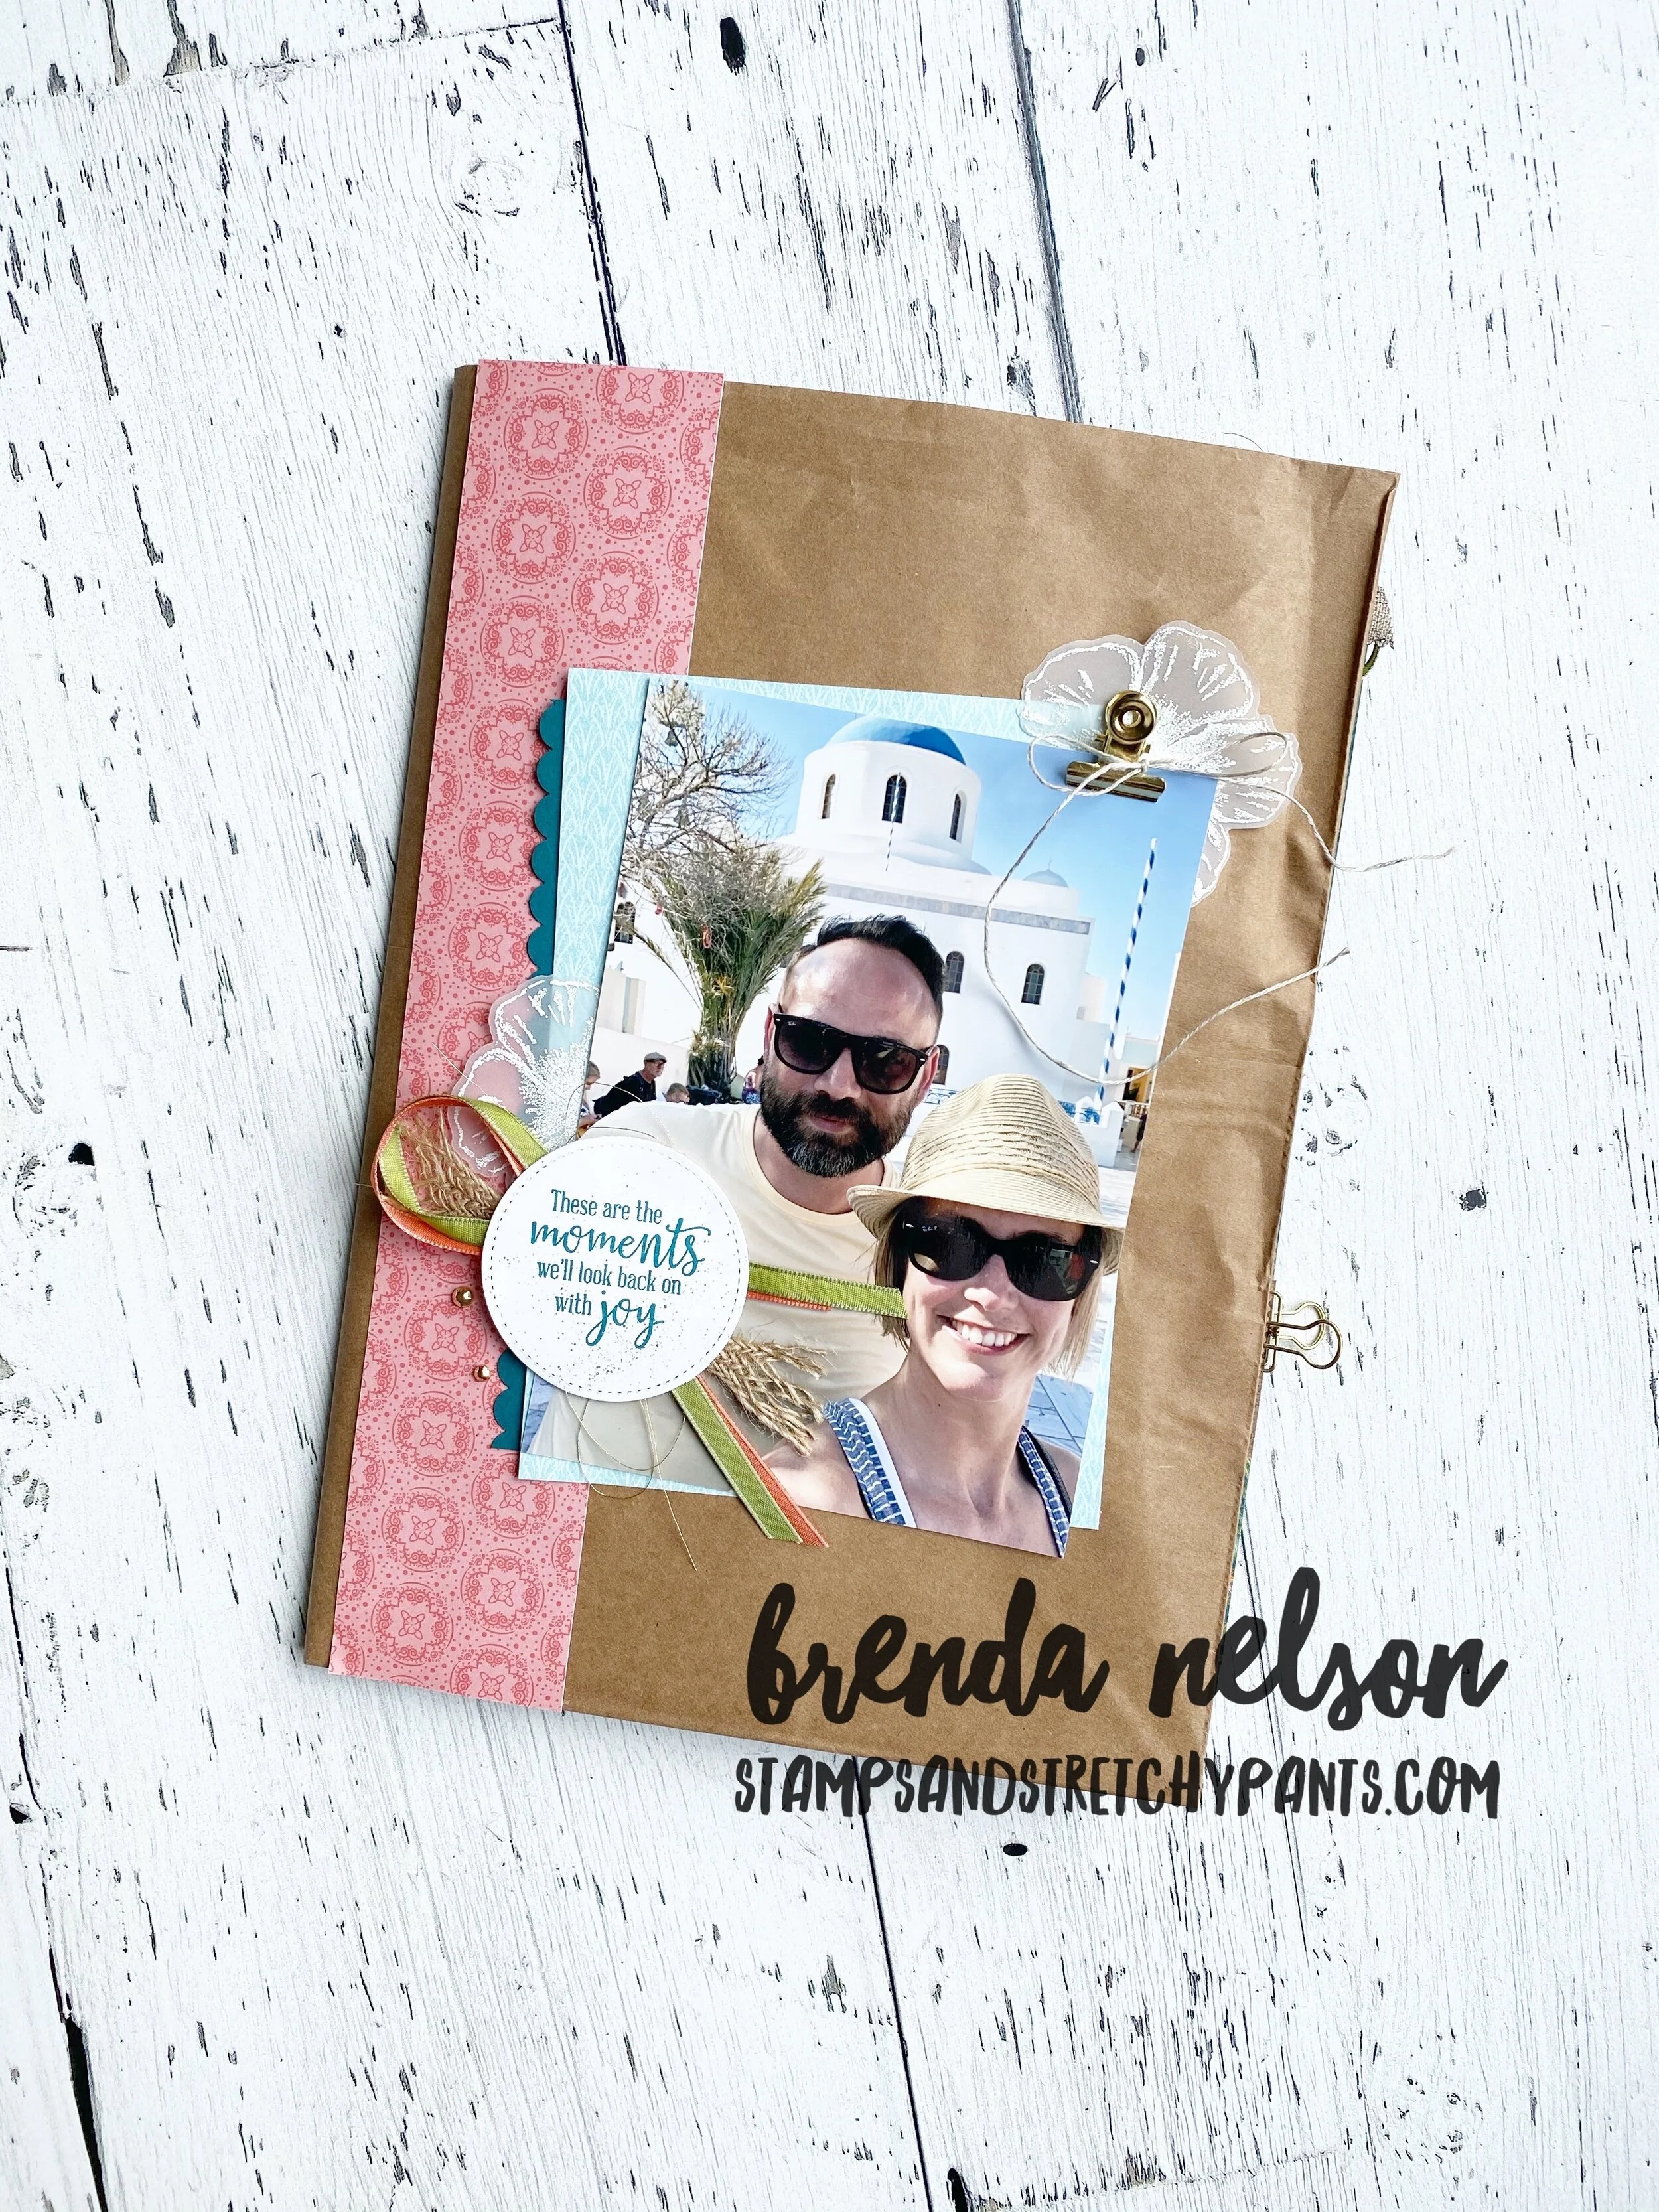
This is one of my favourite pictures of us in Santorini

You will have to use Tear and Tape or Tombow to glue the bottom of the bag flat as seen on the left side page. I then created a pocket to store memorabilia such as train tickets, a few pictures, a bag with a postcard in it etc. I added in a book mark I had picked up along the front of the pocket too! The right side features some fun pictures of us.

Because this is an oversized paper bag it has an option for a pull out page (or more!) as you can see here with the Pretty Peacock pull out page poking out. Say that six times, hahaha!
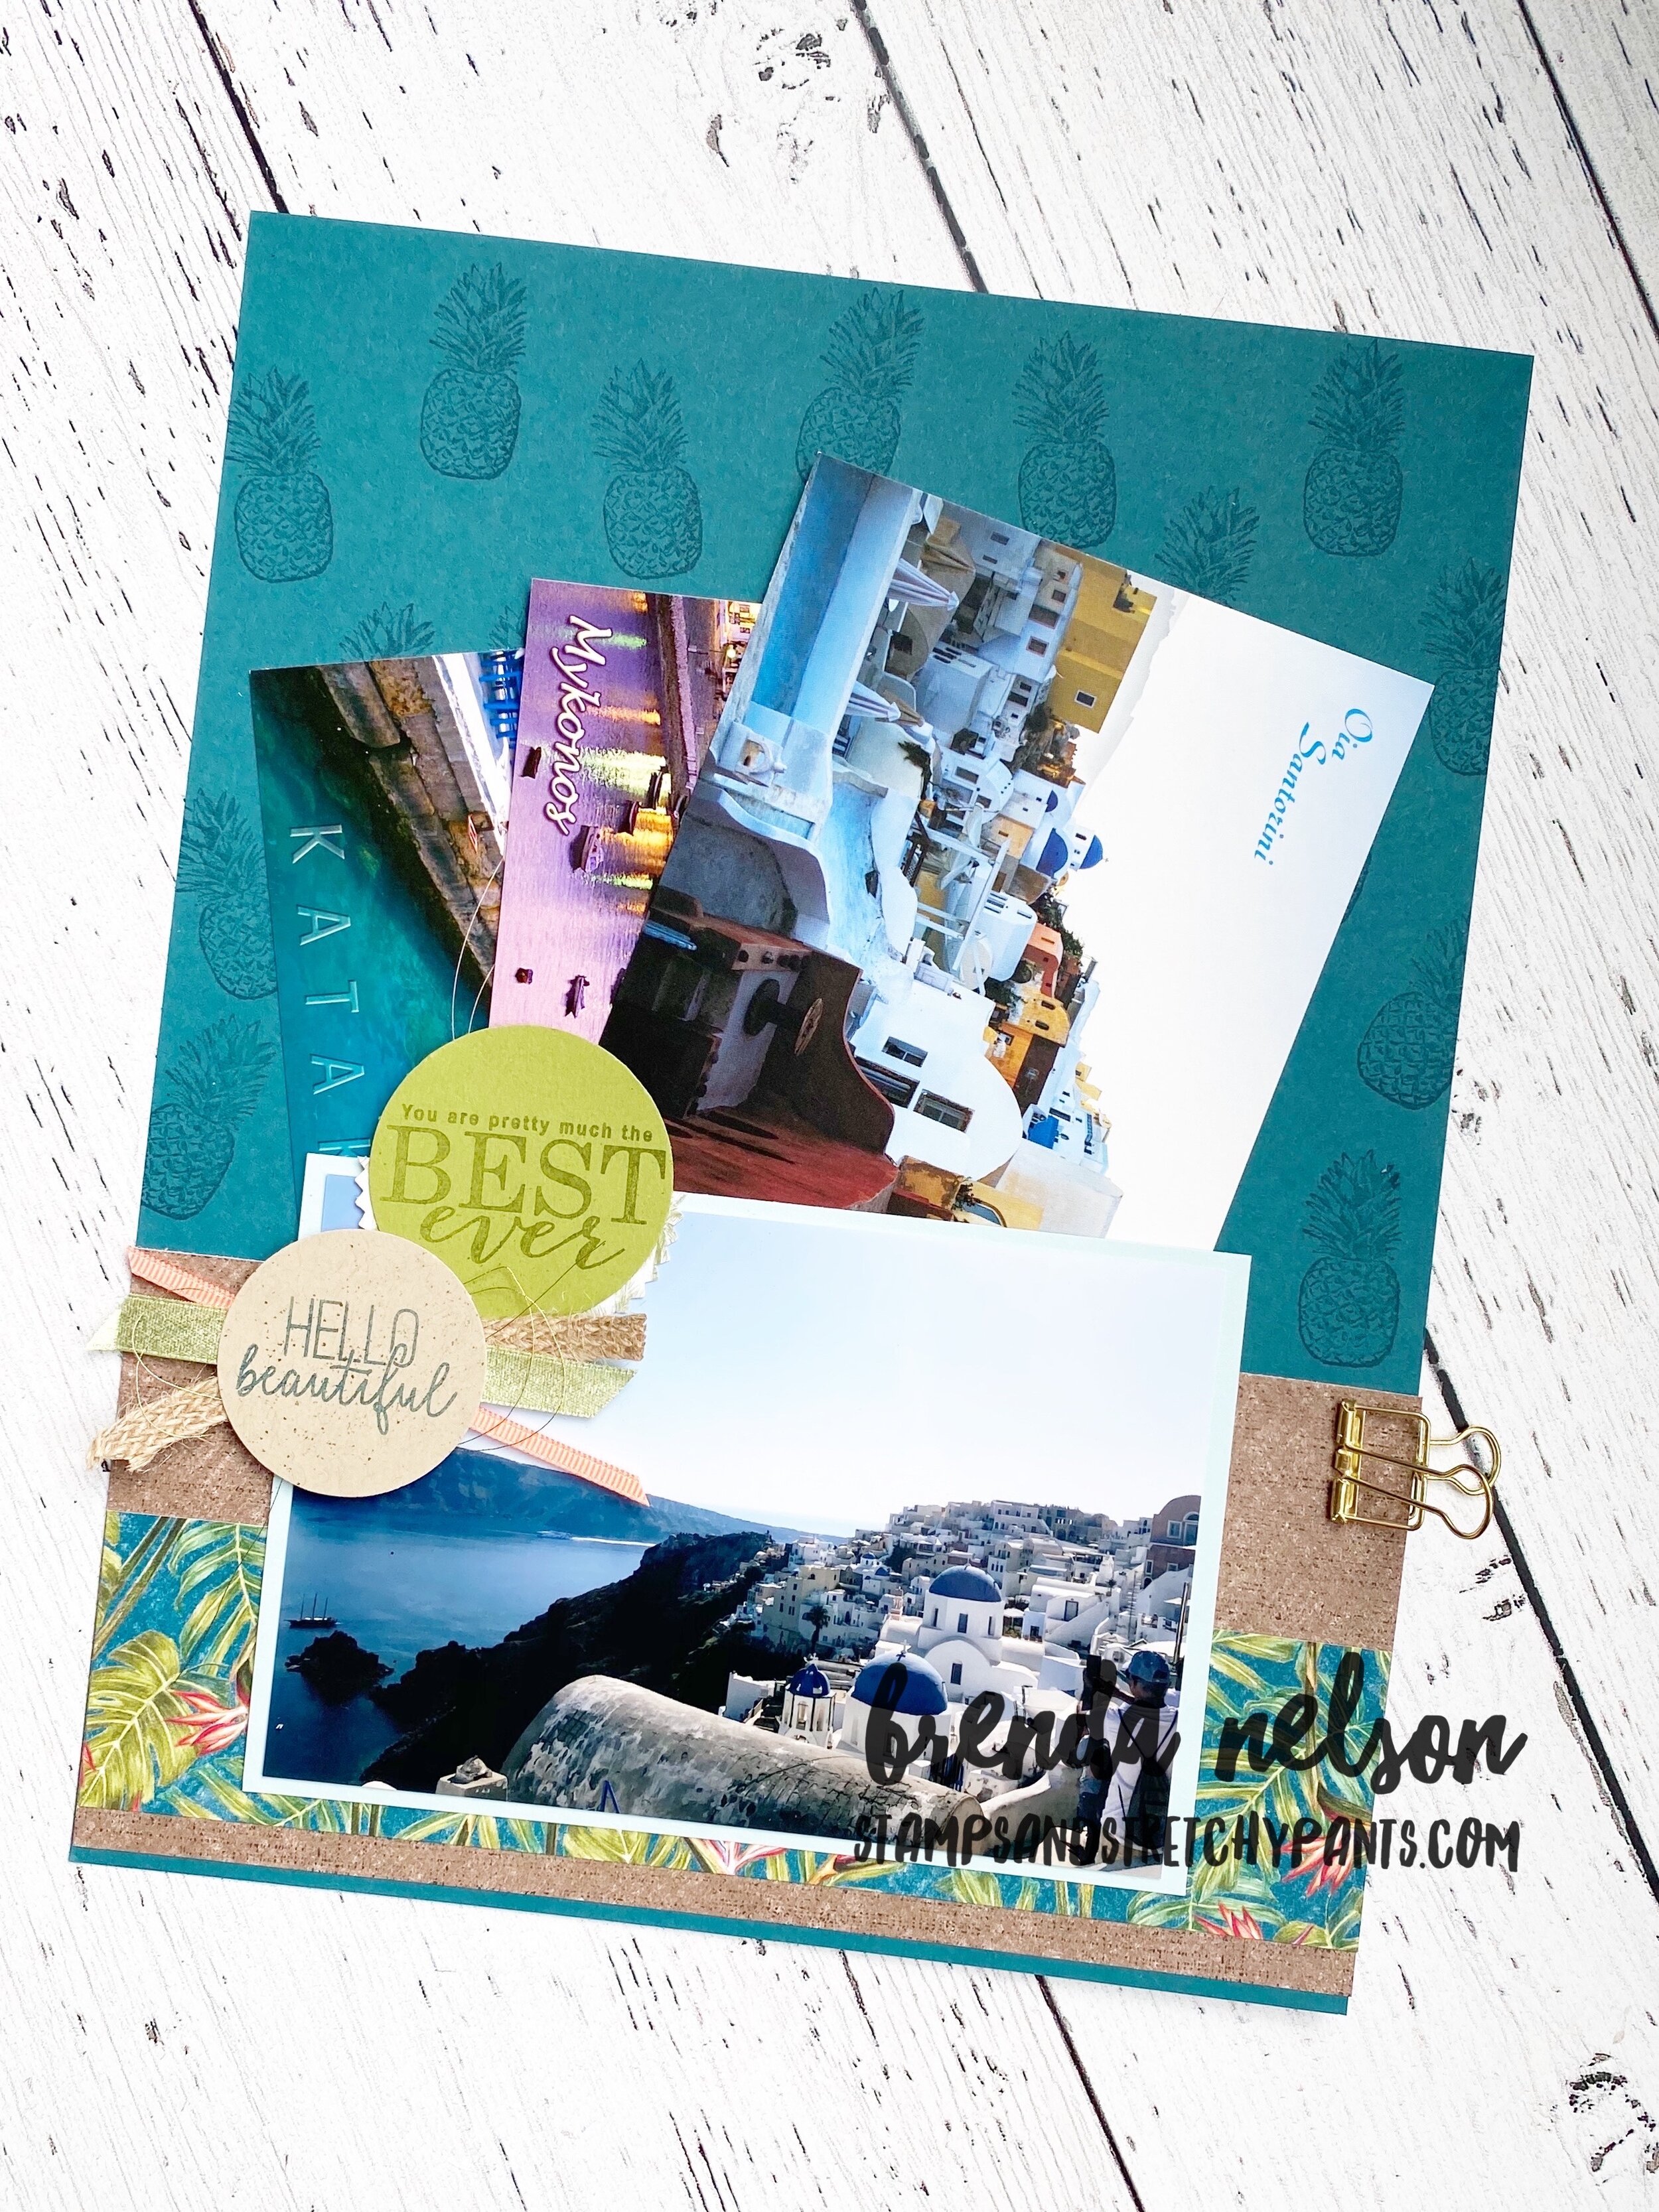
I decided to add another pocket at the bottom of this pull out page for more storage. I included one of my favourite pictures I took on this trip of the iconic blue roofs of Santorini, I still have to pinch myself that I was actually there! The storage pocket allows me to add more postcards collected on this trip.