Easy Watercolor with the Butterfly Brilliance Bundle
/Hello friends! I am always looking for an easy way to create a fantastic background, especially if it can be watercolored! I decided to pair up this easy watercoloring technique with the new Butterfly Brilliance Bundle! It is an awesome bundle with a stamp set and coordinating dies that is an early release product from Stampin’ Up!
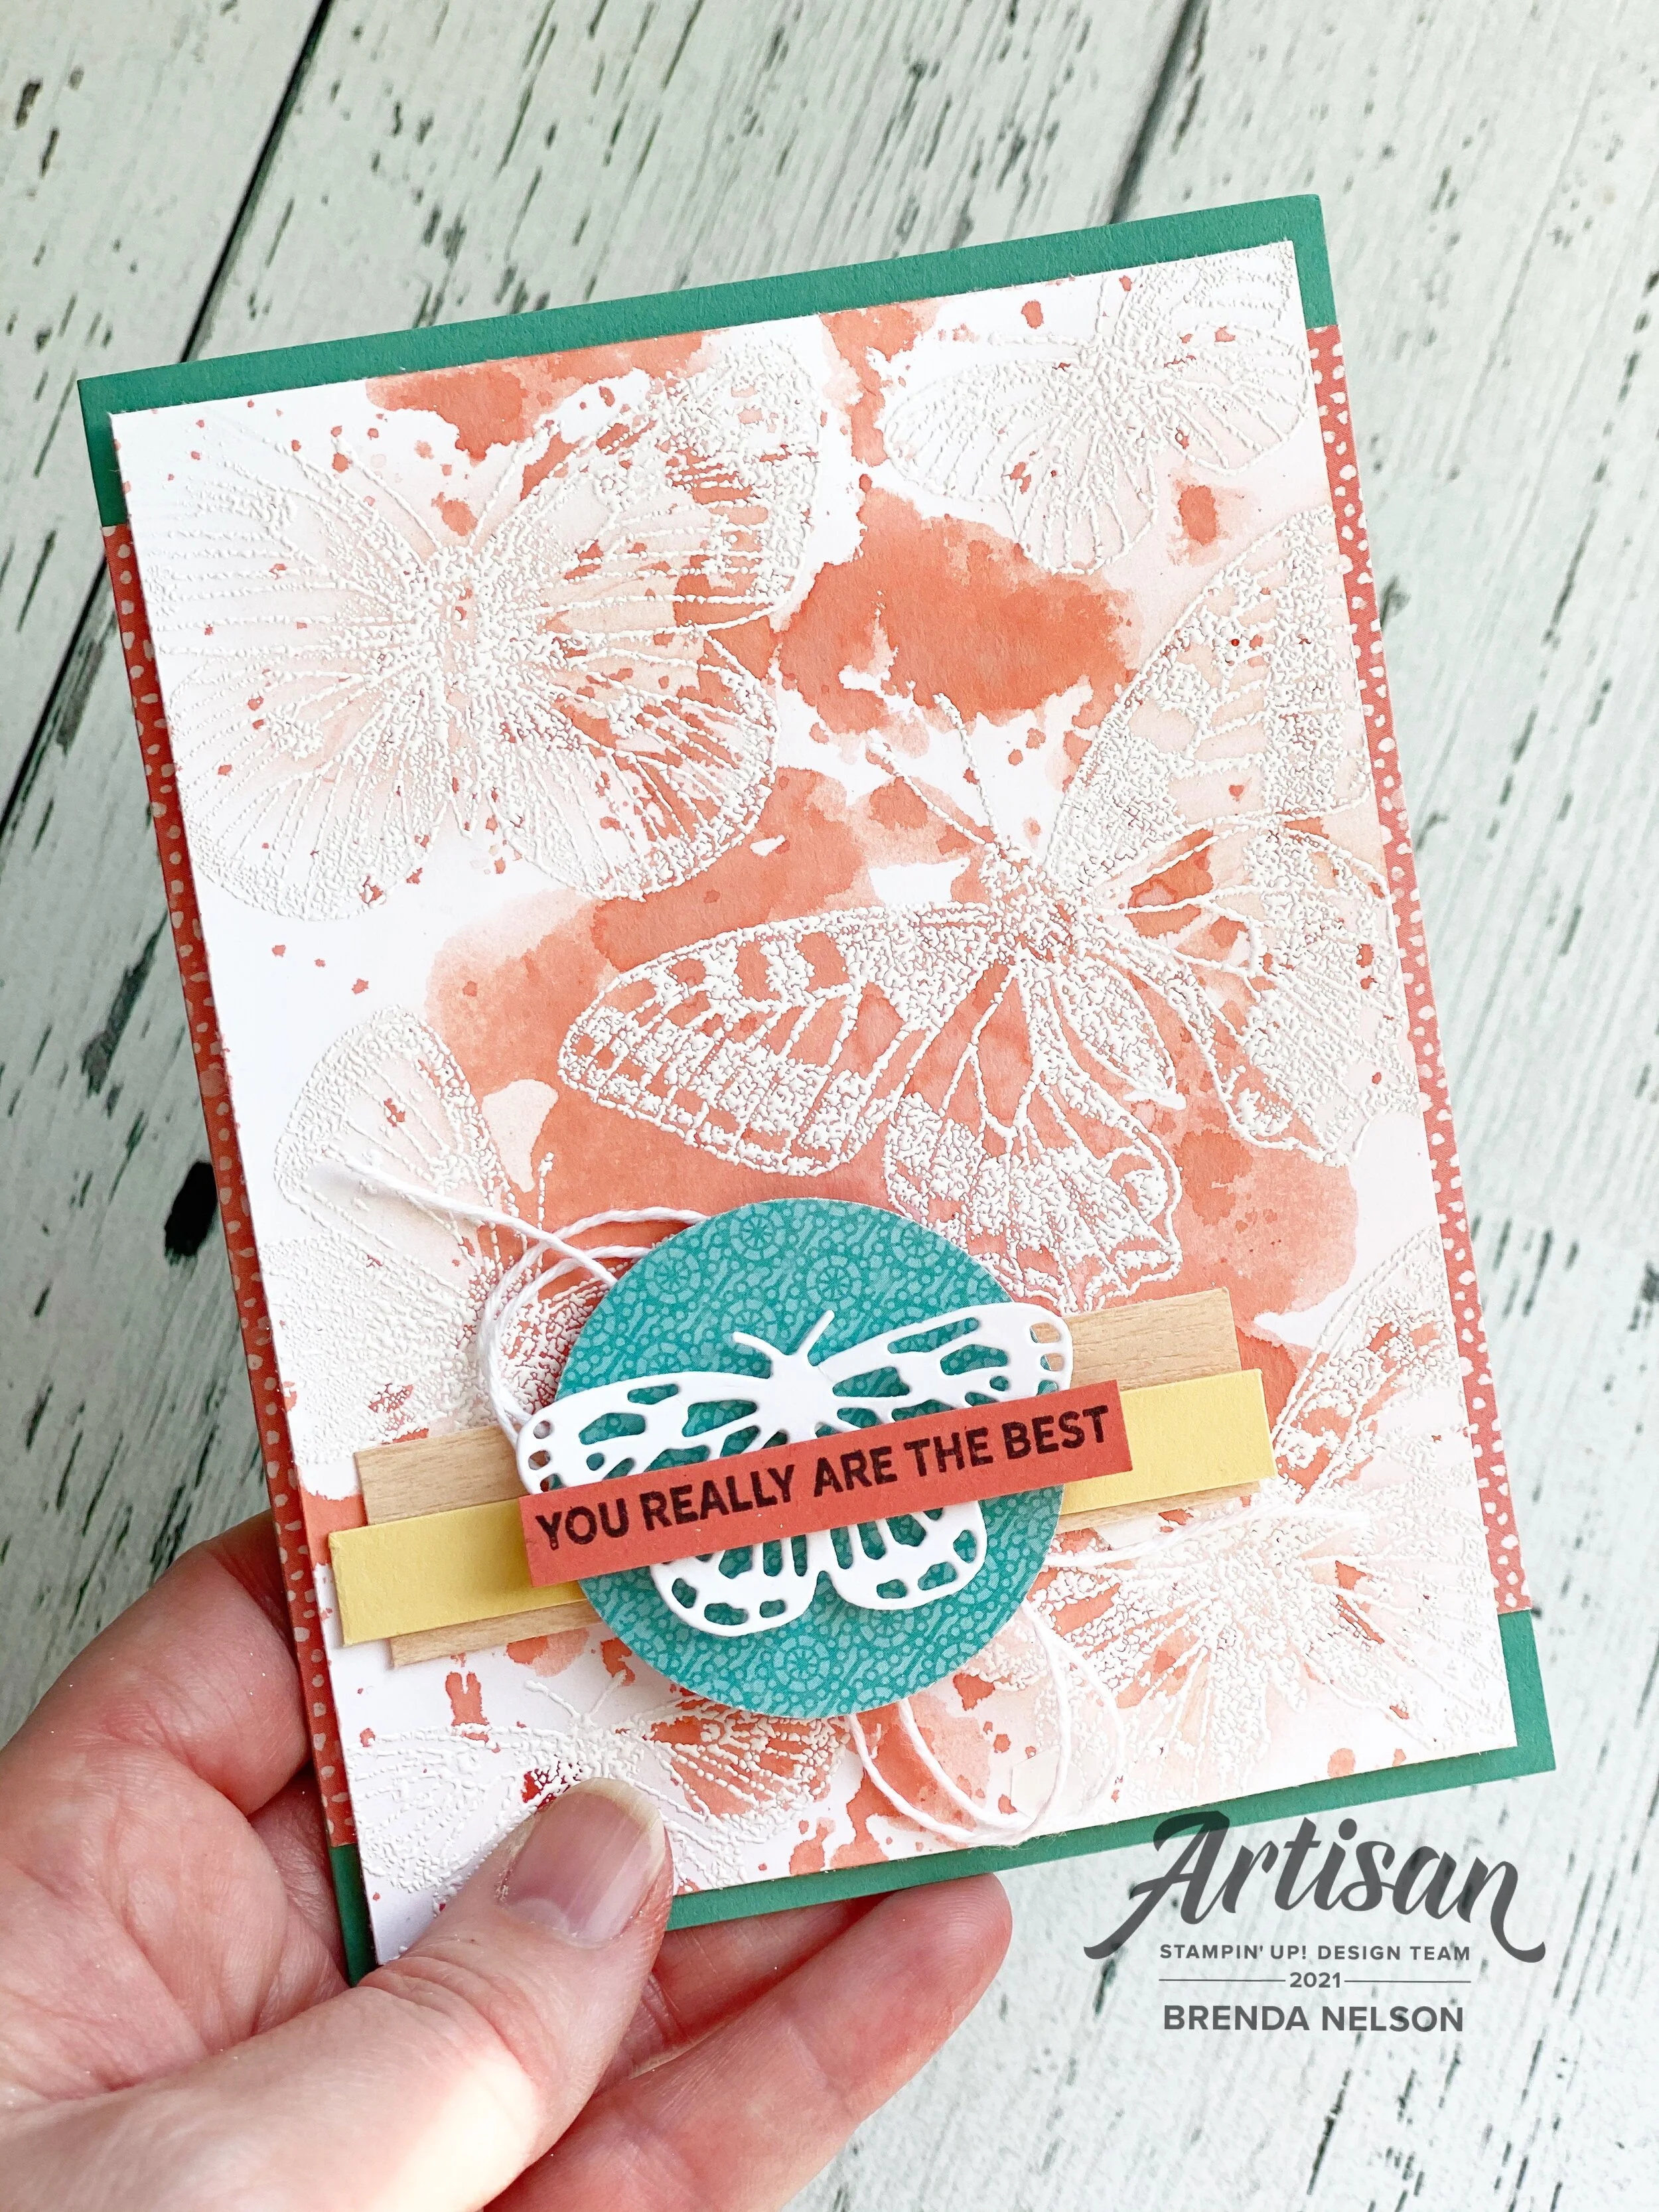
I started with a base of Just Jade card stock and added two little strips of DSP from the Butterfly Bijou collection. This 6x6 stack of paper is only available this month! So it is a fun exclusive offering!
I order to do water coloring I would suggest using Shimmery White, which is what I used on my card, or water color paper. Shimmery White is a little more cost effective if you are planning to make a bunch of cards and it is thicker than Basic White so it allows more water to be used on the card base.

The Stamparatus will be your best friends with this large stamp! You can use the stamp on the plate either attached to the base or separate like I did here.
To start creating my background I began by inking of the stamp with White Craft ink and stamping it on my Shimmery White card stock. I added white embossing powder on top and heat set it.

This step helps create an ‘ink resist’ technique as the water coloring will not take where the butterflies are stamped.
I cut a piece of our Window Sheets to the same size of my card base. You can also use one of our cello bags too if you do not have access to a Window Sheet.
Choose an ink refill of your choice, I decided on Calypso Coral for this project. You will also need a water mister and a water painter. The water painter just helps spread the ink around on the window sheet if you need to.
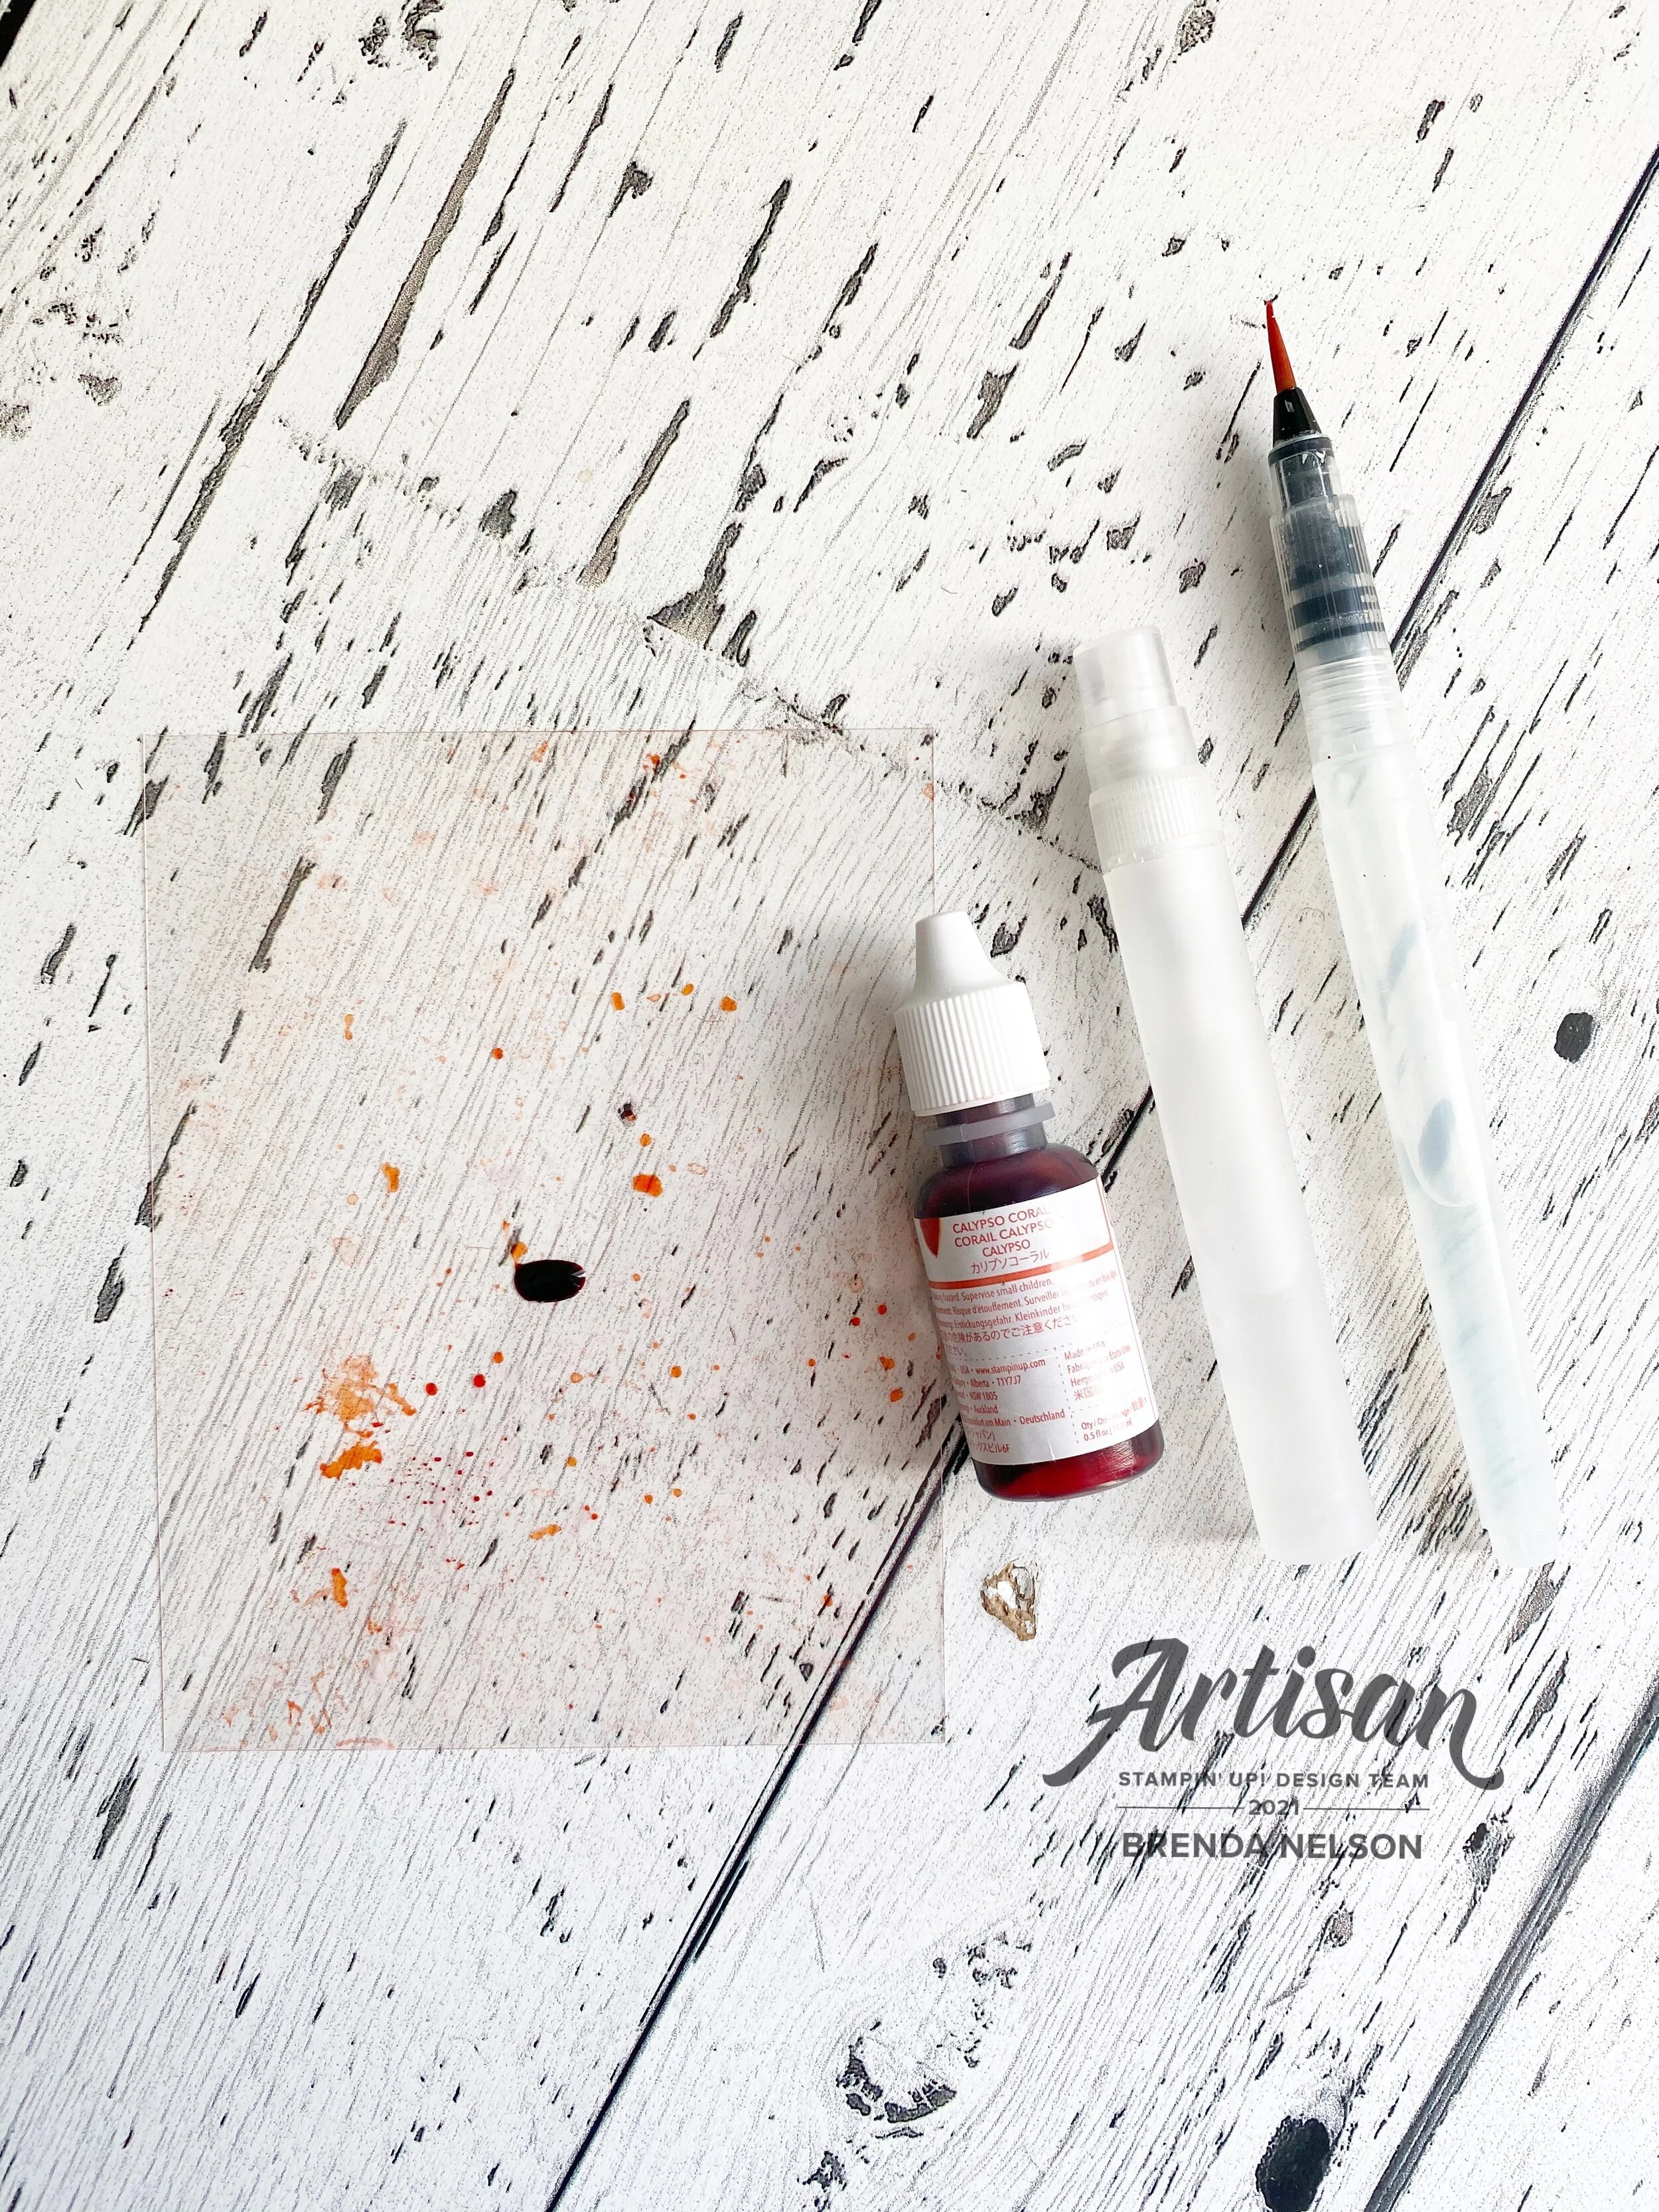
Start by adding a drop of ink onto the window sheet. You will then spritz some water on top and if you need to use the water painter to move the inky water around to cover a larger surface area on the window sheet.
Once you have your window sheet ready you are going to take our butterfly shimmery white card stock layer and flip it over so that the stamped side is going to touch the inky window sheet.
I tapped my paper around using my fingers to press the paper into the ink in different spots. I did not just lay this shimmery white piece on top.
The idea behind this method is that you only want the inky water to touch your paper in select spots.
Each background will be unique and different!


I just think this looks so cool and I love how every single piece will look different! And to clean the window sheet when you are done just. grab a tissue or baby wipe! Easy peesy!

To finish off the front of my card I added a small piece of the Natural Touch specialty paper and a small strip of So Saffron card stock over top. I punched a circle from the Butterfly Bijou DSP and I cut a white butterfly from the dies.
The sentiment is from the In Bloom stamp set and is trimmed down by hand from its original form.
I really love this technique and I hope you are willing to give it a try!


