Be Inspired Blog Hop--Fun with Embossing Folders!
/Hello my crafty friends! Welcome to the Be Inspired Blog Hop! This month (can you believe its the end of September already?) we are focusing on Embossing Folders. We have so many fantastic ones to choose from so I thought, why not use as many as possible!

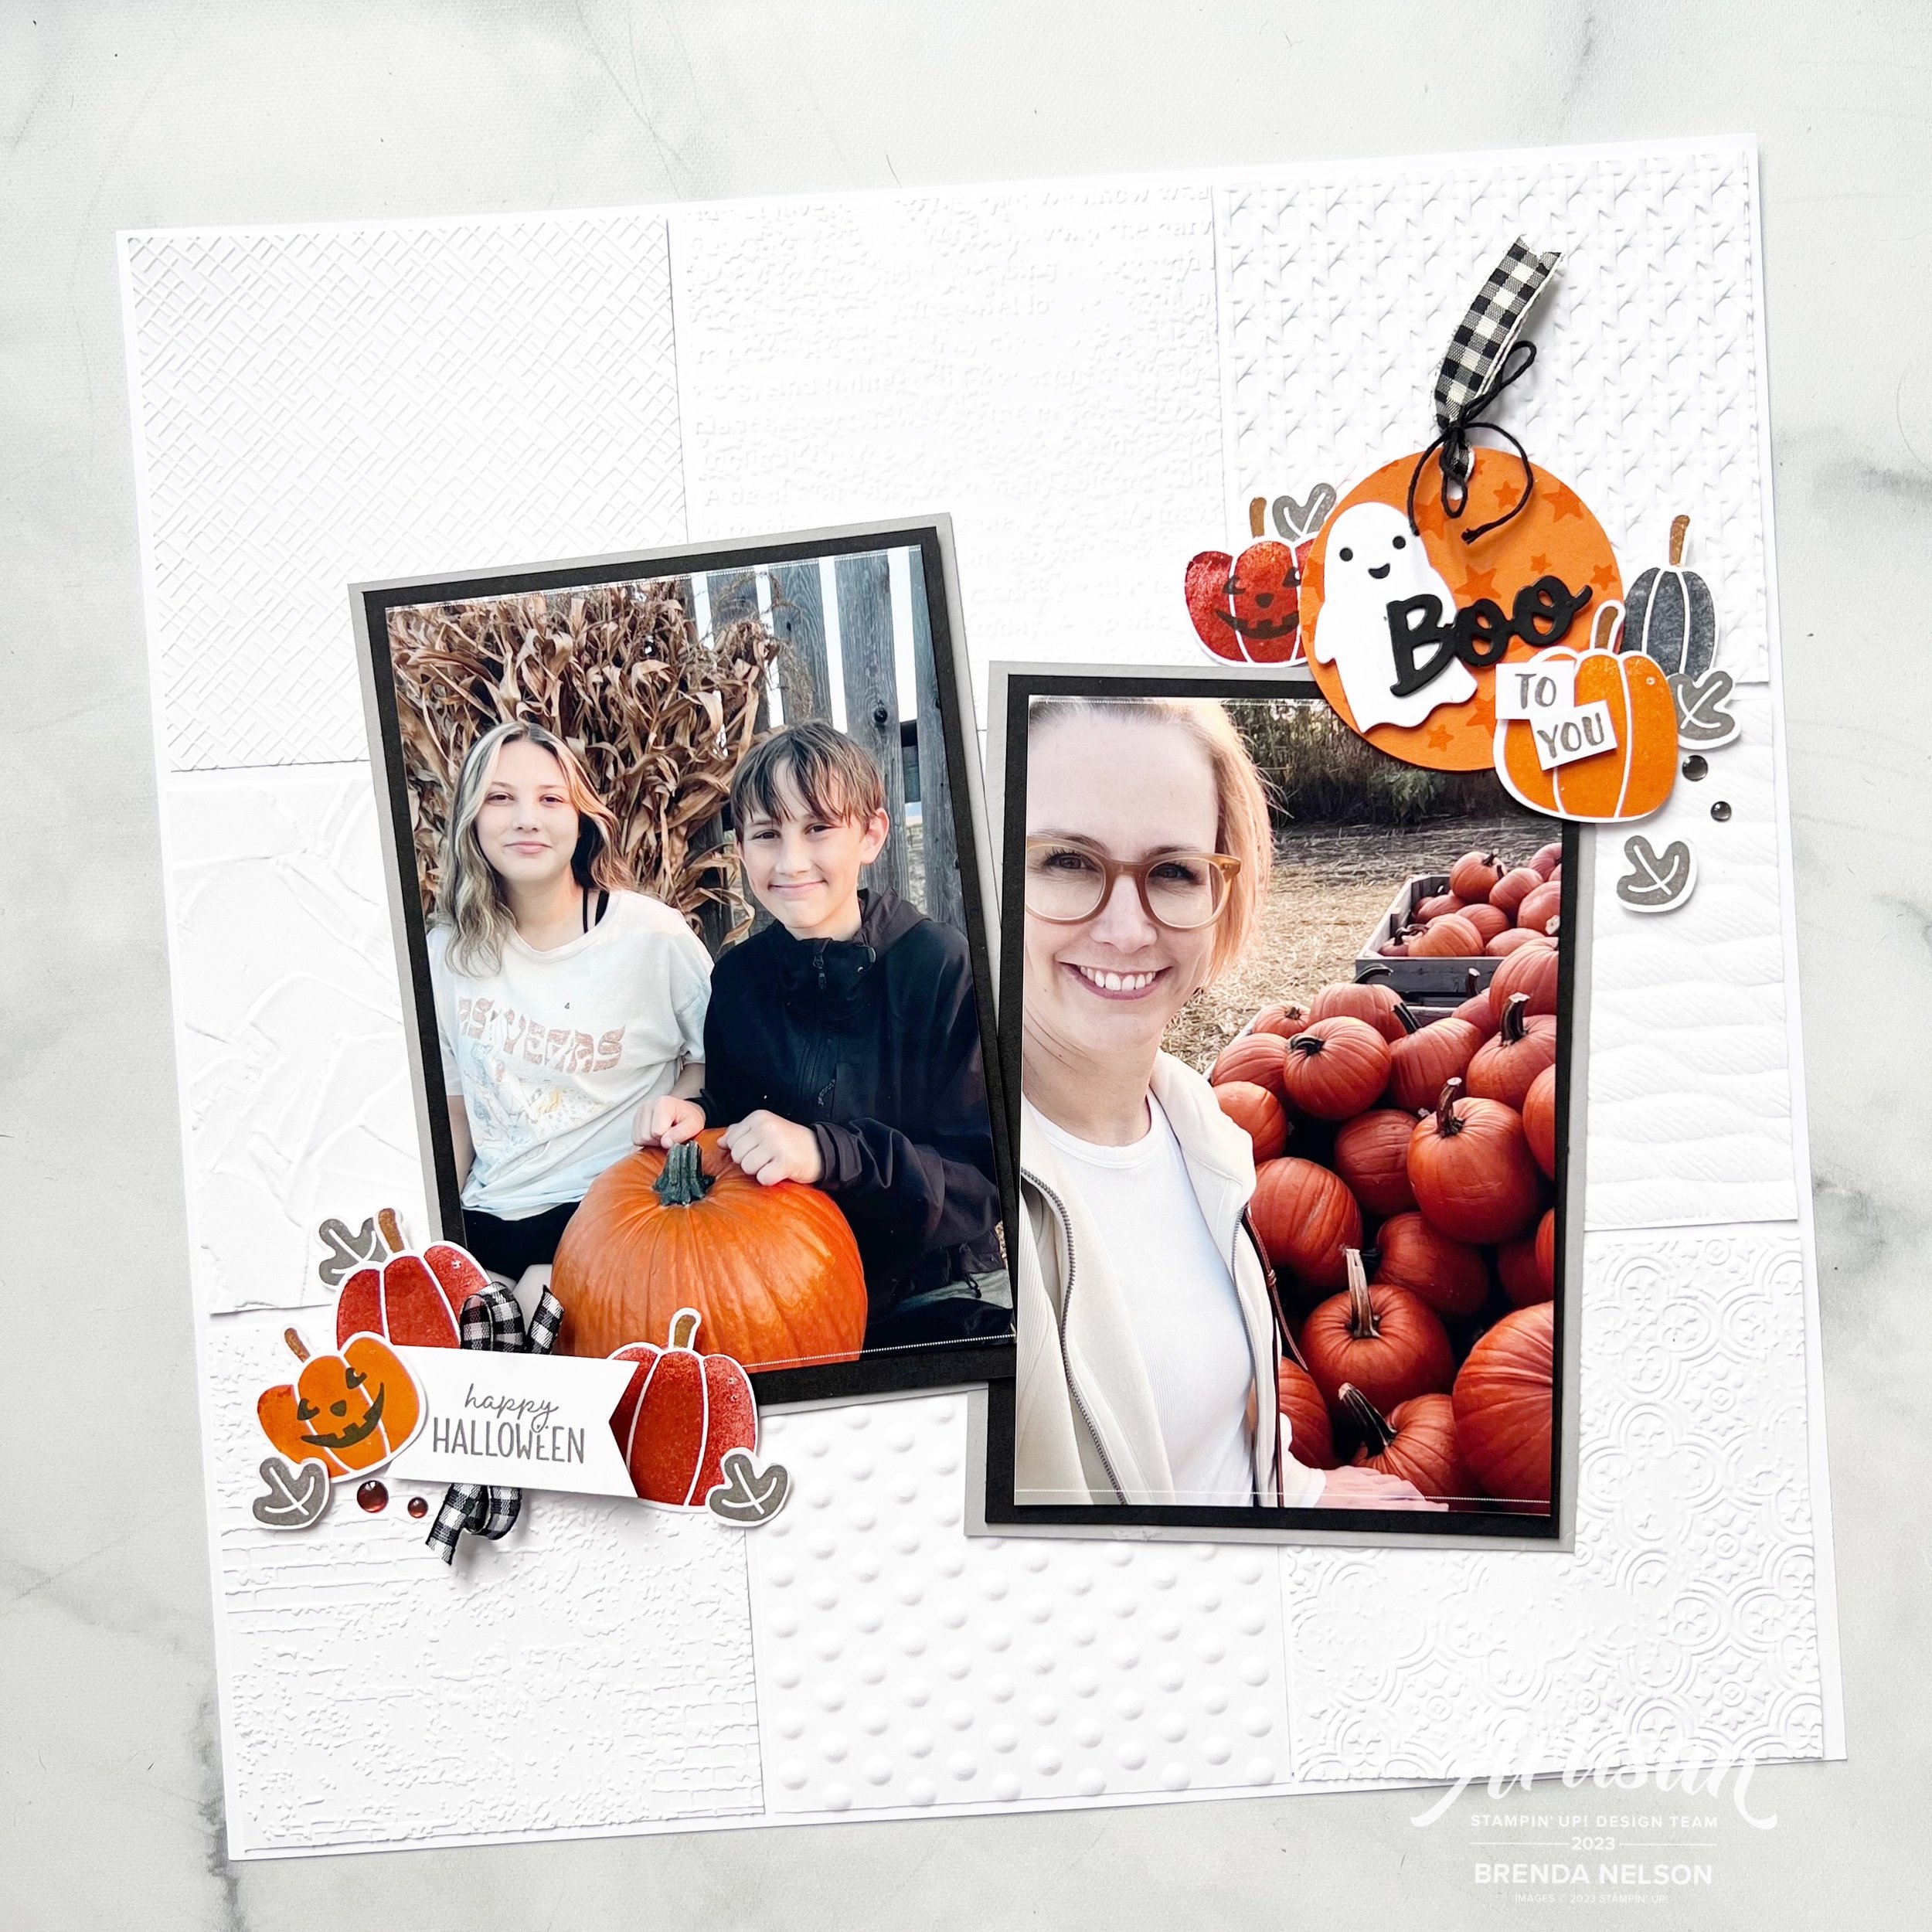
I used a total of 8 different embossing Folders to create this page! I am so happy with how it turned out. I love how the fall colors jump off the crisp Basic White background as well.
The Folders I used were:
2 folders from the Online Exclusive Basics 3D Embossing Folders
Cane Weave
Exposed 3D Brick
Painted Texture
Timeworn Type
Twisted Rope
Distressed Tile
I cut each Basic White square or panel to 3 7/8 x 3 7/8 so that they can fit on your 12 x 12 and look like a bit of a grid. They give such an amazing texture!
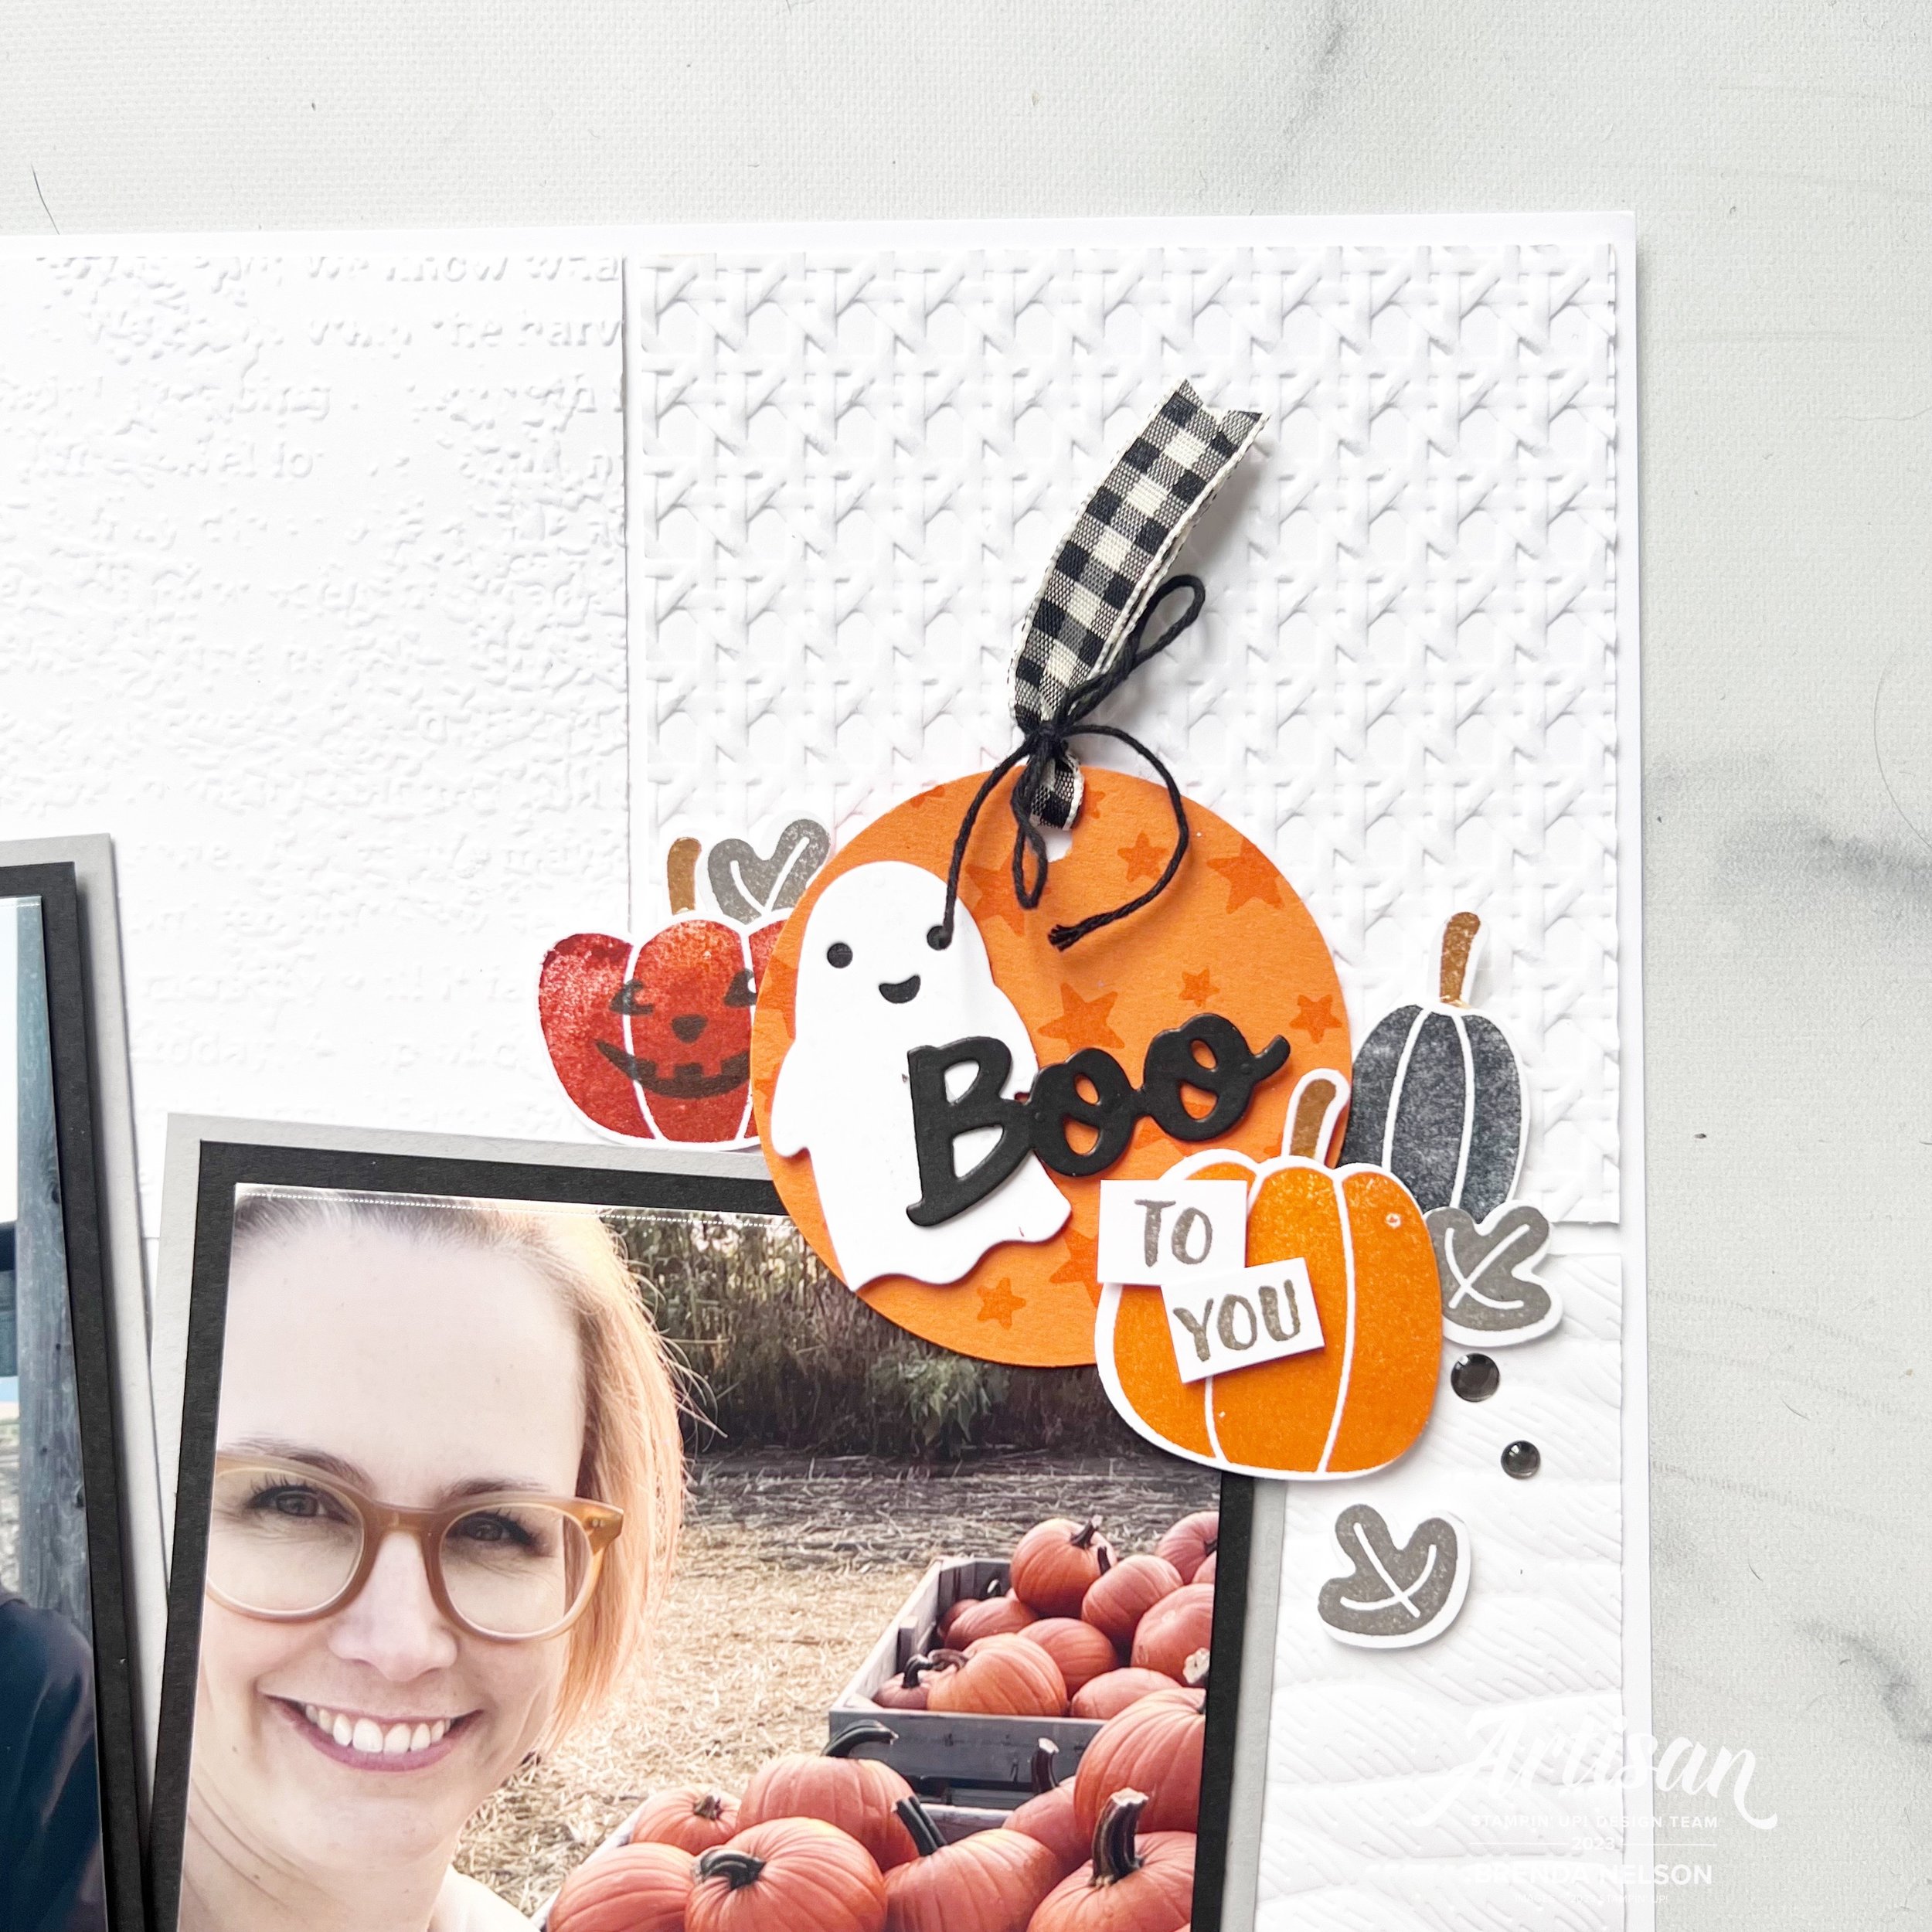
You can find the words ‘to’ and ‘you’ in the Sending Cheer stamp set.
I used the large 2 3/8 punch to create a circle that was turned into an easy tag with the Black & Very Vanilla Large Check Ribbon and some black bakers twine.
I stamped the background with the star cluster from the Tricks & Treats stamp set and used the ghost and ‘boo’ from the coordinating dies.
The Pick of the Patch stamp set has been a craft room favorite these past couple of weeks so there was no doubt I was going to use it to add some fun pumpkins! I turned one into a jack o lantern and added some little leaves that were stamped in Pebbled Path.

On this little vignette I added ‘Happy Halloween’ and another little pumpkin patch!
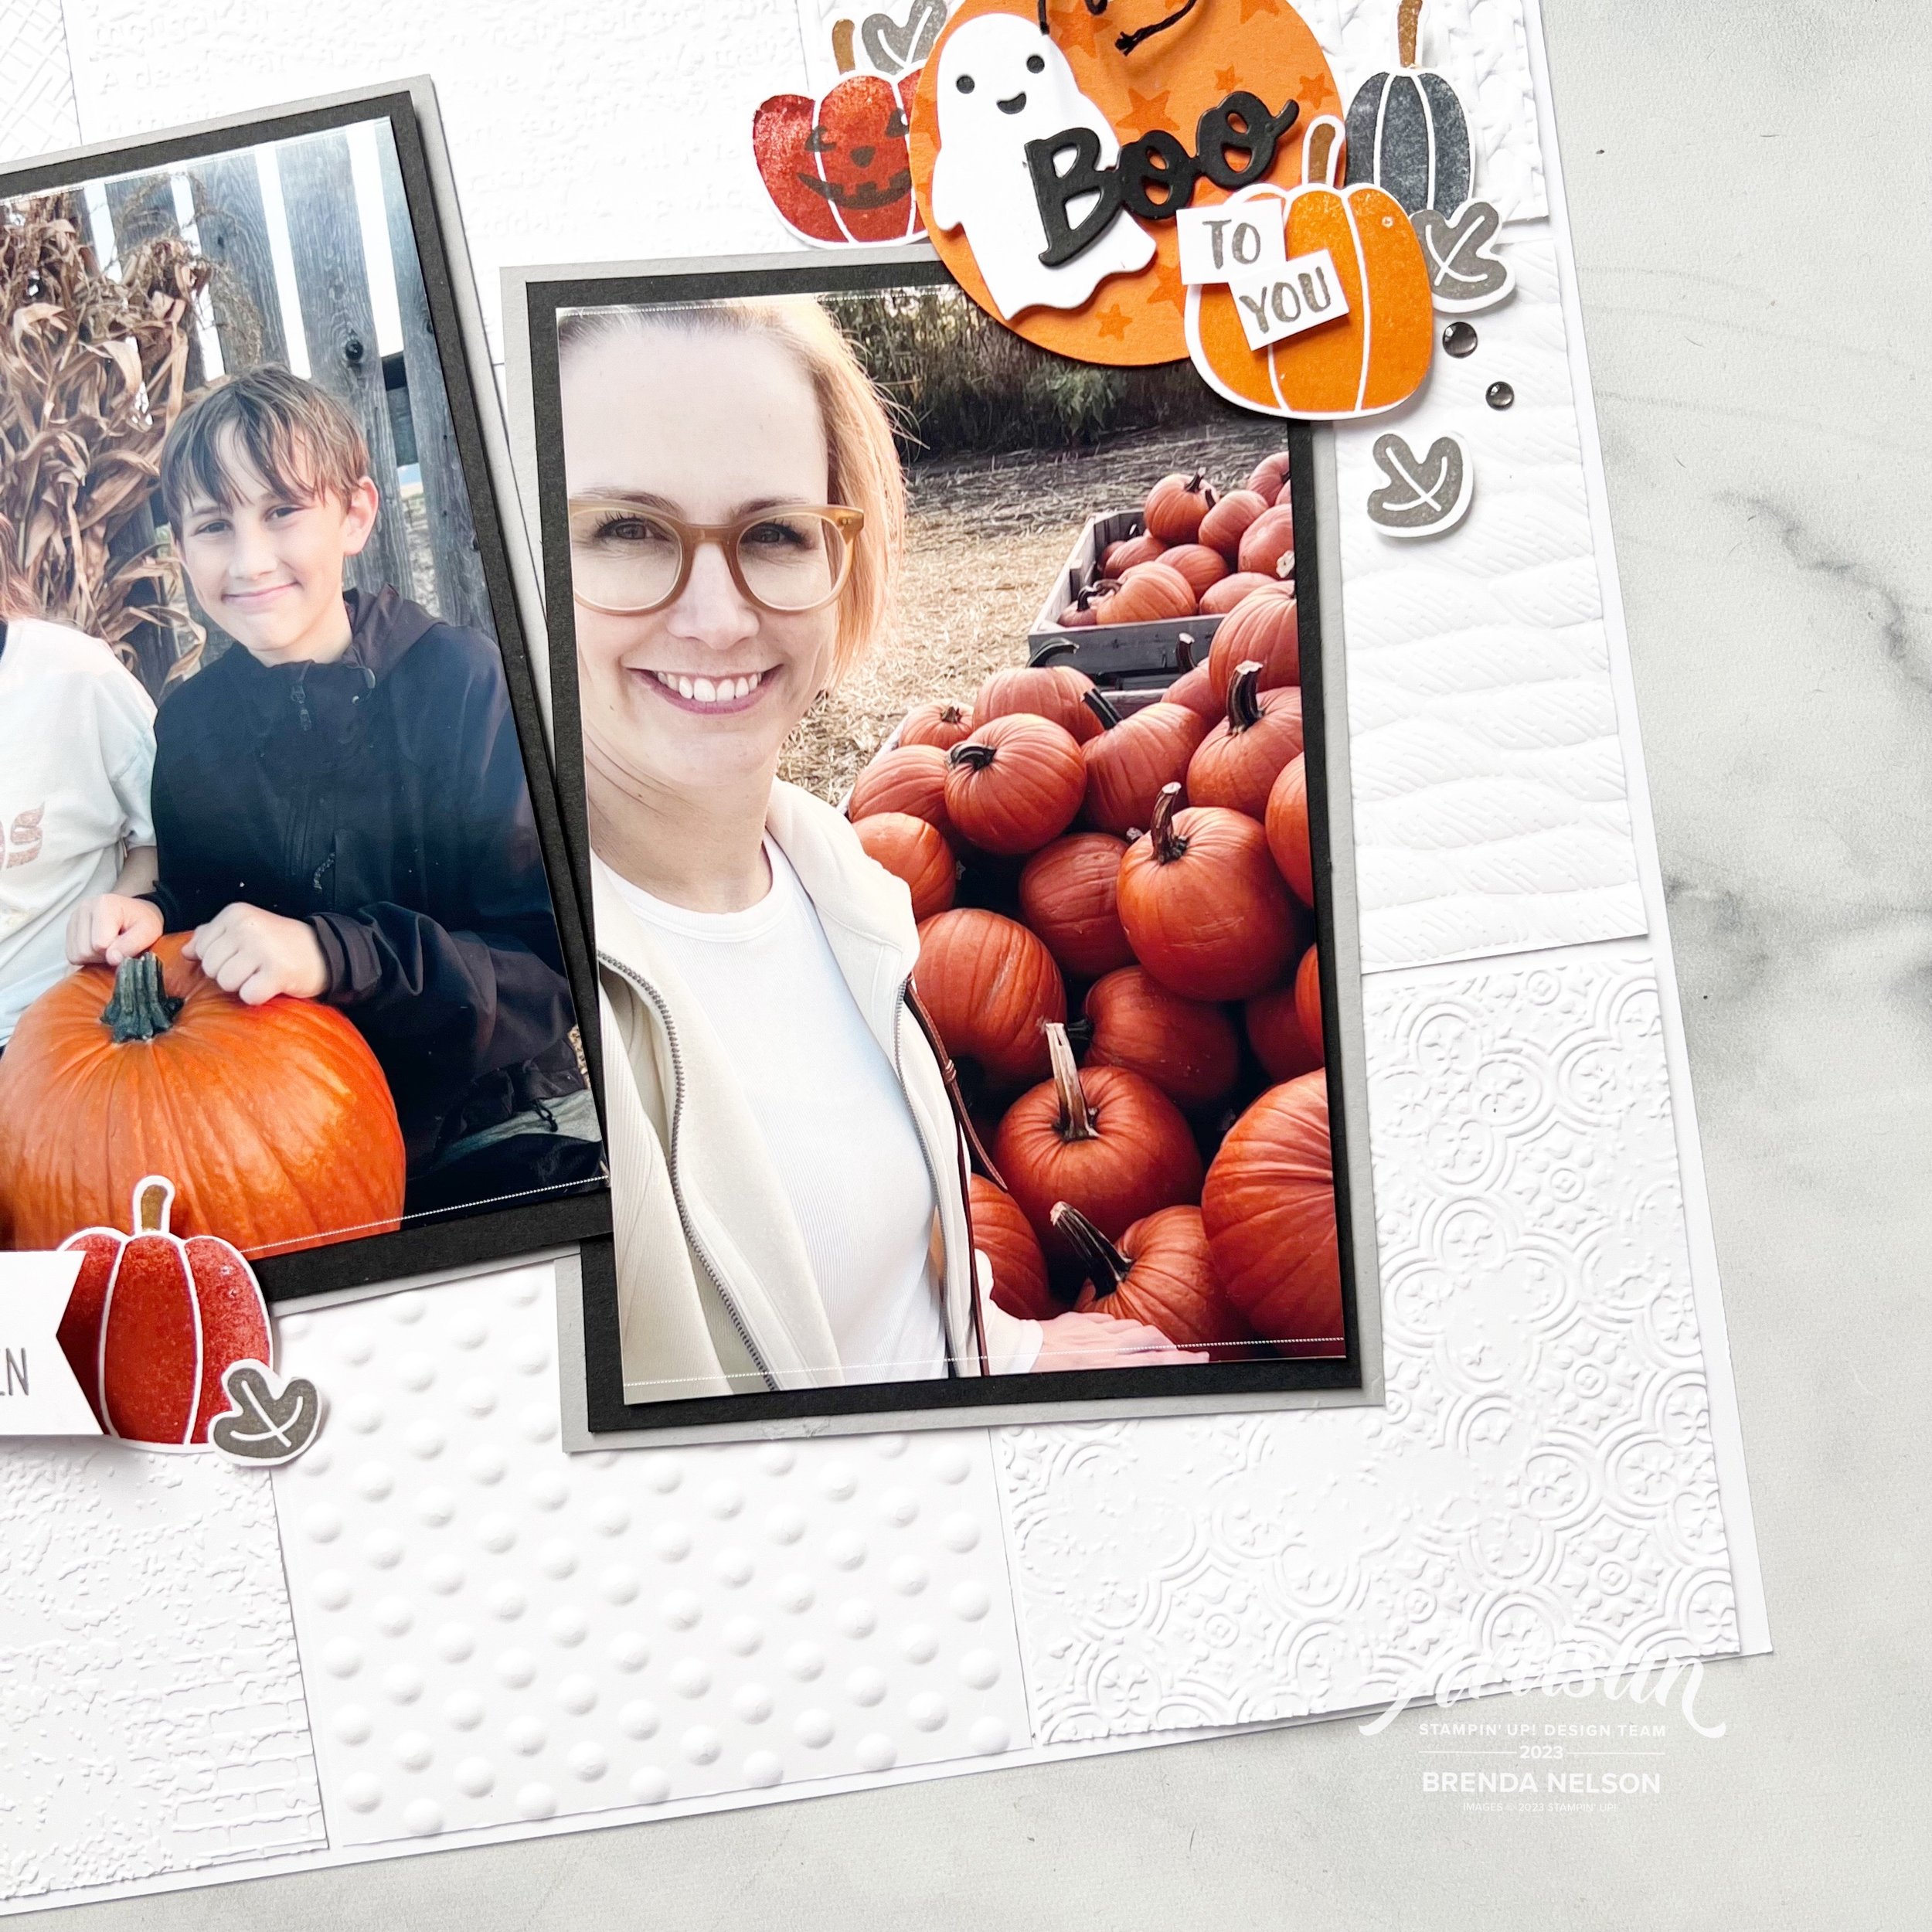
The photos are on a double photo mat—Basic Black and Smoky Slate to really help them pop about the white textured background. A few of the In Color Enamel Dots added to my layout!

Thank you to the Edmonton corn maze for the great photo opps!
I am really excited to see what the rest of the team has created focusing on Embossing Folders. There really are so many different techniques and ways to use these. They are definitely a craft room staple item in my opinion! I hope this page gives you some inspiration on how you could even incorporate mini squares on a card front using a variety of folders.
Next up on the hop is Janneke and I always love her projects and design style! Click on the link below to visit her blog! And as always, please feel free to leave any comments. I love to get your feedback!

If I have inspired you and you need to #addtocart, please click any image to shop my store! Thank you for helping me continue to ‘Love What I Do!’
Click any image to shop my store
Product List")
")
")


 Cardstock")


 Gingham Ribbon")
 Large Check Ribbon")


