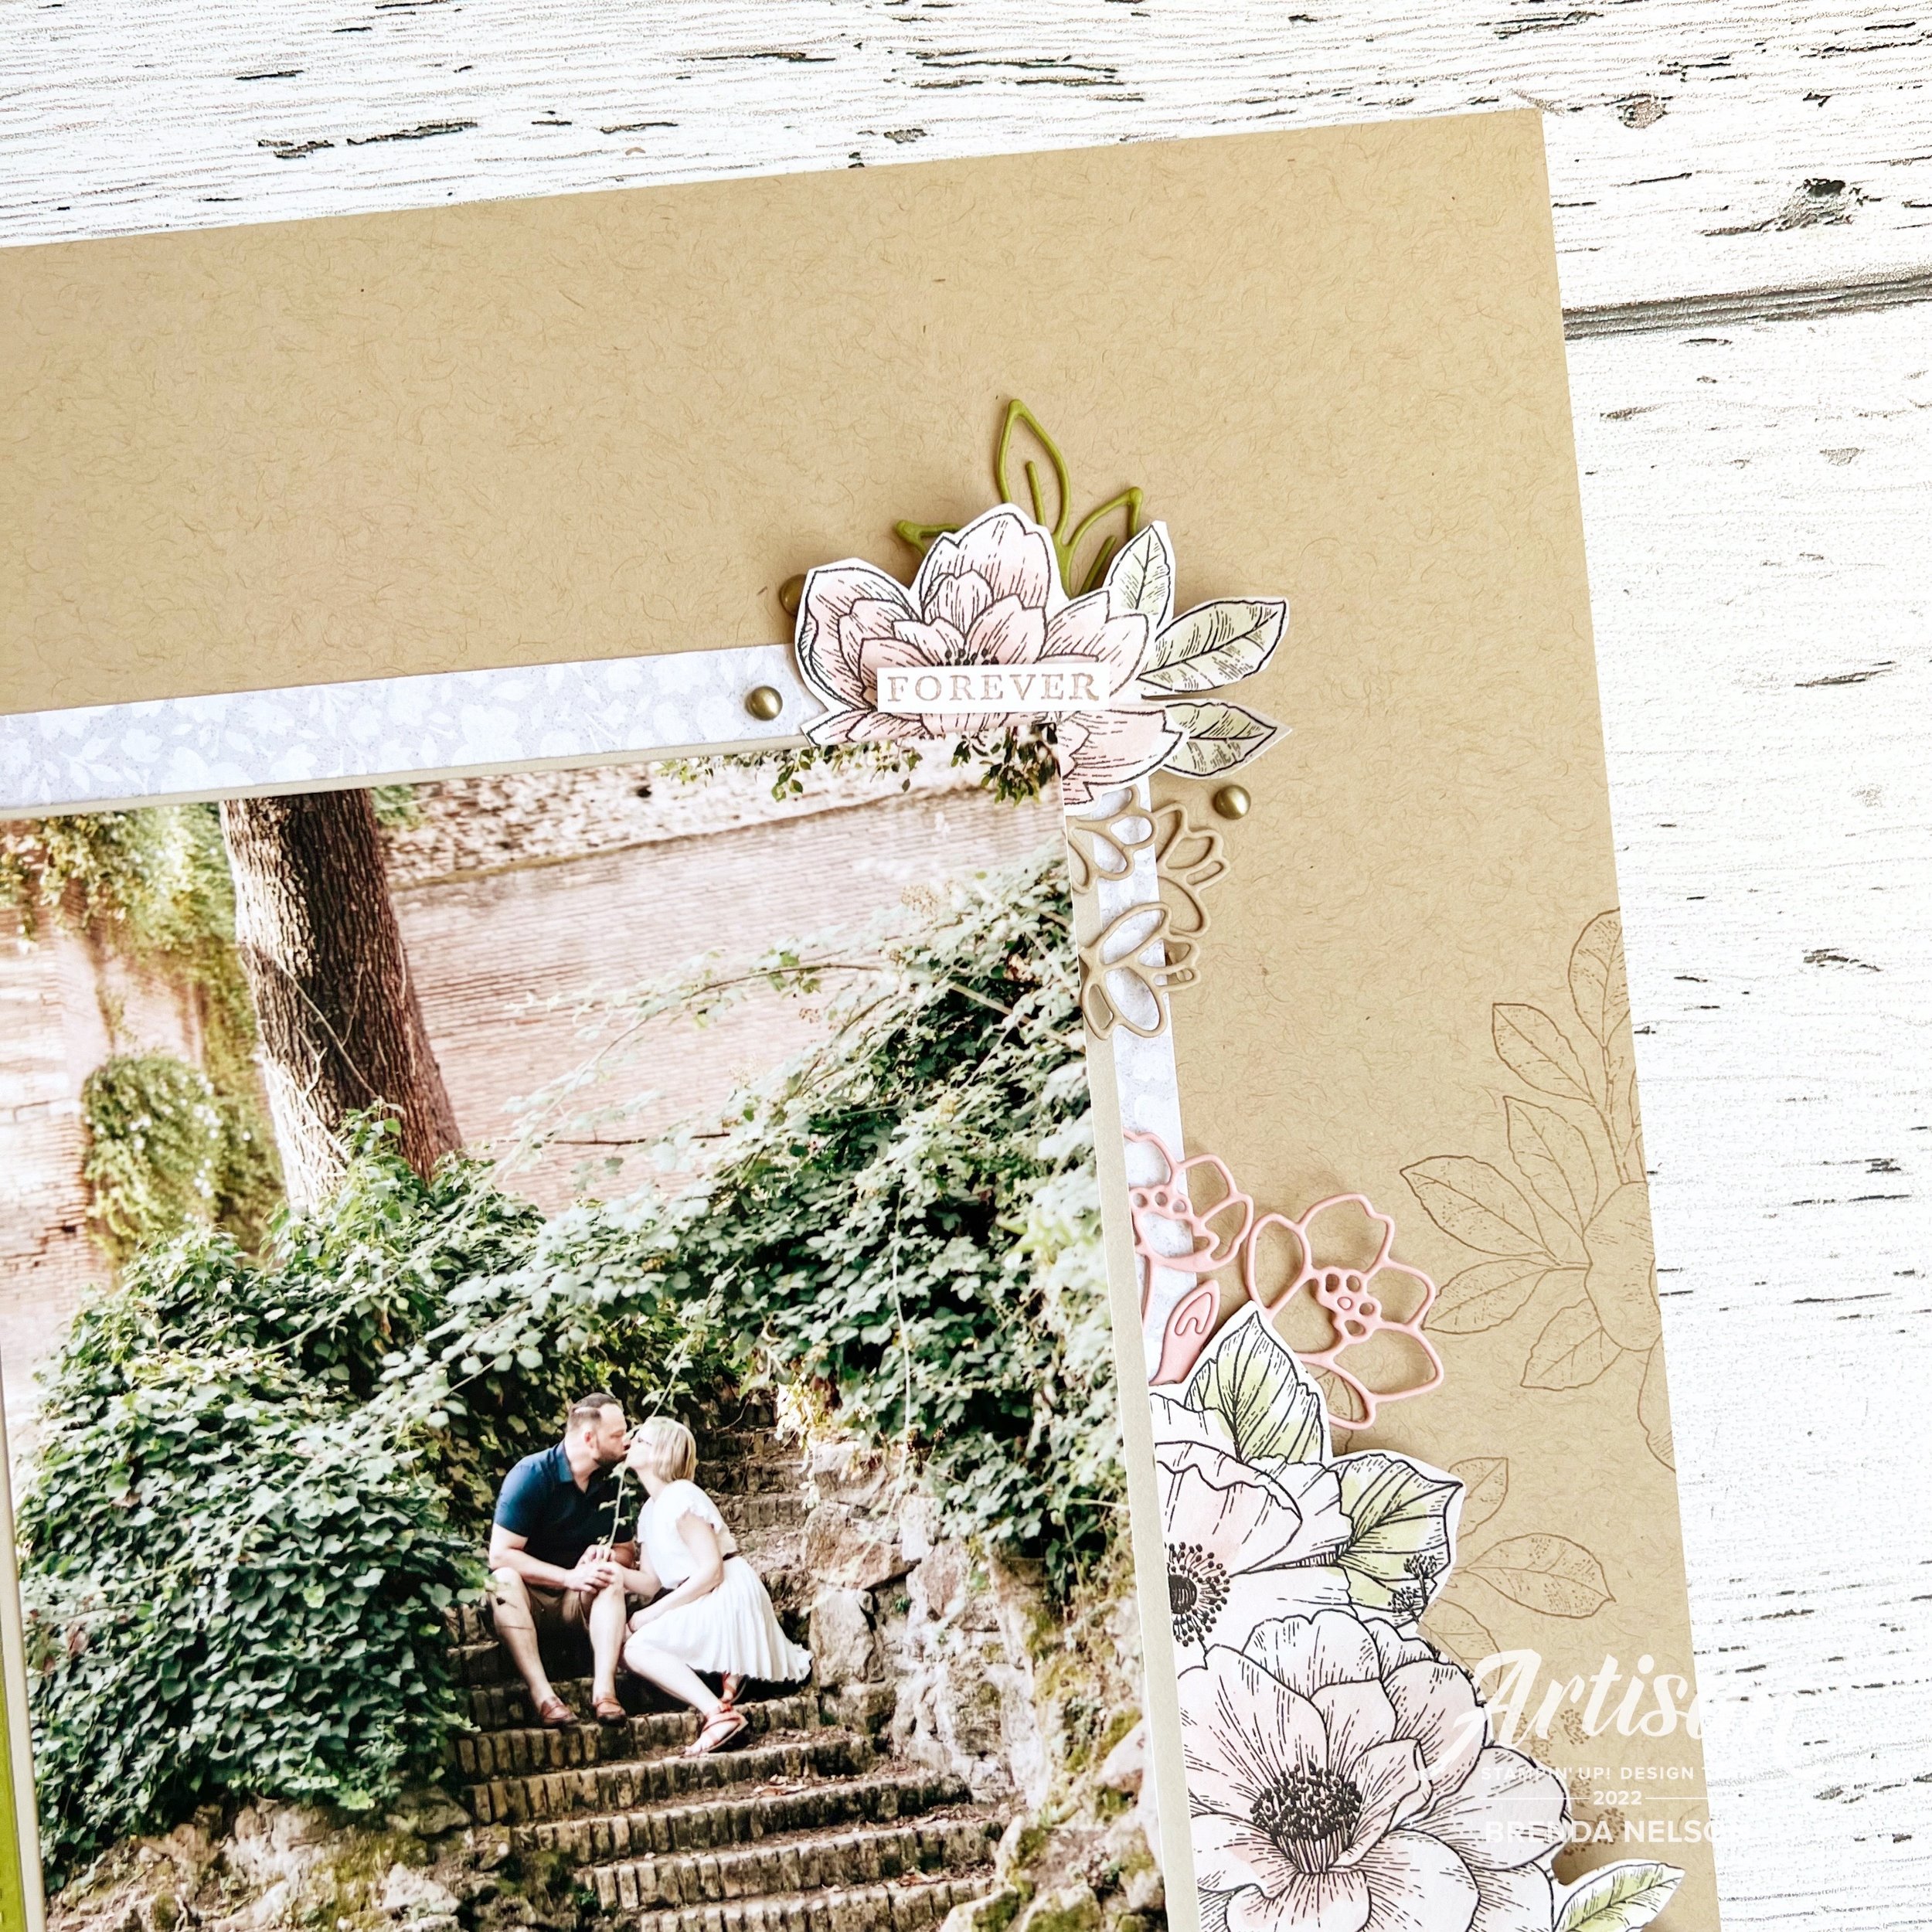
Seven Days of Scrapbooking--Day #4

Hello friends! Are you enjoying following along? I hope so as I have loved creating these pages and am so happy to share them!

My page today uses Crumb Cake and the awesome Abigail Rose Suite! I love this suite and I am hosting a Summer Stamp Camp with Honeybee Stampers in July featuring this product suite. I will also be offering a ‘Scrapbookers Add On’ class as well post event, so if you are interested please look under my events tab or send me a DM!

What I love about the Abigail Rose DSP is its neutrality and how you can turn it into any color you like by spritzing, blending and coloring. I also love the designs of the flowers and how easy it is to die cut or hand trim them out as well.

This is another picture of my husband and I on the Green Incentive trip. When in Rome, hire a photographer to do a photo shoot!

I think the whole highlight of this page is the DSP—I colored the flowers and leaves in using the ‘lazy watercoloring’ technique. I have coined this term because I honestly don’t always have time to fuss about and color things with Stampin’ Blends. So instead, I smash my ink pad onto one of our acrylic blocks and use my Water Painter to swiftly color things in. You have to be quick and not use a ton of water as this is not water color paper! Keep that in mind!


I used Blushing Bride and Old Olive to color in these flowers. I actually hand trimmed them because I wanted to cut a little closer to the line I also layered the flowers by cutting out just a few individual flowers and adding them over top of a larger image.

The sentiment is stamped in Blushing Bride as well and I die cut it with a shape from the All That Dies. I added a little Heart Pearl beside the phrase and some Linen Thread underneath.

I stamped some of the large flowers from Cottage Rose on the base of the page in Crumb Cake ink and added some die cut flowers and leaves in and around my colored DSP flowers. A few of the retired Metallic Dots were a perfect addition.

Everything is concentrated on the right side of this layout and I love how the flowers sort of cascade down much like the greenery in our photo. Tucking die cut shapes in all the layers also helps develop texture as well.

I love this page and hope you are enjoying everything being shared so far! Please feel free to join in by using the tag #sevendaysofscrapbooking and following my Instagram Stories to see what everyone is making! You will be amazing and hopefully inspired to start your own creative journey!

Create with Connie and Mary--Borders and Tags!

Hello and happy Saturday (orr whichever weekday it is when you are reading this!) and welcome to this weeks Hop! Our theme is borders and tags…so I used tags to make a fun border on a scrapbook page! I am absolutely in love with the new Tailor Made Tags dies (in fact they have become a permanent friend beside my Stampin’ Cut & Emboss Machine) and I think I have used them in a unique way!

21SUSatHopWelcome.png

As soon as I saw this design theme I knew I wanted to create a ‘border’ using ‘tags’…and with Father’s Day coming up I couldn’t resist the idea of creating yet another Father’s Day page. I have started a scrapbook gallery here on my blog so feel free to check it out if scrapbooking is your jam!

final (4) 22.jpg

I started my page on a base of Basic White because I knew I wanted the ‘tags’ to really pop off the page and I added a layer of Basic White over top that I trimmed to 9x12. I wanted to be able to slip my tags underneath this piece.

I chose the colors of Calypso Coral, Crumb Cake, So Saffron, Soft Succulent and Night of Navy to cut the largest tag from the die set.

I was also intrigued by the Hats off Bundle to create something without the ‘hat’ and I found this bundle has some really really awesome sentiments! I am so happy that I recently ordered this set as it really made this page come alive. I wanted everything to feel crisp so I did all of my stamping on Basic White.

final (19).jpg
 

Because the focus of this design challenge was on borders and tags which I nailed with the border of tags, I wanted to make sure that I had a few ‘tags’ on my layout too.

For the top of the page I cut a mid sized tag from Soft Succulent and then I stamped the phrase “You’re the Best” and layered it over the tag for a bit of a different look.

final 80.jpg

It is easy to chance up the look of your stamps by eliminating certain things—-for example the outline on the #1. I also like to keep some shapes flat to the page and pop some up on Dimensionals for a little bit of interest. I also love that this is just a ‘DAD’ page so it doesn’t have to be Father’s Day or a birthday, it’s just a great page to celebrate dad.

I am excited to see what the rest of the team comes up with this week! You can go BACK to see what Melissa has created or NEXT to see what Connie has made. And remember to check out my scrapbook gallery or previous blog posts for more memory keeping inspiration.

Capture the Good--Create With Connie and Mary!

Hello my friends! I am so so excited to be a part of the Create with Connie and Mary Blog Hop! These two ladies have been pioneers in blogging and I can’t even express how honoured I am to be joining their weekly Saturday blog hop! It will keep me on my toes for sure! This is also my second card for “A Card a Day in May”.

You should have just been at Melissa Davies blog, I cannot say enough amazing things about her talent!

For my first venture into this challenge, we are using our favourite retiring stamp set. I finally settled on Capture the Good which is a million dollar achiever set designed by Tami White. I am so sad to see it retiring but I also know it will remain in my stamp collection as I absolutely love the camera image. I decided to make the camera image the focus of my card while stamping and embossing it with Whisper White on vellum. Smile is also embossed but in gold and I used my favourite color combo: Petal Pink, Daffodil Delight, and Call Me Clover with gold accents.

Image 2020-04-27 at 6.31 PM (1).jpg
This card also features my favourite retiring DSP, Bird Ballad, and my favourite retiring In Colour, Call Me Clover. I figured I might as well get as many retiring things onto one card as I possibly could!

This card also features my favourite retiring DSP, Bird Ballad, and my favourite retiring In Colour, Call Me Clover. I figured I might as well get as many retiring things onto one card as I possibly could!

I also love the Perennial Essence Flower Centres too! I used them on so many projects!

I also love the Perennial Essence Flower Centres too! I used them on so many projects!

When I create a card I really love I find it also inspires me to make a scrapbook page, as really a scrapbook page is just a larger canvas! So I repeated some of the imagery from this card onto a 12x12 page.

The larger canvass did allow me to add in a few more flowers, ribbon and a heart all while keeping the same elements as the card. I am pretty happy with how it turned out!

The larger canvass did allow me to add in a few more flowers, ribbon and a heart all while keeping the same elements as the card. I am pretty happy with how it turned out!

Next on this Saturday morning blog hop you will be visiting Connie Babert, the creative mastermind along with Mary of this hop! I can’t wait to see how she inspires us this week!

 
Click here to return to Melissa Davies

Click here to return to Melissa Davies

Click here to visit the amazing Connie Babbert

Click here to visit the amazing Connie Babbert

From This to That!

The benefit of having some extra time on my hands is I have been going through my craft room and discovering things, like this layout from several years ago. It gave me the inspiration for another “From This to That”!

final.jpg
final.jpg

On my updated version I used the Honey Bee Specialty DSP from Sale-a-bration as the base and layered a piece of Whisper White card stock over top, I sponged some Soft Seafood in the background under the word ‘cousins’ which were cut with the Hand Lettered Prose dies. I used the Seriously The Best stamp set for the other sentiments paired with the Mountain Air stamp set (which is carrying over to the new annual catalogue!). The best part of this whole layout are the trees along the side!

Supplies you will need:

-cello bag

-two contrasting ink colors but of the same color family (I used Granny Apple Green and Call Me Clover)

-a Spritzer filled with water

-a piece of water-colour or Shimmery White paper

-a die of your choice (I used the two large trees from the Majestic Mountain dies)

How To:

Stamp your two ink pads straight onto your cello bag. Lightly spritz with water and place your paper on top making sure to get both ink colors on the paper. Remove, let dry and cut with your die of choice.

I just love the detail of these trees! I rotated the die on the paper so one tree is bright on top and the other on the bottom!

I just love the detail of these trees! I rotated the die on the paper so one tree is bright on top and the other on the bottom!

And because I was feeling super inspired, I recreated this layout with a completely different color pallet, keeping the elements the same. For these trees I used Merry Merlot and Melon Mambo!

final.jpg
I also discovered how awesome Merry Merlot looks stamped on Rocco Rose!

I also discovered how awesome Merry Merlot looks stamped on Rocco Rose!

Color Coach Combo

Do you ever reach for the Color Coach cards that Stampin’ Up! created? I do find myself looking at them for inspiration when I feel stuck, or want to add a pop of color but not sure what! You can see how I used one of the Calypso Coral cards to influence the color pallet for this scrapbook page. I wanted to create a page that was bright and floral but could be used with a picture from any moment of your life. The pictures I actually used on these pages are from quarantine. I think it is important to document this experience in our lives too, and it is important to me that these paper memories are positive and bright.

final.jpg
Fun fact: I drank the whole bottle that day!

Fun fact: I drank the whole bottle that day!

The colors used on this page are Calypso Coral, Daffodil Delight, Petal Pink, Sahara Sand and Bermuda Bay with a hint of gold accents. I used the Golden Honey Specialty DSP which was the NUMBER ONE item redeemed during Sale-a-bration! The stamp sets used are Beautiful Friendship, Beautiful Promenade, Capture the Good and Well Said.

The ribbon on my selfie is the Whisper White Crinkled Seam Binding Ribbon that I coloured with the dark Petal Pink Blend marker.  If you take the ribbon and lay it on an acrylic block, you can pull it underneath the marker— It is so fast and easy to…

The ribbon on my selfie is the Whisper White Crinkled Seam Binding Ribbon that I coloured with the dark Petal Pink Blend marker. If you take the ribbon and lay it on an acrylic block, you can pull it underneath the marker— It is so fast and easy to do and drives immediately.