Creative Convention--Day 4!

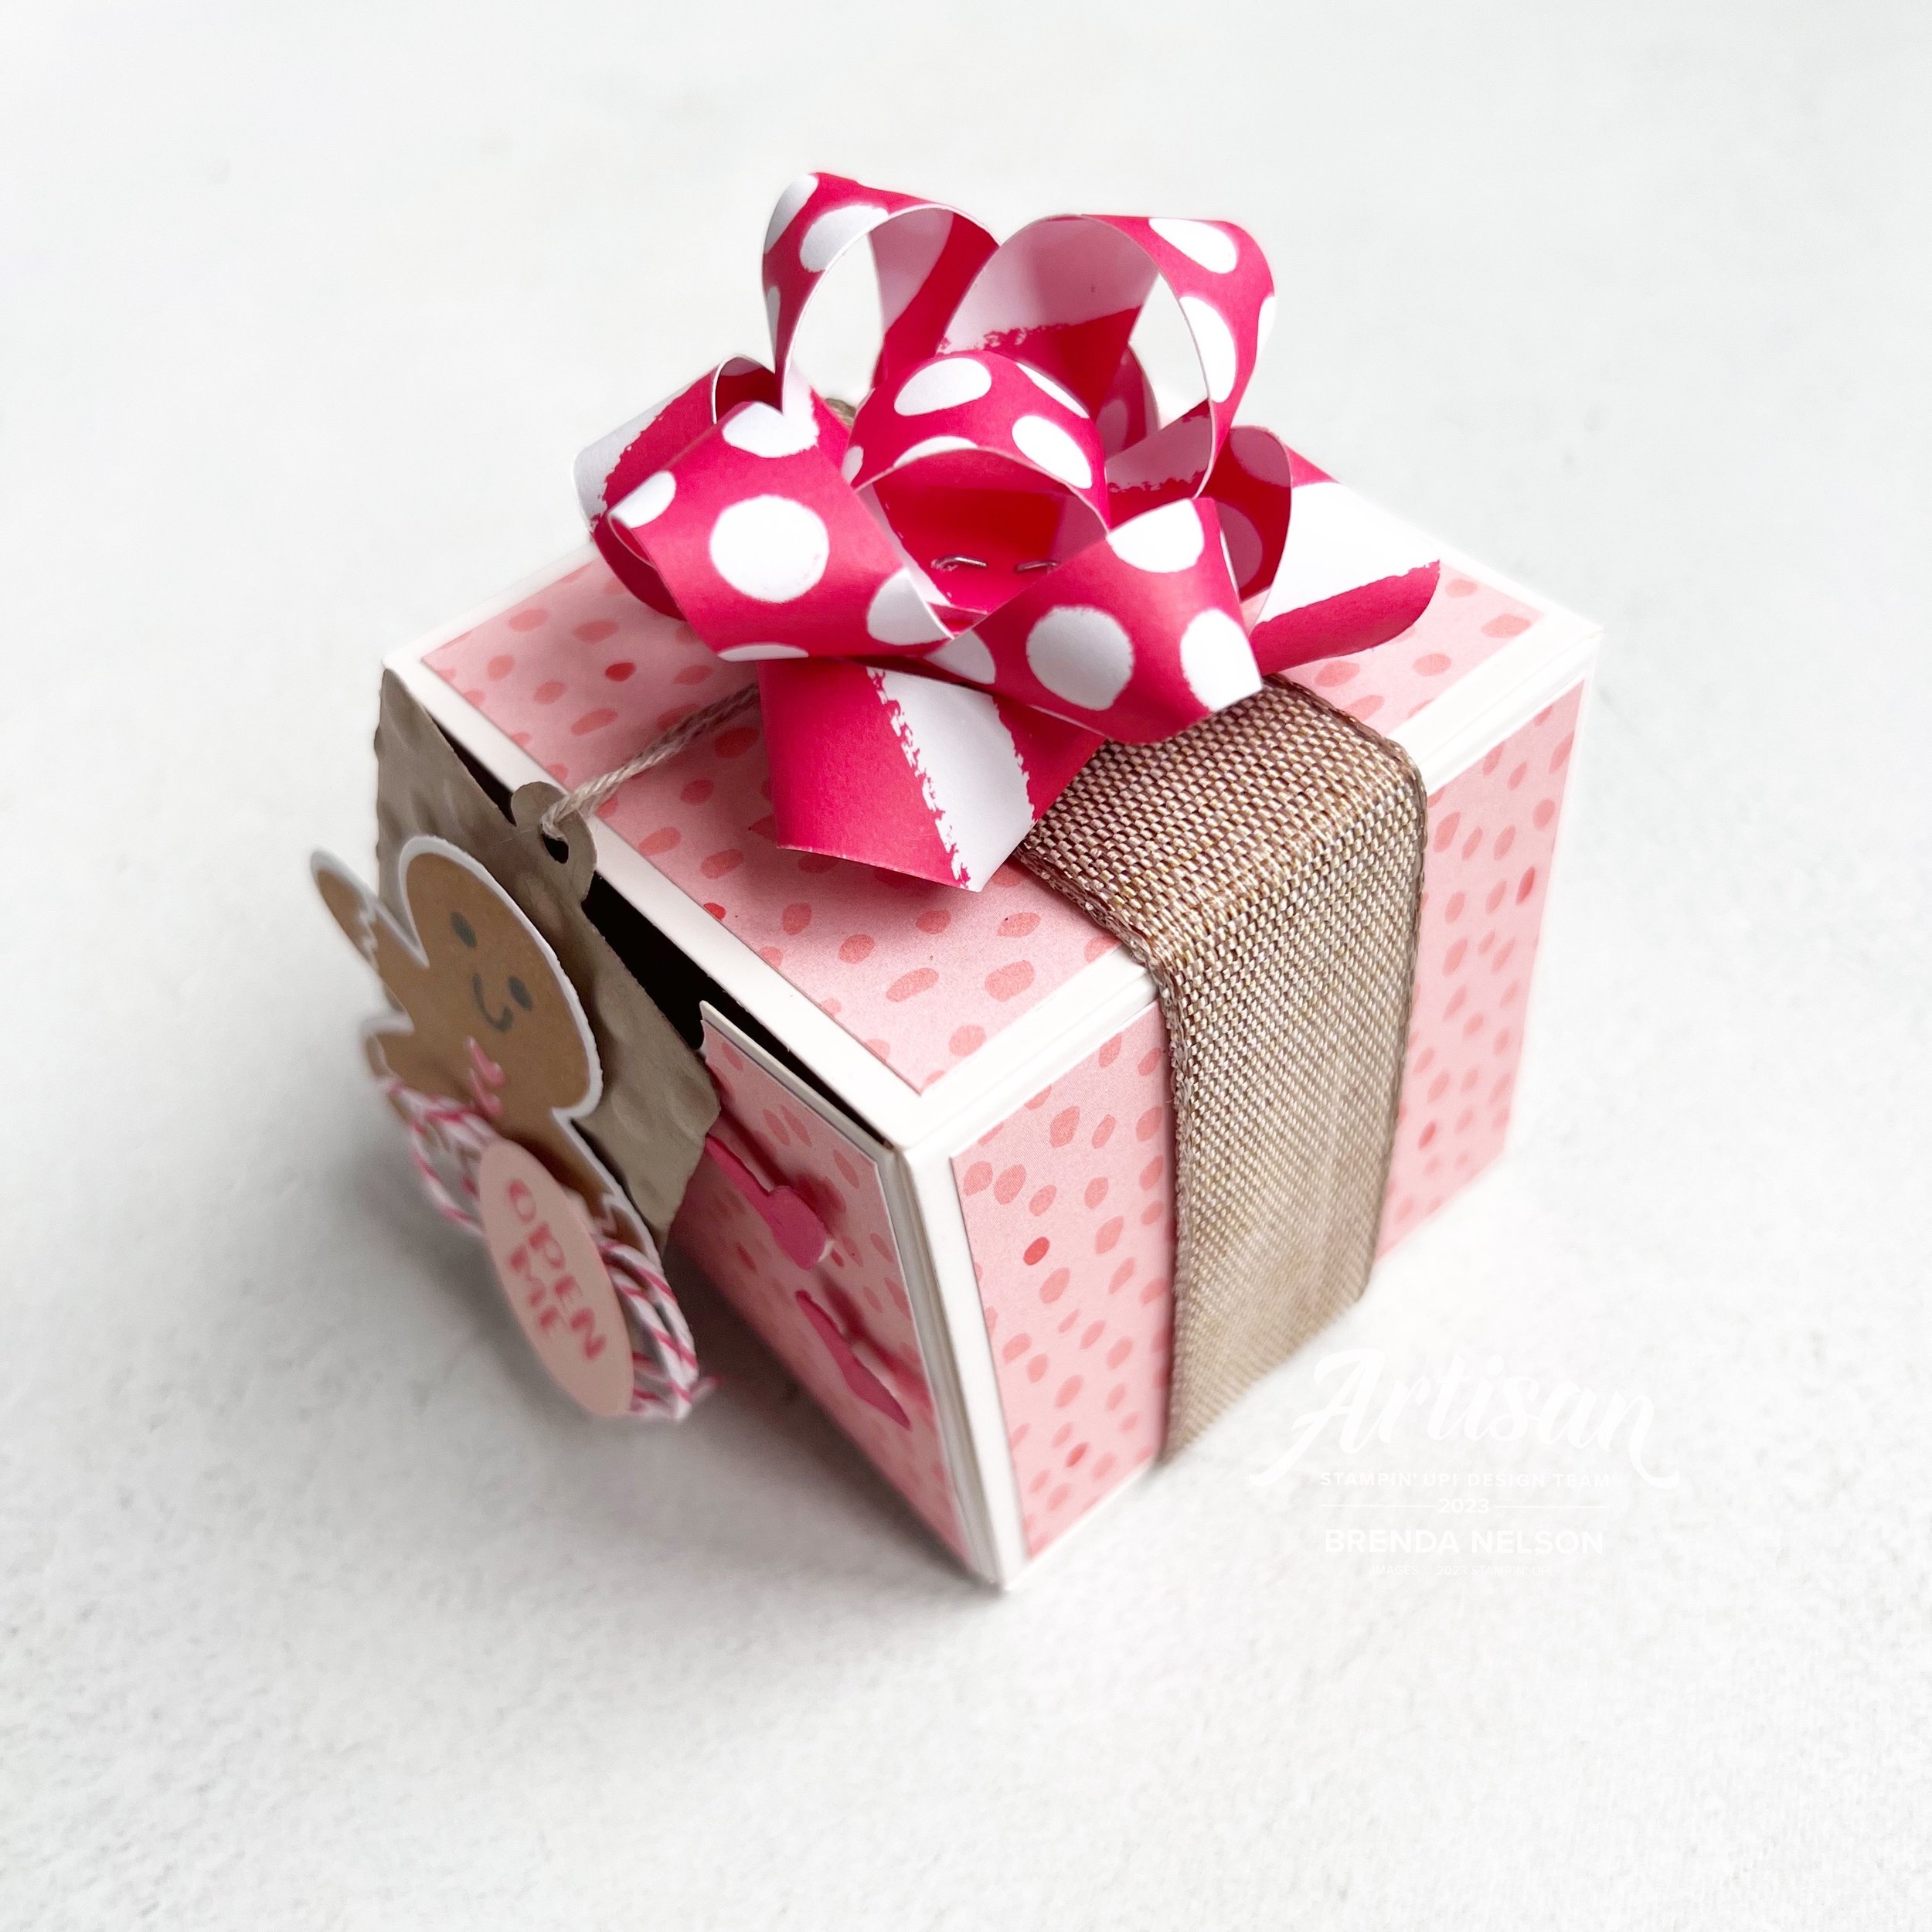
Hello friends! Today I decided to share something that is NOT a card with you because I am really excited about these new Nested Treat Boxes that are coming out in the Holiday Catalogue! Welcome back for my 4th share of my Creative Convention—my week long blogging extravaganza while I am away at Backstage!

These Nested Boxes felt like a natural pairing with the Sending Cheer stamp set. This set is a part of a bundle and was one of my choices when planning my pre-order. While I do love traditional Christmas, I also love fun whimsical Christmas too and this bundle definitely fits the bill!

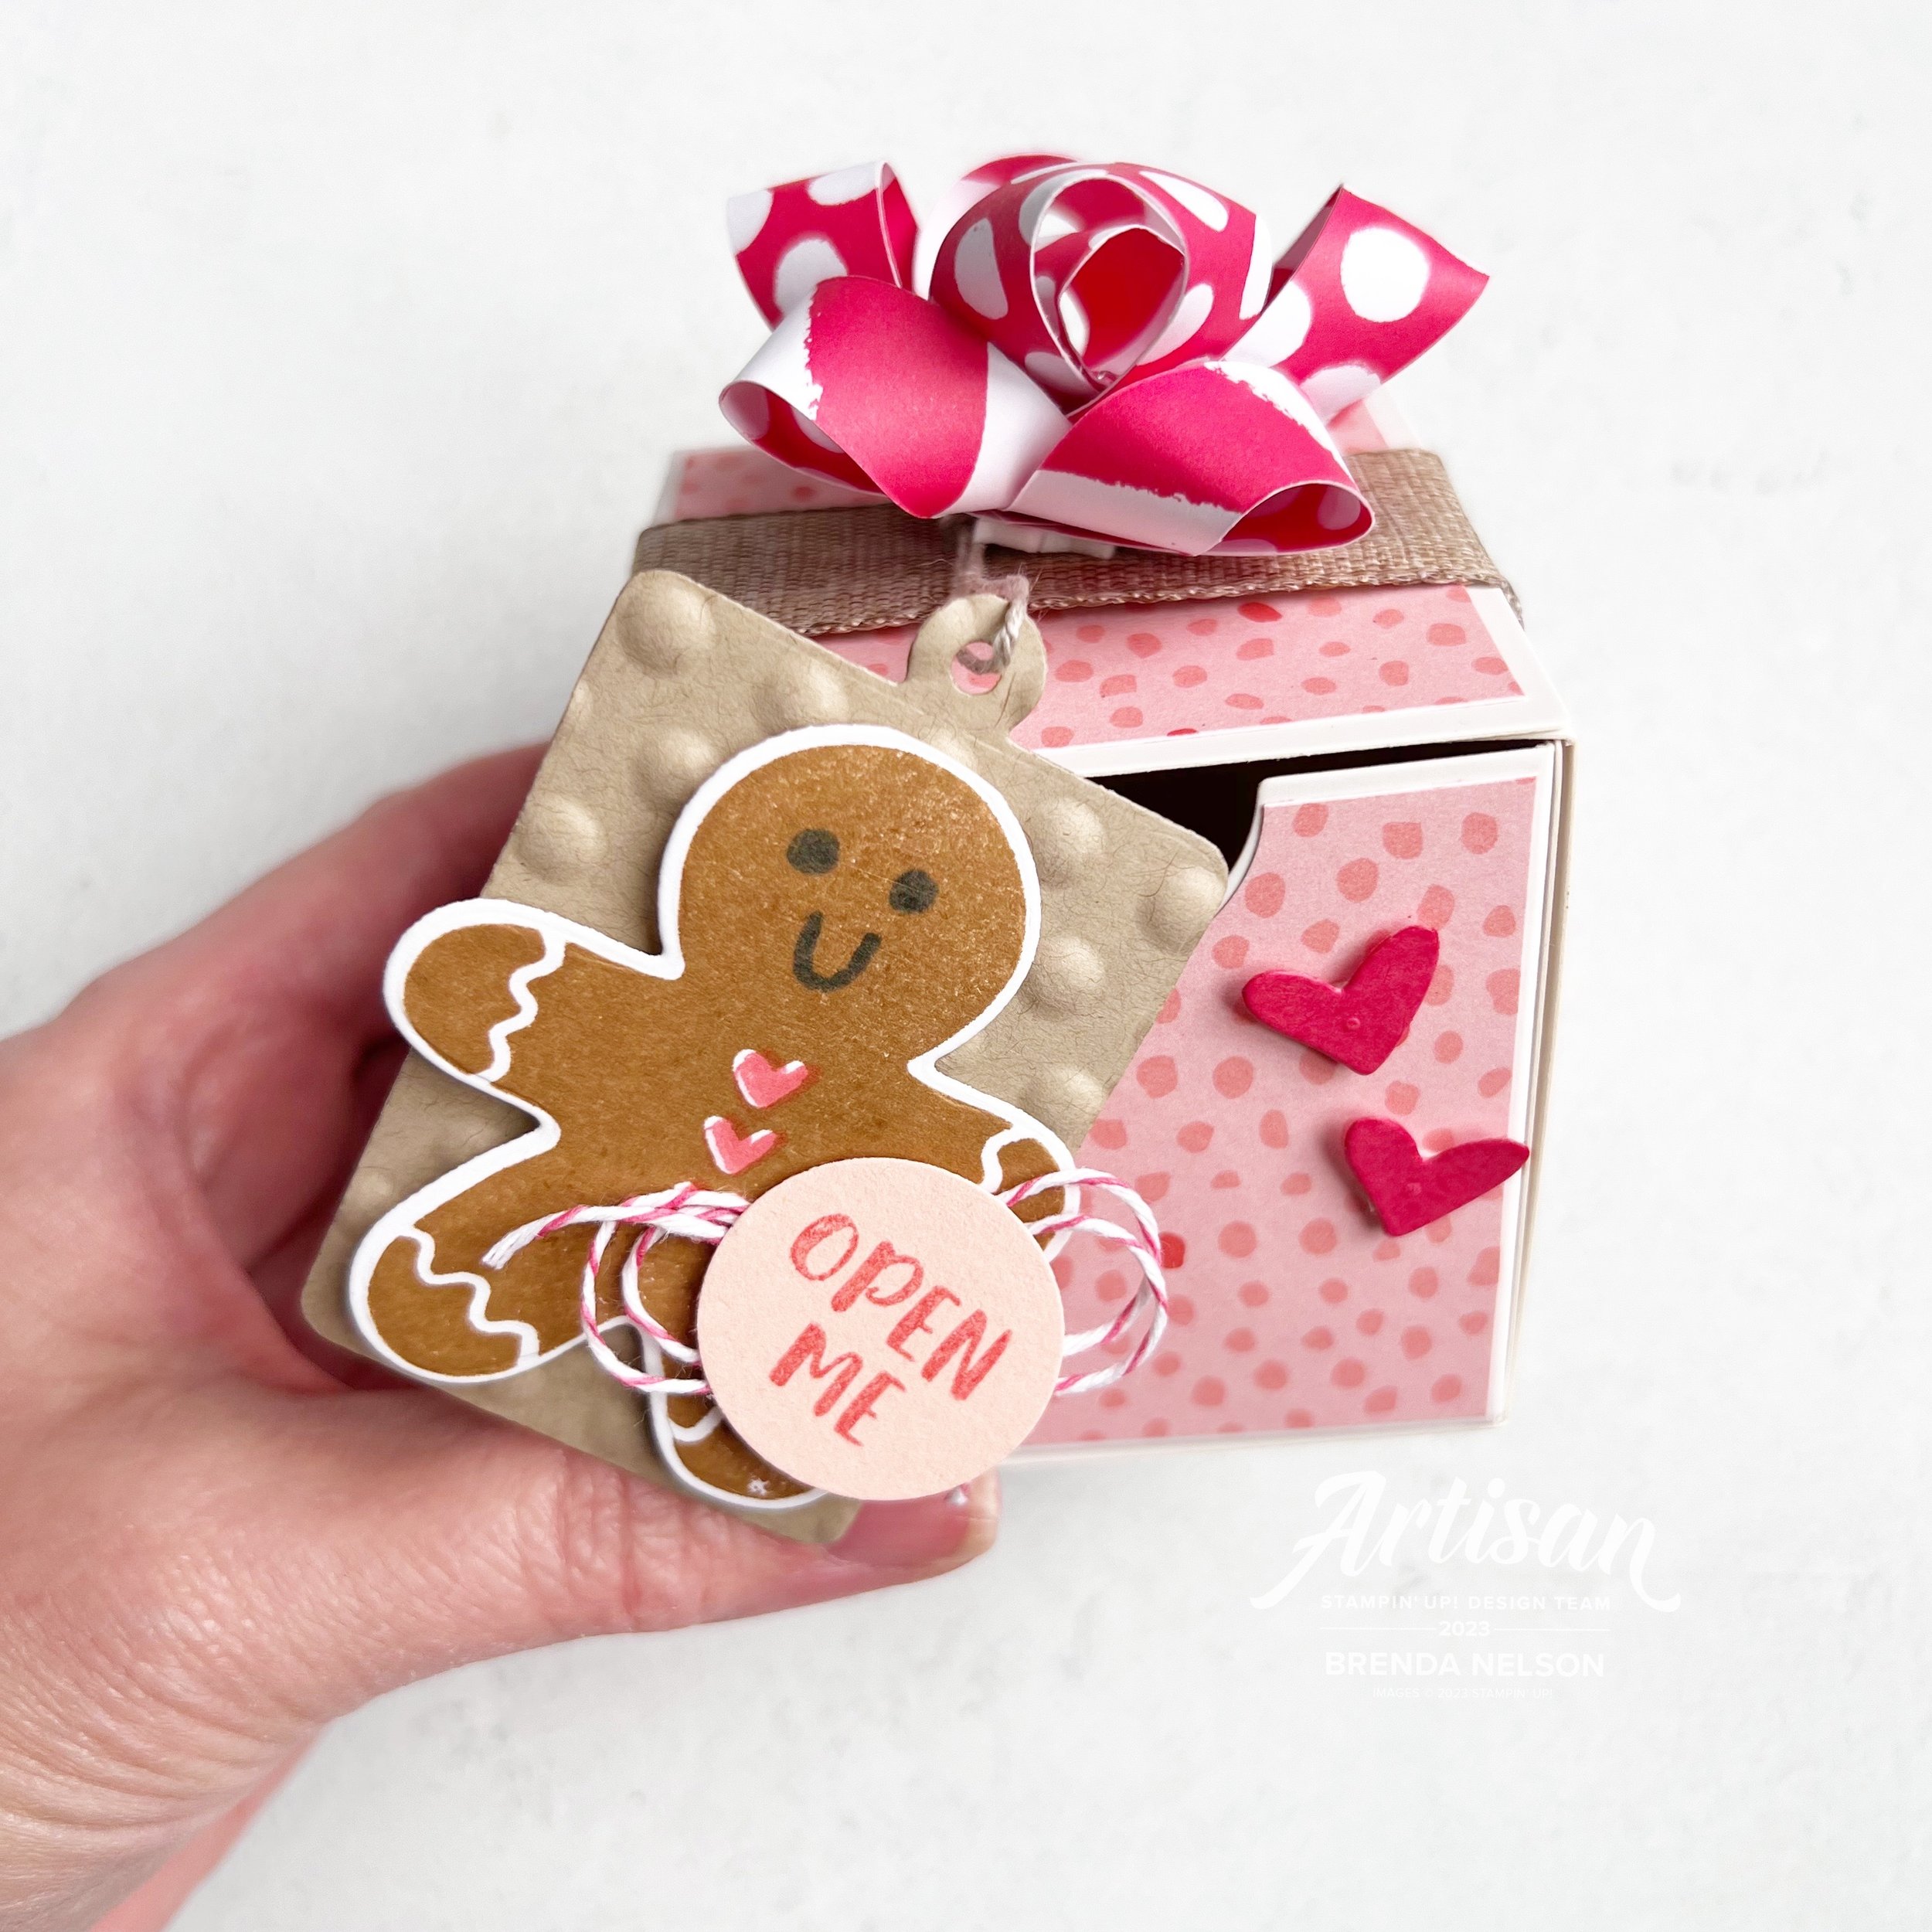
These Nested Treat Boxes are 2 1/2 x 2 1/2 wide so they can fit a variety of awesome surprises inside!

Instead of using this bundle to make a card, I thought it would be fun to use it to decorate the Nested Treat Boxes. I used squares of DSP from the Garden Walk 6x6 paper to cover the sides of the box and wrapped a length of the Natural Ribbon around the box.

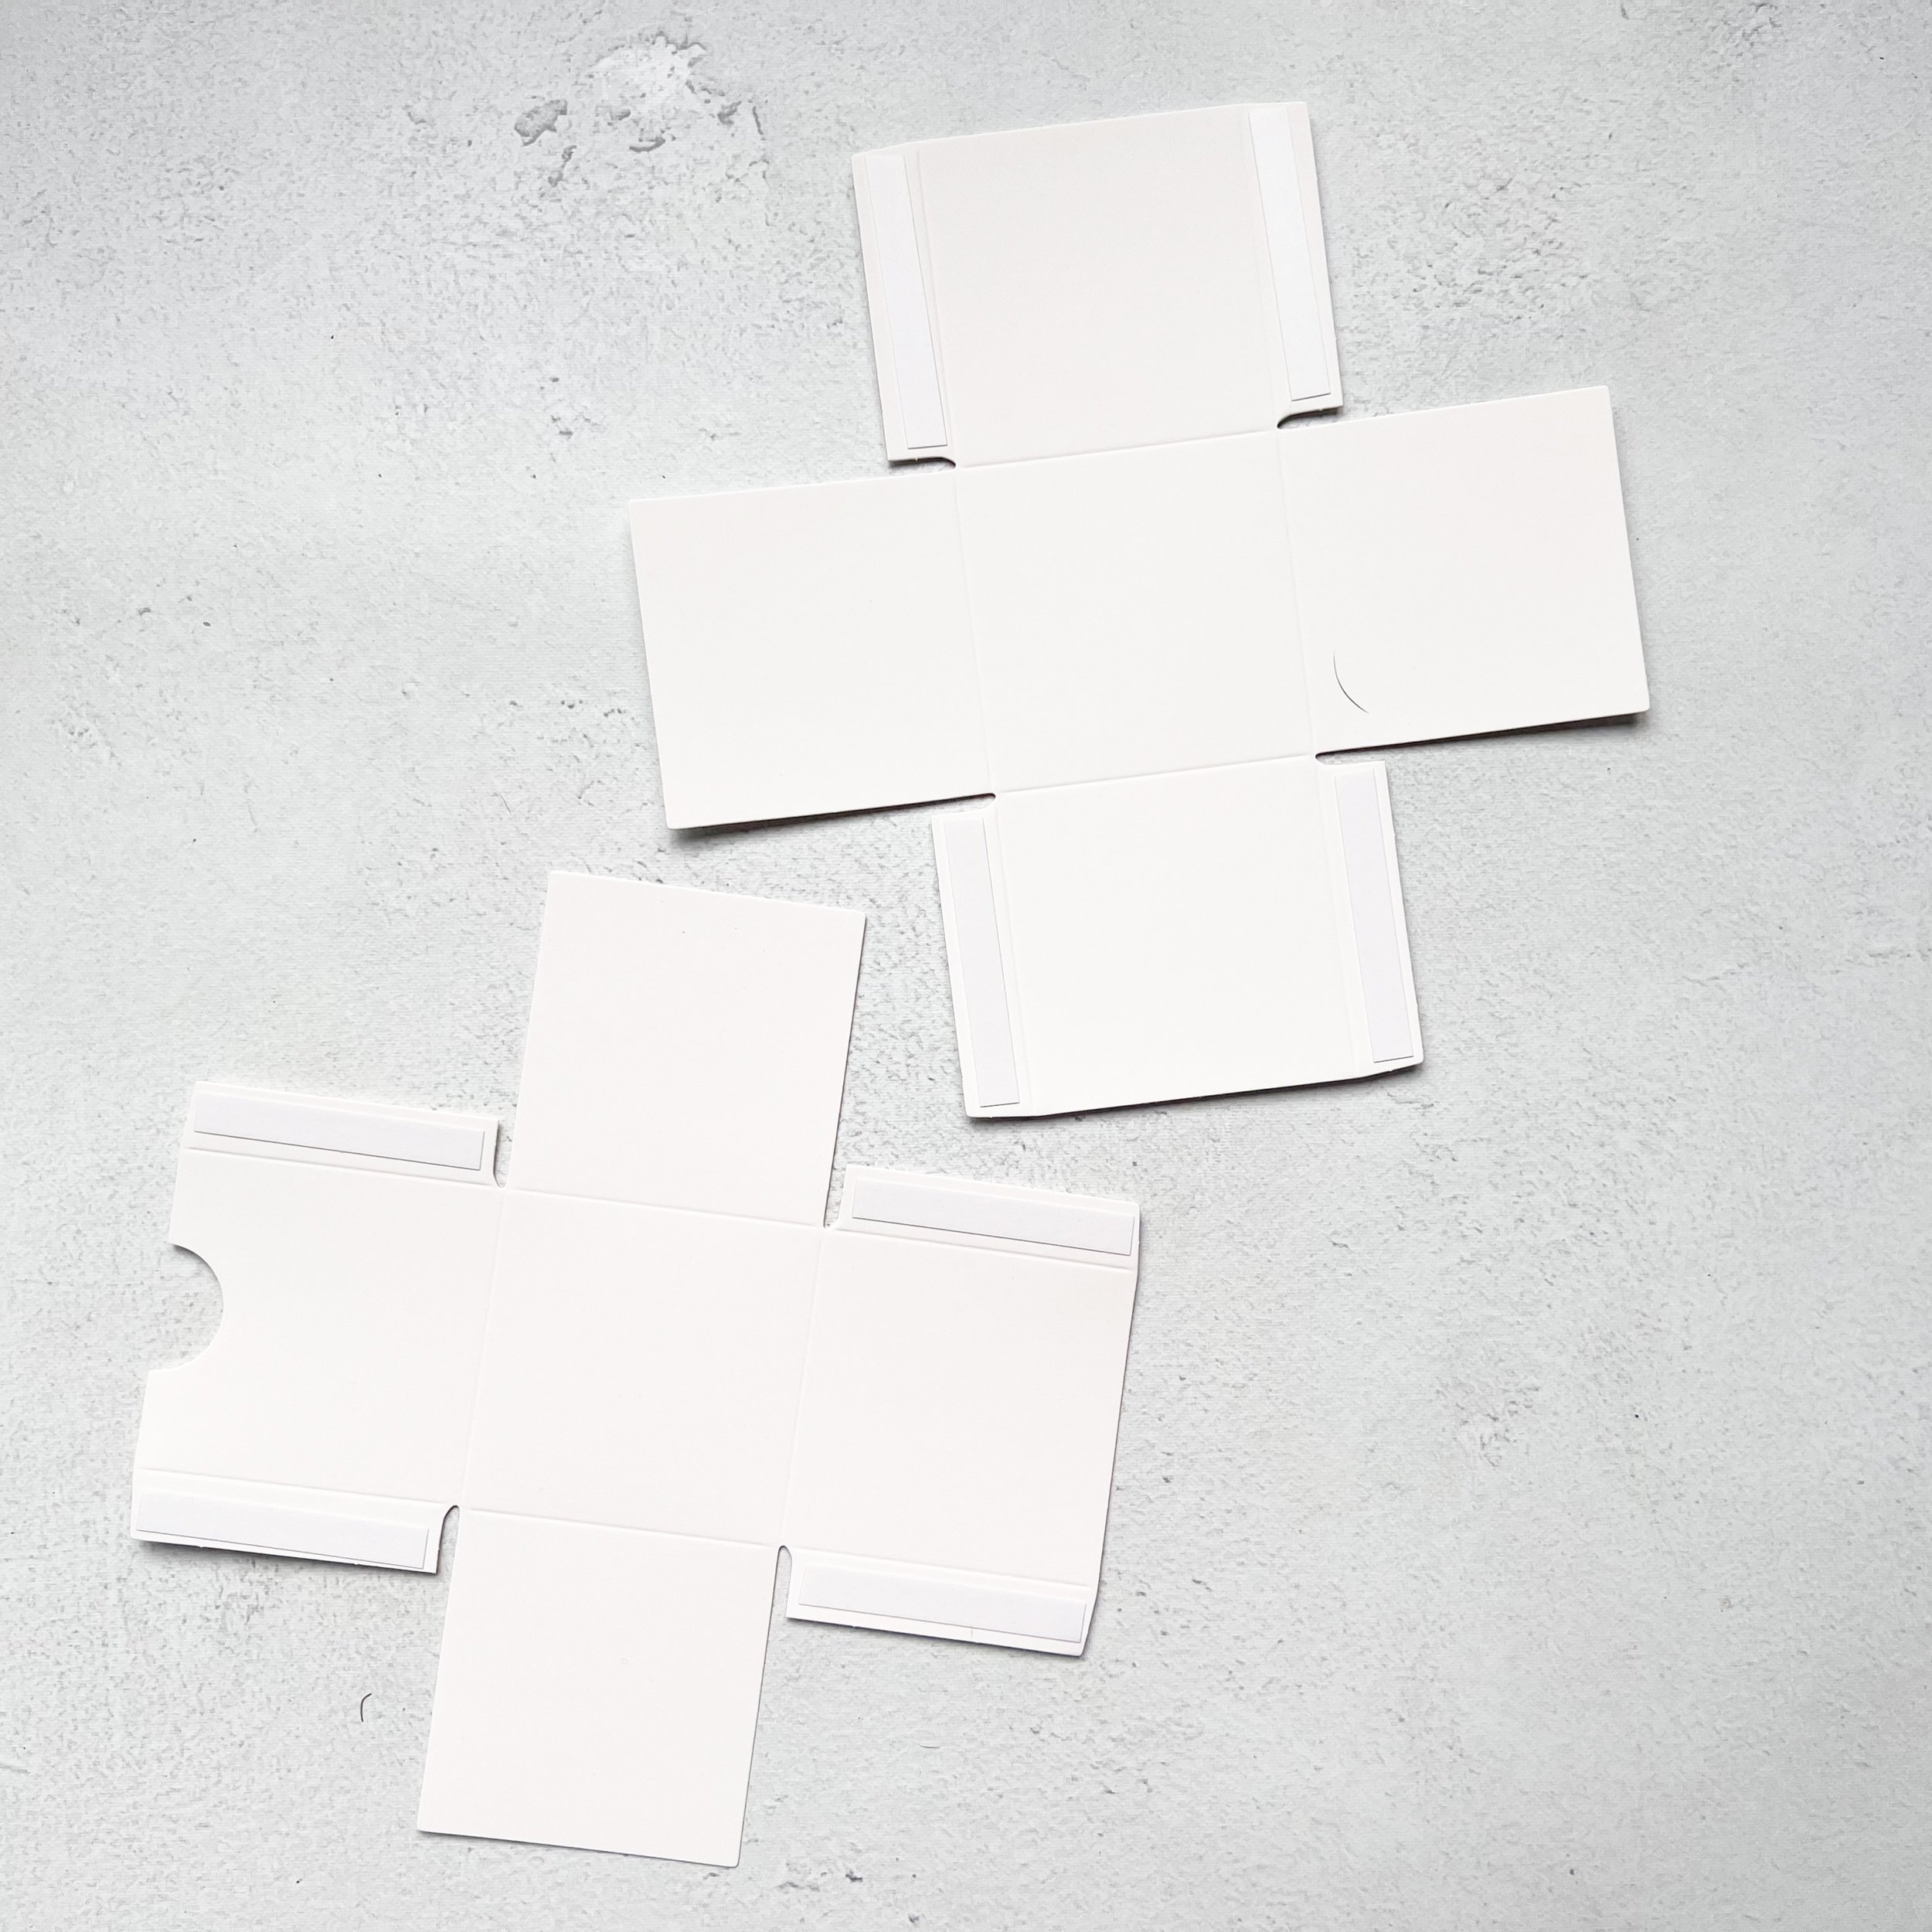
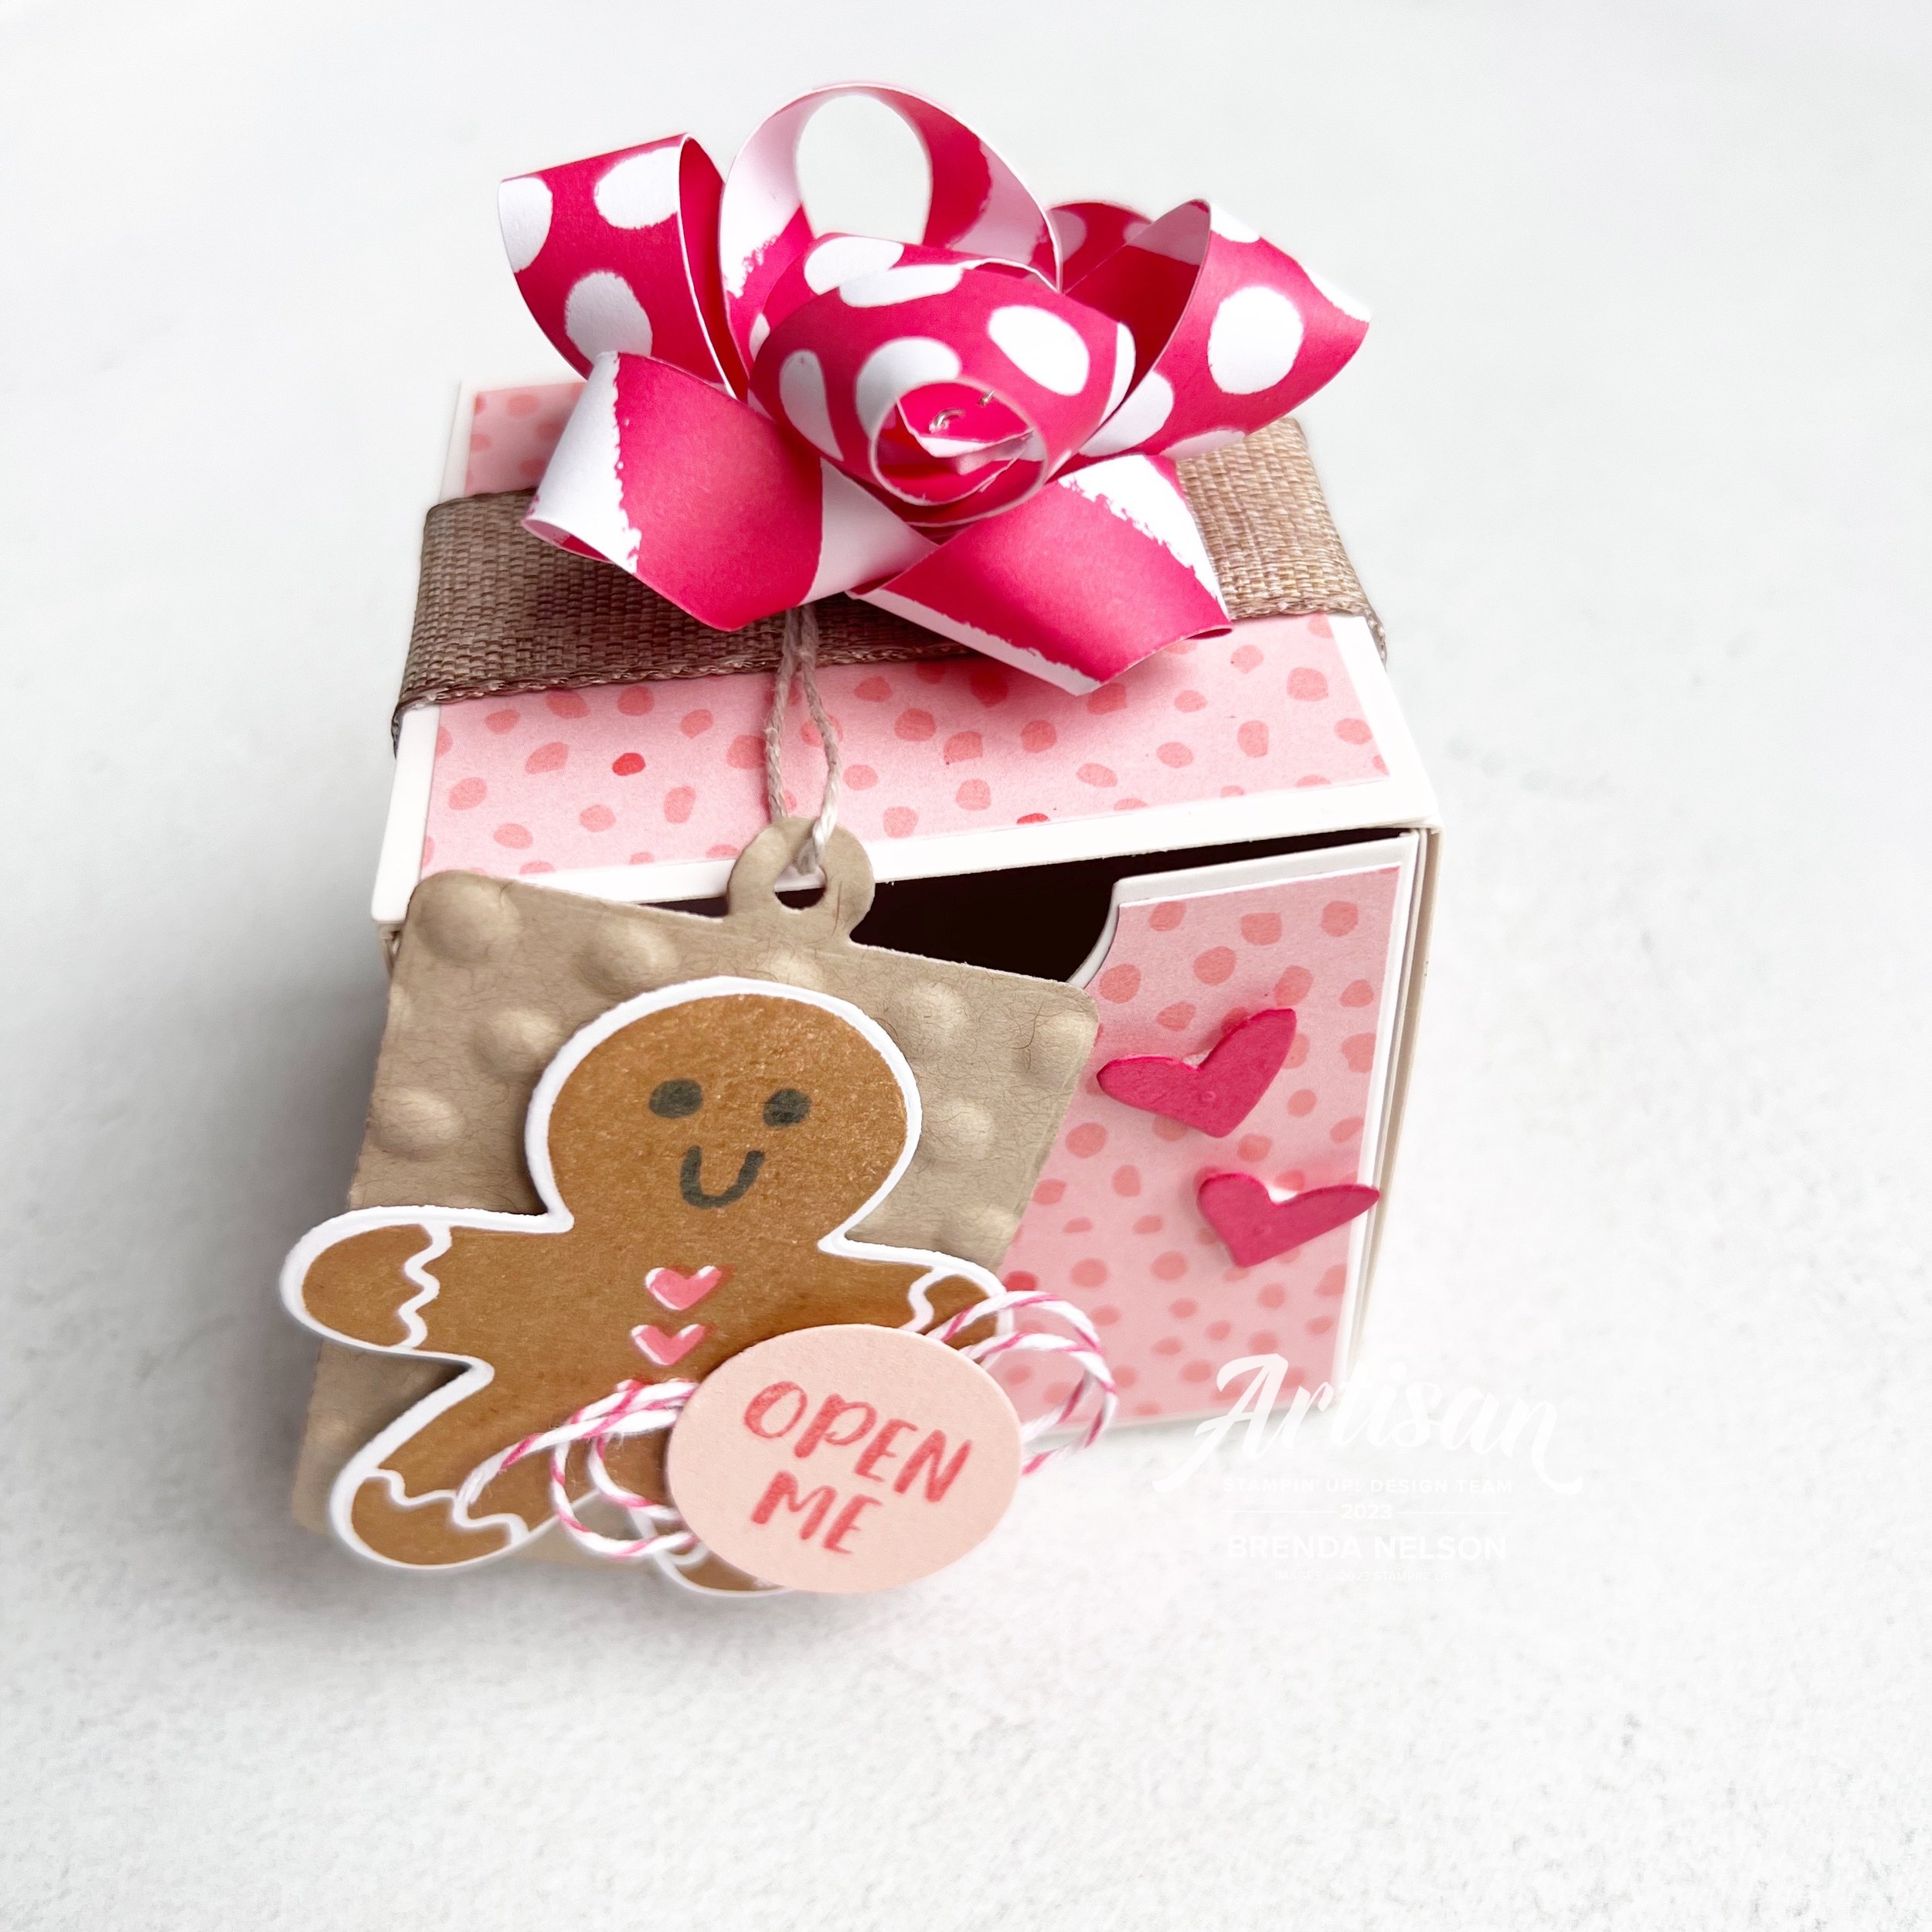
The boxes come in two pieces—the outside and the inside and the inside box has a little notch out so you can get your finger in there to pull it free. You can take a 1 inch circle punch or die and snip out a section of the DSP so that it matches the box!

I love that this box glues itself together! It is a definite perk and makes assembly so easy!


The box was screaming for a mini bow so I made one using strips of DSP from the In Color 2022/24 collection in Sweet Sorbet. Sweet Sorbet is one of my favorite holiday reds! It plays so well with pink so it was a perfect fit to match this DSP! I reversed the patterns on each layer of the bow as well so you see both stripes and dots!

I cut a tag from the Sending Cheer Dies in Crumb Cake card stock and ran it through the polka dot embossing folder that is part of the Online Exclusive embossing folders.

I found Pecan Pie was the perfect color for a Gingerbread Man—you can add his face and fill in his heart buttons with 2 additional stamps in the set. There is a die for him too that is actually a tag, so just snip it off. Easy peasy!

I hope this cut little project inspires you to #addtocart the Nested Treat Boxes when they become available. I think they will make some fun holiday decor, are great for birthdays and little gifts that you want to give!

A Card a Day in December--Holiday Style!

Hello friends! It’s December, which means we have finally made it to the last month of 2020. We did it, we are surviving a pandemic, we are managing a thousand things at once—our families, households, jobs, our stamping and hobbies, our pets, our Netflix addiction and the list goes on and on! Which is why, I want to be fully present in this holiday season. Somehow, it means just a little bit more. Gone are many of the things we have been able to enjoy in the past. However, I am blessed to still be creating and loving what I do.

So today is Day 1 of my A Card a Day in December—Holiday Style Event. I am going to share 25 holiday cards or projects and end the month with a week of New Years Cards! So I hope you are ready for your daily dose of inspiration!

 
IMG_0080.png
 
Don’t you just love coordinating projects? I do! they are so fun to give as a little gift and I don’t think anyone will mind getting a cute little hand sanitizer project  this season!

Don’t you just love coordinating projects? I do! they are so fun to give as a little gift and I don’t think anyone will mind getting a cute little hand sanitizer project this season!

My first project I want to share is this fun holiday card and matching hand sanitizer project! I decided to use a traditional color palette of Real Red, Whisper White and Old Olive!

I used the Little Treats Bundle as the starting point of my card and hand sanitizer holder. I stamped the little candy stamps around the phrase in Real Red. I cut a strip of Real Red card stock that I embossed with the Wrapped in Texture embossing folder. I added a polka dot strip of DSP from the Trimming the Town Designer Paper on top.


The sentiment is from the Little Treats stamp set and is stamped in Old Olive ink on Pear Pizzazz card stock. I added some ribbon from the Ornate Garden Ribbon combo pack and the silver cord is from a past Paper Pumpkin kit.

I added a few embellishments from the All the Trimmings collection and a classic Jewelled Rhinestone.

This card is simple but cute and easily reproducible!

final 2.jpg
final 4.jpeg
 

This little project is one of my favorites! I was so happy when I realized that a mini hand sanitizer could fit inside!

The Little Treat Box dies are so easy to use and assemble and I love that you can get two out of one piece of 8 1/2 x 11 card stock.

The candy canes are from the Sweetest Time Bundle which has been a well used stamp set in my craft room this season!

The stitched scallop circle is included in the Little Treat Box dies too!

I hope you have enjoyed my first card in A Card a Day in December—Holiday Style!


Create with Connie and Mary-Spooky Halloween

Have I said it enough this month how much I love Halloween? Well if today is your first stop by, then I will share it again, its my Favourite Holiday (after my birthday!!!). This week our theme is ‘Spooky’ Halloween and I knew right away I wanted to share one of my families favourite treats, Oreo Popcorn, with a Halloween Twist!

This is my Halloween version of my Oreo Popcorn. The original recipe is under my Lifestyle Tab, Favorite Recipes (I will share a link at the end of this post). I just added in some orange candy balls from Wilton and some candy eyeballs for that ‘spo…

This is my Halloween version of my Oreo Popcorn. The original recipe is under my Lifestyle Tab, Favorite Recipes (I will share a link at the end of this post). I just added in some orange candy balls from Wilton and some candy eyeballs for that ‘spooky’ feel!

 
fullsizeoutput_12d57.jpeg

One batch of this popcorn filled at least a dozen bags with some left over for my family to snack on. This recipe lasts for a few weeks in a sealed container or bag, so it is something you can make ahead of time too. I have all of my bags packed to share at my kids Halloween classes!

final.jpg

I filled our Mosaic cello bags with popcorn (I hope you have spotted these in the Handmade for You catty) and topped the bag off with the largest of the Celebration Labels dies cut from Basic Black card stock and then ran it through the Cobwebs 3D embossing folder for that spooky touch!

final.jpg

Happy Haunting is stamped in Momento Ink on Smoky Slate card stock with the background cobweb in Smoky Slate ink—both of the images are from the Celebration Tidings stamp set. You can find this awesome bundle on page 58 of the Handmade for You. Do not overlook its potential! The dies are the BEST if you are someone who gives a lot of treats. The 5 sizes are all ‘notched’ so you can easily fold them in half to make a bag topper!

final.jpg

Because our theme this week was ‘spooky halloween’ I thought, what is more creepy than spiders in your popcorn? Haha! It would actually scar me for life if it was a reality! Luckily these are just cute glitter spiders that I cut using the Little Treat Box Dies and the Black Glitter Paper. I LOVE this glitter paper as it does not ‘shed’, no glitter on my cutter, hands or Stampin’ Cut & Emboss machine! Win win!

I added in a couple strips of the Terracotta Tile Scalloped Lined Ribbon and coloured the Crinkled Seam Binding Ribbon with the dark Rich Razzleberry Stampn’ Blend marker.

Click on the link for my Oreo Popcorn recipe and watch for a Christmas Twist version coming this holiday season!

I can’t wait to see what the other girls in the Hop have created this week! Next week we start sharing Christmas projects so make sure you mark your calendars for all the Saturday’s!

You can go BACK to see what Melissa has created or NEXT to see what Connie has designed! Have a safe and healthy Halloween everyone!