Backstage Presents for my People

Hi friends! I really hope you enjoyed my Creative Convention last week while I was in Vegas at Backstage. I had so much fun creating those projects for you!

Backstage was so much fun, my cup and heart are full. I am so excited about this upcoming holiday season and all the fun we are going to have crafting together! I love to have people here in my Home Studio in the YEG area and I host lots of stuff on zoom/facebook! So if you haven’t crafted with me before maybe this will be an opportunity for us!

One of the fun things of getting together at any Stampin’ Up! event, whether is company hosted, or hosted by demonstrators, is the PEOPLE! We know this right? So of course I had to take some gifts to my ‘people’!


The absolute HIGHLIGHT of Backstage for me was getting to me some fellow members of the Artisan Design Team, both current and past! My friends Heather @songbirdstamper was coming over from the UK so of course I had to give her a gift of Canadian maple syrup and some maple Sweet Georgia Browns from a Canadian chocolatier company, Purdy’s.


I thought this little tin was cute to share with my roomie and best stamping buddy, Tammy Nelson @stampandscraptammy—We met a few years back on the Alaskan incentive trip and have been having fun together ever since. I thought after enjoying all of the maple truffles inside she could pop this tin up in her craft room aa a little reminder of me!

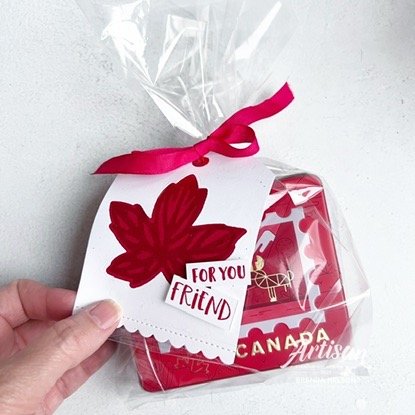
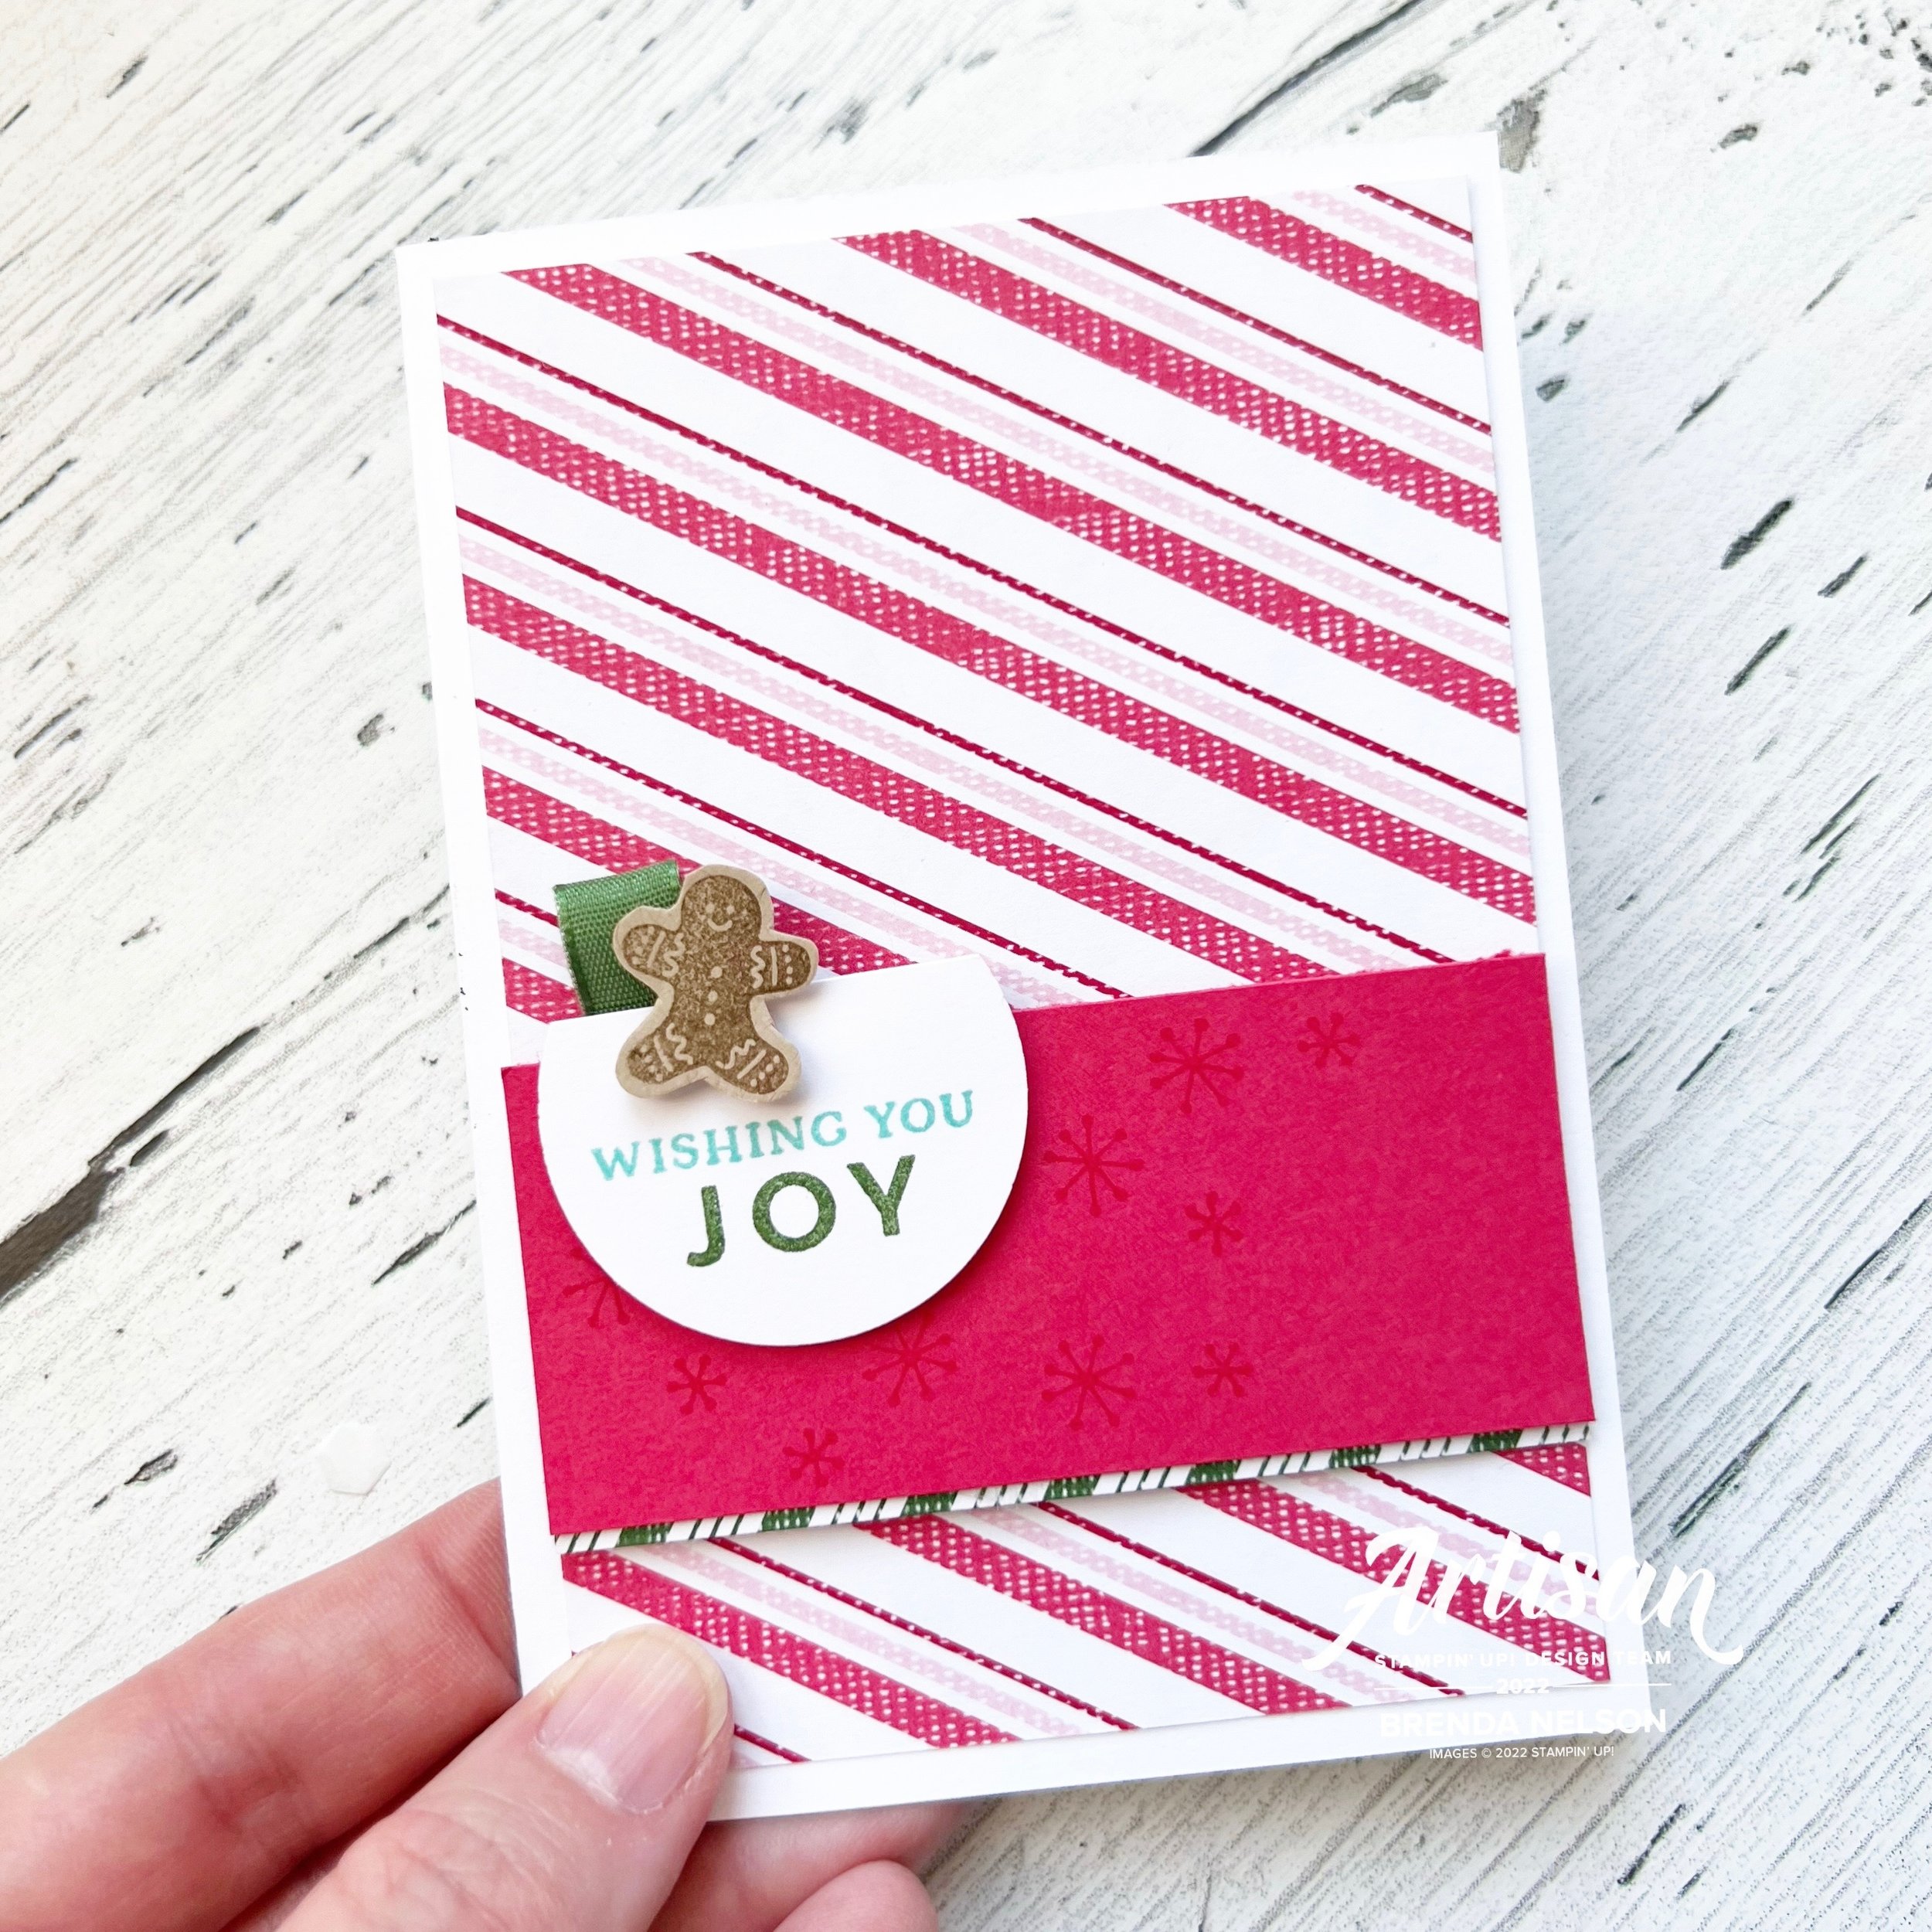
These tags were inspired by a card that my fellow Canadian Teammate Verena @simple_stamper shared a couple weeks back! I thought the design was easy and perfect to convert into tags! The maple leaf is stamped in Real Red ink on coordinating card stock. Once you cut your tag to size, use the maple leaf die cut to create a negative image. You can then pop your stamped image in behind.

For the Starbucks mugs, I wrapped strips of Real Red card stock around the boxes that I stamped with the large maple leaf stamp in the Autumn Leaves stamp set. The sentiments ‘For You Friend’ are from the Best Family Ever stamp set!

I did a MUG SWAP with Kurstan @stampwithkurstan_ which was so much fun! Now I have a San Francisco mug to add to my collection! She also filled it with chocolates which caused my carry-on suitcase to get inspected at security! I guess they looked suspicious in there!

I took an Alberta mug as a surprise to my friend Melanie @melsinkyfingers—you may remember last holiday season we did a 12 Days of Christmas Blog Hop and I am so happy we are going to offer that to you again starting on November 1st! We are working out the details on an event as well, so stay tuned!

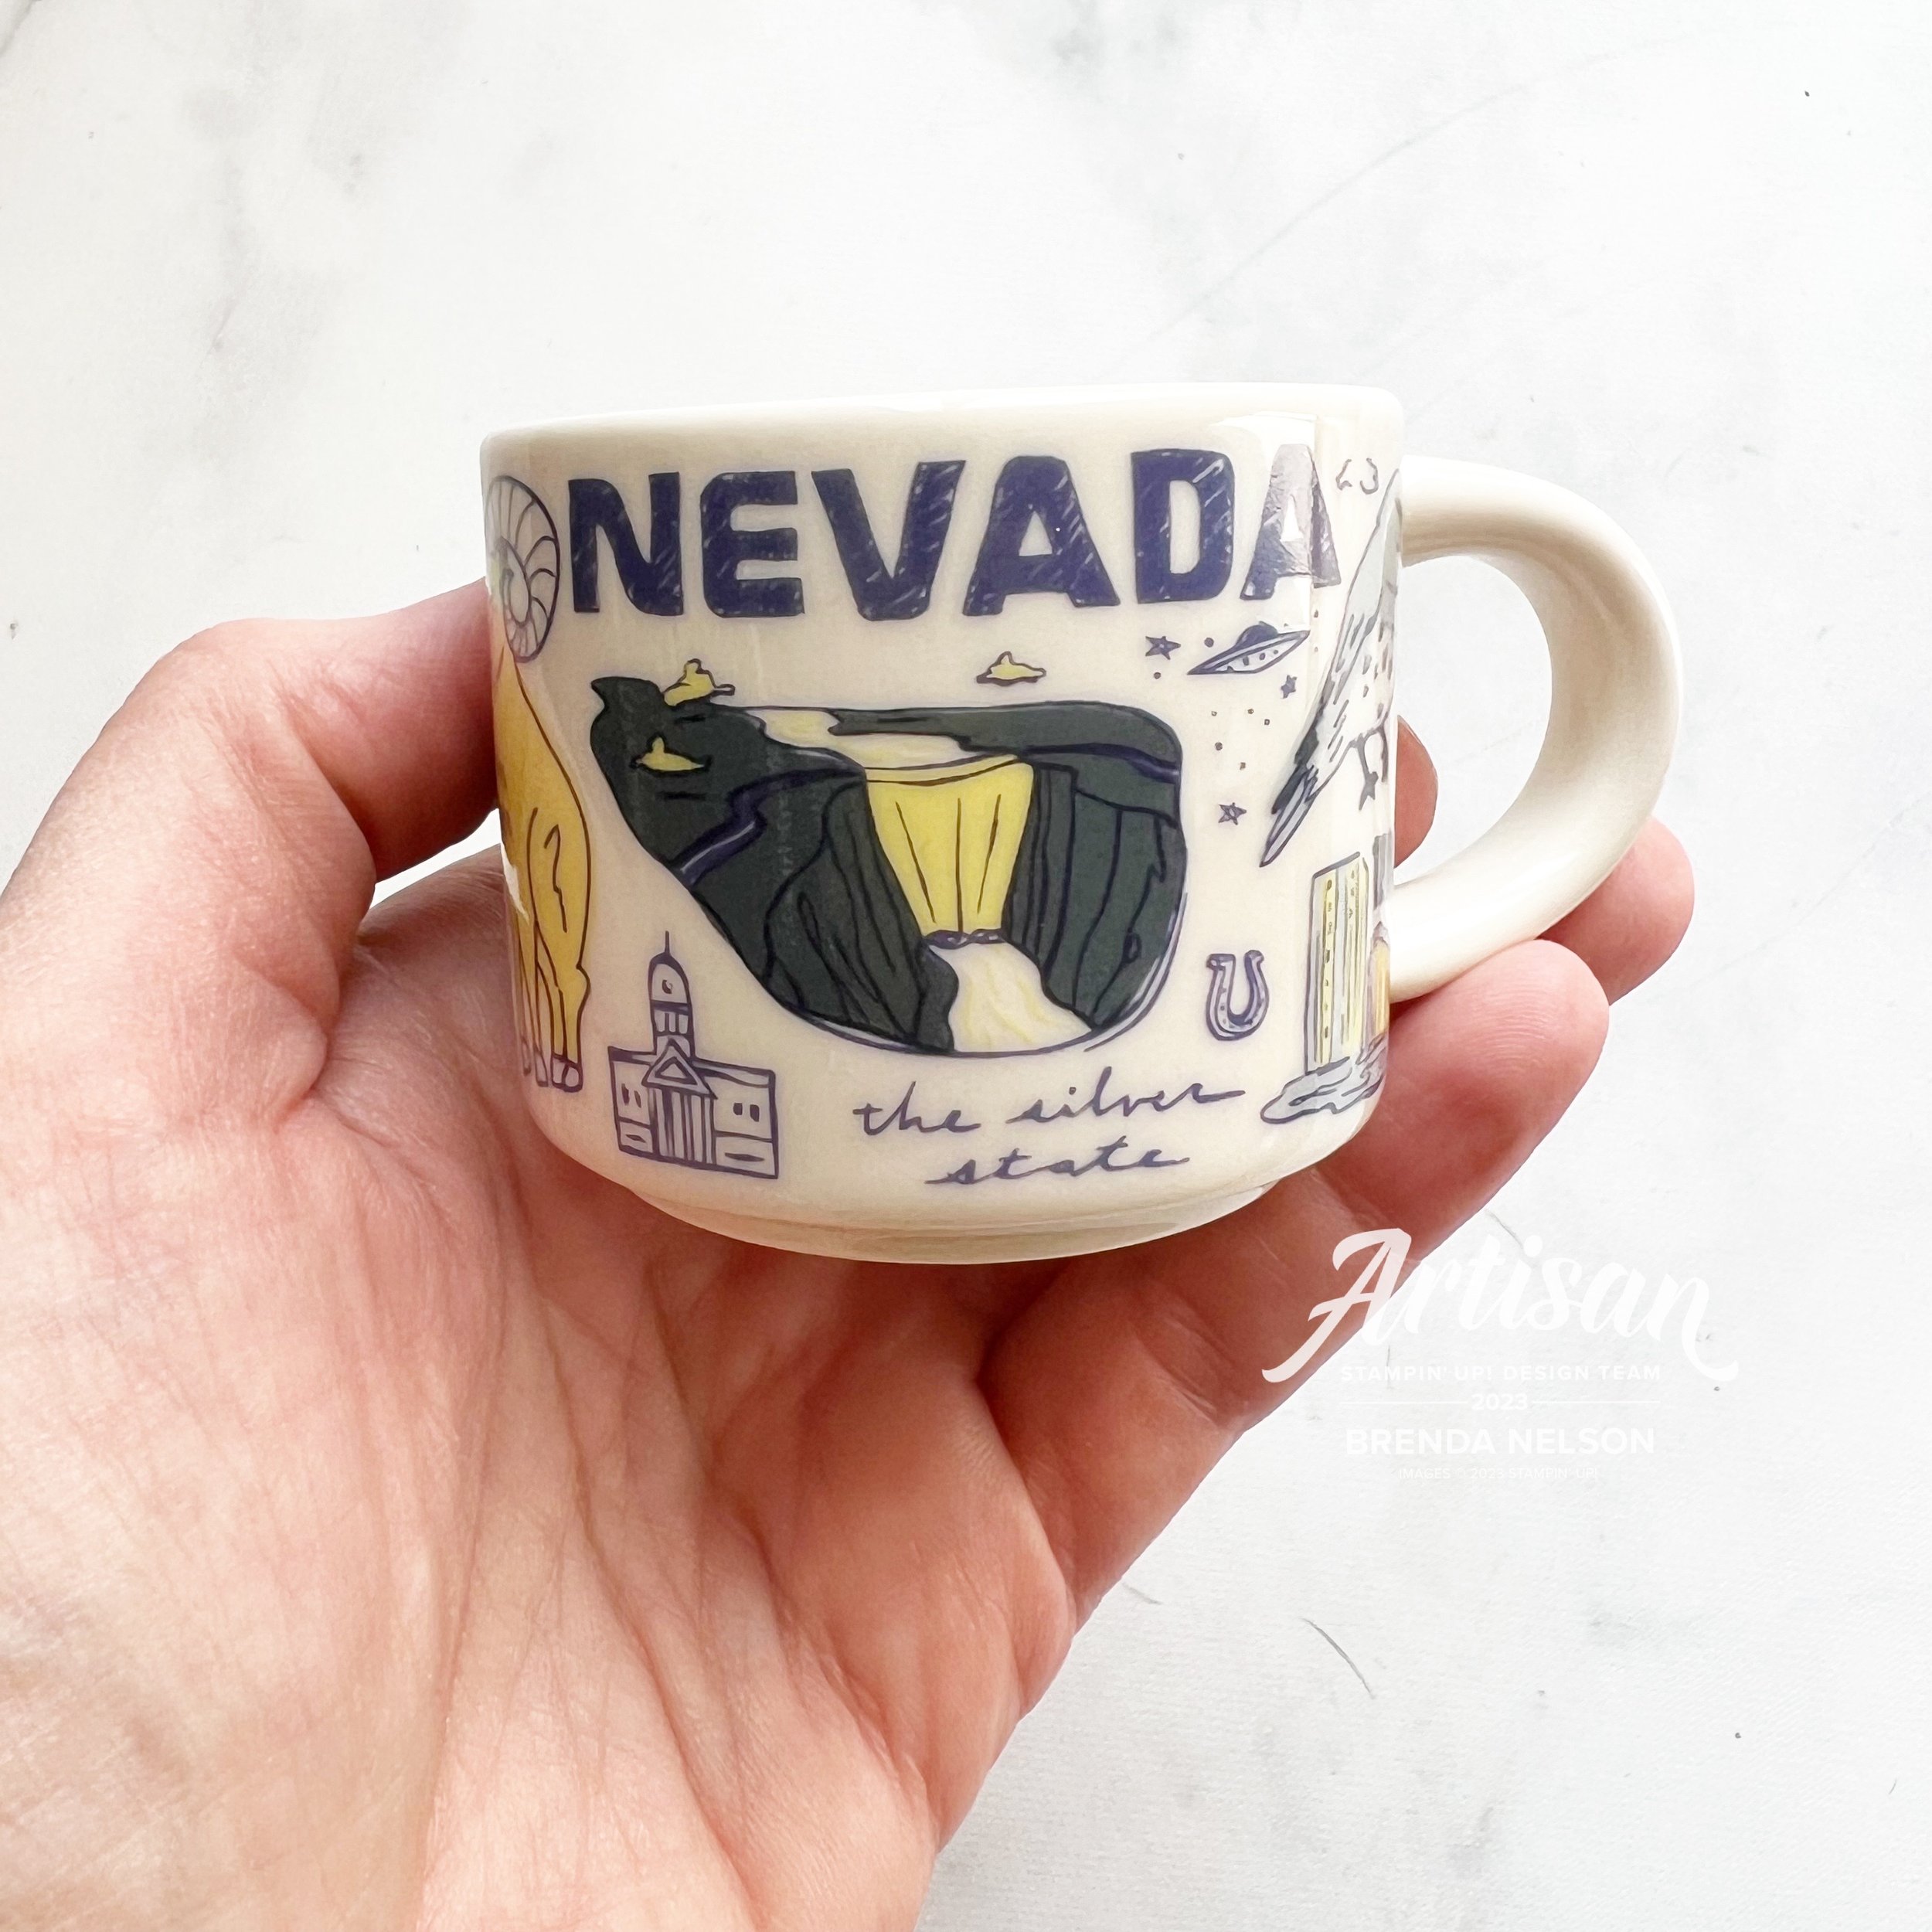
Of course I had to pick myself up a Las Vegas mug for my collection and this itty bitty Nevada mini mug! Isn’t it so cute! Its a perfect little decor item for my stamp room!

I will be sharing alot more fun stuff—pictures and reels on my Instagram so make sure you are following me along there!

Creative Convention--Day 4!

Hello friends! Today I decided to share something that is NOT a card with you because I am really excited about these new Nested Treat Boxes that are coming out in the Holiday Catalogue! Welcome back for my 4th share of my Creative Convention—my week long blogging extravaganza while I am away at Backstage!

These Nested Boxes felt like a natural pairing with the Sending Cheer stamp set. This set is a part of a bundle and was one of my choices when planning my pre-order. While I do love traditional Christmas, I also love fun whimsical Christmas too and this bundle definitely fits the bill!

These Nested Treat Boxes are 2 1/2 x 2 1/2 wide so they can fit a variety of awesome surprises inside!

Instead of using this bundle to make a card, I thought it would be fun to use it to decorate the Nested Treat Boxes. I used squares of DSP from the Garden Walk 6x6 paper to cover the sides of the box and wrapped a length of the Natural Ribbon around the box.

The boxes come in two pieces—the outside and the inside and the inside box has a little notch out so you can get your finger in there to pull it free. You can take a 1 inch circle punch or die and snip out a section of the DSP so that it matches the box!

I love that this box glues itself together! It is a definite perk and makes assembly so easy!


The box was screaming for a mini bow so I made one using strips of DSP from the In Color 2022/24 collection in Sweet Sorbet. Sweet Sorbet is one of my favorite holiday reds! It plays so well with pink so it was a perfect fit to match this DSP! I reversed the patterns on each layer of the bow as well so you see both stripes and dots!

I cut a tag from the Sending Cheer Dies in Crumb Cake card stock and ran it through the polka dot embossing folder that is part of the Online Exclusive embossing folders.

I found Pecan Pie was the perfect color for a Gingerbread Man—you can add his face and fill in his heart buttons with 2 additional stamps in the set. There is a die for him too that is actually a tag, so just snip it off. Easy peasy!

I hope this cut little project inspires you to #addtocart the Nested Treat Boxes when they become available. I think they will make some fun holiday decor, are great for birthdays and little gifts that you want to give!

12 Days of Christmas--Day 1

Hello my friends! I am so excited to share 12 Days of Christmas with you—with a twist! My awesome friend Melanie from @melsinkyfingers and I have decided to team up to each share 12 awesome holiday projects with you! At the end of each of my posts there will be a link to go visit her blog and see her project of the day. In the end, you will actually have 24 project ideas!

Thanks Melanie for making this cute graphic for us!

I can’t wait to get started! My first project is this fun notecard set and basic box. I got this project template from another talented friend Lisa Althouse @stampaholic. I just love our stampin’ community!

This basic box is perfect for holding 4 notecards and envelopes. You could even create this project without a lid and use the box to hold holiday snacks or treats (like Oreo Popcorn! I have this recipe on my blog under Lifestyle—Favorite Recipes).

I used the Sweetest Christmas DSP as my color inspiration and paired it up with the Handmade Wishes Bundle. I just love this bundle because the stamp set is so versatile. You can created so many different phrase/sentiment combinations. And the design of the label punch is really unique!

The label on this box is designed to reflect that a treat will be in the box. I plan to add a single card and a little holiday treat inside these boxes! I added another panel to the front of my box that I ran through the Timber 3D folder.


Sweet Sorbet has definitely been my favorite red this season. I added a panel to the front of my card and stamped some little snowflakes as an accent.

A couple strips of DSP (its so fun to mix and match patterns), and a cute sentiment stamped on Pool Party card stock in Coastal Cabana, make this notecard so fun. Of course I had to add some Garden Green Ribbon and white Bakers Twine.

I love a good stripe pattern and this Sweet Sorbet/ Blushing Bride one is just perfect for a card front! I softened the front with a panel of card stock and a bit of stamping. The little gingerbread man was the perfect fun add on to this sentiment!


I love to stamp little hearts on my projects, they just make everything perfect. This little notecard has DSP with a ribbon border, the punch and sentiment and of course some Bakers Twine. This is such a ‘Good Card Design’!

The best part of this little notecard is the candy canes that are die cut, right from the DSP! Isn’t that brilliant? It makes creating this card so easy!

I hope you have fallen in love with this project as much as I have! I shared it with my team last month and it was so well received, I knew it would make the best project to kick off 12 days of Christmas. I have a few other 3D projects to share, some cards and of course some scrapbooking/mini album inspiration projects. I hope you will check back each day and go over to Melanie’s blog to see her awesome projects as well!

Click here to get to Melanie’s first 12 Days of Christmas post! I can’t wait to see what she made!


Tropical Retreat Weekend

Today was supposed to be the first day of my three day Tropical Themed retreat. I was scheduled to host a weekend of stampin’ with 15 of my favourite people, but the universe has had other plans. We have rescheduled but I wanted to share some of the fun projects I had created for them. It makes me a little less sad about the turn of events.

I created a cute pocket pouch that holds some class passes to some of my favourite workout studios in Edmonton and a voucher for some Davids Tea. I recently shared another project with this pouch style card, I hope you were inspired by it too! The flowers, DSP and color pallet are all inspired but the Tropical Oasis suite in the Occasions catalogue.

Fun tip: Sometimes a stamped image just needs a little something, I find a flick or spray of a Stampin’ Write marker ink is the perfect touch as you can tell on the large flower.

The attendees at my retreat received this cute pouch that had gift cards to my favourite local fitness studios and Davids Tea

The attendees at my retreat received this cute pouch that had gift cards to my favourite local fitness studios and Davids Tea

I found these cute bags on my recent Target trip and they were perfect for some of the little gifts I had for everyone. A fun stamped tag was the perfect touch!

I found these cute bags on my recent Target trip and they were perfect for some of the little gifts I had for everyone. A fun stamped tag was the perfect touch!

fullsizeoutput_1139b.jpeg

This was a last minute project! I had already done a lot of the food prep including making my Oreo Popcorn. Here is the link, it is posted on my Lifestyle Tab under Favourite Recipes :

www.stampsandstretchypants.com/oreo-popcorn

Once I decided the retreat wasn’t going ahead I packaged up a bunch of popcorn using the 3x9 Printed Gusseted Cellophane Bags from the Birthday Bonanza collection. The pineapple tag was created using the yellow pigment sprinkles on Daffodil Delight card stock. The top of the pineapple is from the SAB Lilypad DSP. The Let’s Hang Out Soon sentiment seemed appropriate and is from the SAB second release called Rise and Shine. I hope they do brighten up everyone’s day a little bit!

Hello Fabulous Friend

final.jpg

I can’t believe this is the first time I have pulled out the All Dressed Up Dies (pg 56 of the Occasions Catalogue)! It was actually quite easy to assemble this little purse, which can also convert into a cute backpack too by just placing the straps in different spots. I love the stitched details around the edges of the purse and because of that I decided to leave it ‘clean’ and just have an over the top embellishment instead. I paired the Dressed to Impress stamp set with the Cherry Blossoms and Painted Labels Dies and added in some Pineapple Punch ribbon, Bakers Twine and Metallic Thread. I reached into my stash and pulled out some Faceted Gems (pg 178 of the Idea Book & Catalogue).

Sometimes our scraps can create the most beautiful things!

Sometimes our scraps can create the most beautiful things!

The best part of this card is the fact that it was created almost entirely with scraps I had laying around in my craft room! I had already created the purse and thought it would be fun to create a coordinating card. The purse is a perfect way to give a gift card! I stamped the large cherry blossom stem from the Forever Blossoms stamp set (pg 16 of the Occasions Catalogue) straight on the card base, a very rare occurrence for me, and added a few flicks of my Call Me Clover marker. I had a scrap of white card stock on my table so I ran it though the Parisian Flourish 3D Embossing Folder and layered on top some of the Braided Burlap Trim and Pineapple Punch ribbon. I cut another shape from the Painted Labels Dies and added in some Metallic Thread. I left the sentiment at ‘friend’ and inside stamped ‘you mean so much to me’. Together I think they make an awesome combo!

final.jpg