Backstage Presents for my People

Hi friends! I really hope you enjoyed my Creative Convention last week while I was in Vegas at Backstage. I had so much fun creating those projects for you!

Backstage was so much fun, my cup and heart are full. I am so excited about this upcoming holiday season and all the fun we are going to have crafting together! I love to have people here in my Home Studio in the YEG area and I host lots of stuff on zoom/facebook! So if you haven’t crafted with me before maybe this will be an opportunity for us!

One of the fun things of getting together at any Stampin’ Up! event, whether is company hosted, or hosted by demonstrators, is the PEOPLE! We know this right? So of course I had to take some gifts to my ‘people’!


The absolute HIGHLIGHT of Backstage for me was getting to me some fellow members of the Artisan Design Team, both current and past! My friends Heather @songbirdstamper was coming over from the UK so of course I had to give her a gift of Canadian maple syrup and some maple Sweet Georgia Browns from a Canadian chocolatier company, Purdy’s.


I thought this little tin was cute to share with my roomie and best stamping buddy, Tammy Nelson @stampandscraptammy—We met a few years back on the Alaskan incentive trip and have been having fun together ever since. I thought after enjoying all of the maple truffles inside she could pop this tin up in her craft room aa a little reminder of me!

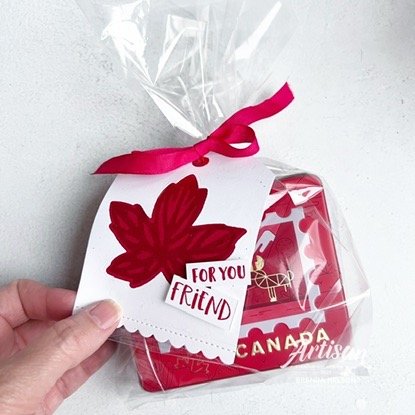
These tags were inspired by a card that my fellow Canadian Teammate Verena @simple_stamper shared a couple weeks back! I thought the design was easy and perfect to convert into tags! The maple leaf is stamped in Real Red ink on coordinating card stock. Once you cut your tag to size, use the maple leaf die cut to create a negative image. You can then pop your stamped image in behind.

For the Starbucks mugs, I wrapped strips of Real Red card stock around the boxes that I stamped with the large maple leaf stamp in the Autumn Leaves stamp set. The sentiments ‘For You Friend’ are from the Best Family Ever stamp set!

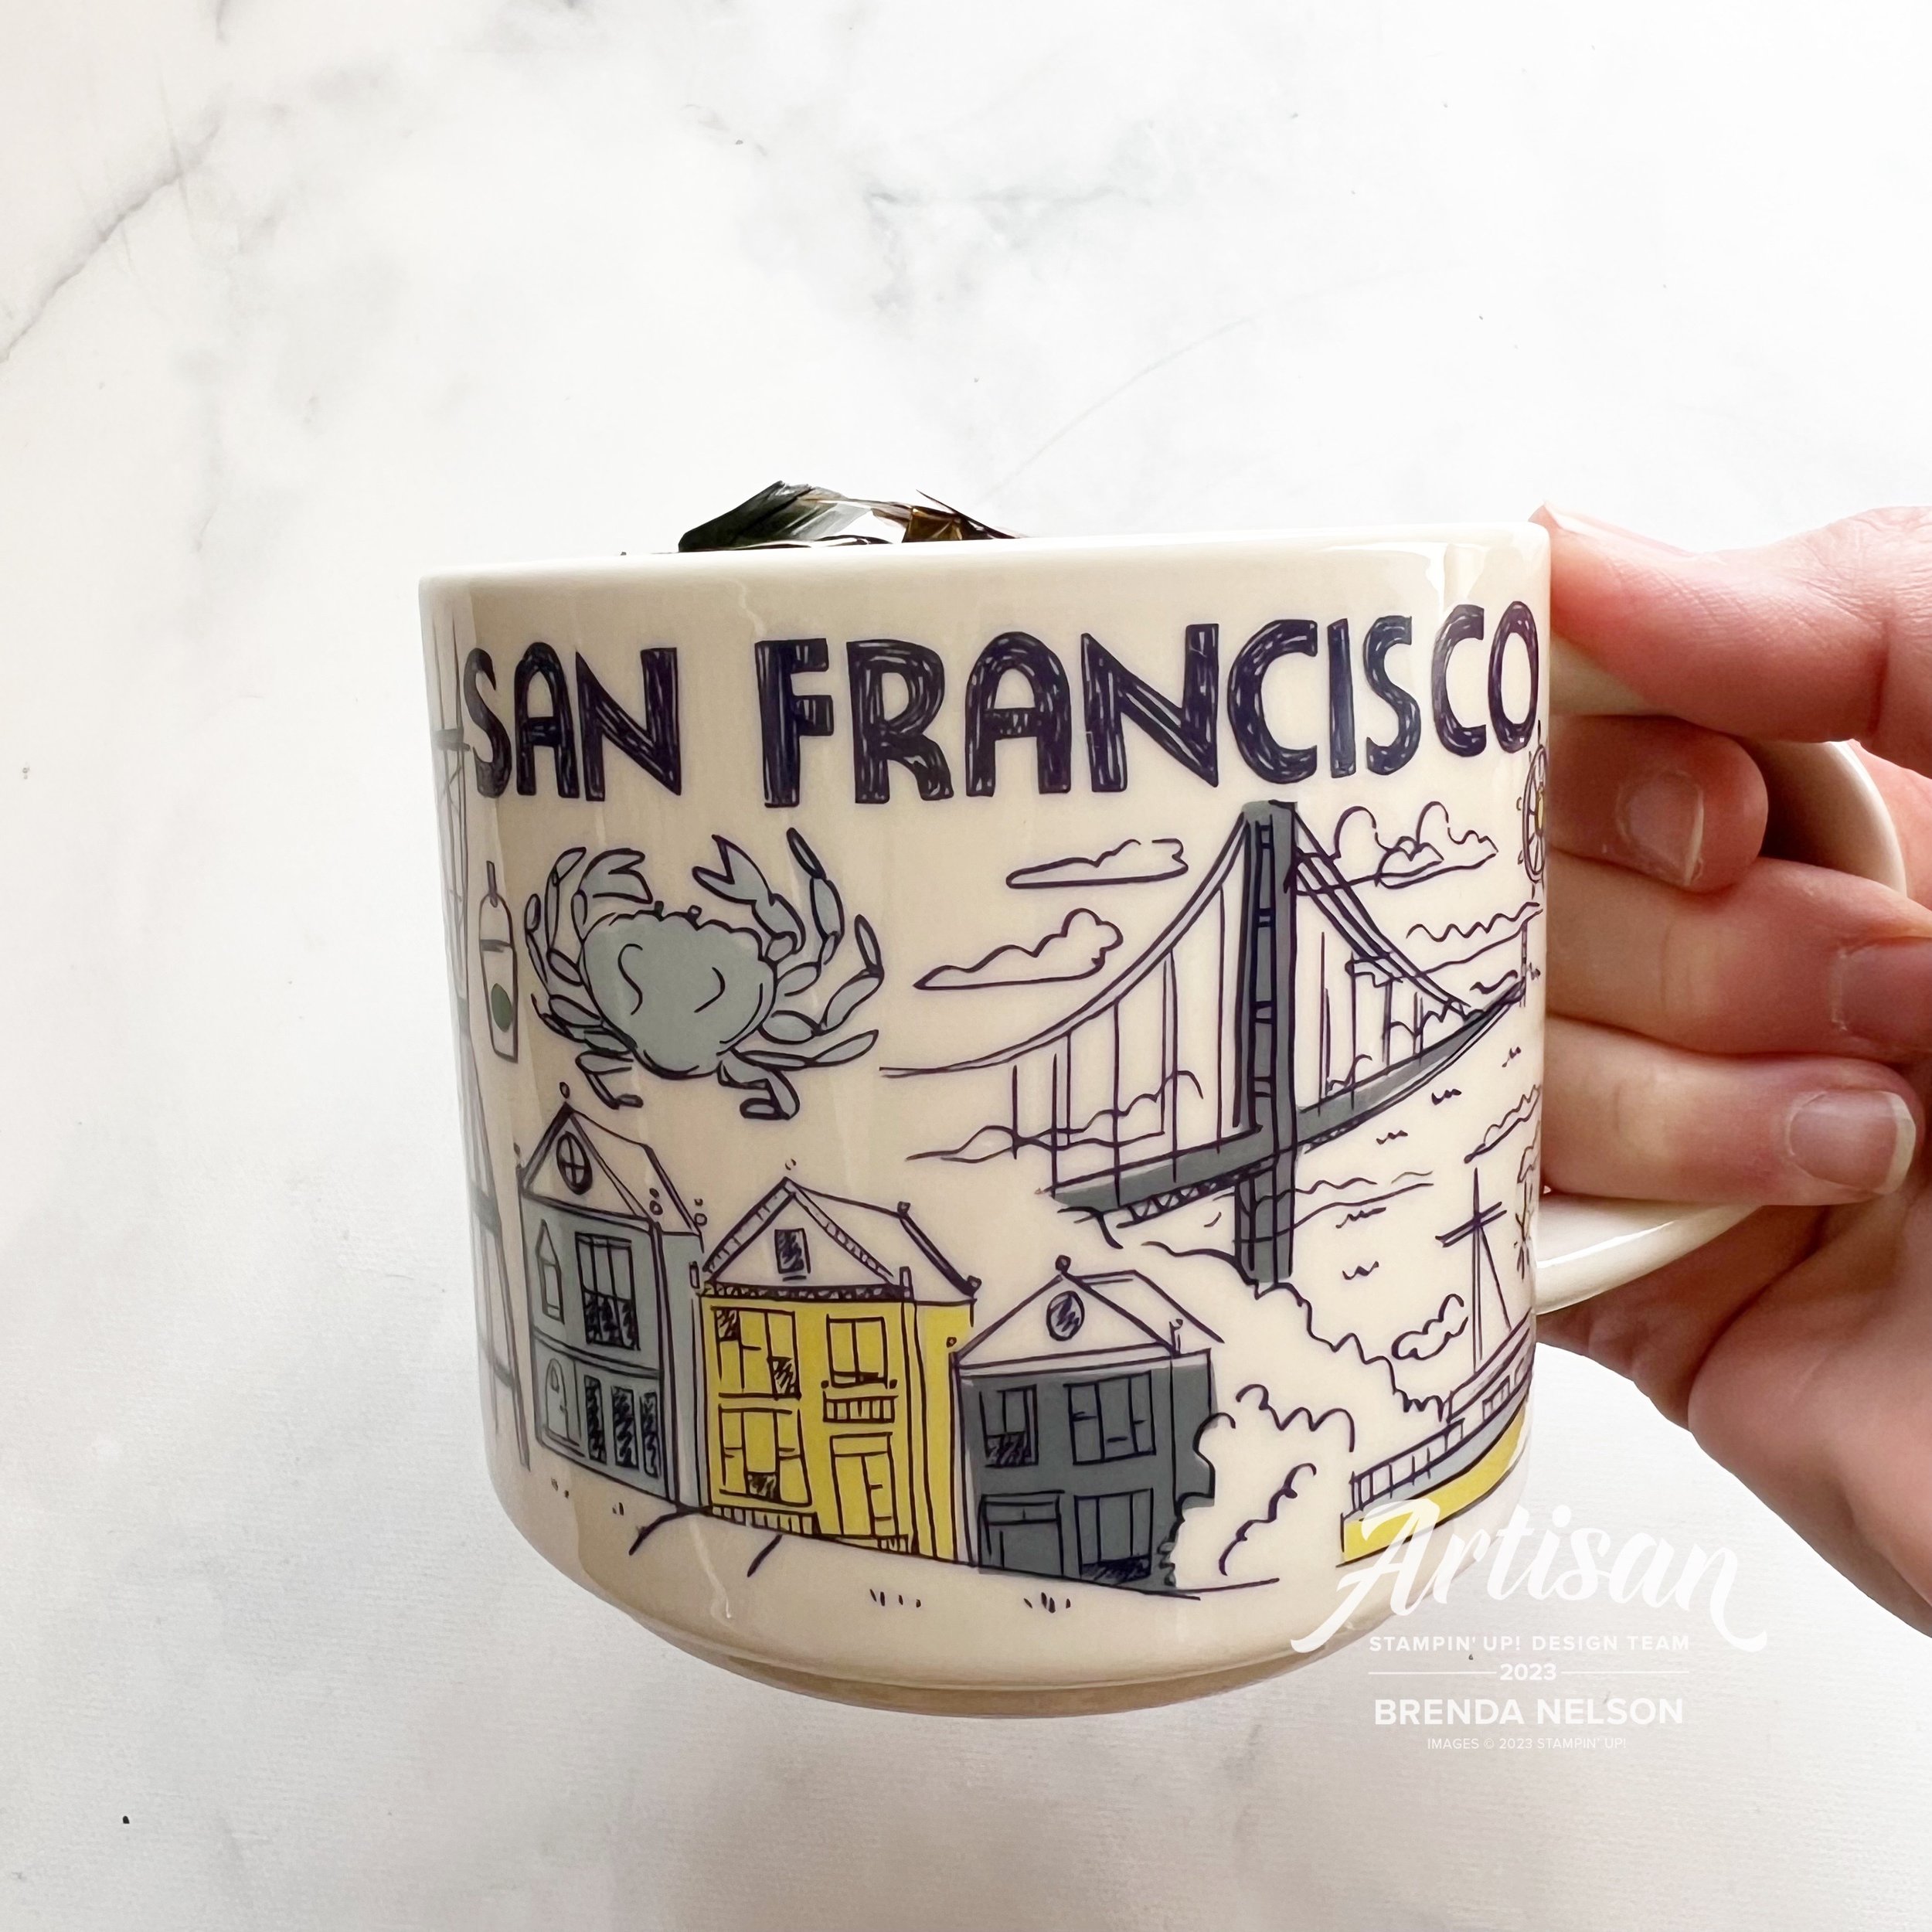
I did a MUG SWAP with Kurstan @stampwithkurstan_ which was so much fun! Now I have a San Francisco mug to add to my collection! She also filled it with chocolates which caused my carry-on suitcase to get inspected at security! I guess they looked suspicious in there!

I took an Alberta mug as a surprise to my friend Melanie @melsinkyfingers—you may remember last holiday season we did a 12 Days of Christmas Blog Hop and I am so happy we are going to offer that to you again starting on November 1st! We are working out the details on an event as well, so stay tuned!

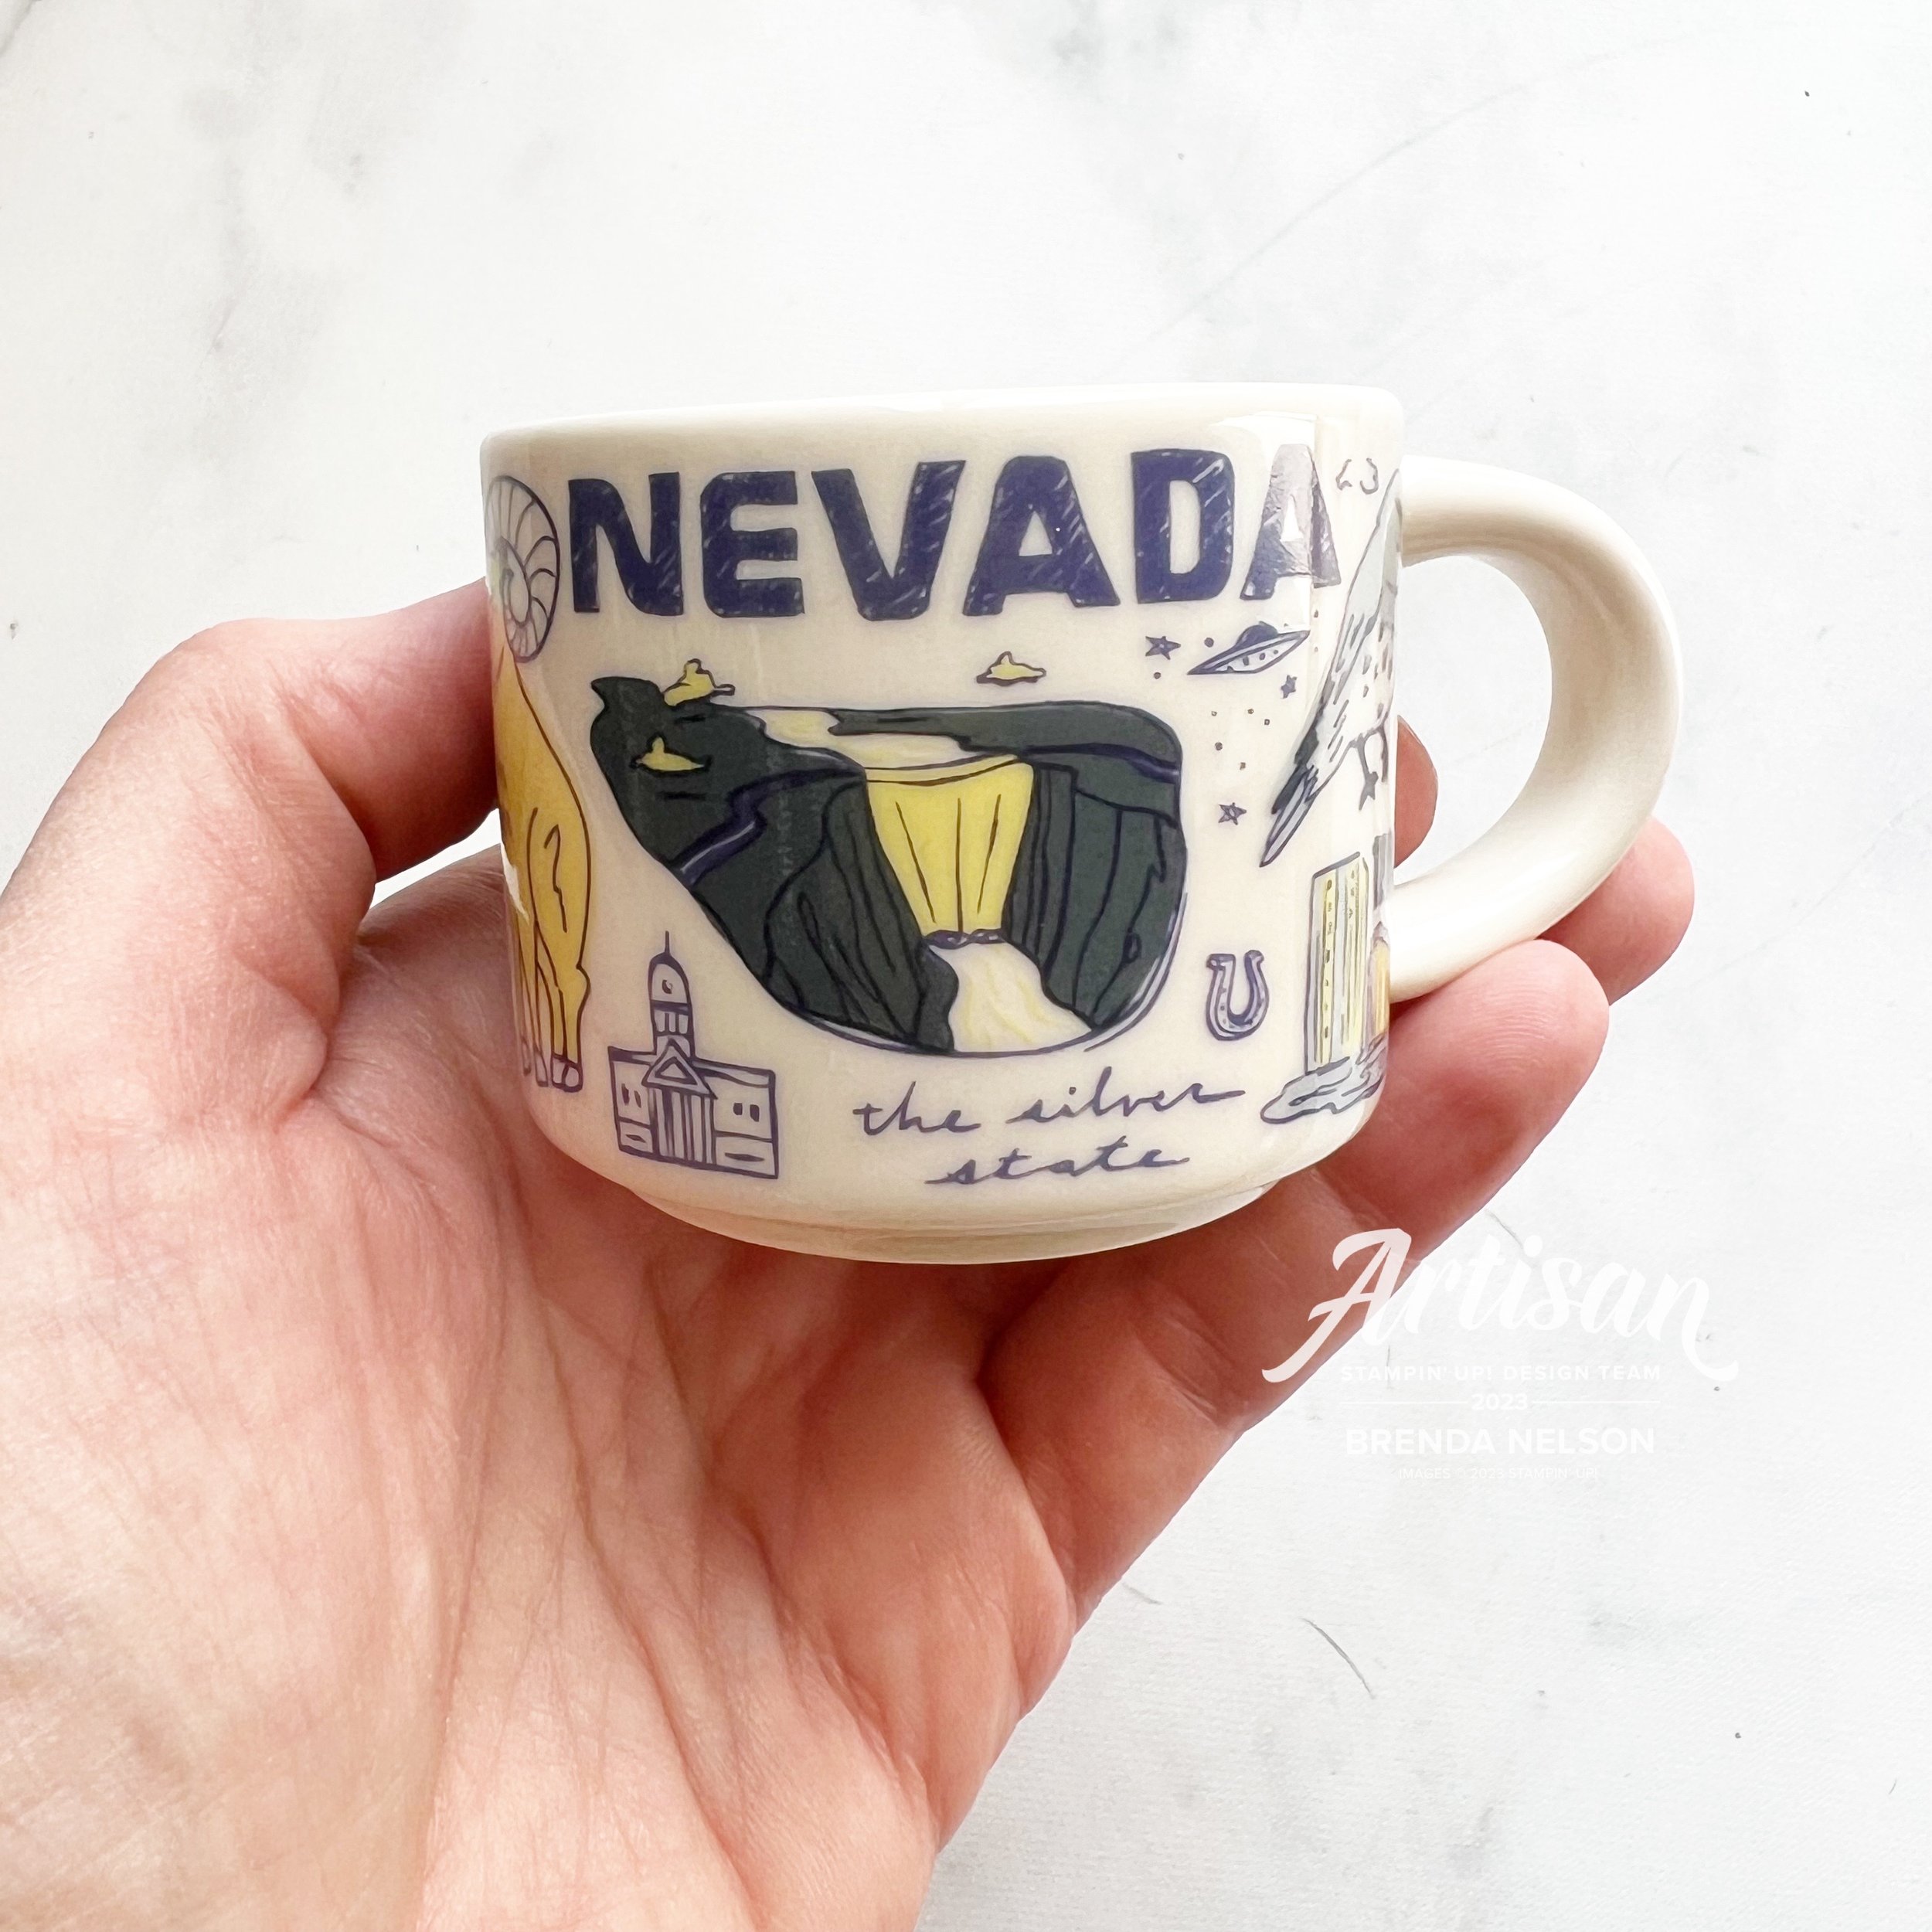
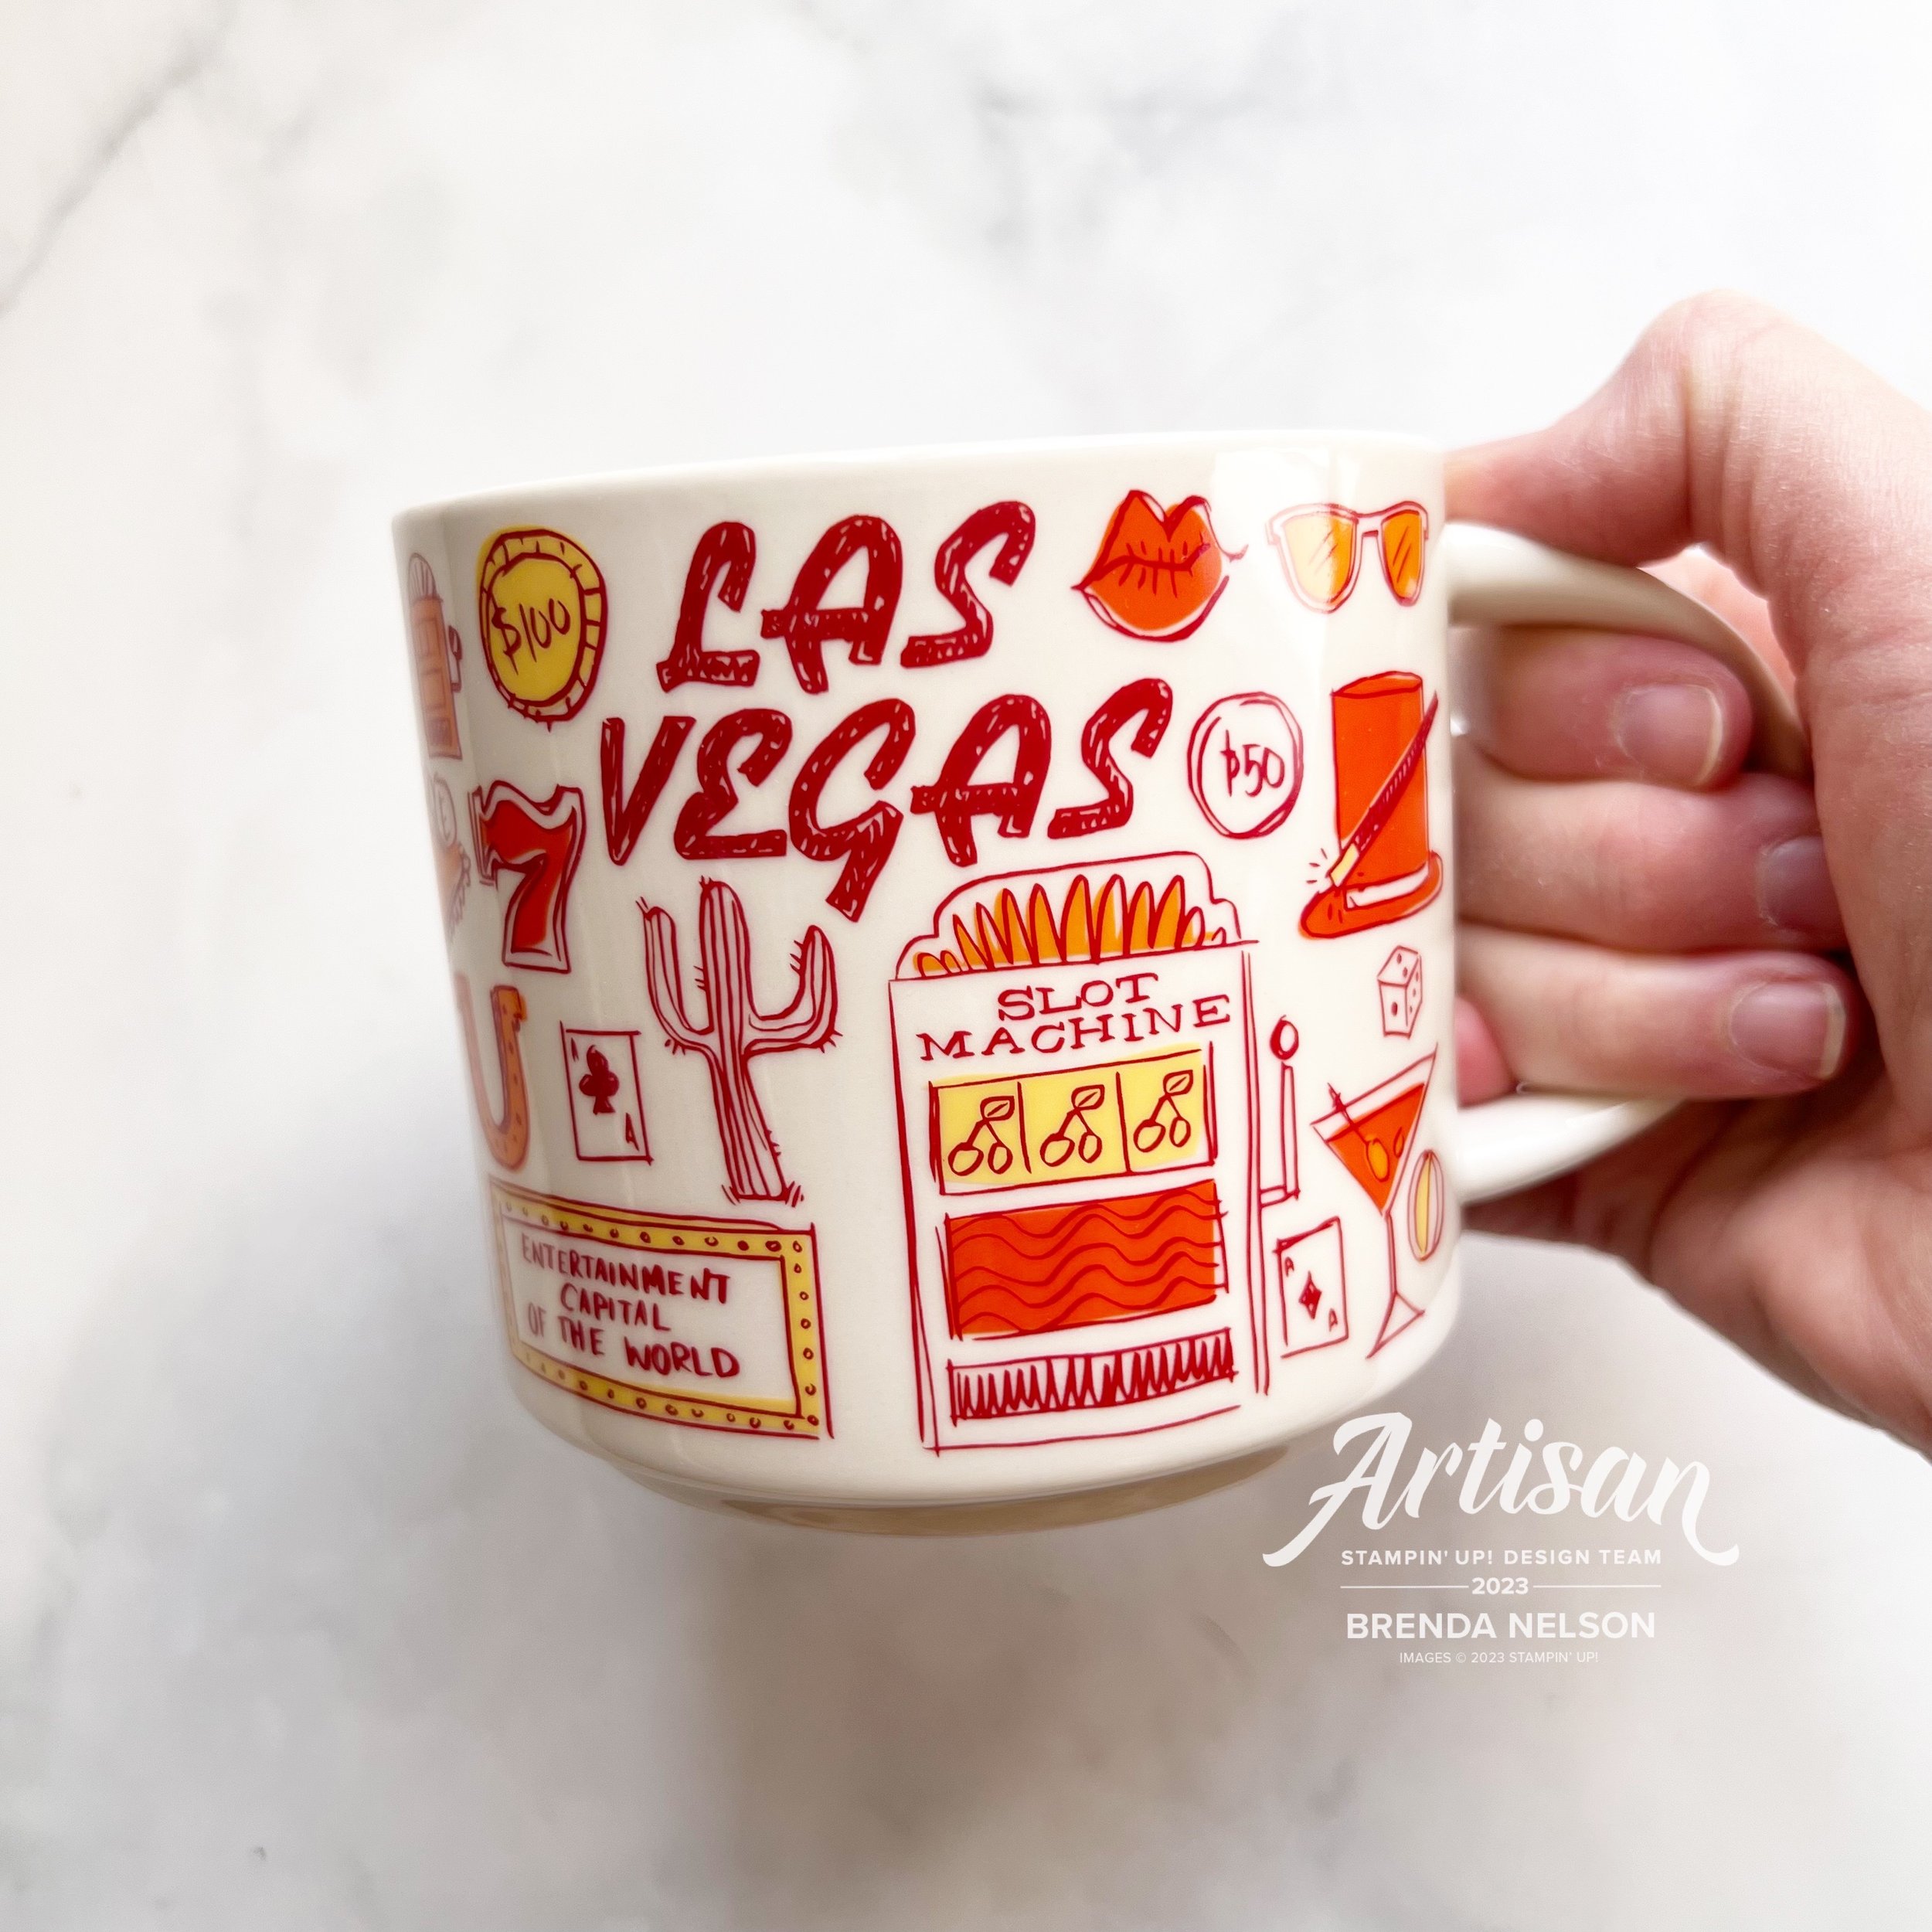
Of course I had to pick myself up a Las Vegas mug for my collection and this itty bitty Nevada mini mug! Isn’t it so cute! Its a perfect little decor item for my stamp room!

I will be sharing alot more fun stuff—pictures and reels on my Instagram so make sure you are following me along there!

Creative Convention--Day 7!

Yay! A whole week of fun and inspiration! I have had an amazing time at Backstage being inspired myself so I wanted to inspire you as well! I hope you have enjoyed all of my posts so far and I have gotten you excited for the upcoming Holiday catalogue!

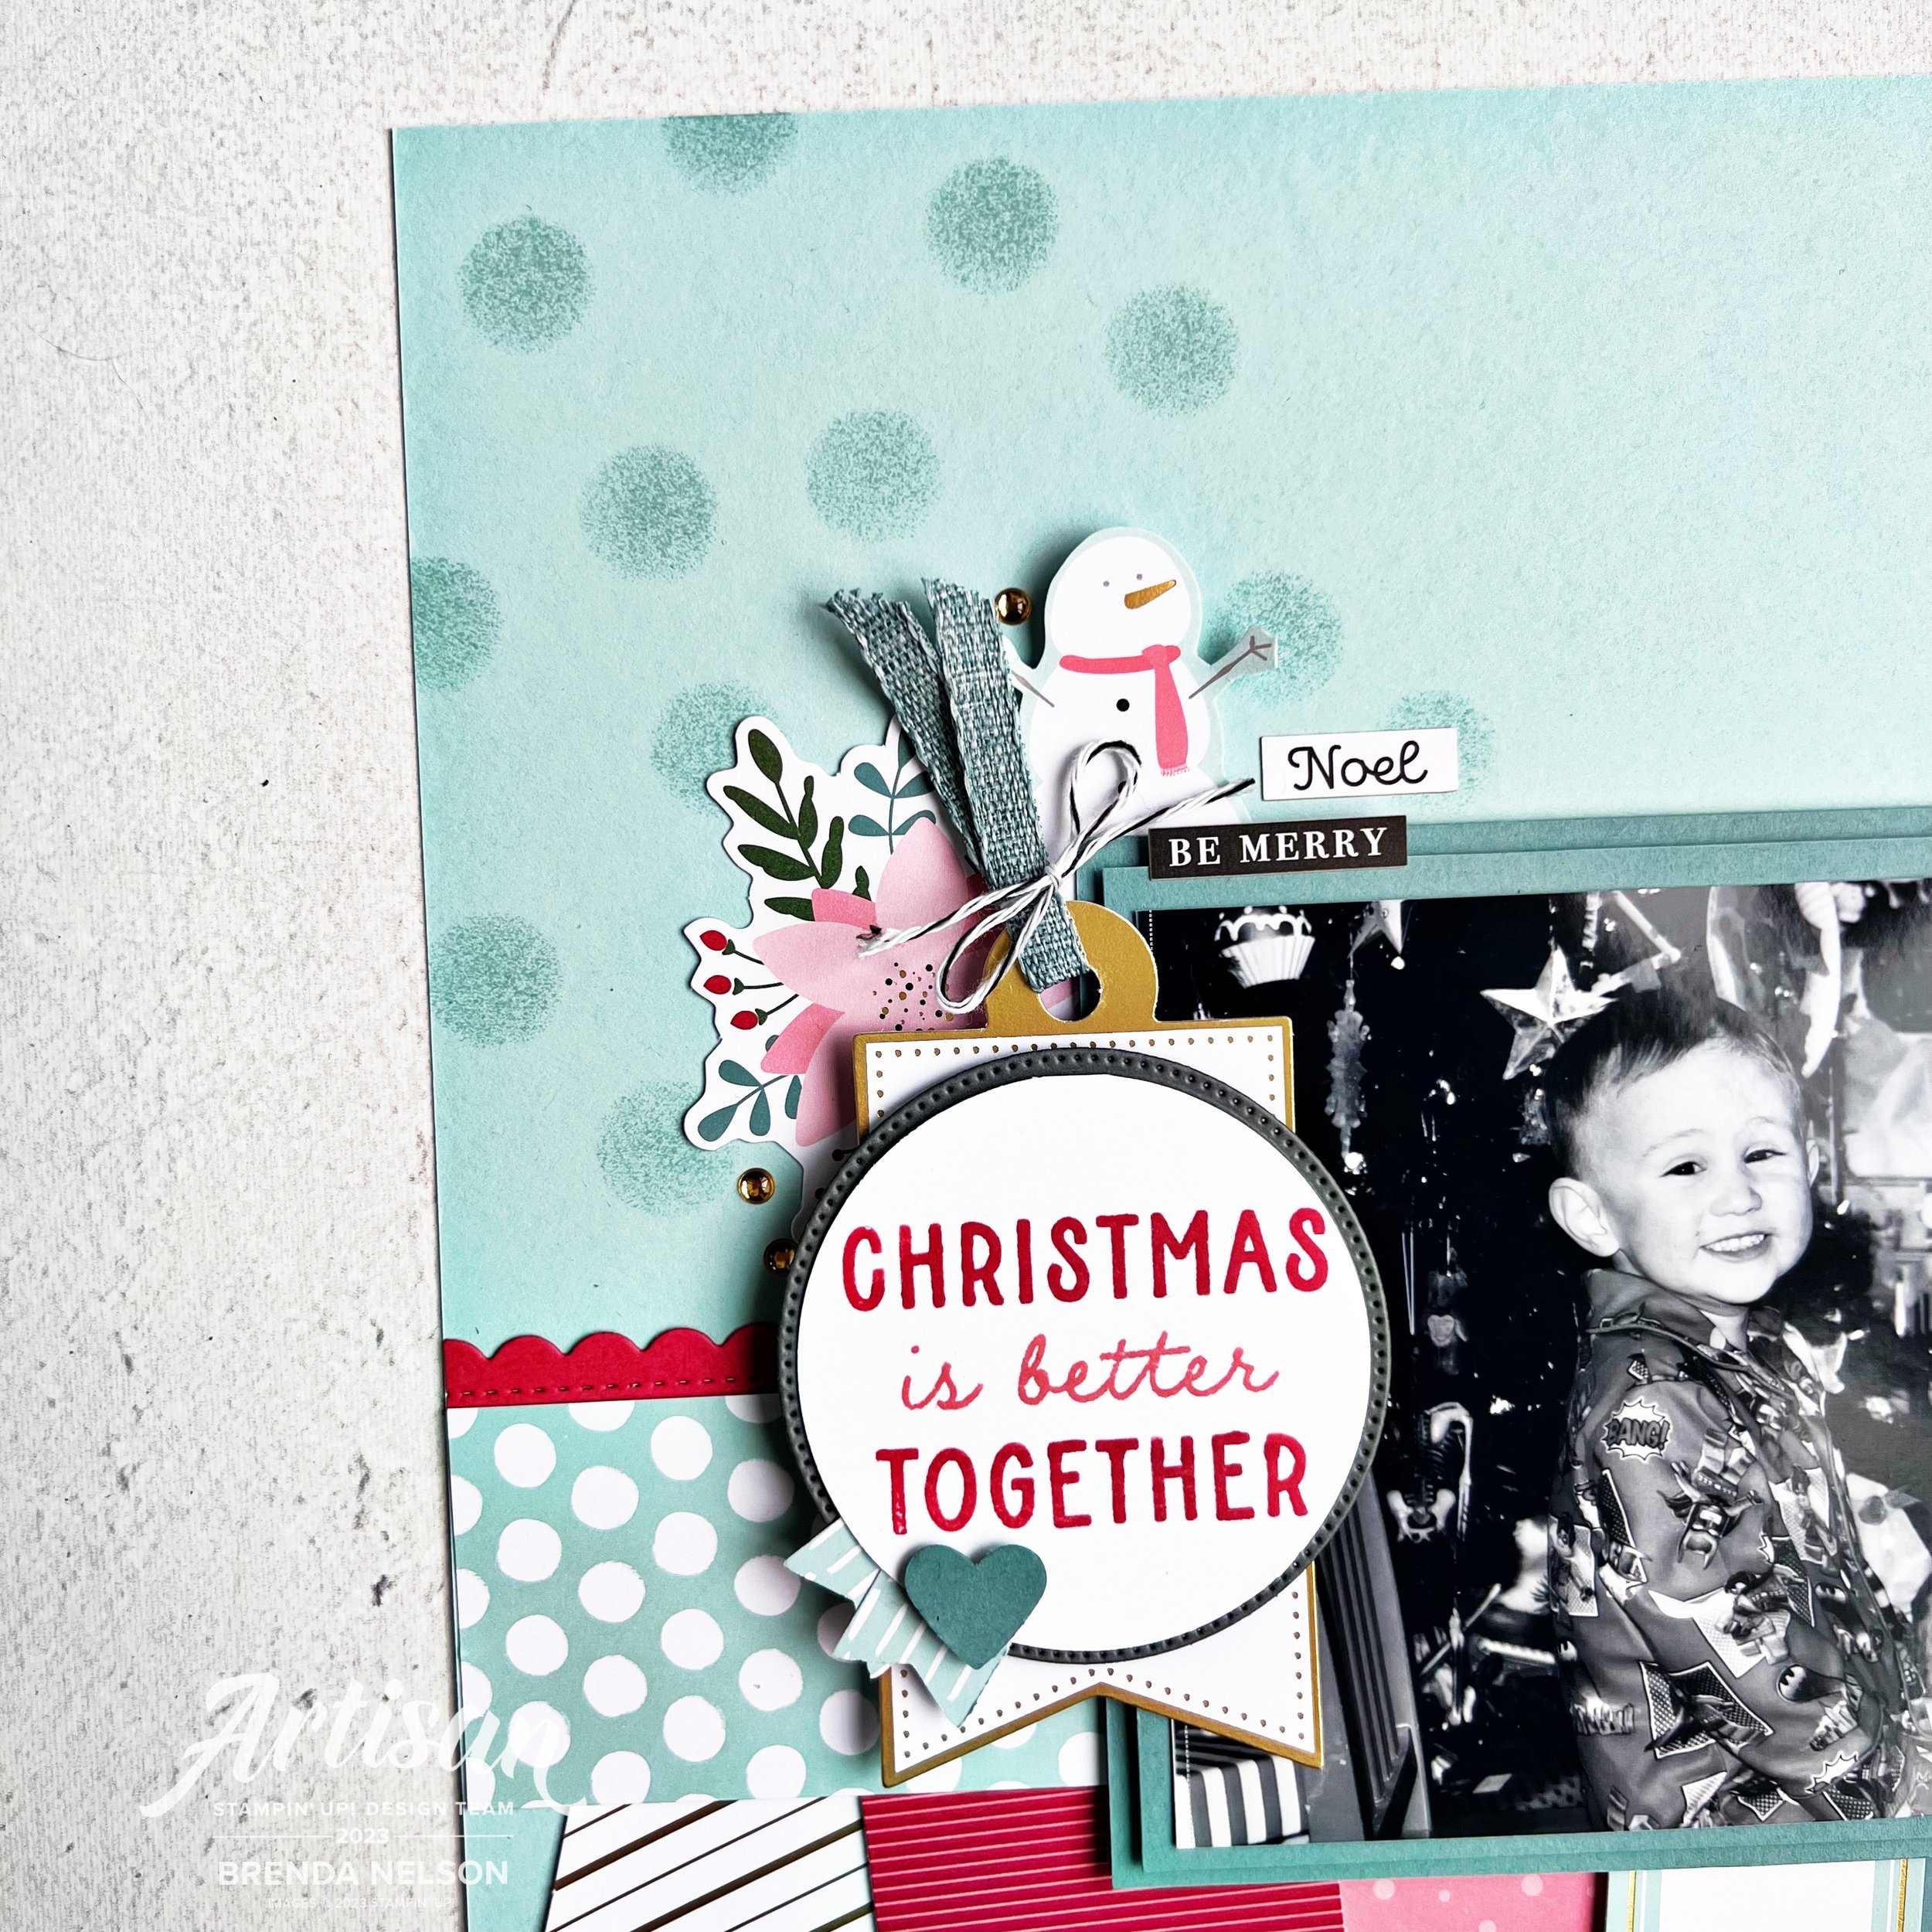
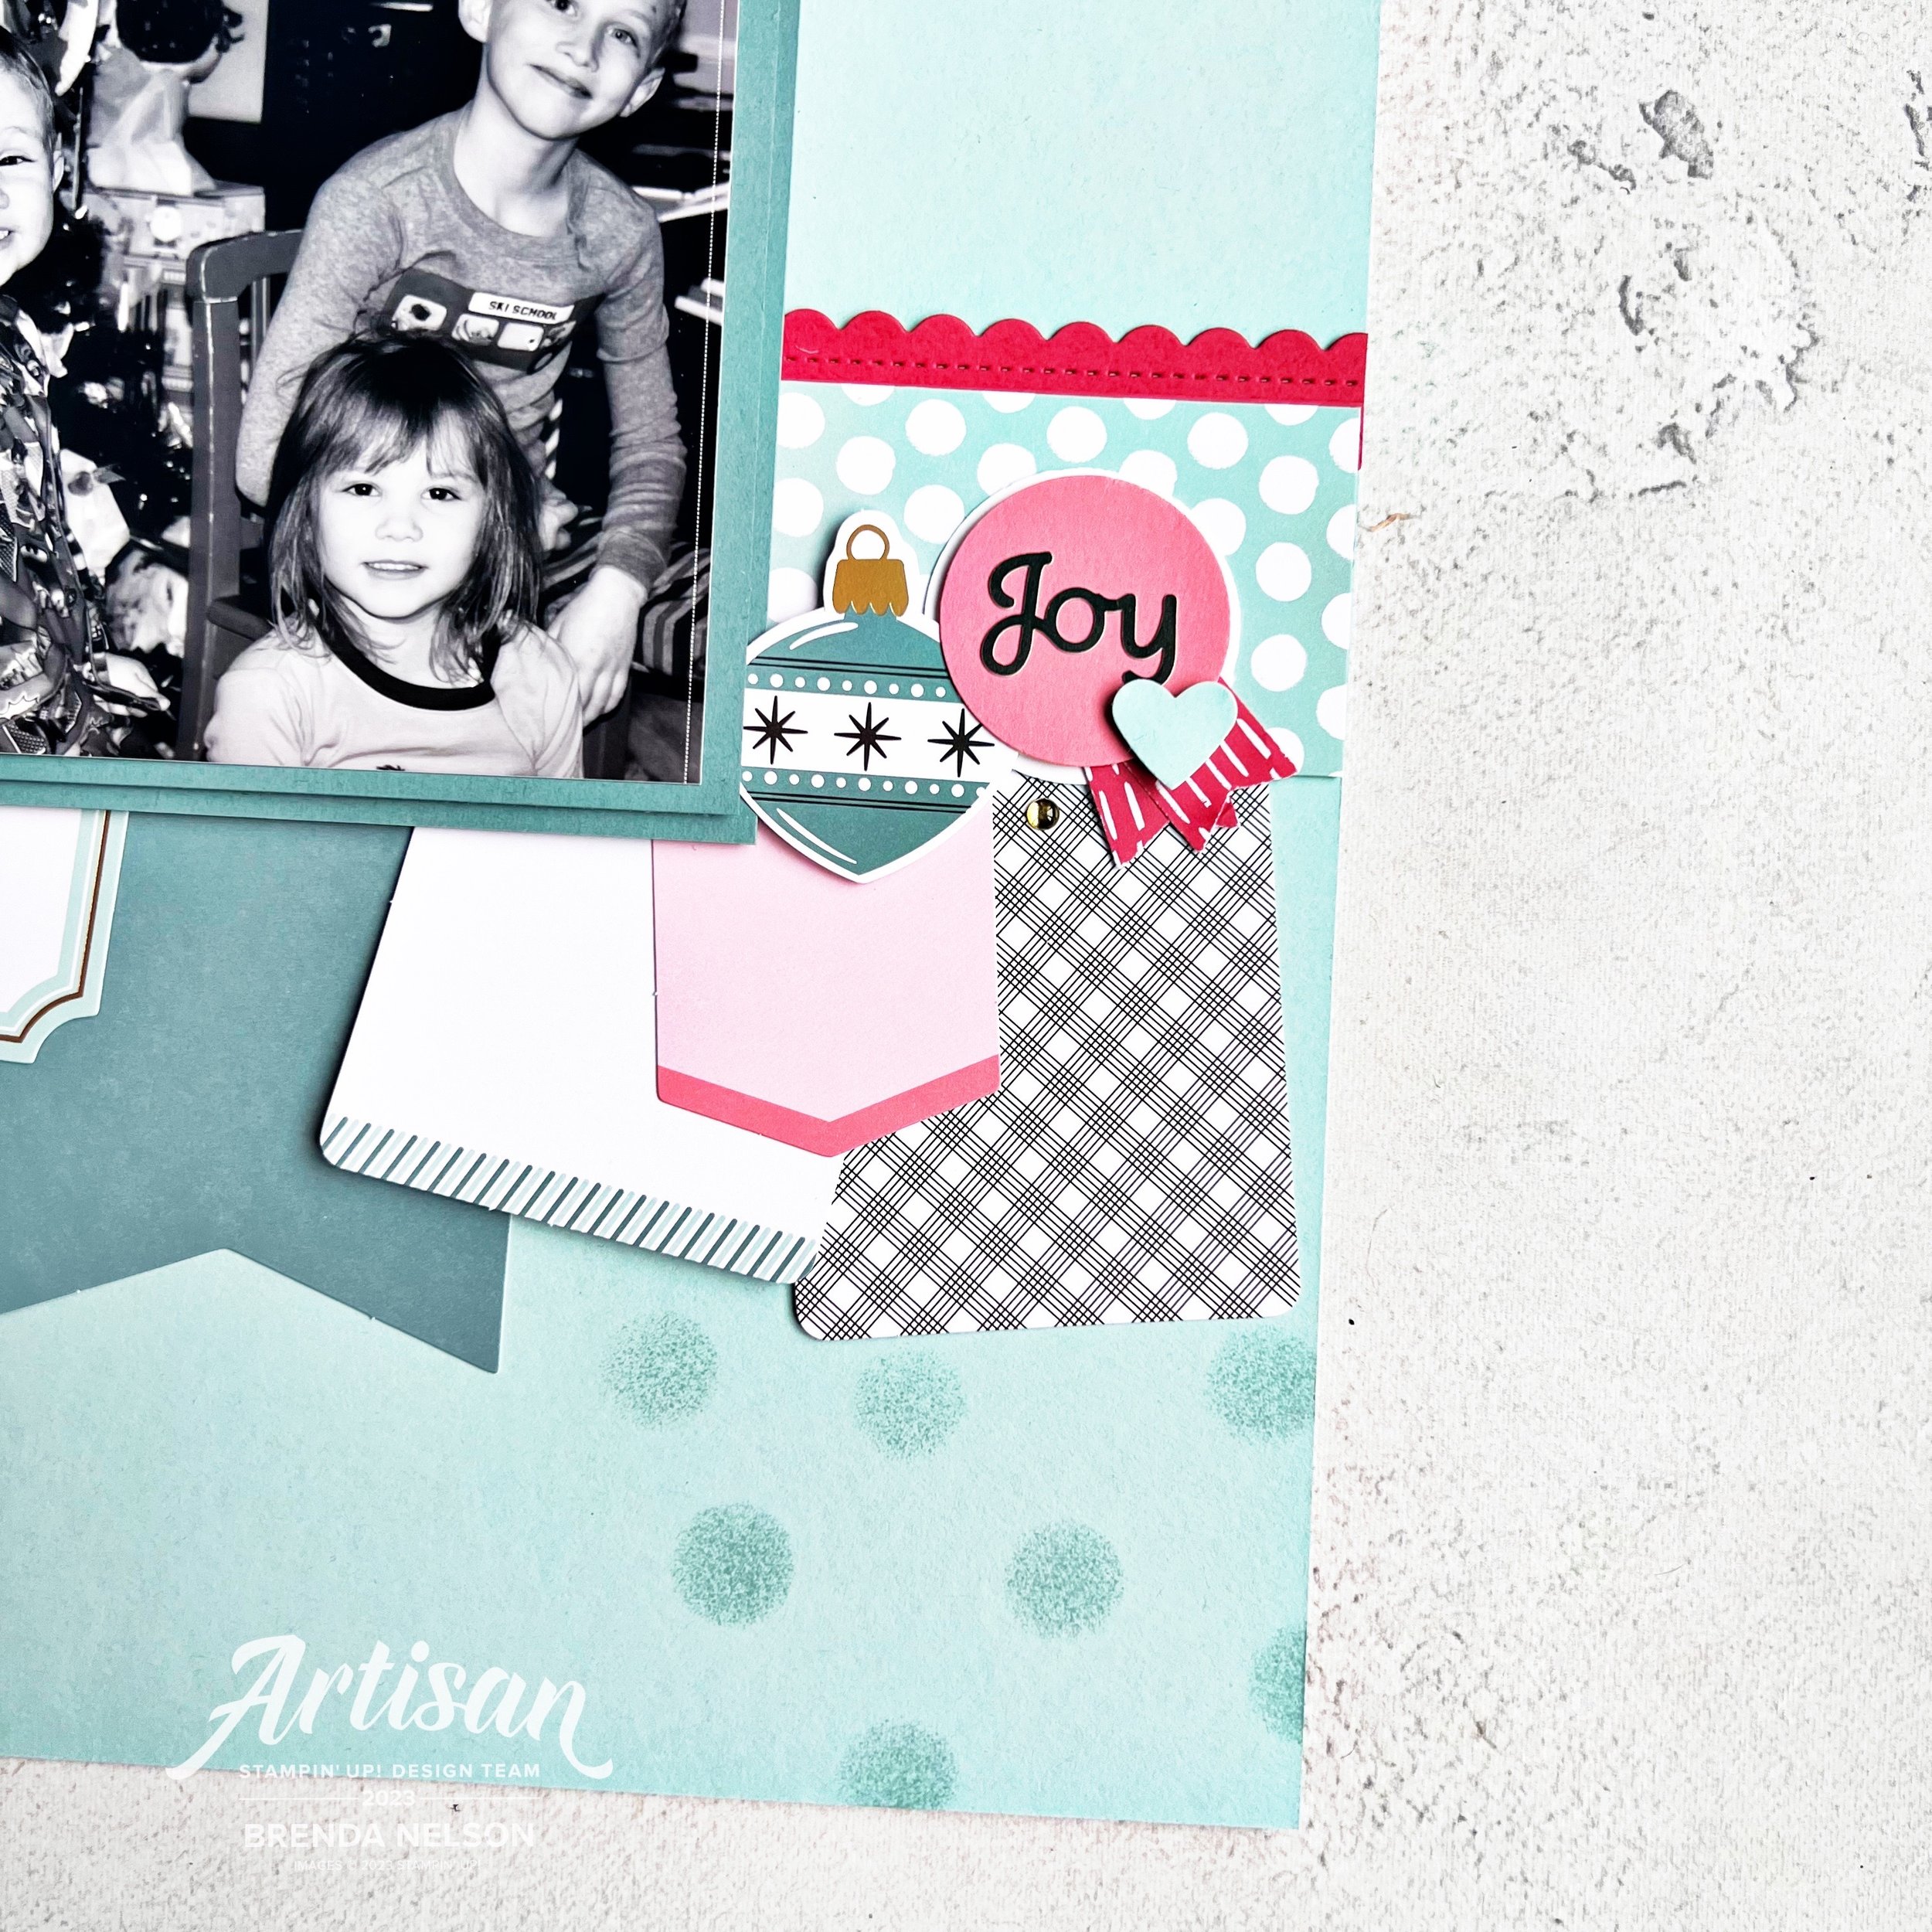
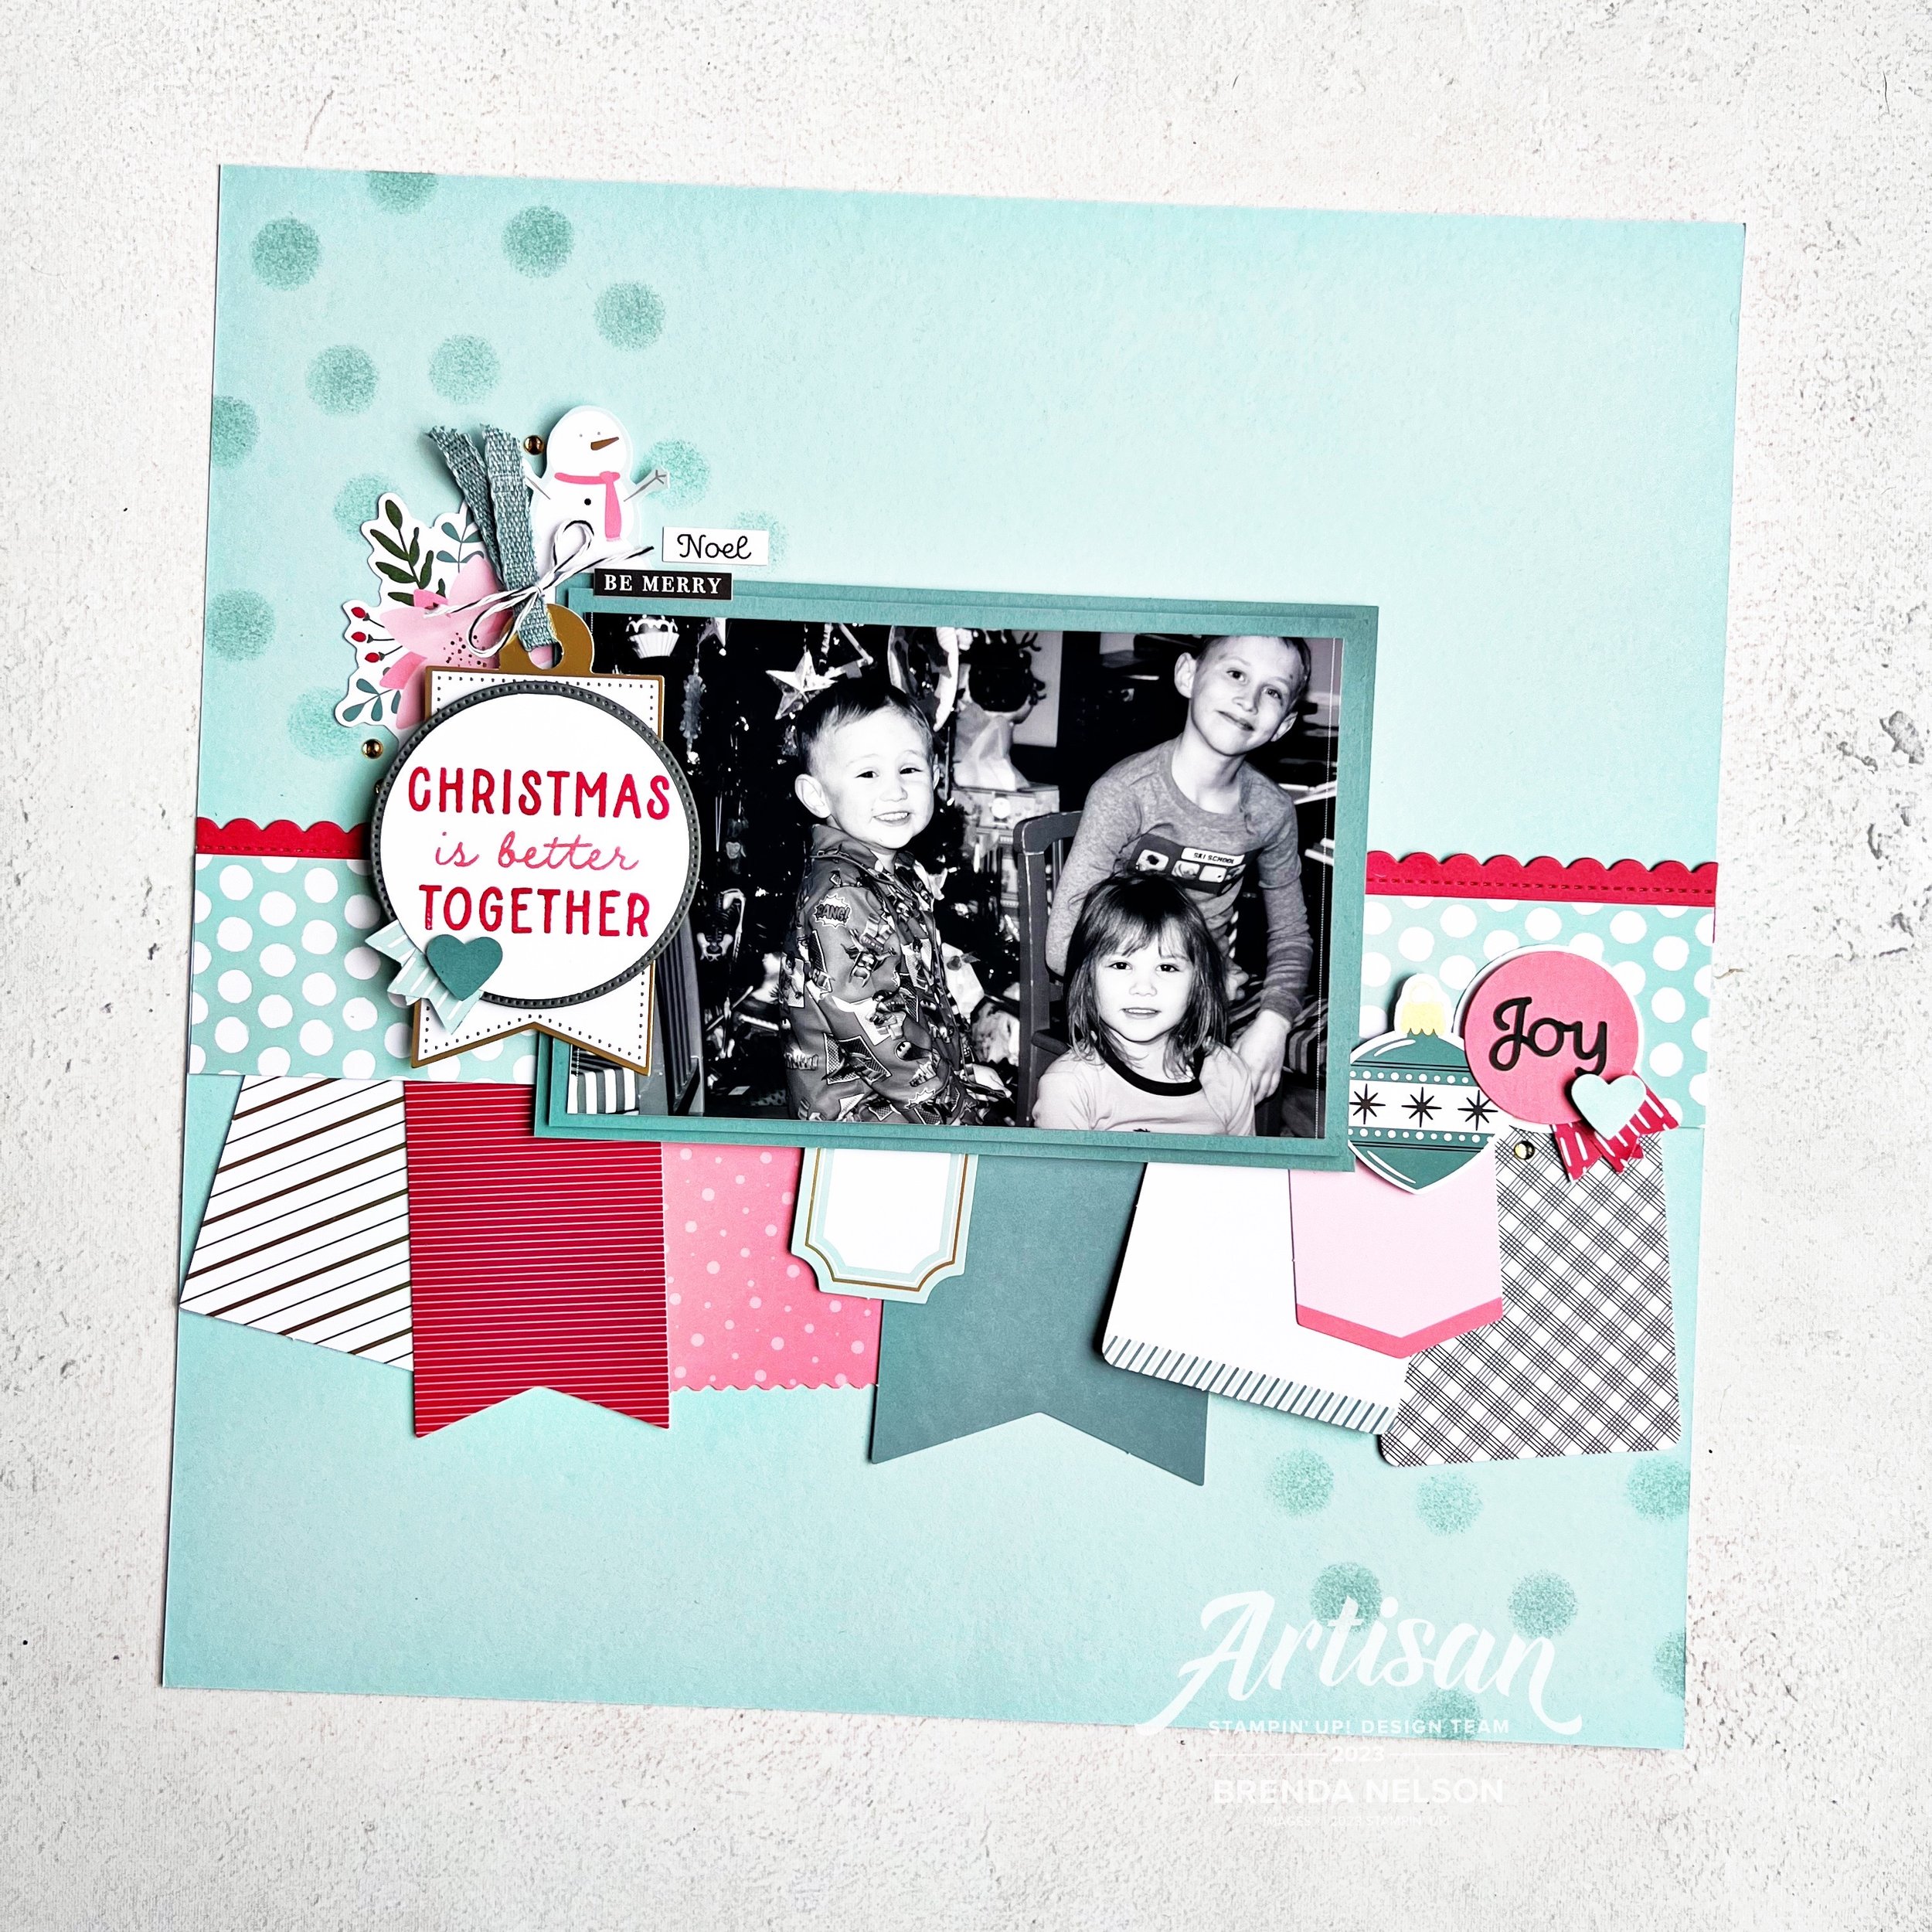
My last project had to be a scrapbook page, there was no way I could not share one as that is actually my passion. While I do enjoy making cards, I really LOVE making scrapbook pages!

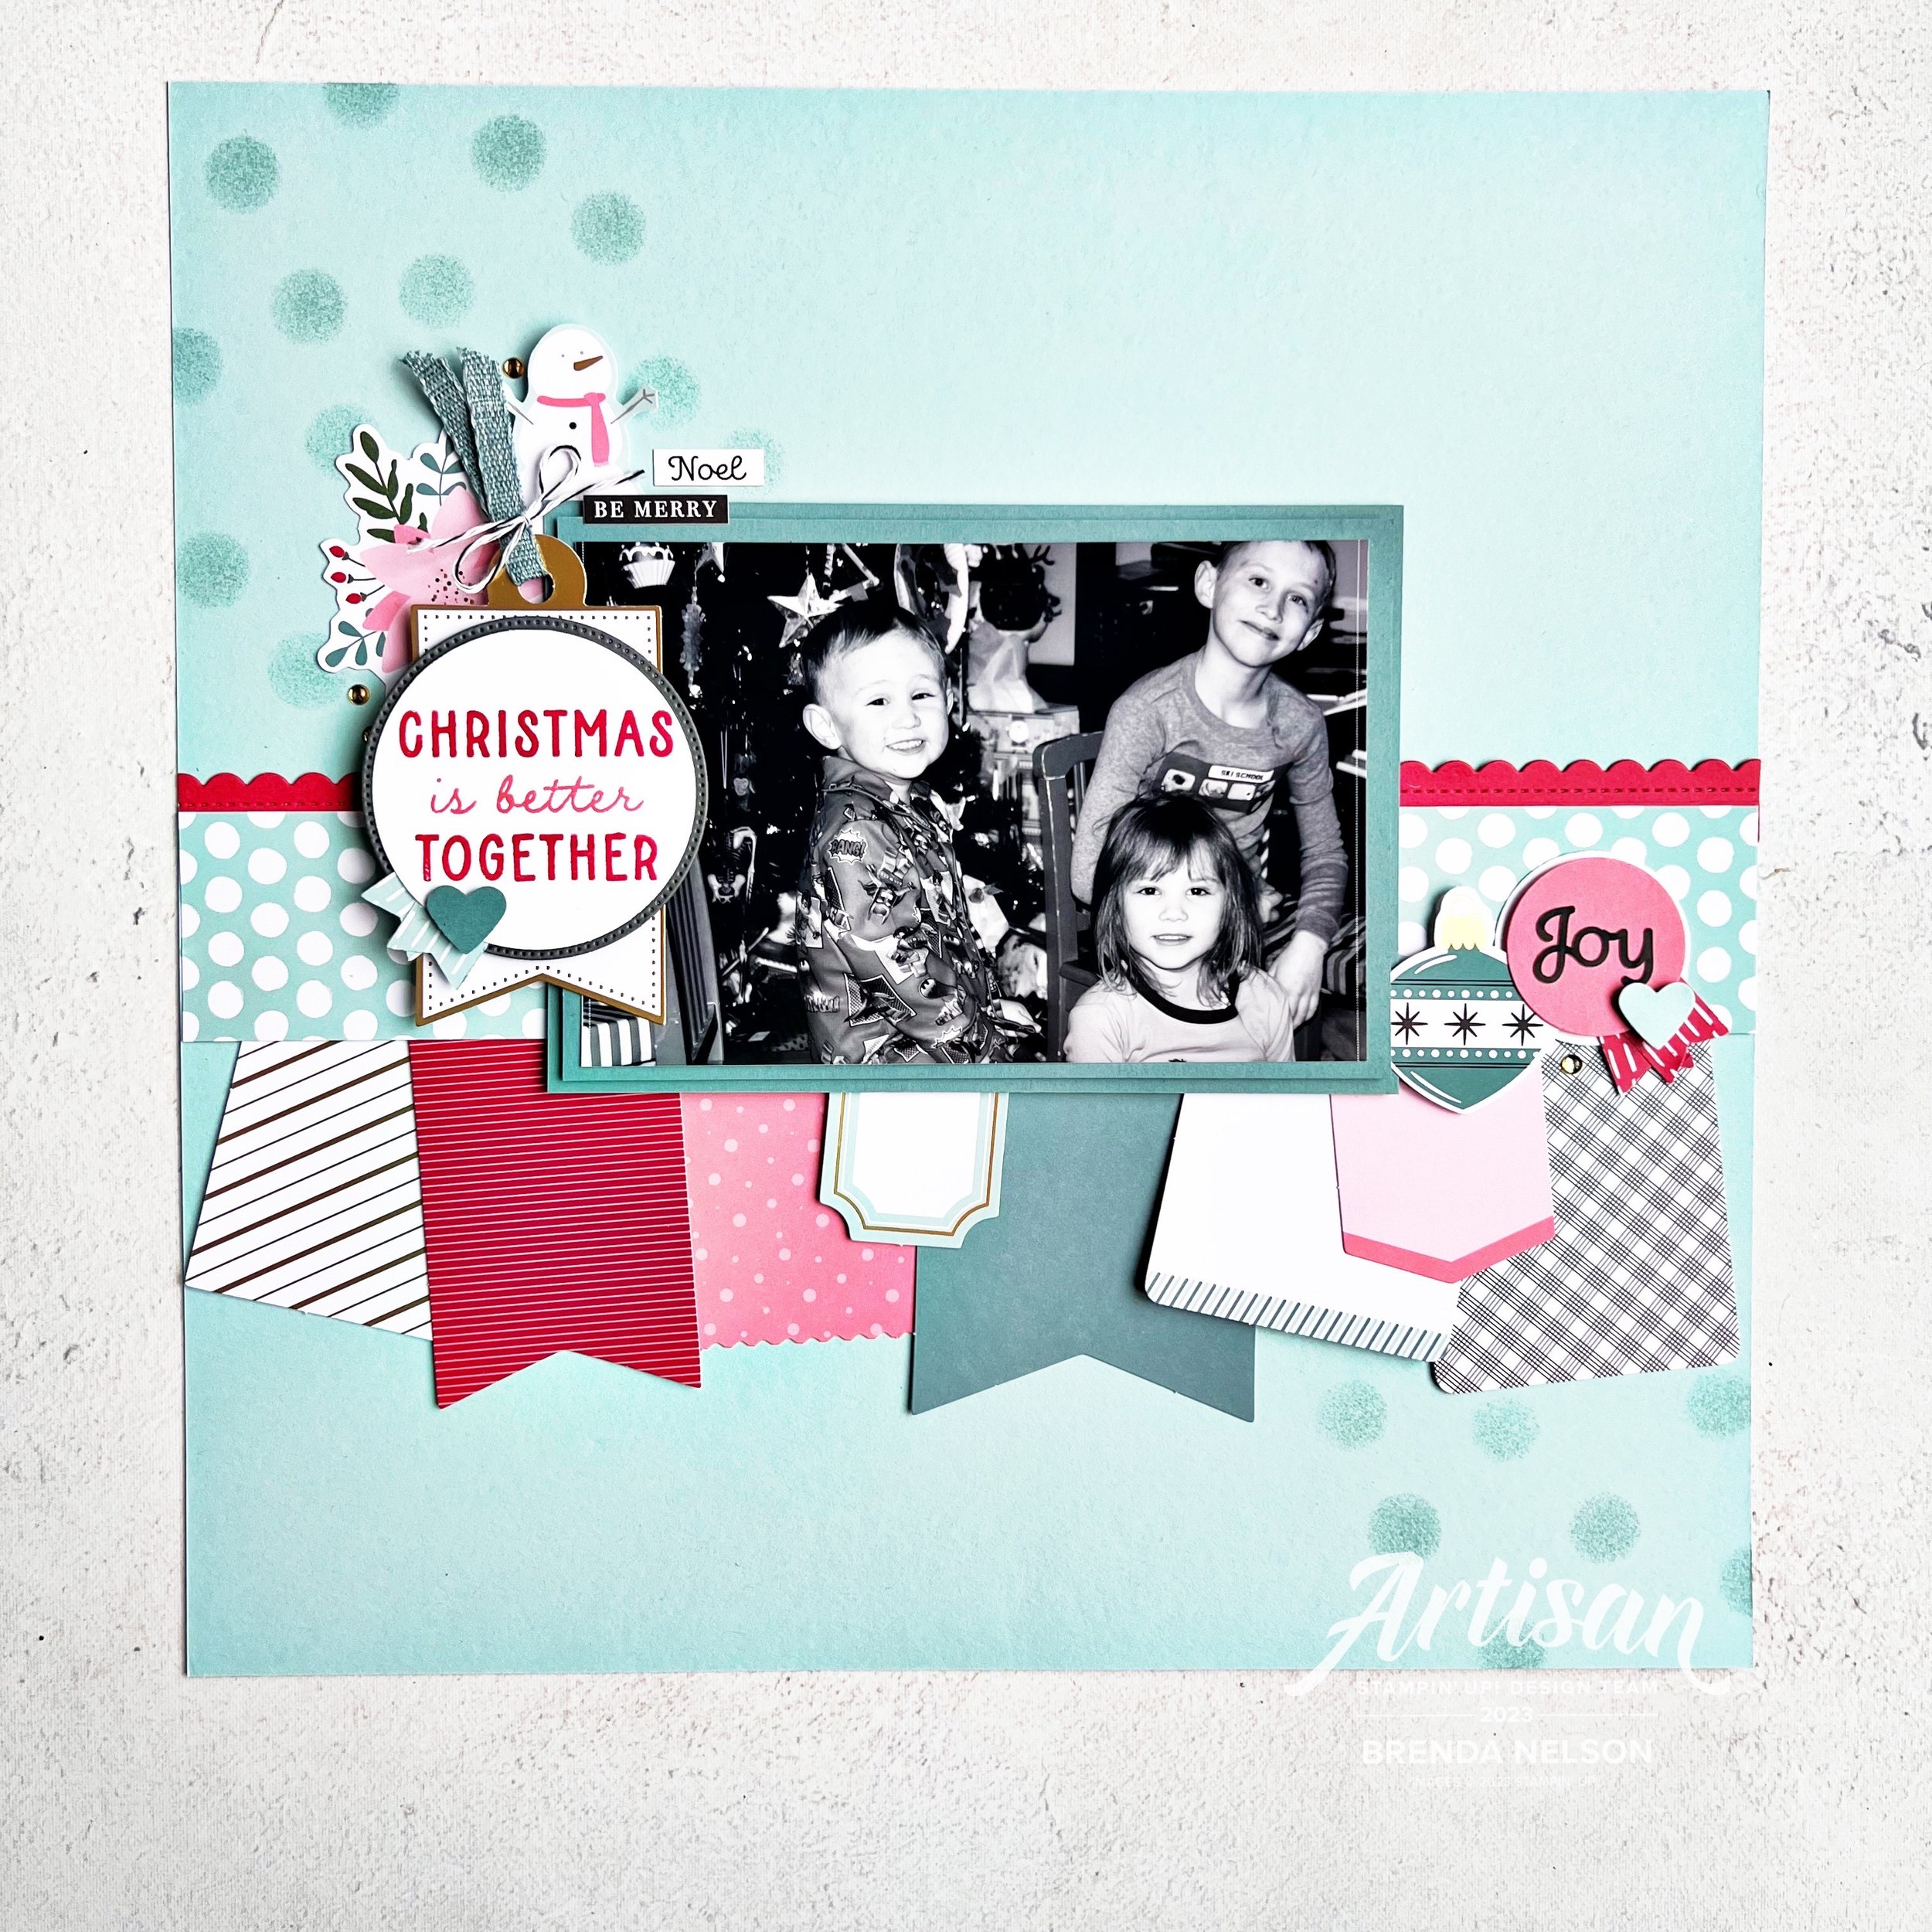
I really wanted to use the new Festive Tags —kits are on sale this month, and I love how SU released a new kit and put it on sale for us! Isn’t that amazing? I always love our tag kits as I find them to be extremely valuable in content and a total time saver when the holidays get busy!

I thought these tags would look awesome as a banner on a scrapbook page and I was right! I was so easily able to bring my vision to life with this tag kit. I love the color palette of the kit—Lost Lagoon, Pool Party, Sweet Sorbet, Flirty Flamingo with gold accents!

I also printed my christmas picture in black & white—the reason is that I find holiday photos almost overwhelming with all the color and it sometimes competes with the colors in your scrapbook page, so this is an easy solve—print in black & white so it is a neutral canvas!

There is only one things stamped on this page because I could not resist this sentiment. I was absolutely perfect for this page! You can find ‘Christmas is better Together’ in the Beary Cute stamp set. I love it so much!

I also decided that my Pool Party background needed a little something and since I had already added polka dot Pool Party DSP (from the 6x6 Subtles paper collection) to my page I decided to continue that theme. The easiest way to add polka dots is with a finger dauber! It is the ideal size as the scale works perfectly on scrapbook pages and cards.

Not only does this kit have adorable tags but it also has cut things like snowmen, trees, ornaments and a whole bunch of holiday words that are STICKERS! Yes, this actually a stamp free kit!

I miss these little kids—this was christmas eve 2012! They say the days are long but the years are fast and it is so true!

I really hope this scrapbook page encourages you to look at our Kits as a whole in a new way. I often find I can use the elements to create completely different projects than intended!

Thank you so much for being a part of my “Creative Convention”—please feel free to shop with me if you do not have a demonstrator. I love what I do and your support allows me to keep doing it!

And if you missed yesterday’s post, please go back and take a look and consider joining me and Tricia for the Joy of Christmas Stamp Camp on October 21st on Zoom! We would love to spend the day stamping with you!

Brenda's Top Ten

Brenda N Branding_0021.jpg

Friends! I don’t know about YOU but every year I swear I love this new Annual Catalogue THE MOST. It is almost laughable at this point, but every year I truly do find myself falling in love again! Here are my Top Ten Favorite NEW things coming out!

1.     The NEW In Colors (pg 122) —This is really on my list every year, but how can it not be to have 5 new colors to create with? This is like, my 16th year as a demo, and I am pretty sure these 5 colors are the most original ones we have ever had. They are definitely the most neutral of the bunch for sure. My current fav—Boho Blue. Message me next week, it will probably be different!

2. The Bright & Beautiful 6x6 DSP (pg 129)—I LOVE STARS, like love them. For my wedding my friends and I traced out literally hundreds of stars, spray painted them, and hung them from the ceiling at my wedding. So naturally I am in love with this collection of DSP because it has several star prints AND the most amazing color combinations! Trust me, you will love it too!

3. Level Complete Stamp Set (pg93)—where has this set been all my life? Having two boys, who are into gaming, this set is perfect! Teen boy cards will be so easy with this awesome gaming themed stamp set! I would love to make you some—hit me up! I love to do custom card orders!

4. New and Improved Stampin’ Write Markers (pg 125)—with an increased ink barrel and bullet writing tip, these updated markers are AMAZING! Trust me! And available in all of our new Core Colors, this is the perfect time to give your markers a refresh!

5. Scallop Gift Card Boxes (pg 126)—I give alot of gift cards with having 3 teens and lots of teenage nieces and nephews. I love to spoil my kids on every holiday too so these boxes are perfect for their favorite gift cards!

6. Tinsel Gems (pg 140)—these come in a Three Pack or Four Pack option in a variety of colors that are the perfect size to add a little bling to your projects!

7. Just my Type Stamp Set (pg 69)—over the years we have had a few different type writer sets and I will never stop loving the vintage nostalgic aspect of them. I got a type writer as a birthday present in grade 7 and while I have yet to write my manuscript, I am excited to create cards with one!

8. 3/8 Sheer Ribbon Combo Pack (pg 143)—I’m sorry, but who doesn’t love ribbon? Especially ribbon with a beautiful silver edge in 3 brand new colors?

9. 2 3/8 Circle Punch (pg 147)—This circle punch is a part of a bundle called Circle Sayings and it is a brand new circle size, the biggest one we have seen yet! And I don’t know what SU changed in their punch design, but its definitely more light weight than previous punches which is FANTASTIC!

10. Paper Florist Dies (pg 165)—these are stand alone dies (which is what I refer to them as because they do not have a stamp set attached) are AMAZING! They are the dies used to create the project on the back cover of the catalogue. They have unlimited potential!

Artisan Design Team Project--Marigold Moments Bundle

Hello friends! This month my Artisan Group consisting of Tammy Wilson, Heather Thomas, Sandra Herzog, Karine Lison and myself where given the Marigold Moments bundle to design with. I actually quite enjoyed this bundle as it has some really amazing elements!

I am really going to miss these embossed treat bags! they were so easy to create with!

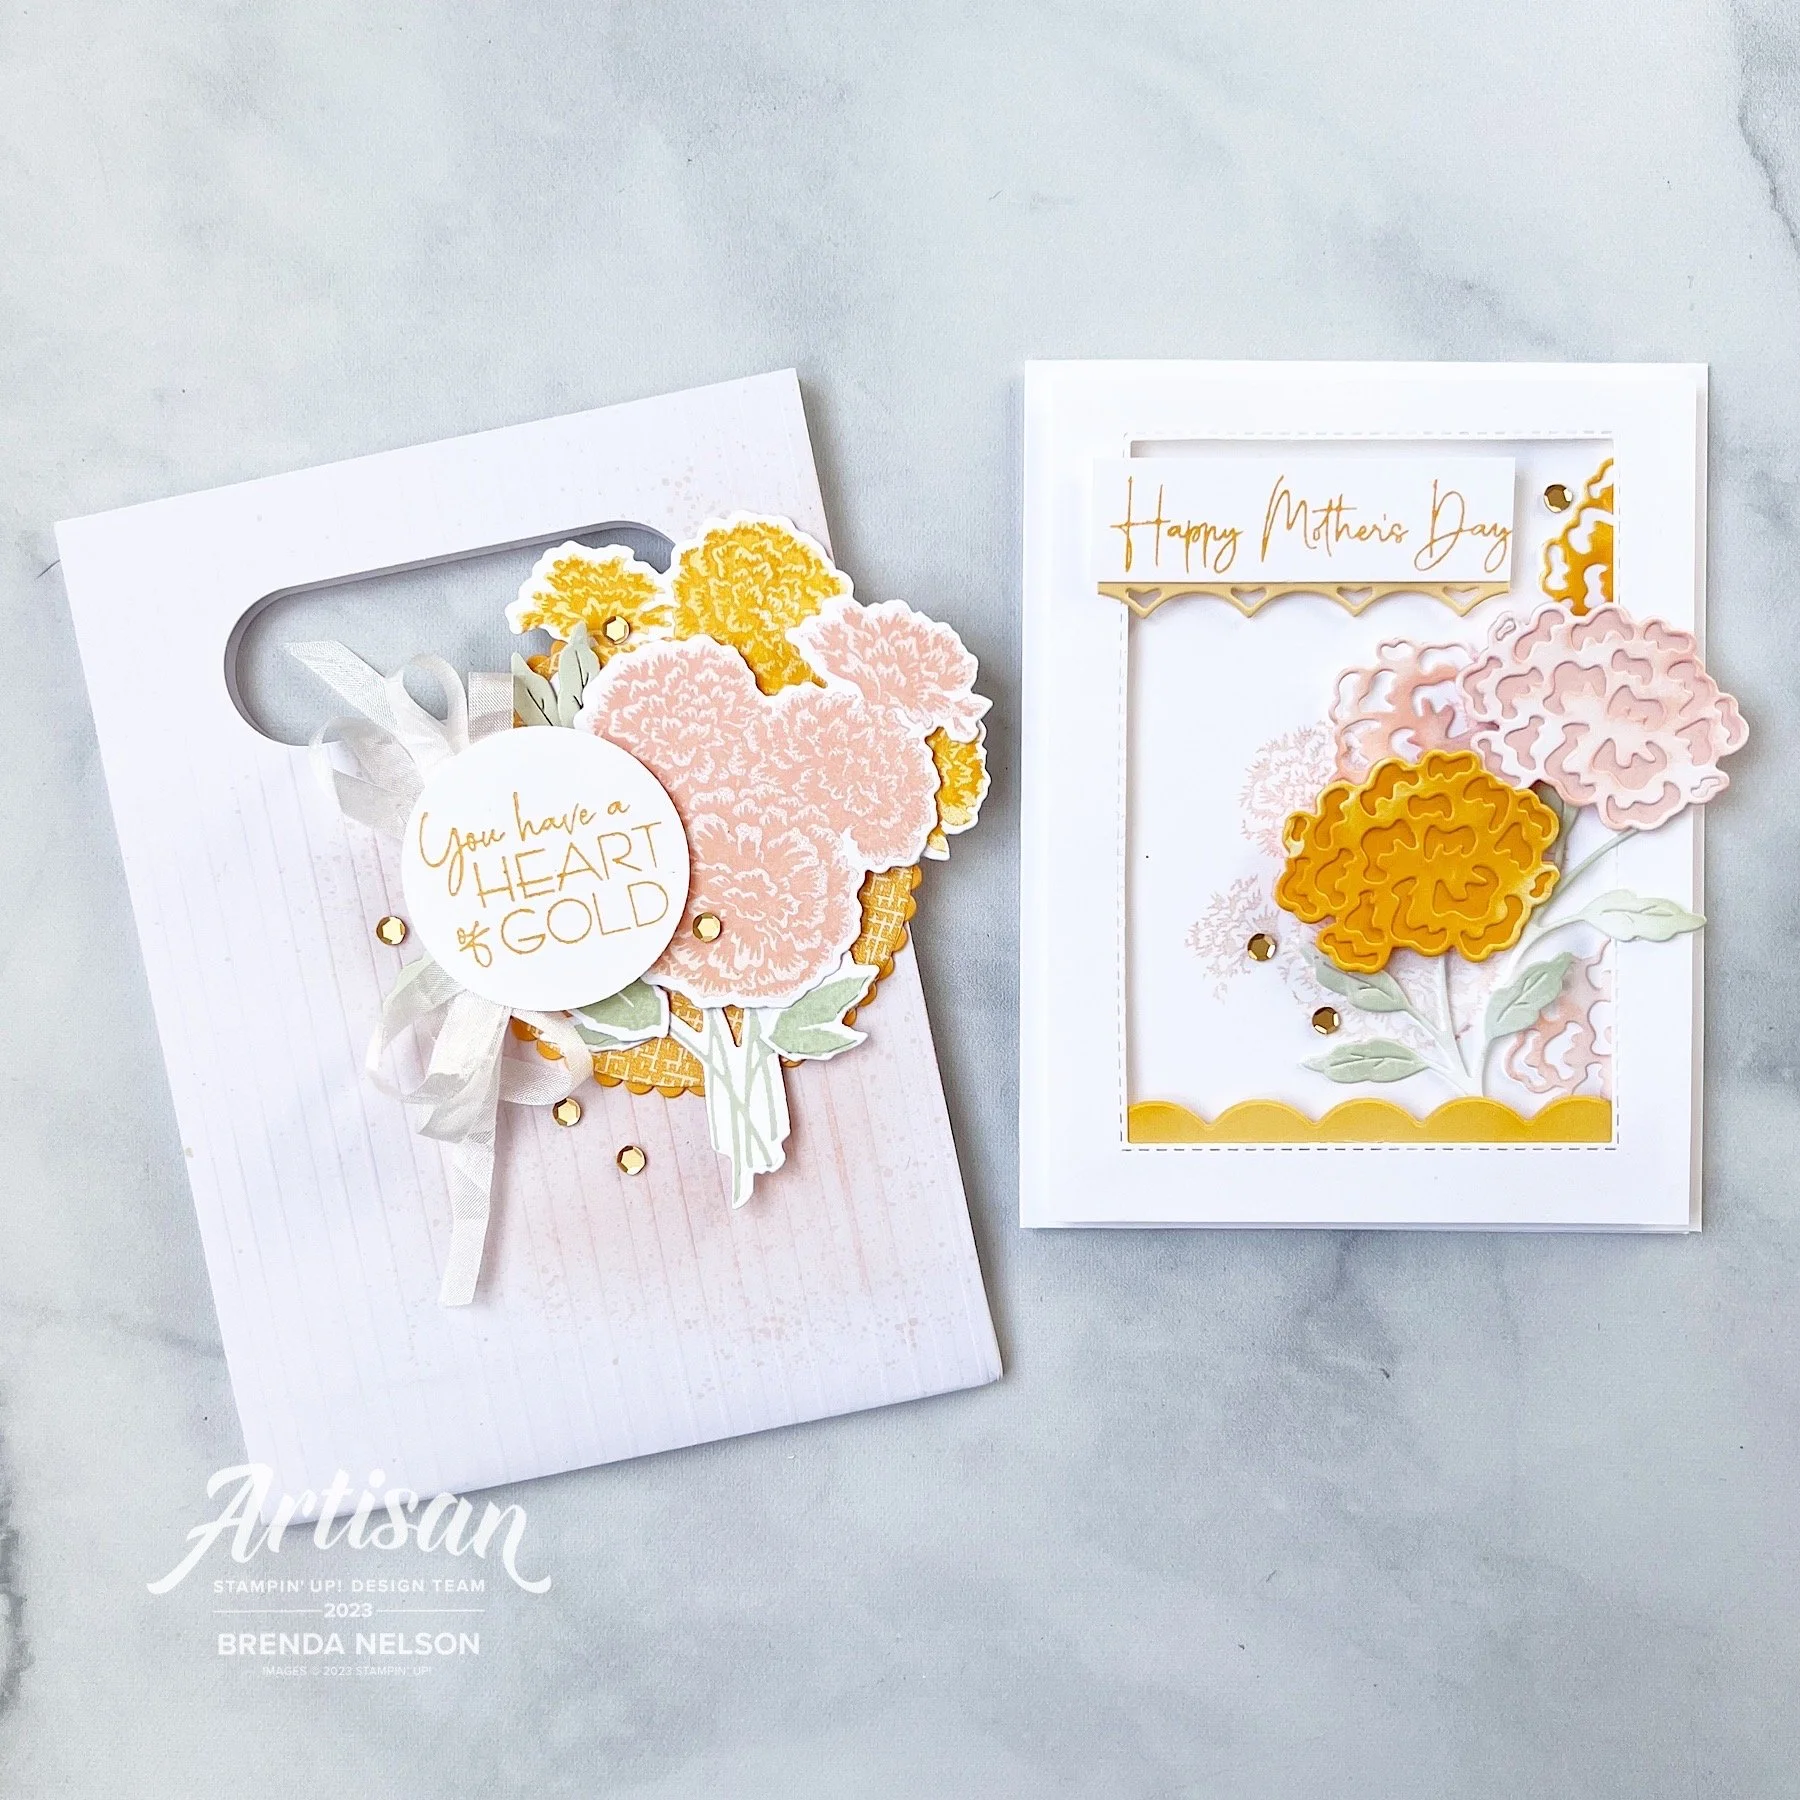
I decided to make a card and coordinating treat bag for my projects this month. You can give these together or individually! Let’s start with the Embossed Treat Bag—I used my Blending Brush in Blushing Bride to give a bit of color to the right side of the bag and then I flicked my Stampin’ Write marker over top as I do love the splatter look.

I cut a large scallop circle from the Layering Circle Dies and then a circle of DSP from the Regency Park DSP to go on top. The marigold cluster was stamped in Blushing Bride and Mango Melody ink and die cut. All of the greenery is either stamped or die cut from Soft Seafoam ink.

I actually LOVED this color combination and am sad to see both Blushing Bride and Mango Melody retire. I had alot of fun creating with them over the years.

The sentiment “You have a Heart of Gold” is absolutely AWESOME and one that I don’t recall ever seeing in any other stamp sets before. I added a double bow behind it in the Crinkled Seam Binding Ribbon, another LOVE that is retiring. And lastly to play off of the sentiment I added some gold sequins from the Adhesive Backed Pastel Sequins.

To all of the moms out there…you are killin’ it. have an awesome mother’s day!

This card is quite fun as its a shakerless shaker card, hahaha! I cut a window out of my first layer of Basic White card stock using the Stitched Rectangle Dies and after I stamped the cluster of marigold flowers on the card base in Blushing Bride, I added this window layer with the Adhesive Strips.

TOP TIP: Use Adhesive Strips instead of Dimensionals to get a little more lift. They are thicker and so easy to run around the edges of your shape as you can cut them to any length you like!

The Marigold Moments Dies have a really awesome border die that cuts out the scallop that I tucked along the inside bottom of the card and the reverse image underneath the sentiment. I love that this stamp set includes a Happy Mother’s Day stamp,

There are two dies used to create one of these marigold flowers and one for the stem. For the base of the flowers I die cut the solid back in Mango Melody and Blushing Bride. The top die cut layer and the stamps are cut out of Basic White and then I used my Blending Brushes to add some color. I love this look because it adds so much texture and depth. The idea is NOT to make the Basic White base look like card stock but to allow for color variation. I added a few extra flowers tucked in and behind my main blooms to help give the illusion of a bouquet.

And of course I had to add some gold sequins. Every project needs a little bling right?

I hope these projects inspire you and please make sure to check out what the rest of my group has created on either the Stampin’ Up! Official Instagram page or their individual pages:

Tammy @stampspaperscissors

Sandra @herzerlskreativecke

Heather @thesongbirdstamper

Karine @karinelison73choupinette

Thanks friends and see you again soon!

Here is a supply list of what was used to create these projects. If they have inspired you, please consider shopping with me so I can continue to do what I love!

Artisan Design Team Project featuring Delicate Desert

Hello friends! I could not be more excited to share my projects for March that I created for the Artisan Design Team. I absolutely loved designing with the Delicate Desert Suite especially because I used one of my all time favorite pictures of my youngest son, Shepard.

I recently updated my Scrapbook Gallery on my blog as well—so if you are looking for more scrapbook page inspiration, please check there!

Shep really was the happiest baby and such an easy toddler—I simply cannot believe at the time of writing this he is 12. I wish i had a time machine to go back and cuddle this little guy again.

I decided to make a scrapbook page AND a card for my Team projects this month. I really love the color palette of this suite—Petal Pink, Calypso Coral, Cajun Craze, Pale Papaya, Soft Succulent and Gray Granite look so AWESOME together!

For my scrapbook page, I started with a sheet of the Delicate Desert 12x12 DSP as the base and then I added a layer of Basic White over top that is cut to 11x11. This lets you see a little bit of the pattern behind. I used another piece of the DSP for the photo mat as well and cut out the leaf like shape out of the DSP and the Dry Brushed Metallic 12x12 paper. If you haven’t ordered the Dry Brushed paper yet, you should really take a chance on it. It is really cool and has alot of fabulous texture w the hints of gold layered through.

Seriously, look at Sheppie’s cute face. I can’t even.

Because the Dry Brushed Metallic paper has gold in the design I decided to stamp one of the larger flowers in Versamark and use Gold Embossing Powder. I then used my Blending Brush with Pale Papaya ink to a bit of emboss resist. It is such a classic technique, and I find everyone is impressed with embossing! I also die cut some of the triangular shapes (they remind me of a pattern on a western blanket) to add it to represent foliage. I think it worked really well!

The sentiment could not be more perfect for this scrapbook page! However, the Desert Details Dies do not have a label shape, so I borrowed this one from the He’s the Man Dies. The suite also includes the Pale Papaya Faux Velvet Trim which I cut in half to add underneath the sentiment.

My favorite part of this scrapbook page is actually the base where I used both of the large panels to create interest and texture by die cutting them in Basic White. They are added flat to the page with all of the other elements on top. I also used the Gold Faceted Adhesive Backed Sequins to add interest to the scrapbook page.

The stamp set also includes two longer border type stamps which I used along the right side of the photo. I thought it was an interesting way to bring in those design elements.


The sentiment in the top left, “Your Smile is Pure Magic” was also a fantastic addition to this page. I stamped it in Pale Papaya first and then used my Calyspso Coral marker over the ‘magic’ to make it pop. I added some of the Pale Papaya Ribbon and a die cut element.

TOP TIP: I cut the element horizontally into two pieces so I could spread it out and give the illusion of it being larger than it really is

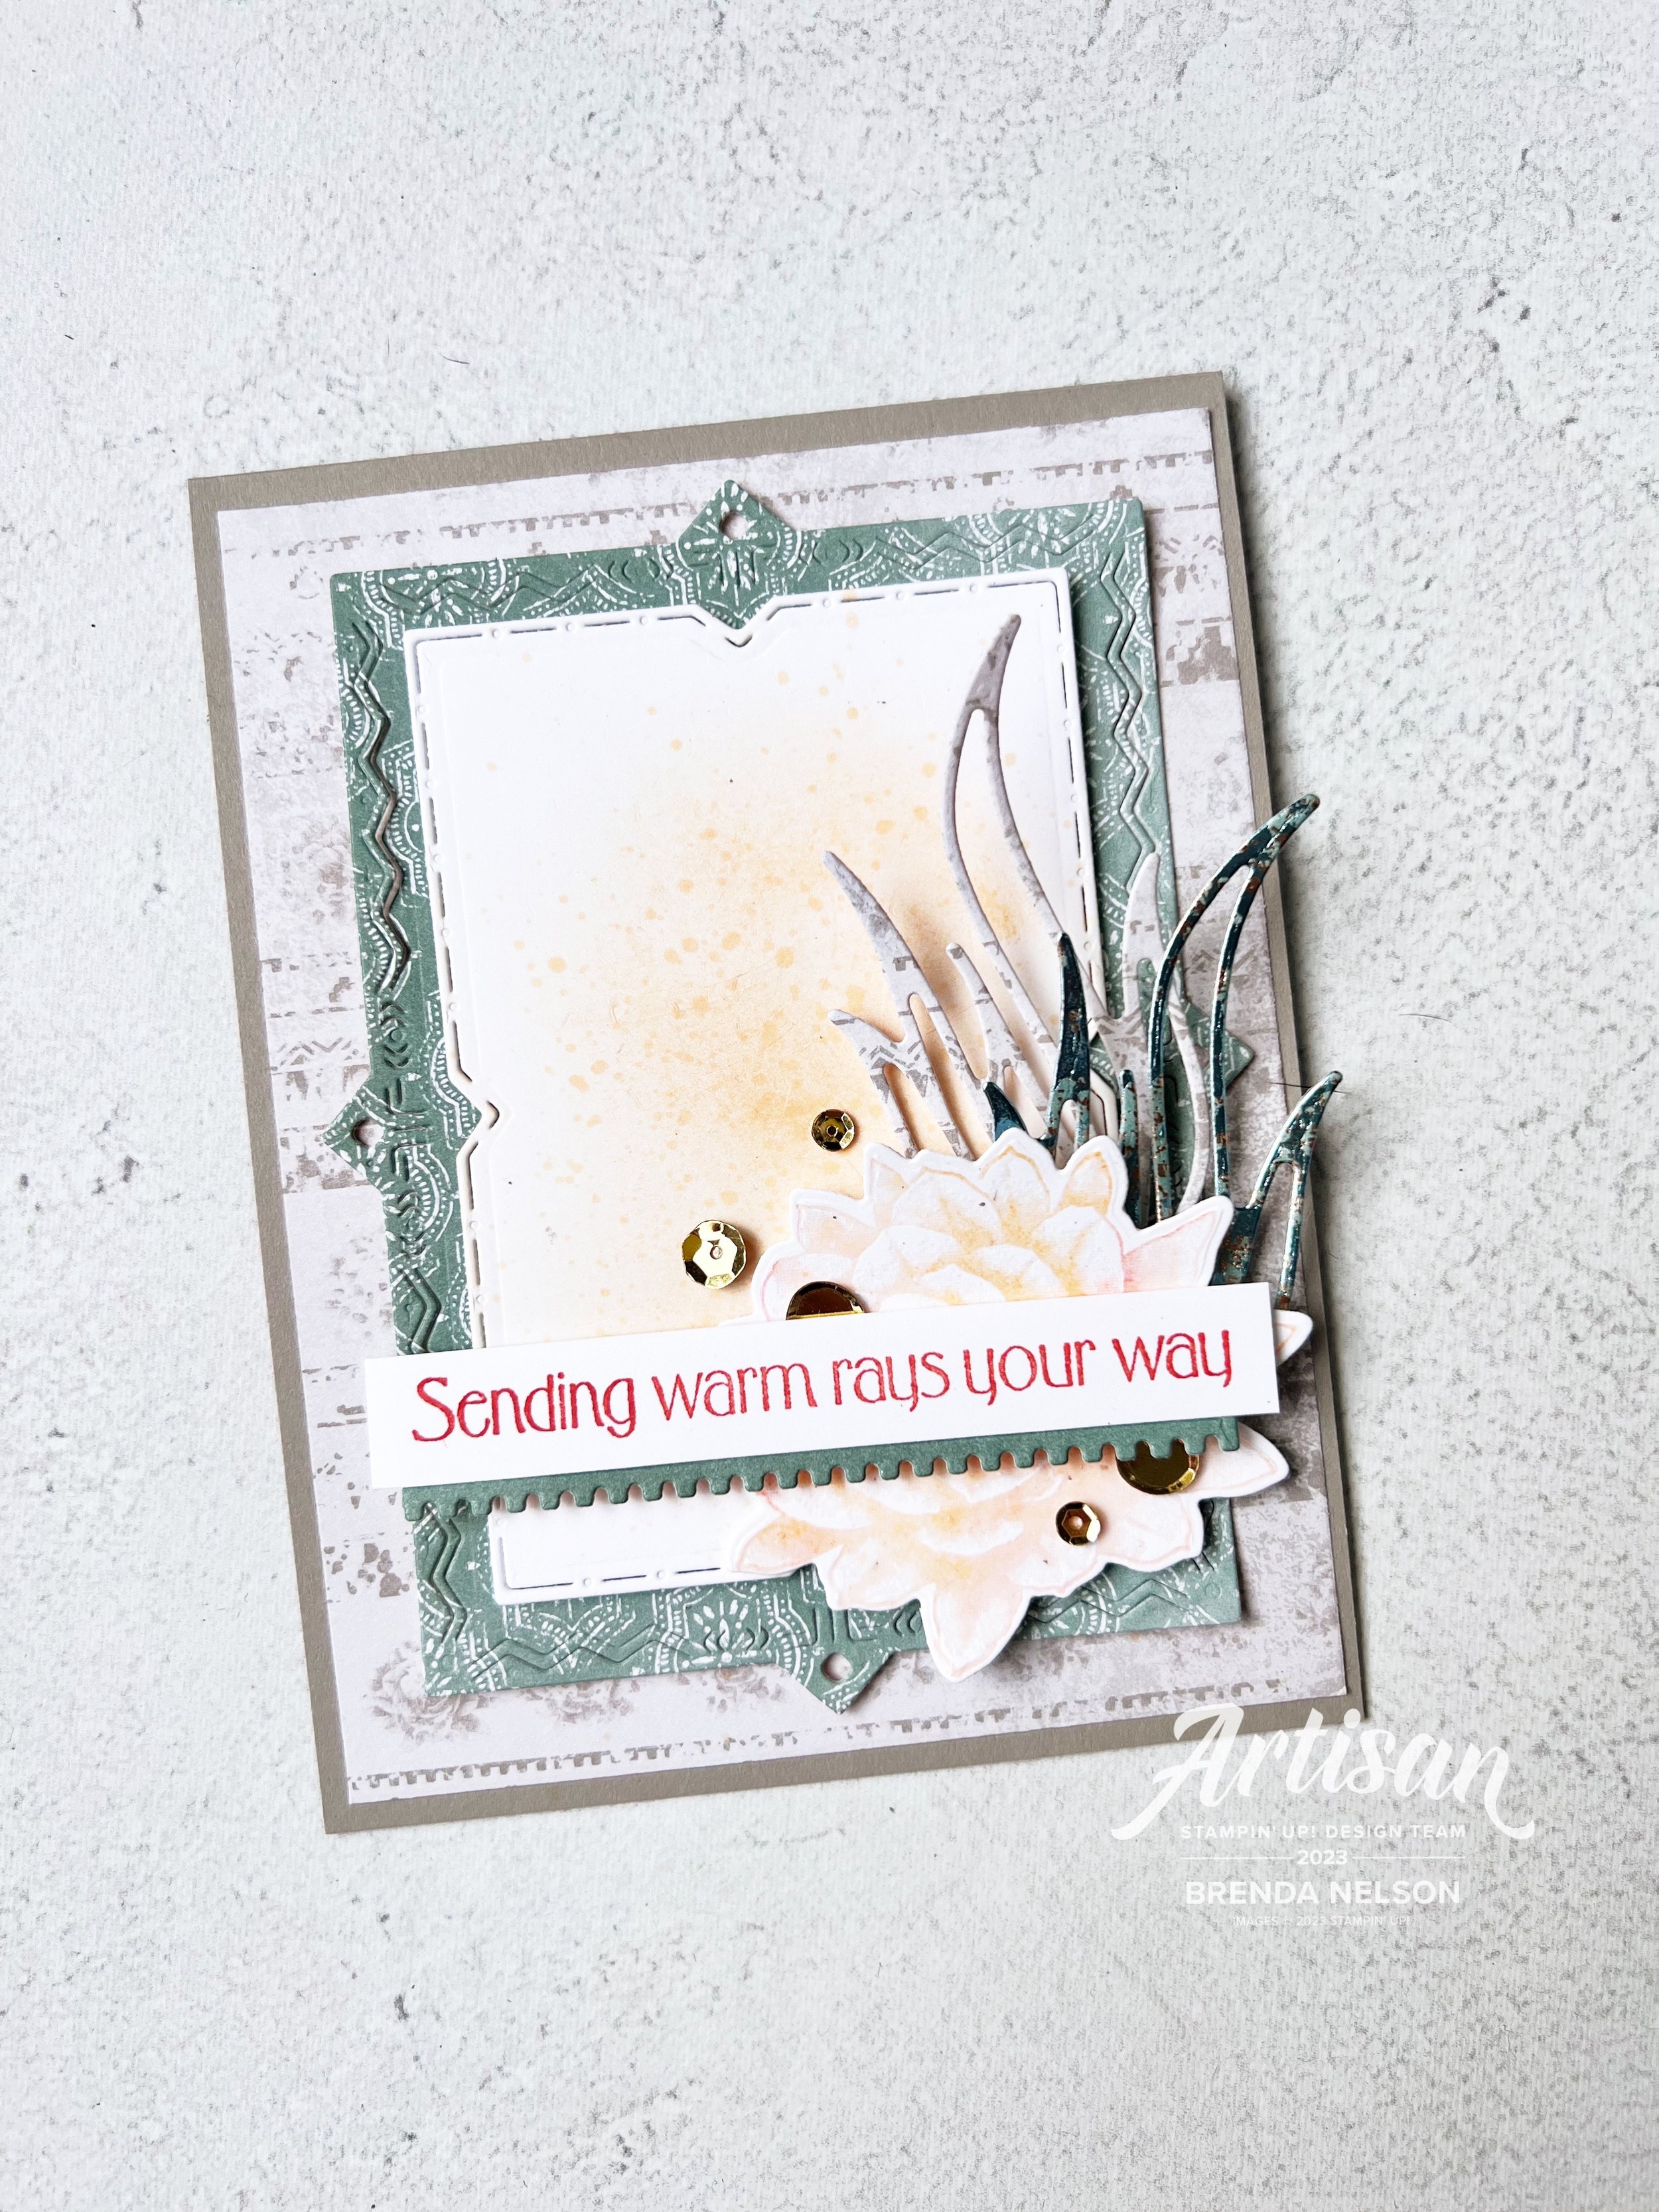
For my card design, I started with a base of Grey Granite, and then I used a piece of the DSP as a base, with another DSP design die cut with the larger decorative panel. I then cut the smaller decorative panel in Basic White. I love the edge detailing on both of these dies and how they nestle together.

The Basic White panel has a touch of color added by using a Blending Brush and Pale Papaya ink. I also flicked my Pale Papaya Stampin’ Blend over top.

The flower is also stamped in Versamark, then I added ink in Pale Papaya and Calypso Coral with a Blending Brush and finished it off with Clear Embossing Powder. This gives the flower a glossy feel. I used both the Delicate Desert and the Dry Brushed Metallic paper with the foliage die to layer behind the sentiment.

The border die included in the set was used as an accent underneath my sentiment as well. And of course, who can resist bling? So I added some of the Gold Faceted Adhesive Backed Sequins to this project as well.

I hope you enjoyed these projects and all of the other amazing things created by the Artisan Design Team! For more inspo with the Delicate Desert Suite check out on Instagram and Facebook the Stampin’ Up! Official account as well as Heather Thomas @thesongbirdstamper , Karine Lison @karinelison73choupinette, Sandra Herzog @herzerlskreativecke and Tammy Wilson @stamppaperscissors

Please feel free to shop my online store by clicking this button or any supply images! If I have inspired you, I appreciate your support so I can keep loving what I do :)