12 Days of Christmas--Day 6

I am so excited to share this adorable mini bags with you today! I love love love to give little treats to people and after my recent Target trip I have so many fun options to give to people. I came across the template for these mini bags at sunnydaystamping.com, so I need to give her a shout out for her awesome tutorial!

I made these cute little bags at my recent team meeting and then made a bunch up to give to participants at a Christmas Card class I was hosting. They were the perfect little add on.

I decided to make these bags using the Sweetest Christmas DSP, you just need 2 pieces of 6x6 DSP. You could make these bags for any occasion and tuck a treat inside with a a gift card. In the video tutorial, sunnydaystamping.com, even added handles to the bags with some ribbon. There is so much potential with these!

I used the Handmade Christmas Bundle to decorate and embellish these cute little bags along with the Lasting Label Punch. I love to use our punches together with some Bakers Twine to create a larger sentiment label.

I used some of these retired treat bags to hold a handful of Hershey Nuggets that I wrapped with DSP. It is just an extra fun added touch. Some Garden Green ribbon around the bag was perfect and I love that it peeks out of the top of the bag.


The best part of our large DSP collection is all of the fun patterns to choose from. I love how this bag style does let you see both sides, so you might need to make sure that what you choose does work in this format.

The Handmade Wishes stamp set is the perfect set for those creative types that like to bake, make chocolates, buy chocolates, eat chocolates, give chocolates…haha! You get my drift. This label was made by combining 4 different stamps from the stamp set. I also couldn’t resist adding some of the mini hearts in the background too.

I really encourage you to try making these mini gift bags, they are quite simple and can be such a fun way to showcase our DSP for any little event that you need a cute bag!

I can’t wait to see what Melanie is sharing today! Click the image to hop over to her blog!


12 Days of Christmas--Day 1

Hello my friends! I am so excited to share 12 Days of Christmas with you—with a twist! My awesome friend Melanie from @melsinkyfingers and I have decided to team up to each share 12 awesome holiday projects with you! At the end of each of my posts there will be a link to go visit her blog and see her project of the day. In the end, you will actually have 24 project ideas!

Thanks Melanie for making this cute graphic for us!

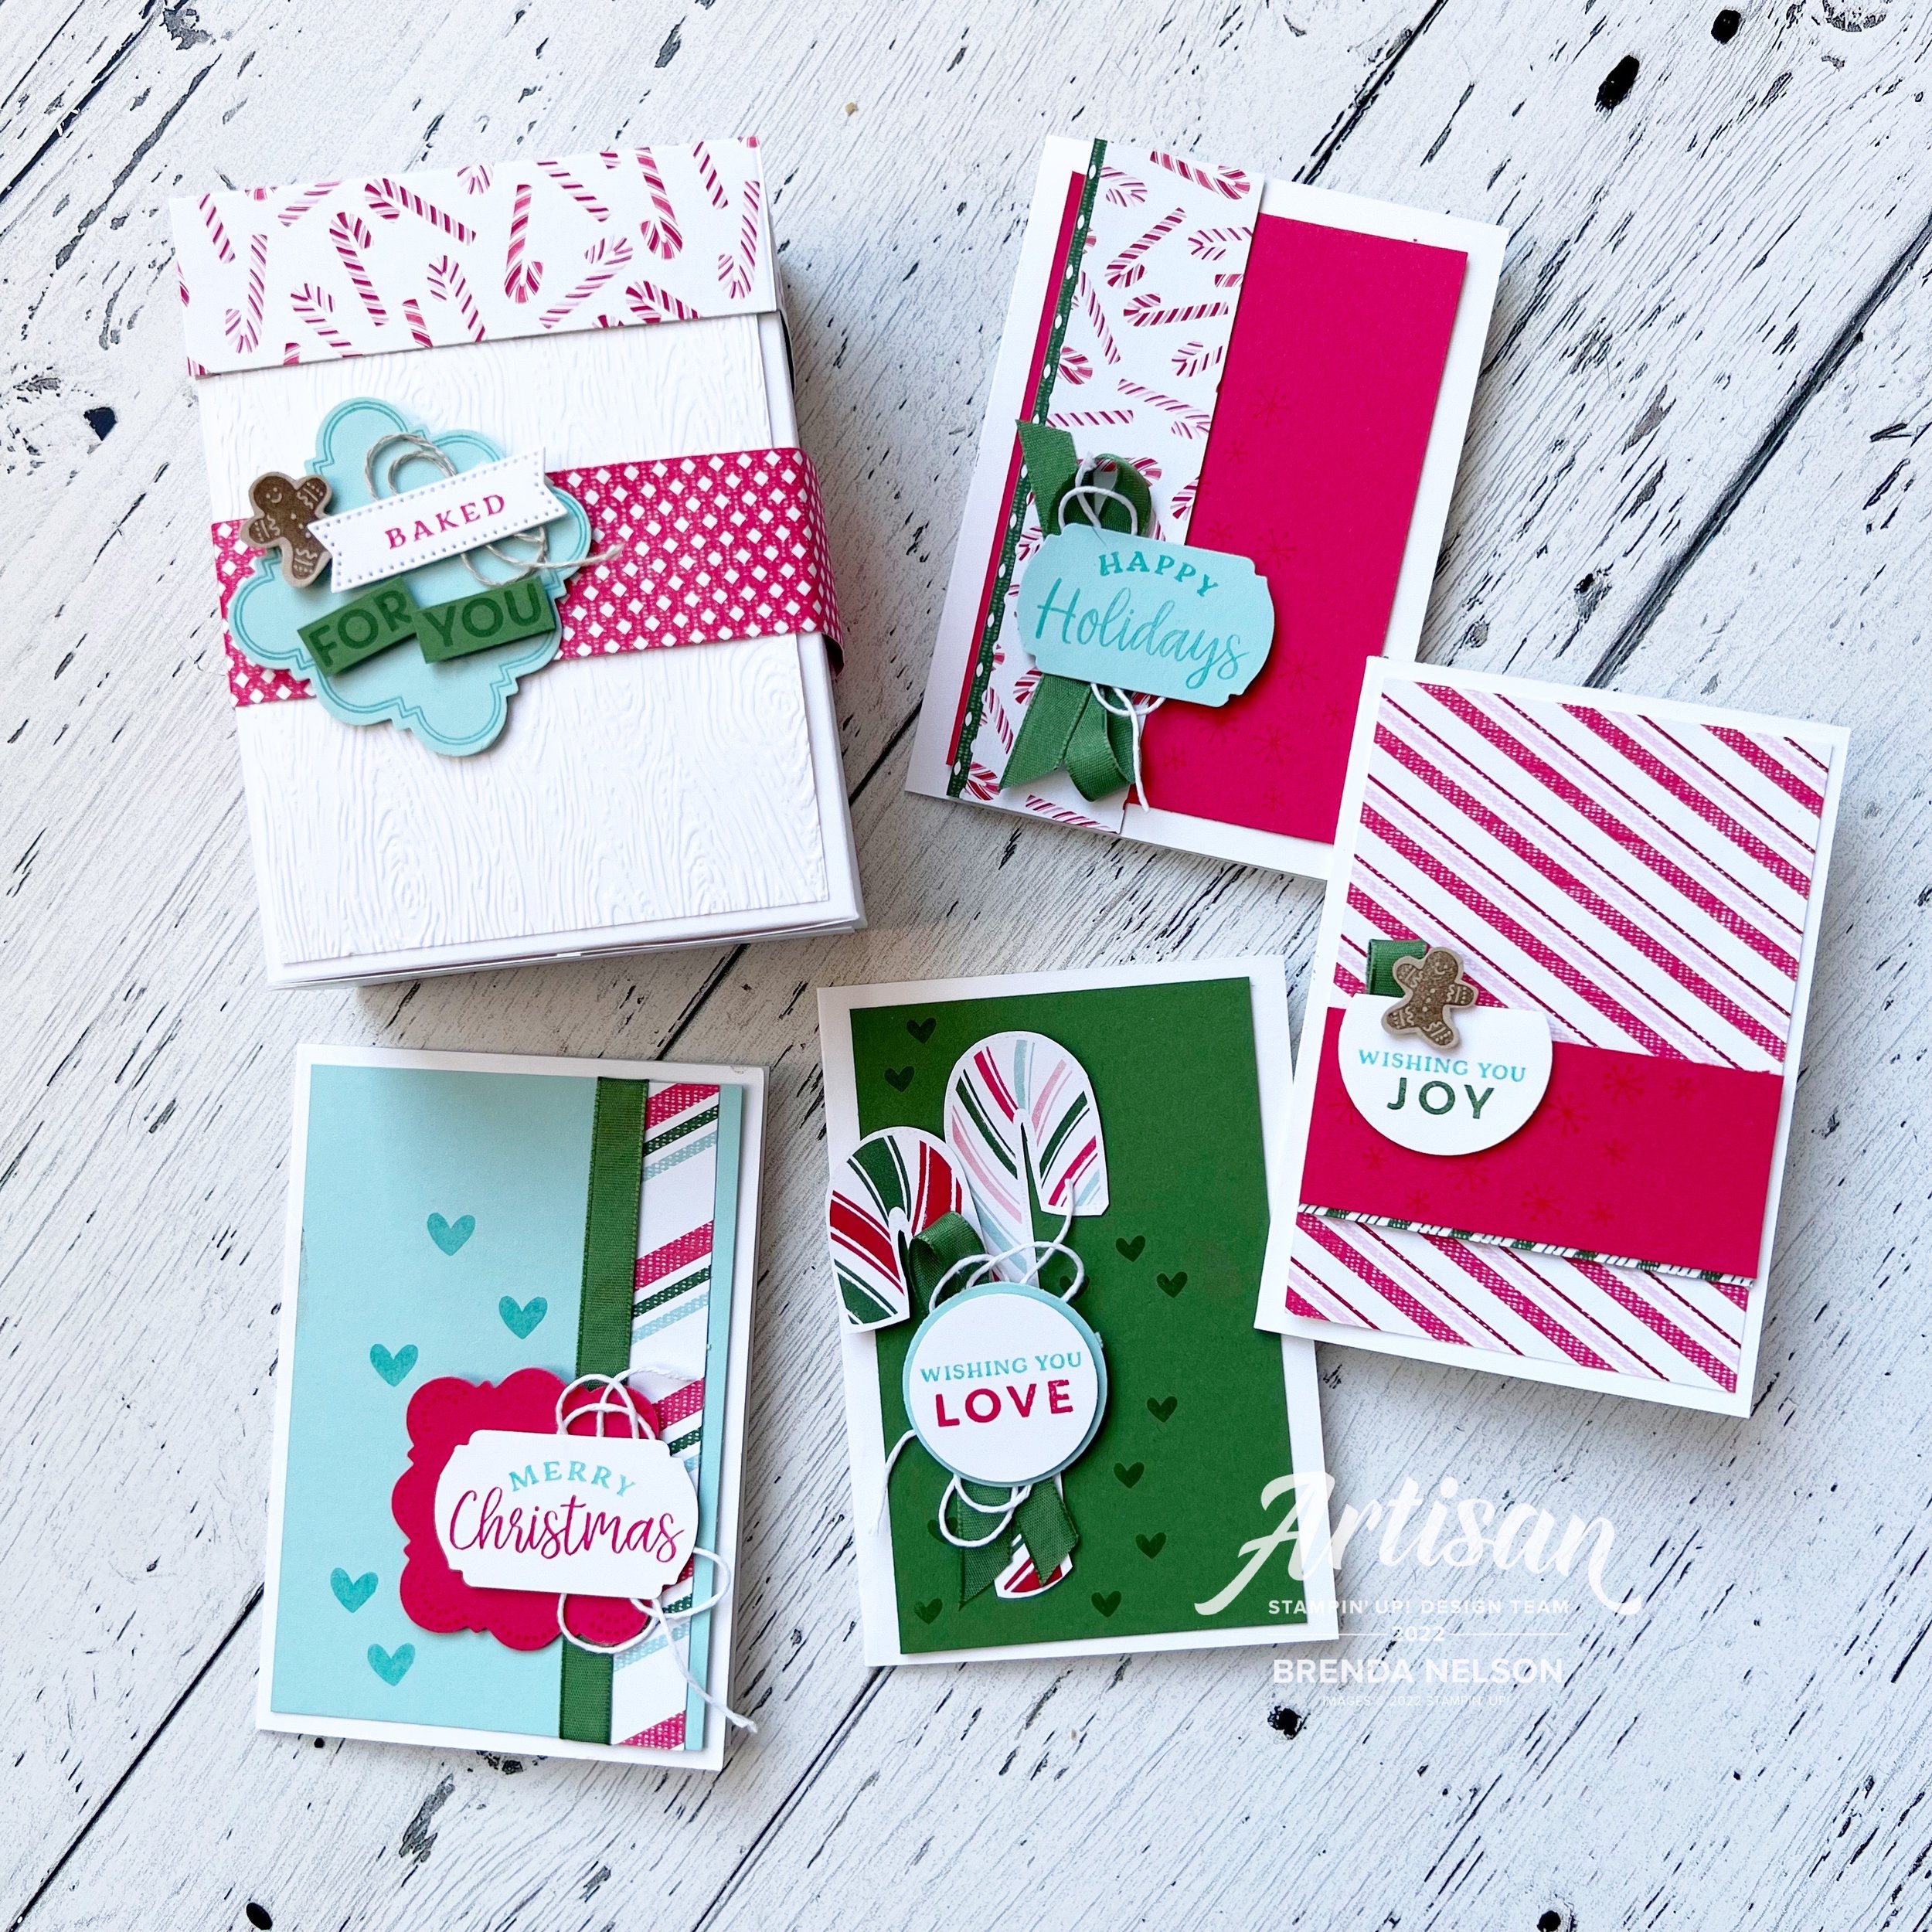
I can’t wait to get started! My first project is this fun notecard set and basic box. I got this project template from another talented friend Lisa Althouse @stampaholic. I just love our stampin’ community!

This basic box is perfect for holding 4 notecards and envelopes. You could even create this project without a lid and use the box to hold holiday snacks or treats (like Oreo Popcorn! I have this recipe on my blog under Lifestyle—Favorite Recipes).

I used the Sweetest Christmas DSP as my color inspiration and paired it up with the Handmade Wishes Bundle. I just love this bundle because the stamp set is so versatile. You can created so many different phrase/sentiment combinations. And the design of the label punch is really unique!

The label on this box is designed to reflect that a treat will be in the box. I plan to add a single card and a little holiday treat inside these boxes! I added another panel to the front of my box that I ran through the Timber 3D folder.


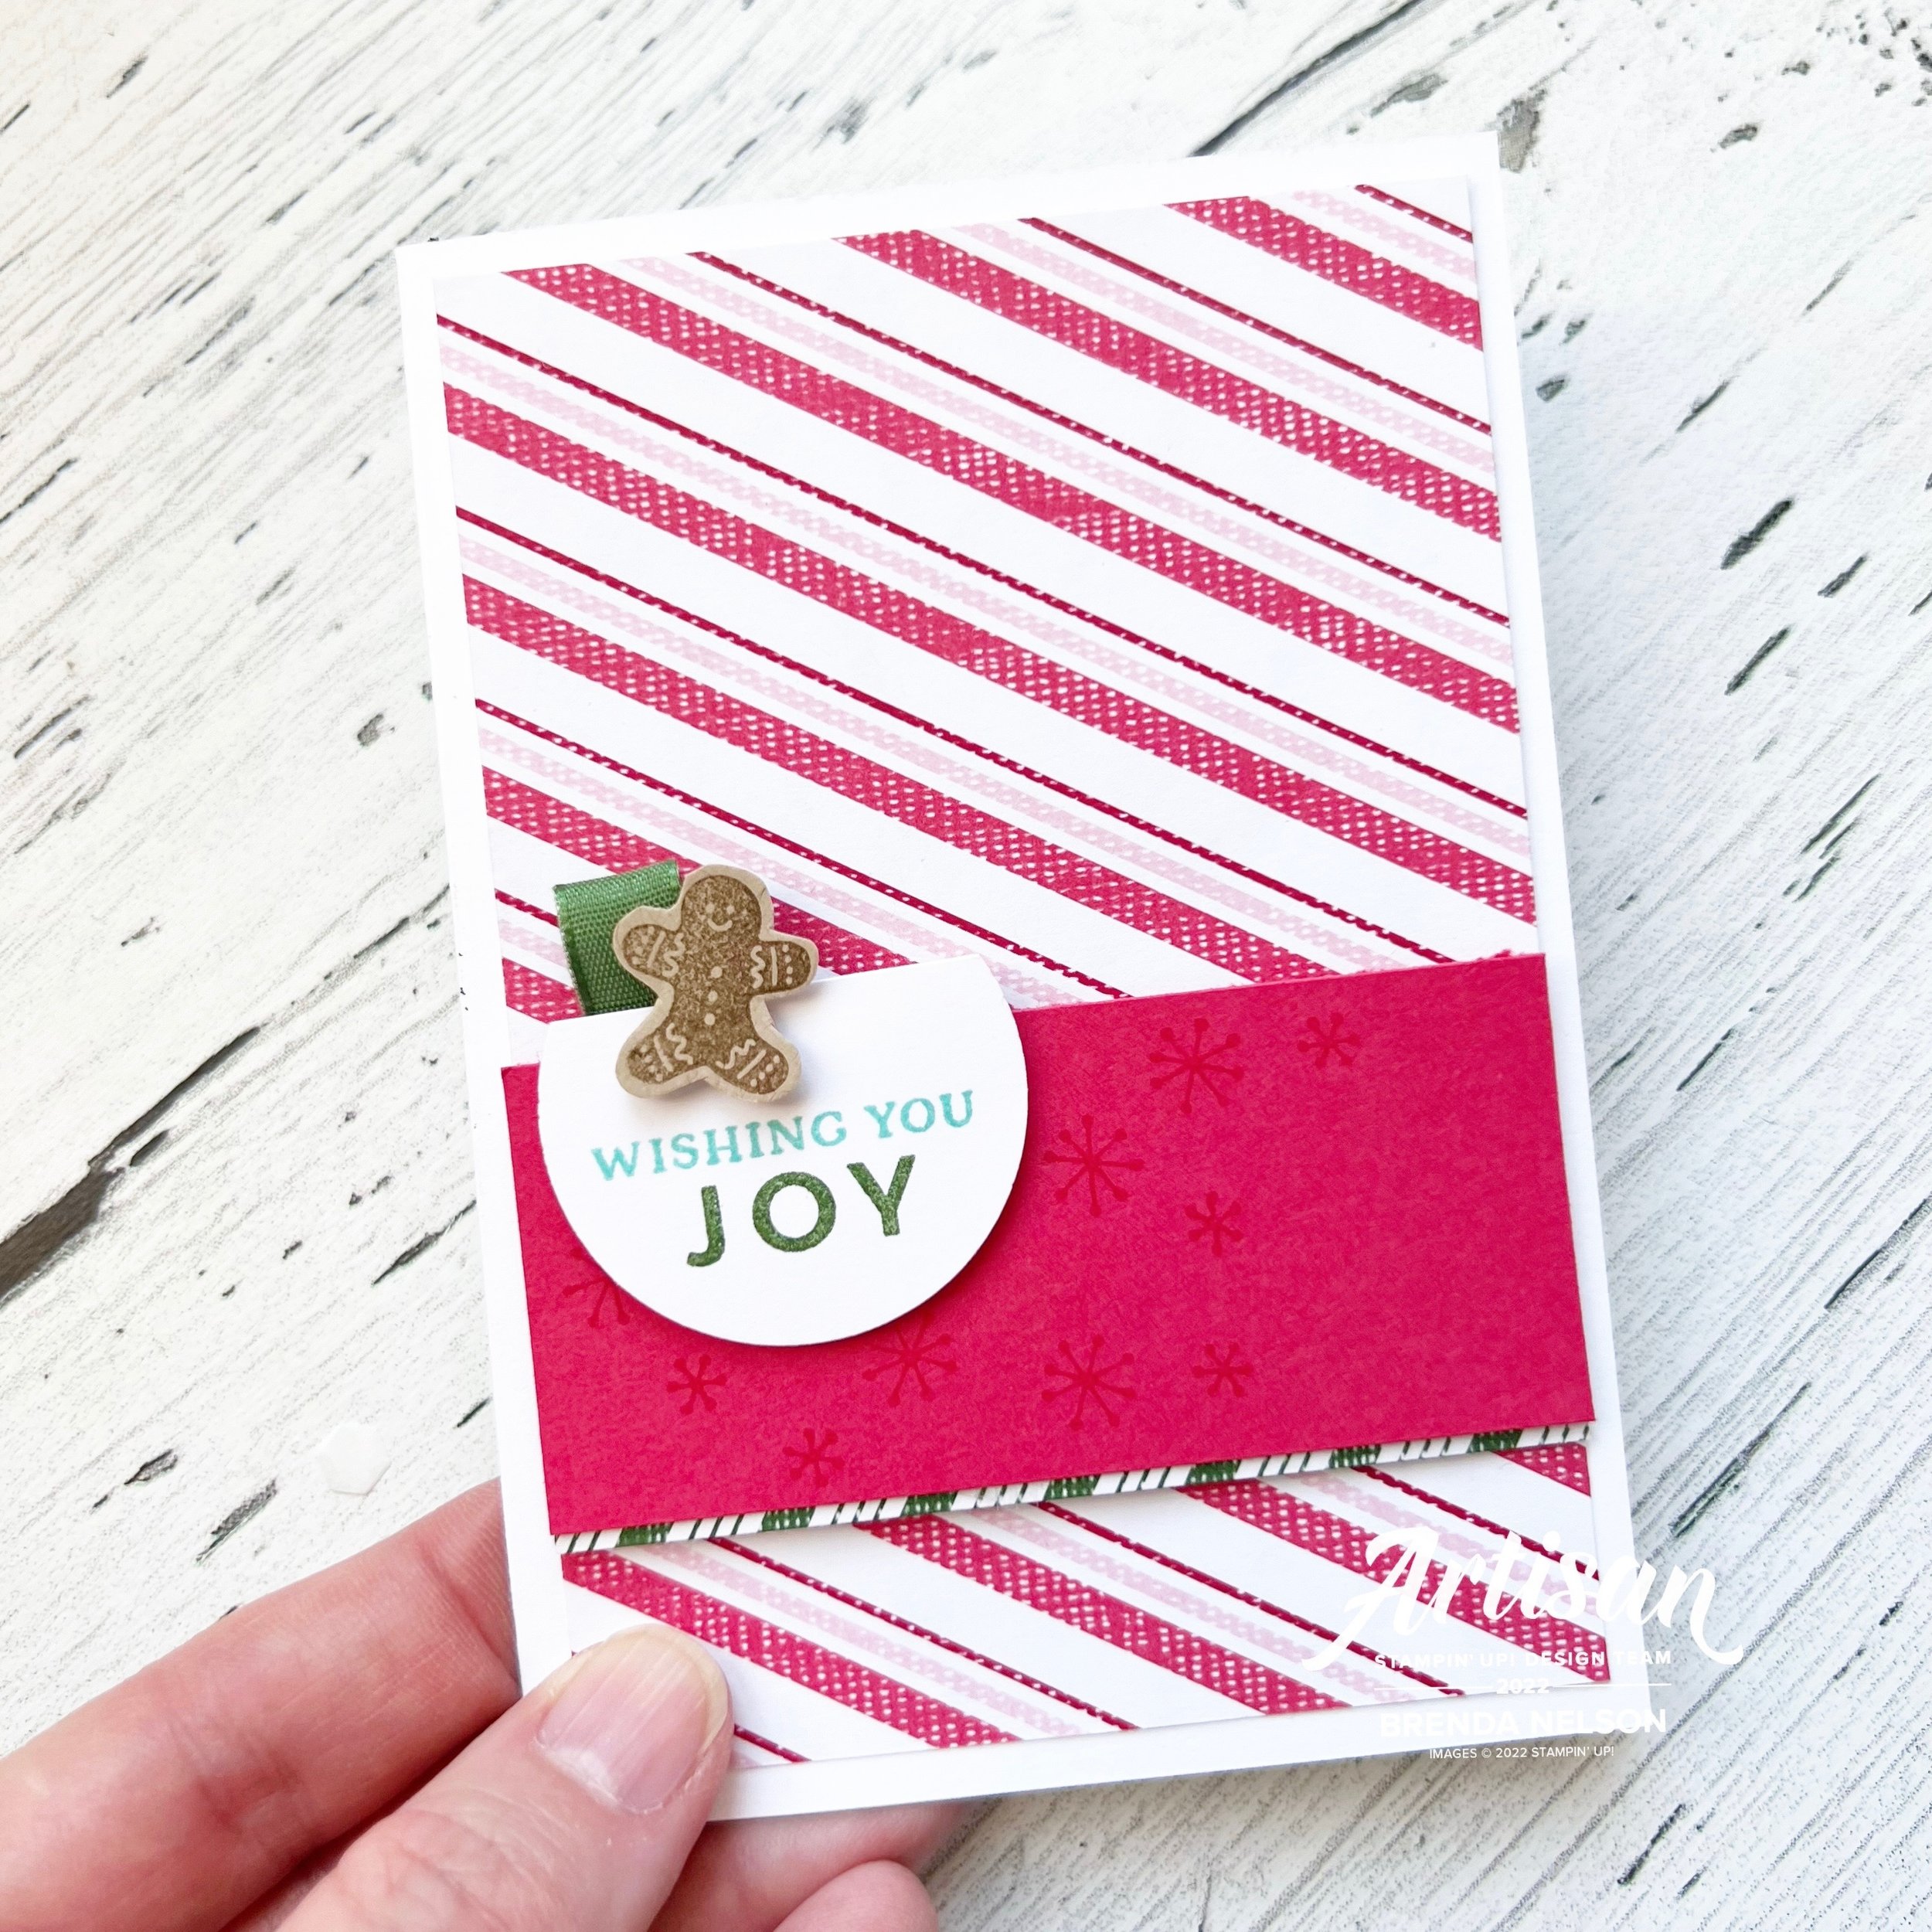
Sweet Sorbet has definitely been my favorite red this season. I added a panel to the front of my card and stamped some little snowflakes as an accent.

A couple strips of DSP (its so fun to mix and match patterns), and a cute sentiment stamped on Pool Party card stock in Coastal Cabana, make this notecard so fun. Of course I had to add some Garden Green Ribbon and white Bakers Twine.

I love a good stripe pattern and this Sweet Sorbet/ Blushing Bride one is just perfect for a card front! I softened the front with a panel of card stock and a bit of stamping. The little gingerbread man was the perfect fun add on to this sentiment!


I love to stamp little hearts on my projects, they just make everything perfect. This little notecard has DSP with a ribbon border, the punch and sentiment and of course some Bakers Twine. This is such a ‘Good Card Design’!

The best part of this little notecard is the candy canes that are die cut, right from the DSP! Isn’t that brilliant? It makes creating this card so easy!

I hope you have fallen in love with this project as much as I have! I shared it with my team last month and it was so well received, I knew it would make the best project to kick off 12 days of Christmas. I have a few other 3D projects to share, some cards and of course some scrapbooking/mini album inspiration projects. I hope you will check back each day and go over to Melanie’s blog to see her awesome projects as well!

Click here to get to Melanie’s first 12 Days of Christmas post! I can’t wait to see what she made!