Creative Convention--Day 5!

5 awesome days of inspiration! Yippee! I hope you have been following along so far, if this is your first visit, make sure you go back to see what you have missed. I away in Las Vegas this week with some of my Stampin’ friends for Backstage—a leadership conference SO I thought I should have my own little Creative Convention by sharing a full week of projects with you!

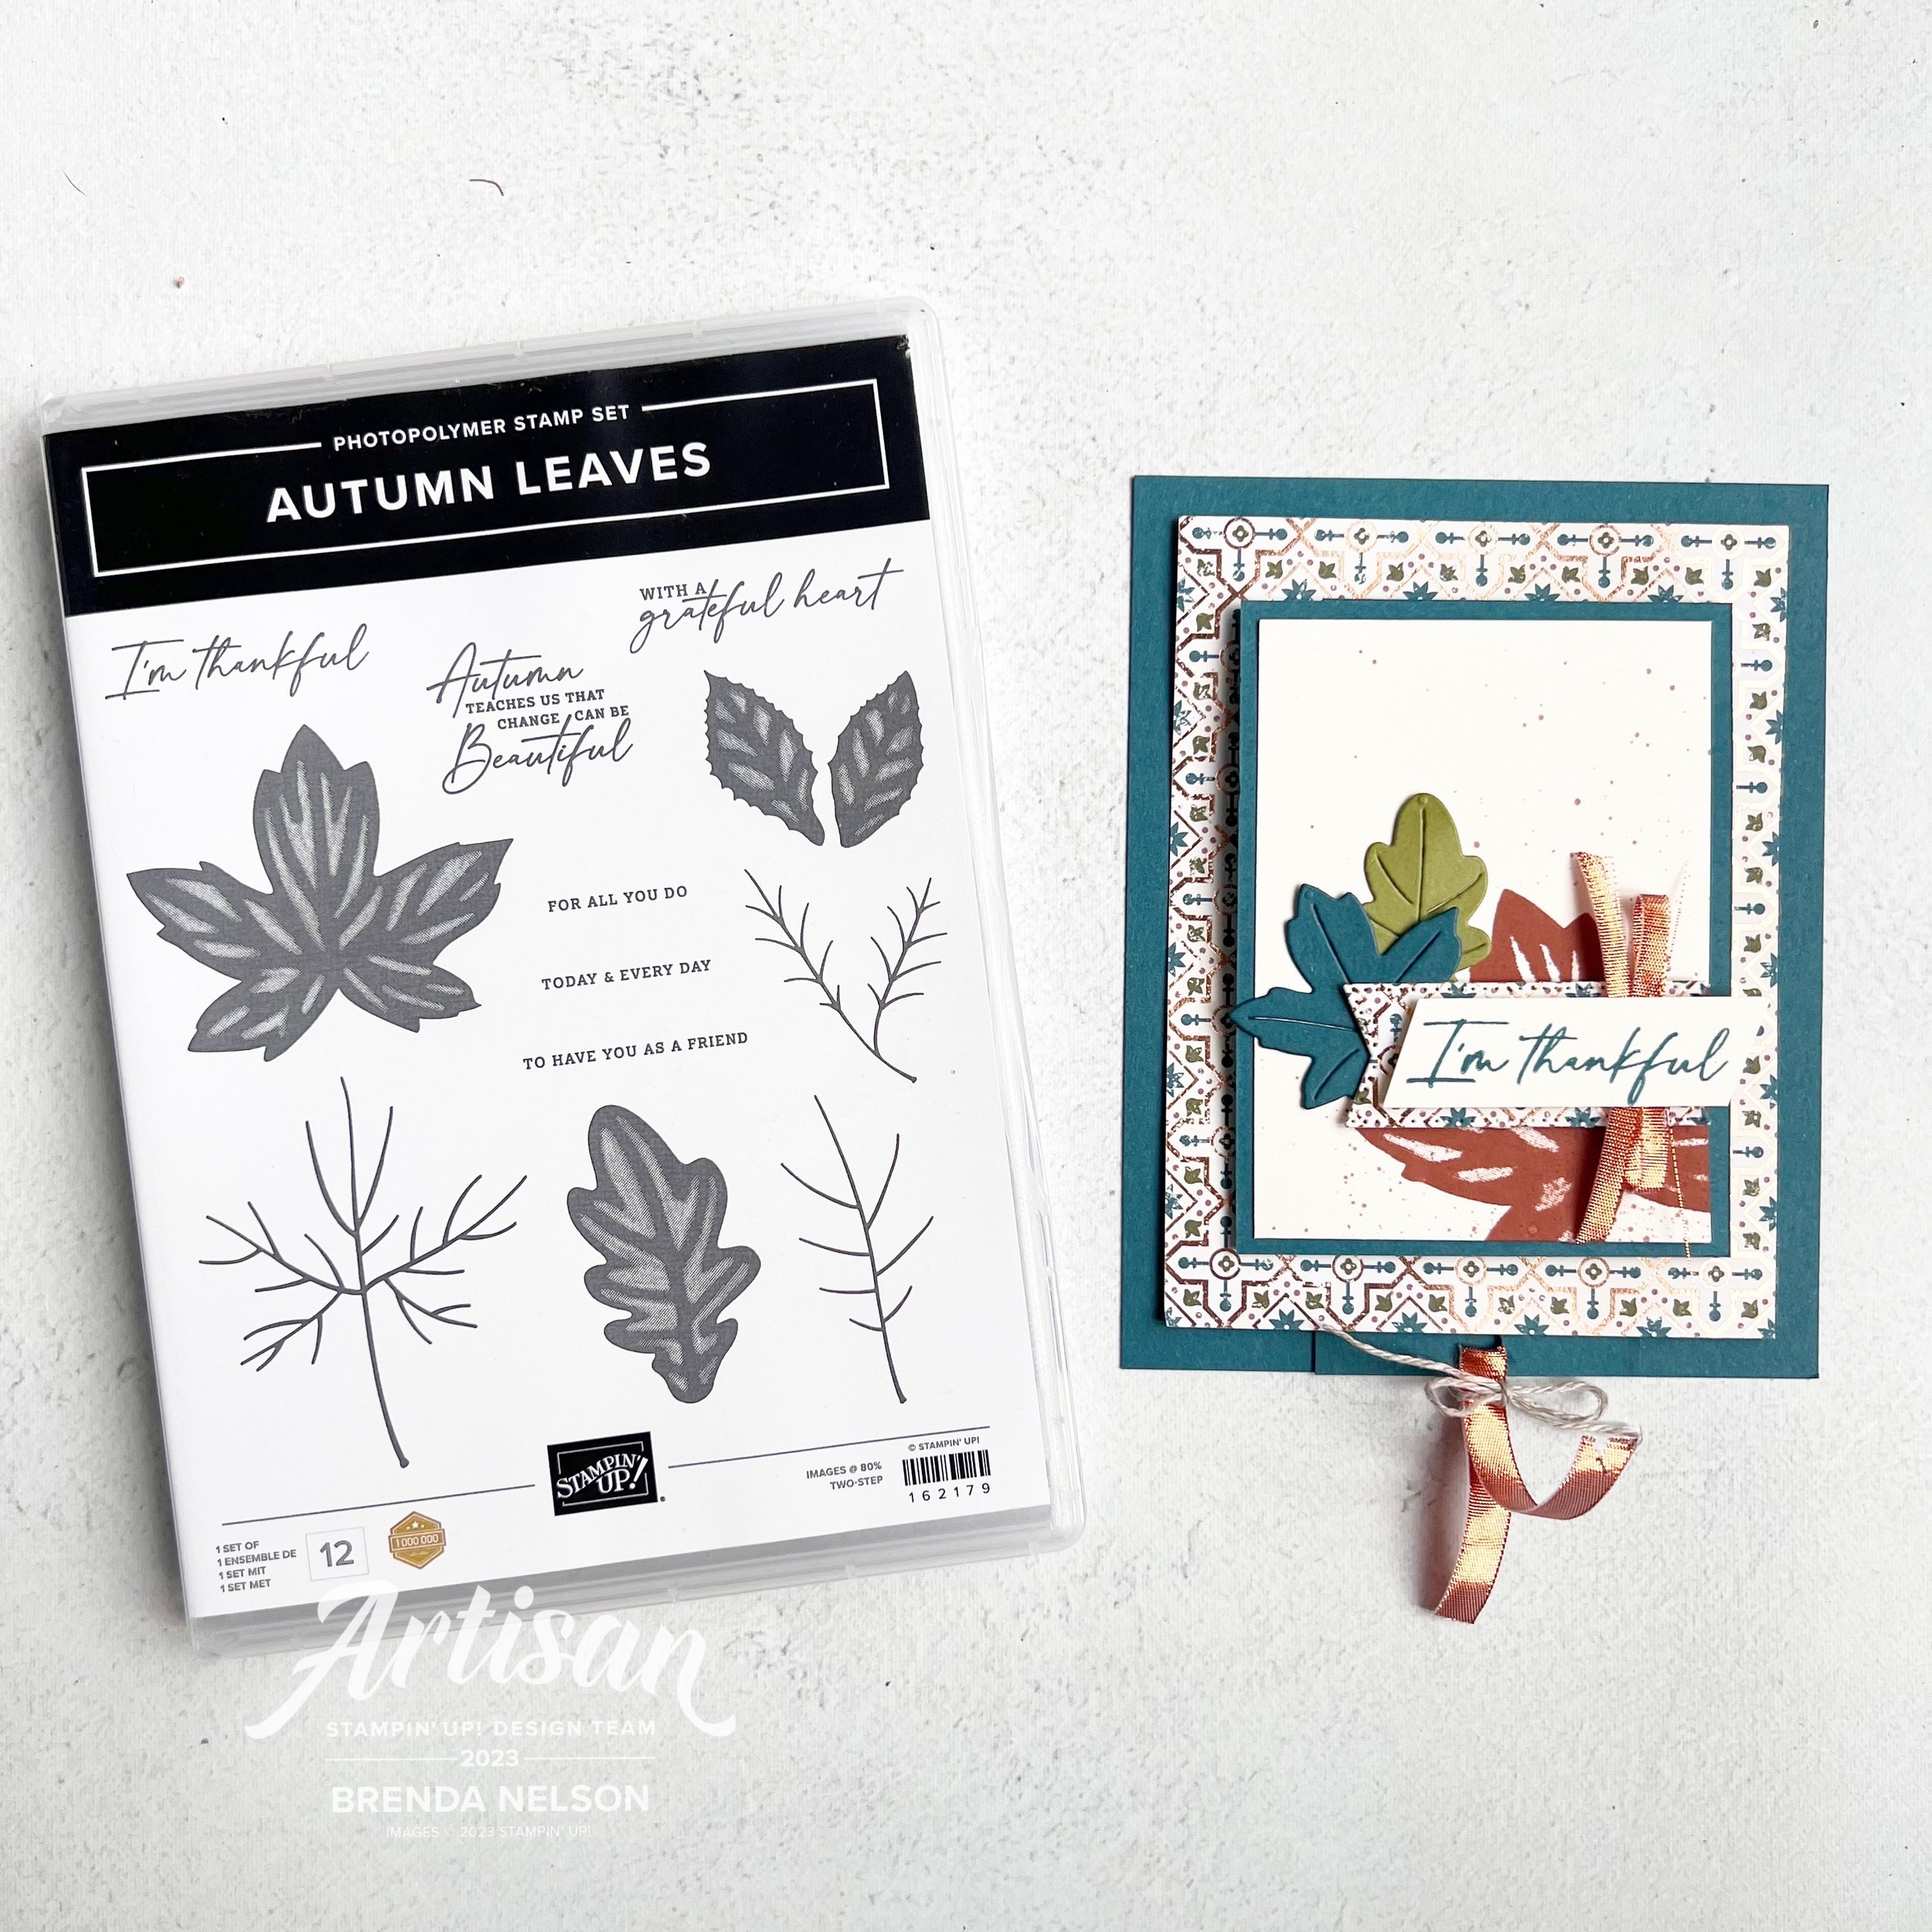
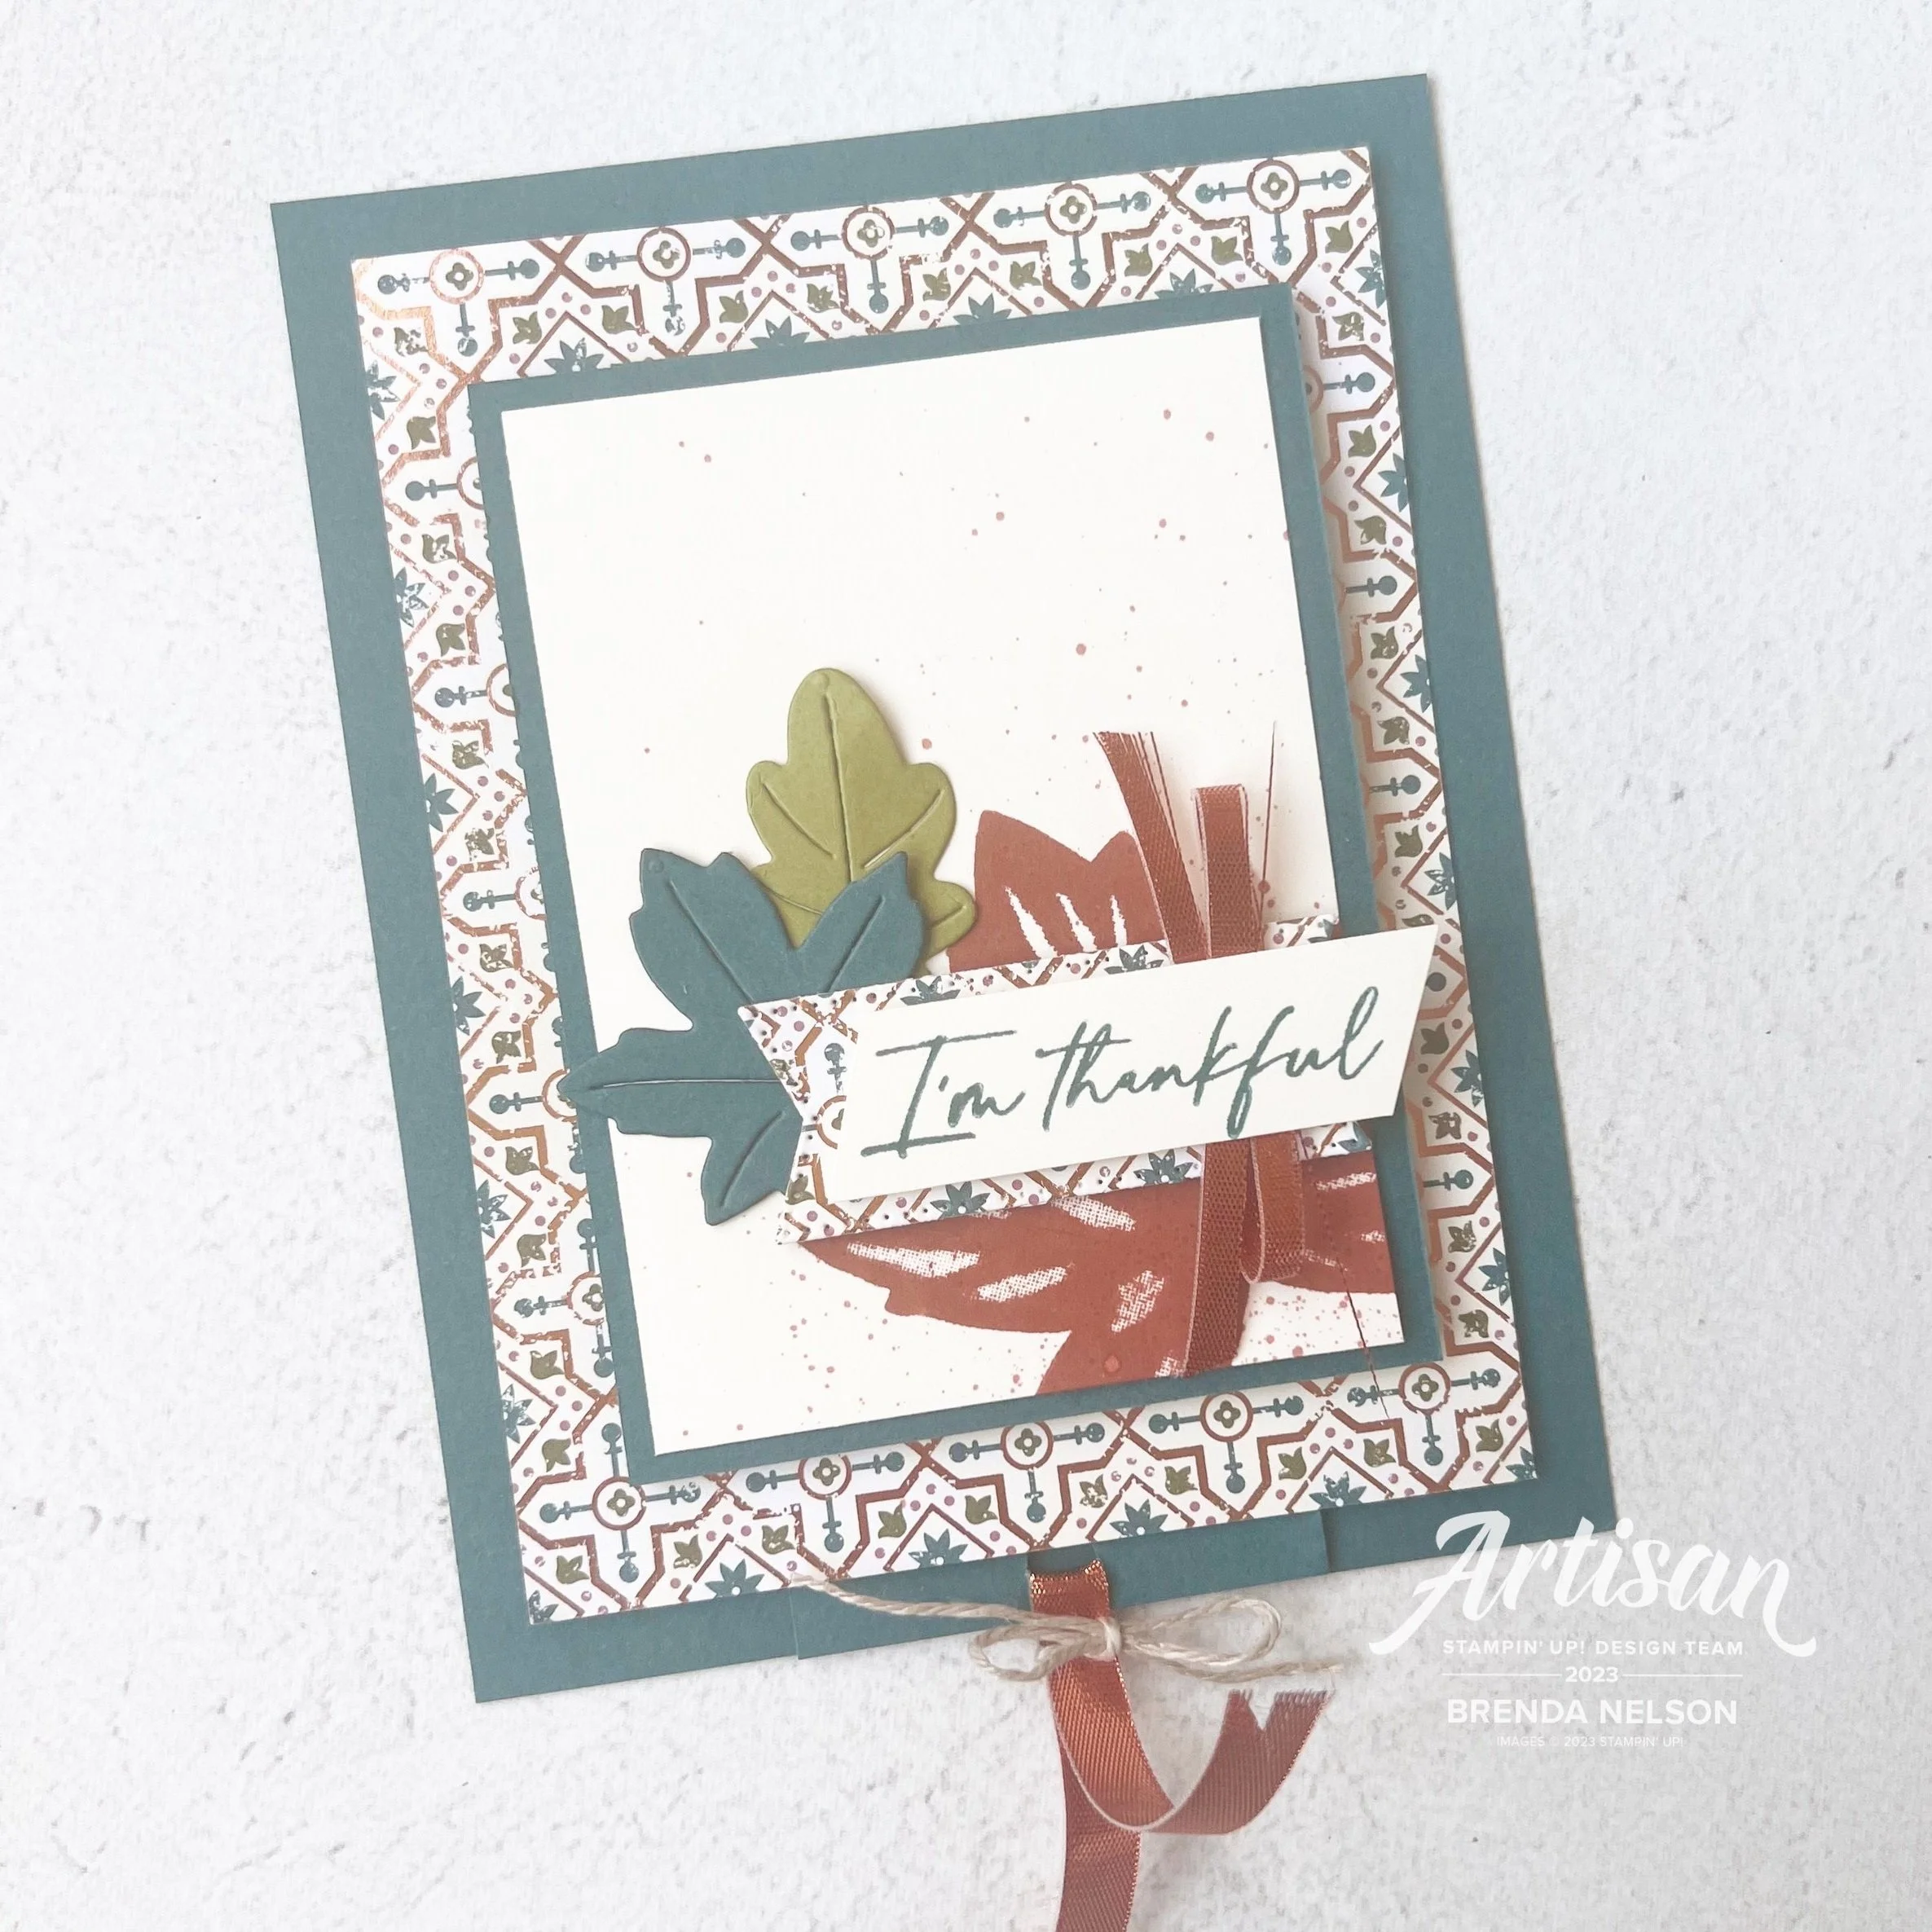
I couldn’t resist making another project with the Autumn Leaves Bundle. Fall is beautiful here in Edmonton, but sometimes it doesn’t last that long and winter comes too quick. So I will take all the opportunity to create fall projects while I can!

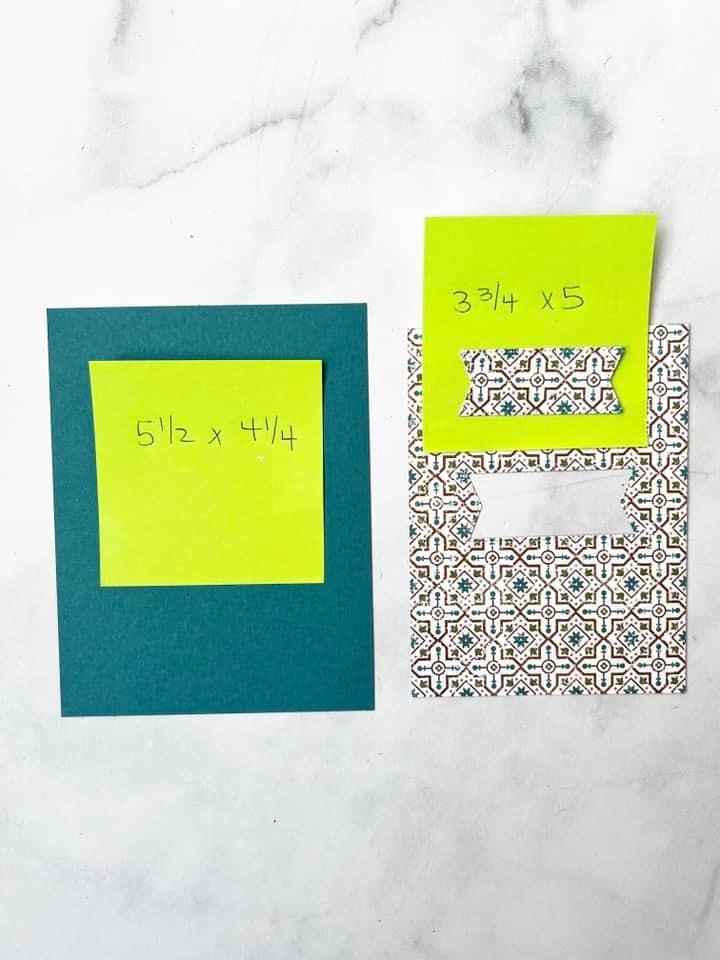
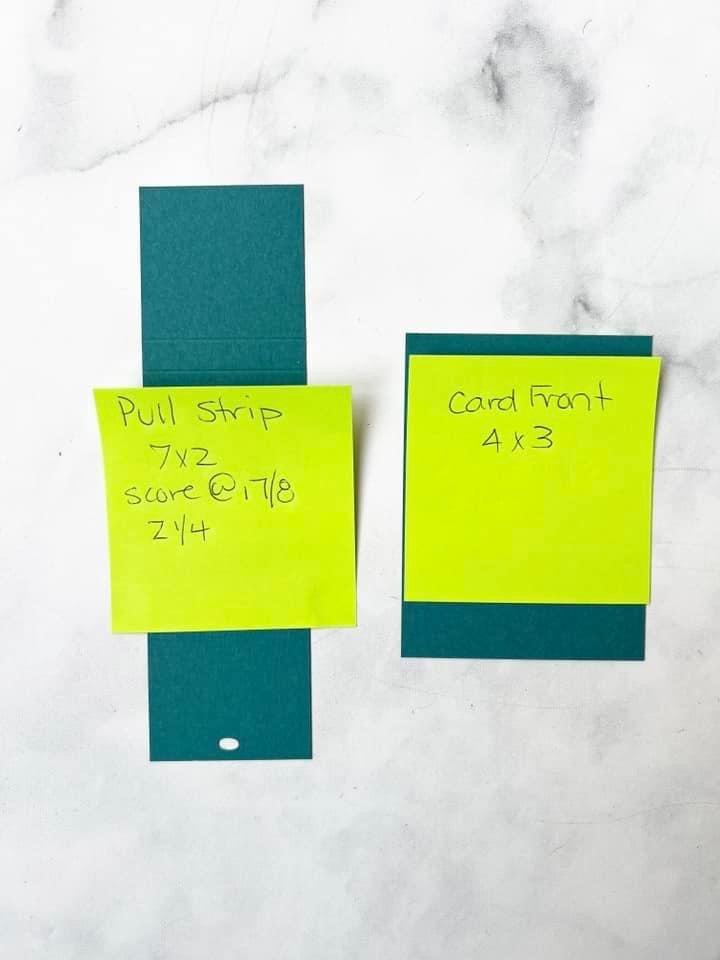
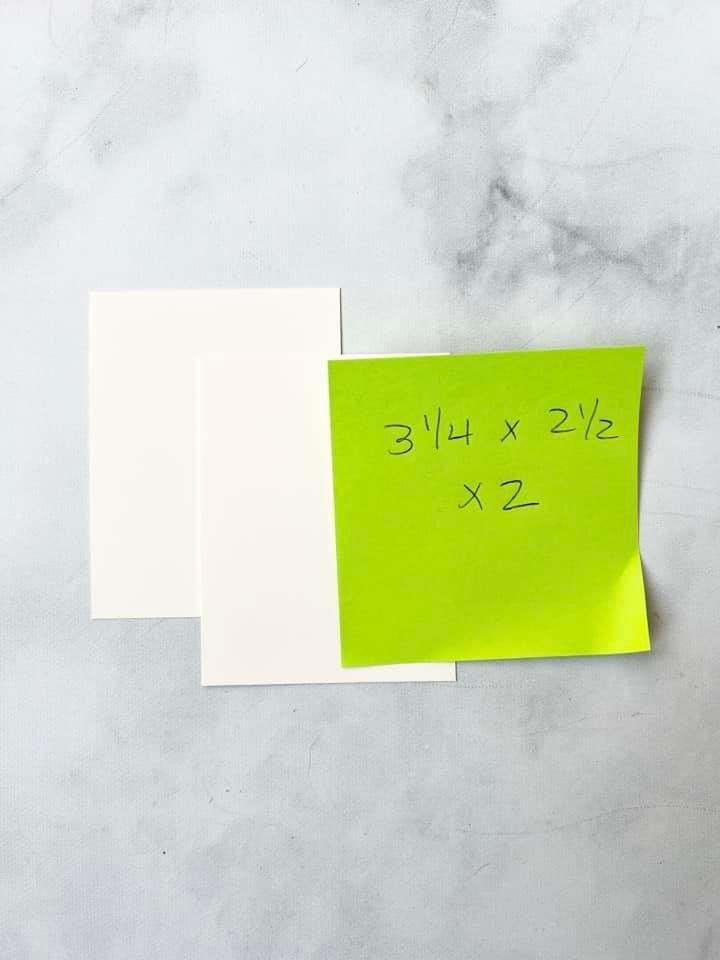
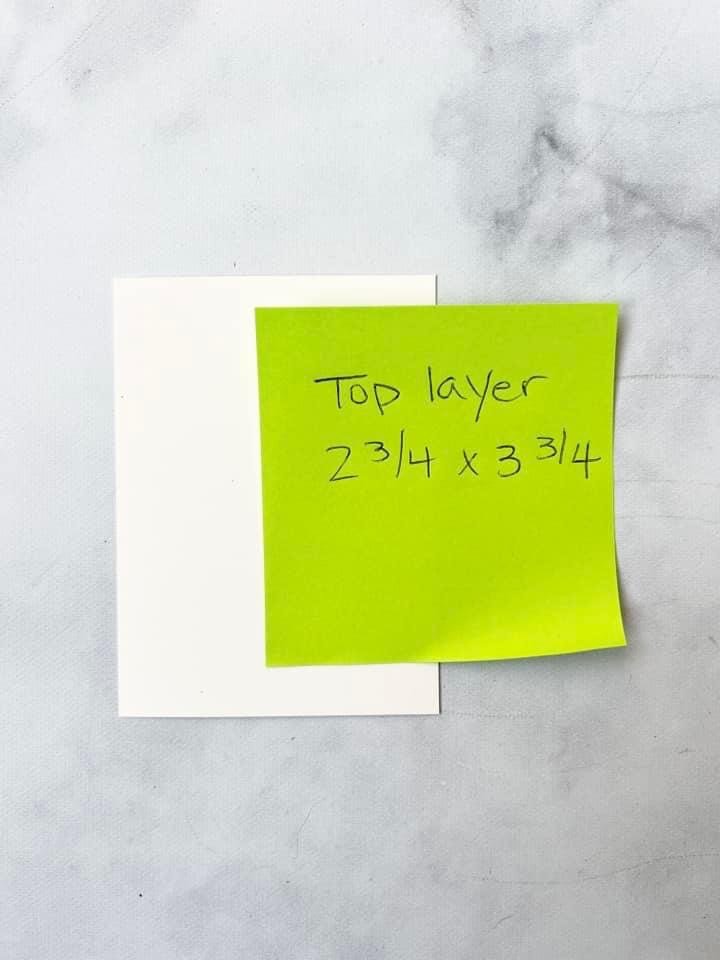
Earlier this month I had a Team meeting and I have been trying to share fun or unique folds with my team. Now I do not have the brain power to create these folds myself which is why I am so grateful for this amazing Stampin’ community we have. I found this ‘Pull Tab’ card on Instagram by @stampinjill (go give her a follow if you aren’t) and I went to her blog for all of the measurements and instructions on how to make this card. Here are the measurements I shared with my team (I have the pictures so why not share!)

I wanted to use the All About Autumn suite to inspire my team so I stayed really true to the colors found in the All About Autumn 6x6 DSP.

The base of my card is Pretty Peacock and I used Very Vanilla for all of my stamping.

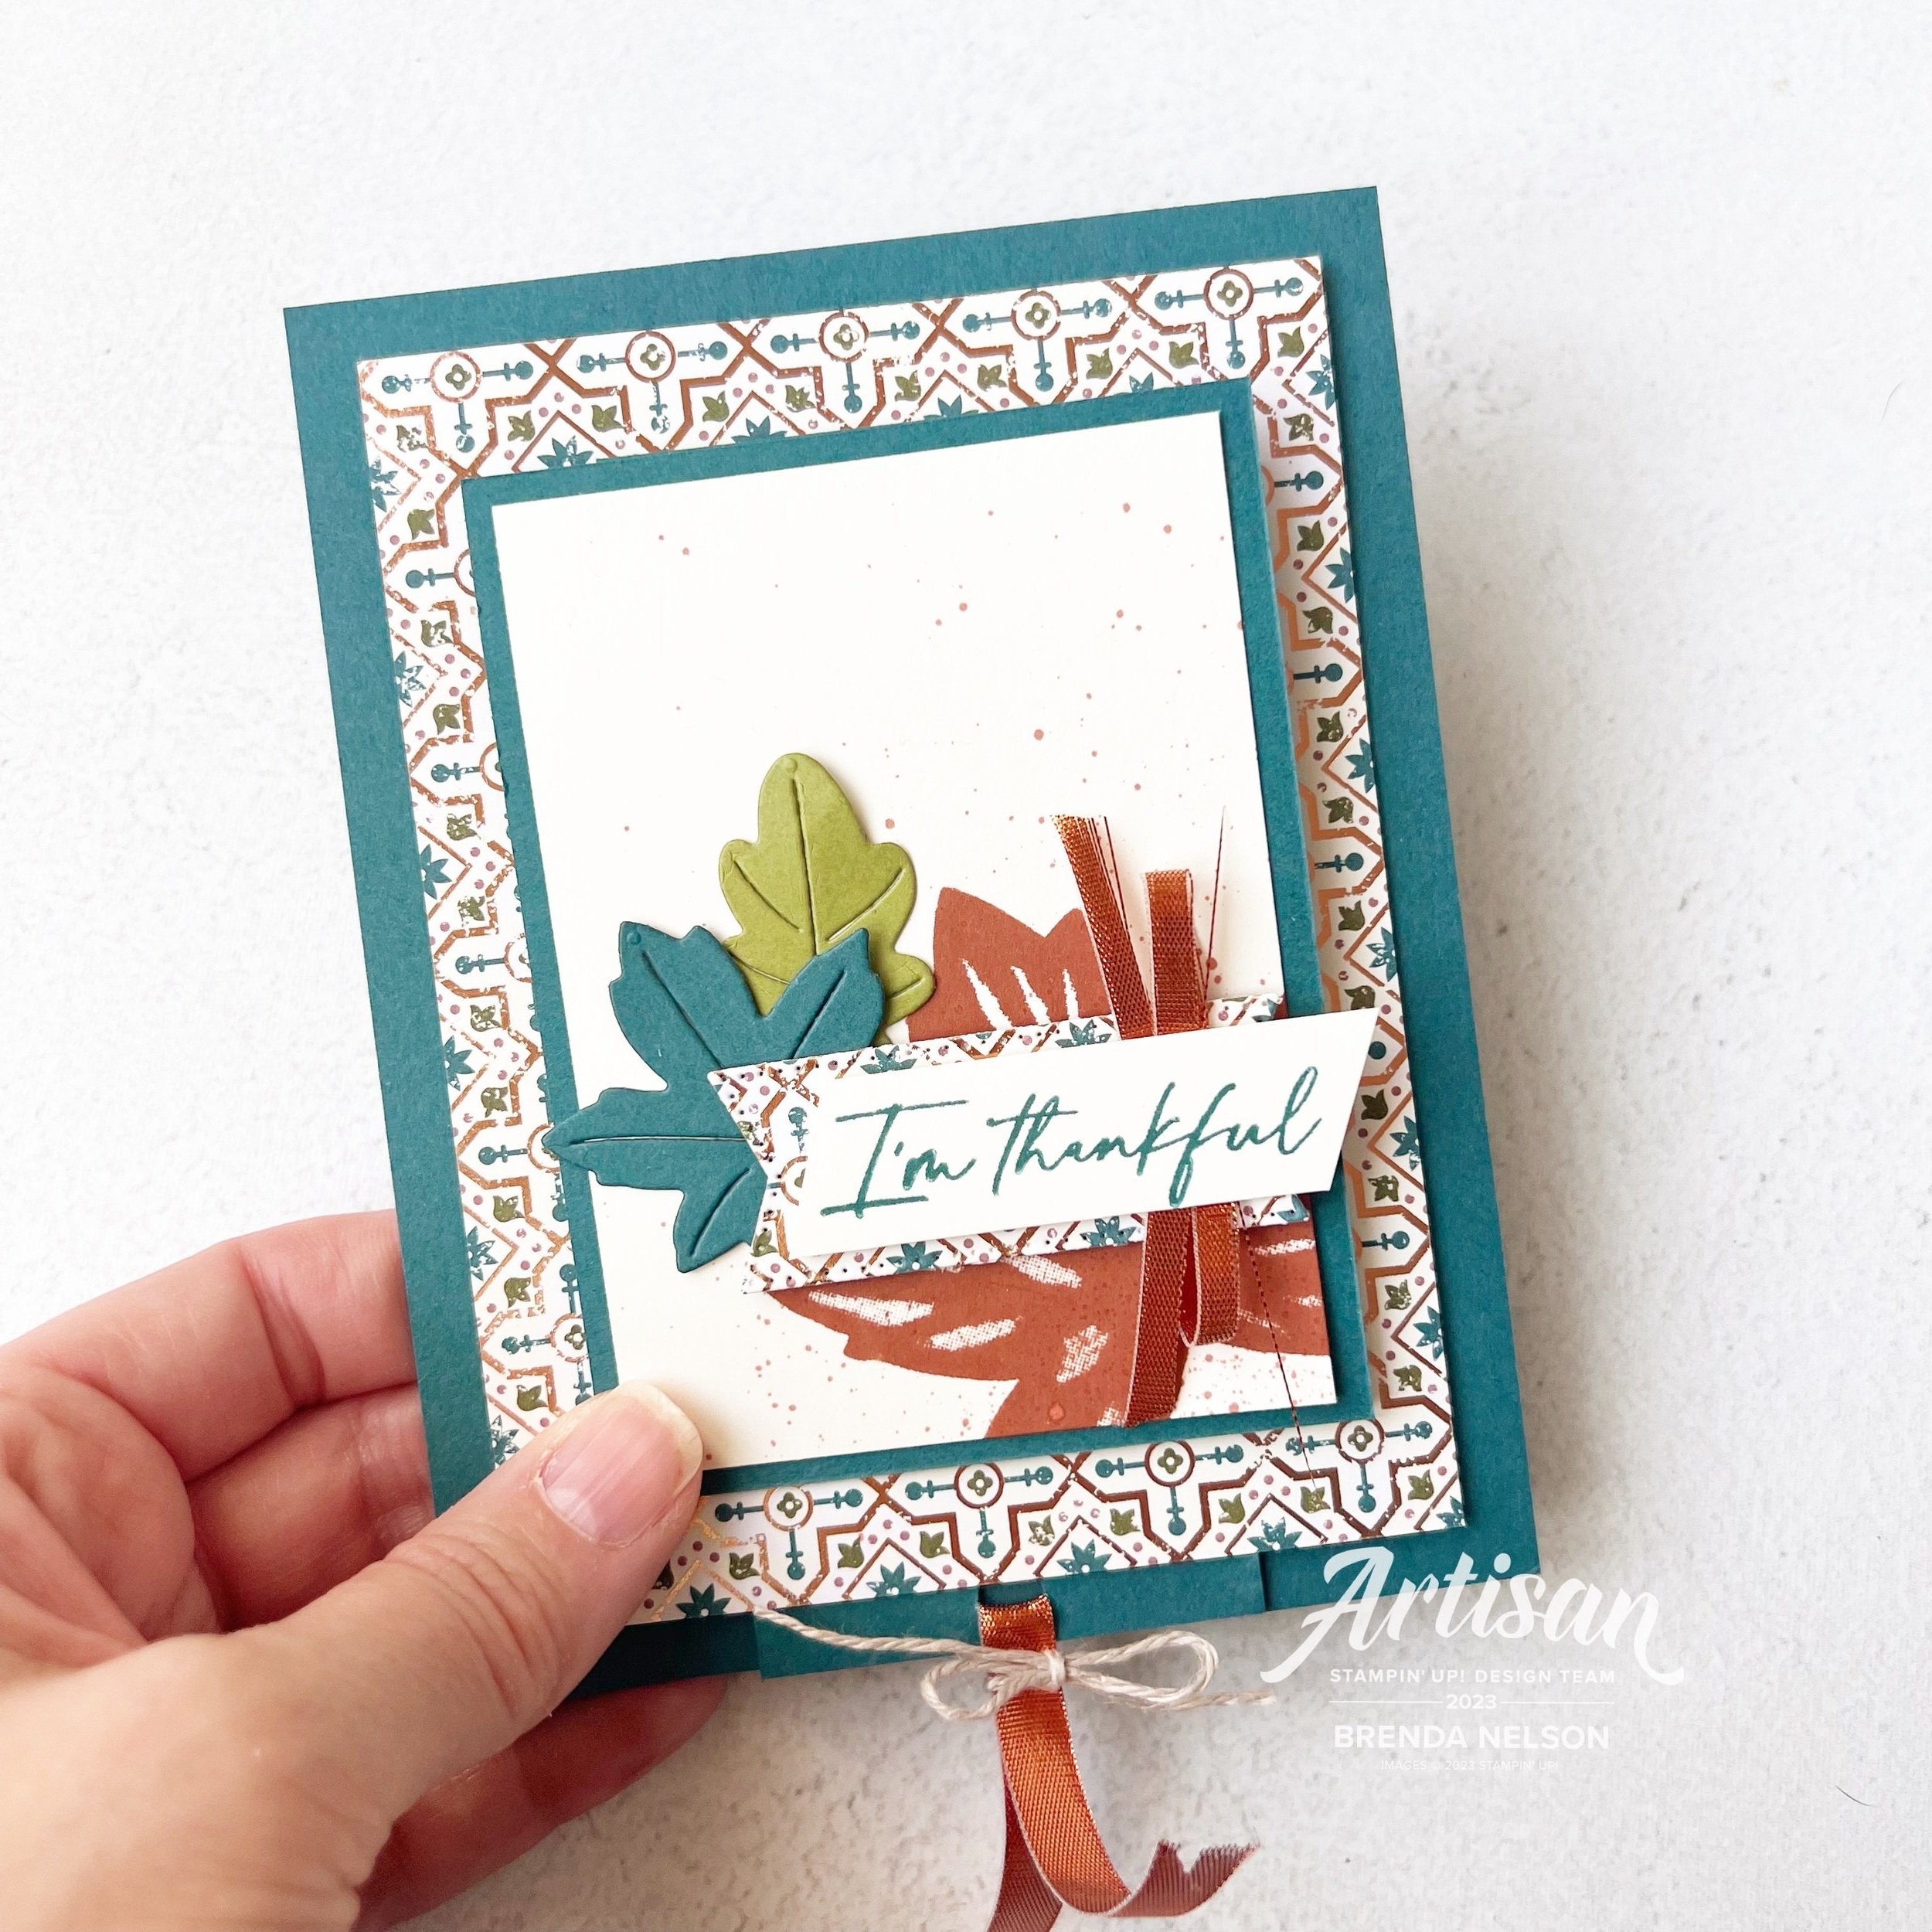
I stamped the large maple leaf in Copper Clay, one of our fabulous new In Colors and did a little spray of ink with the dark Stampin’ Blend marker. Two die cut leaves in Old Olive and Pretty Peacock finished off the front with the sentiment and some of the new Copper ribbon.

NOTE: I repurposed the tag die that was used to cut the pull tab section from the DSP. I don’t like to waste so it was perfect to add under the sentiment

When you pull the tab at the bottom the front panel flips open to this perspective.

I did a little more stamping on the top Very Vanilla piece, this time using the large leaves from the set in Old Olive ink and the smaller leaves in the Copper Clay ink. I did a little more ink spray and added another leaf die cut.

On the bottom panel, I let the DSP shine (along with the base piece of course) by choosing a pattern and simply cutting it with the maple leaf die and adding the sentiment on top w a little Linen Thread.

I hope you head over to Jill’s blog— https://stampingjill.com/ to see her awesome instructions on how to make this Pull Tab card!

Hope to see you back tomorrow! Please feel free to leave me comment too!
Creative Convention--Day 4!

Hello friends! Today I decided to share something that is NOT a card with you because I am really excited about these new Nested Treat Boxes that are coming out in the Holiday Catalogue! Welcome back for my 4th share of my Creative Convention—my week long blogging extravaganza while I am away at Backstage!

These Nested Boxes felt like a natural pairing with the Sending Cheer stamp set. This set is a part of a bundle and was one of my choices when planning my pre-order. While I do love traditional Christmas, I also love fun whimsical Christmas too and this bundle definitely fits the bill!

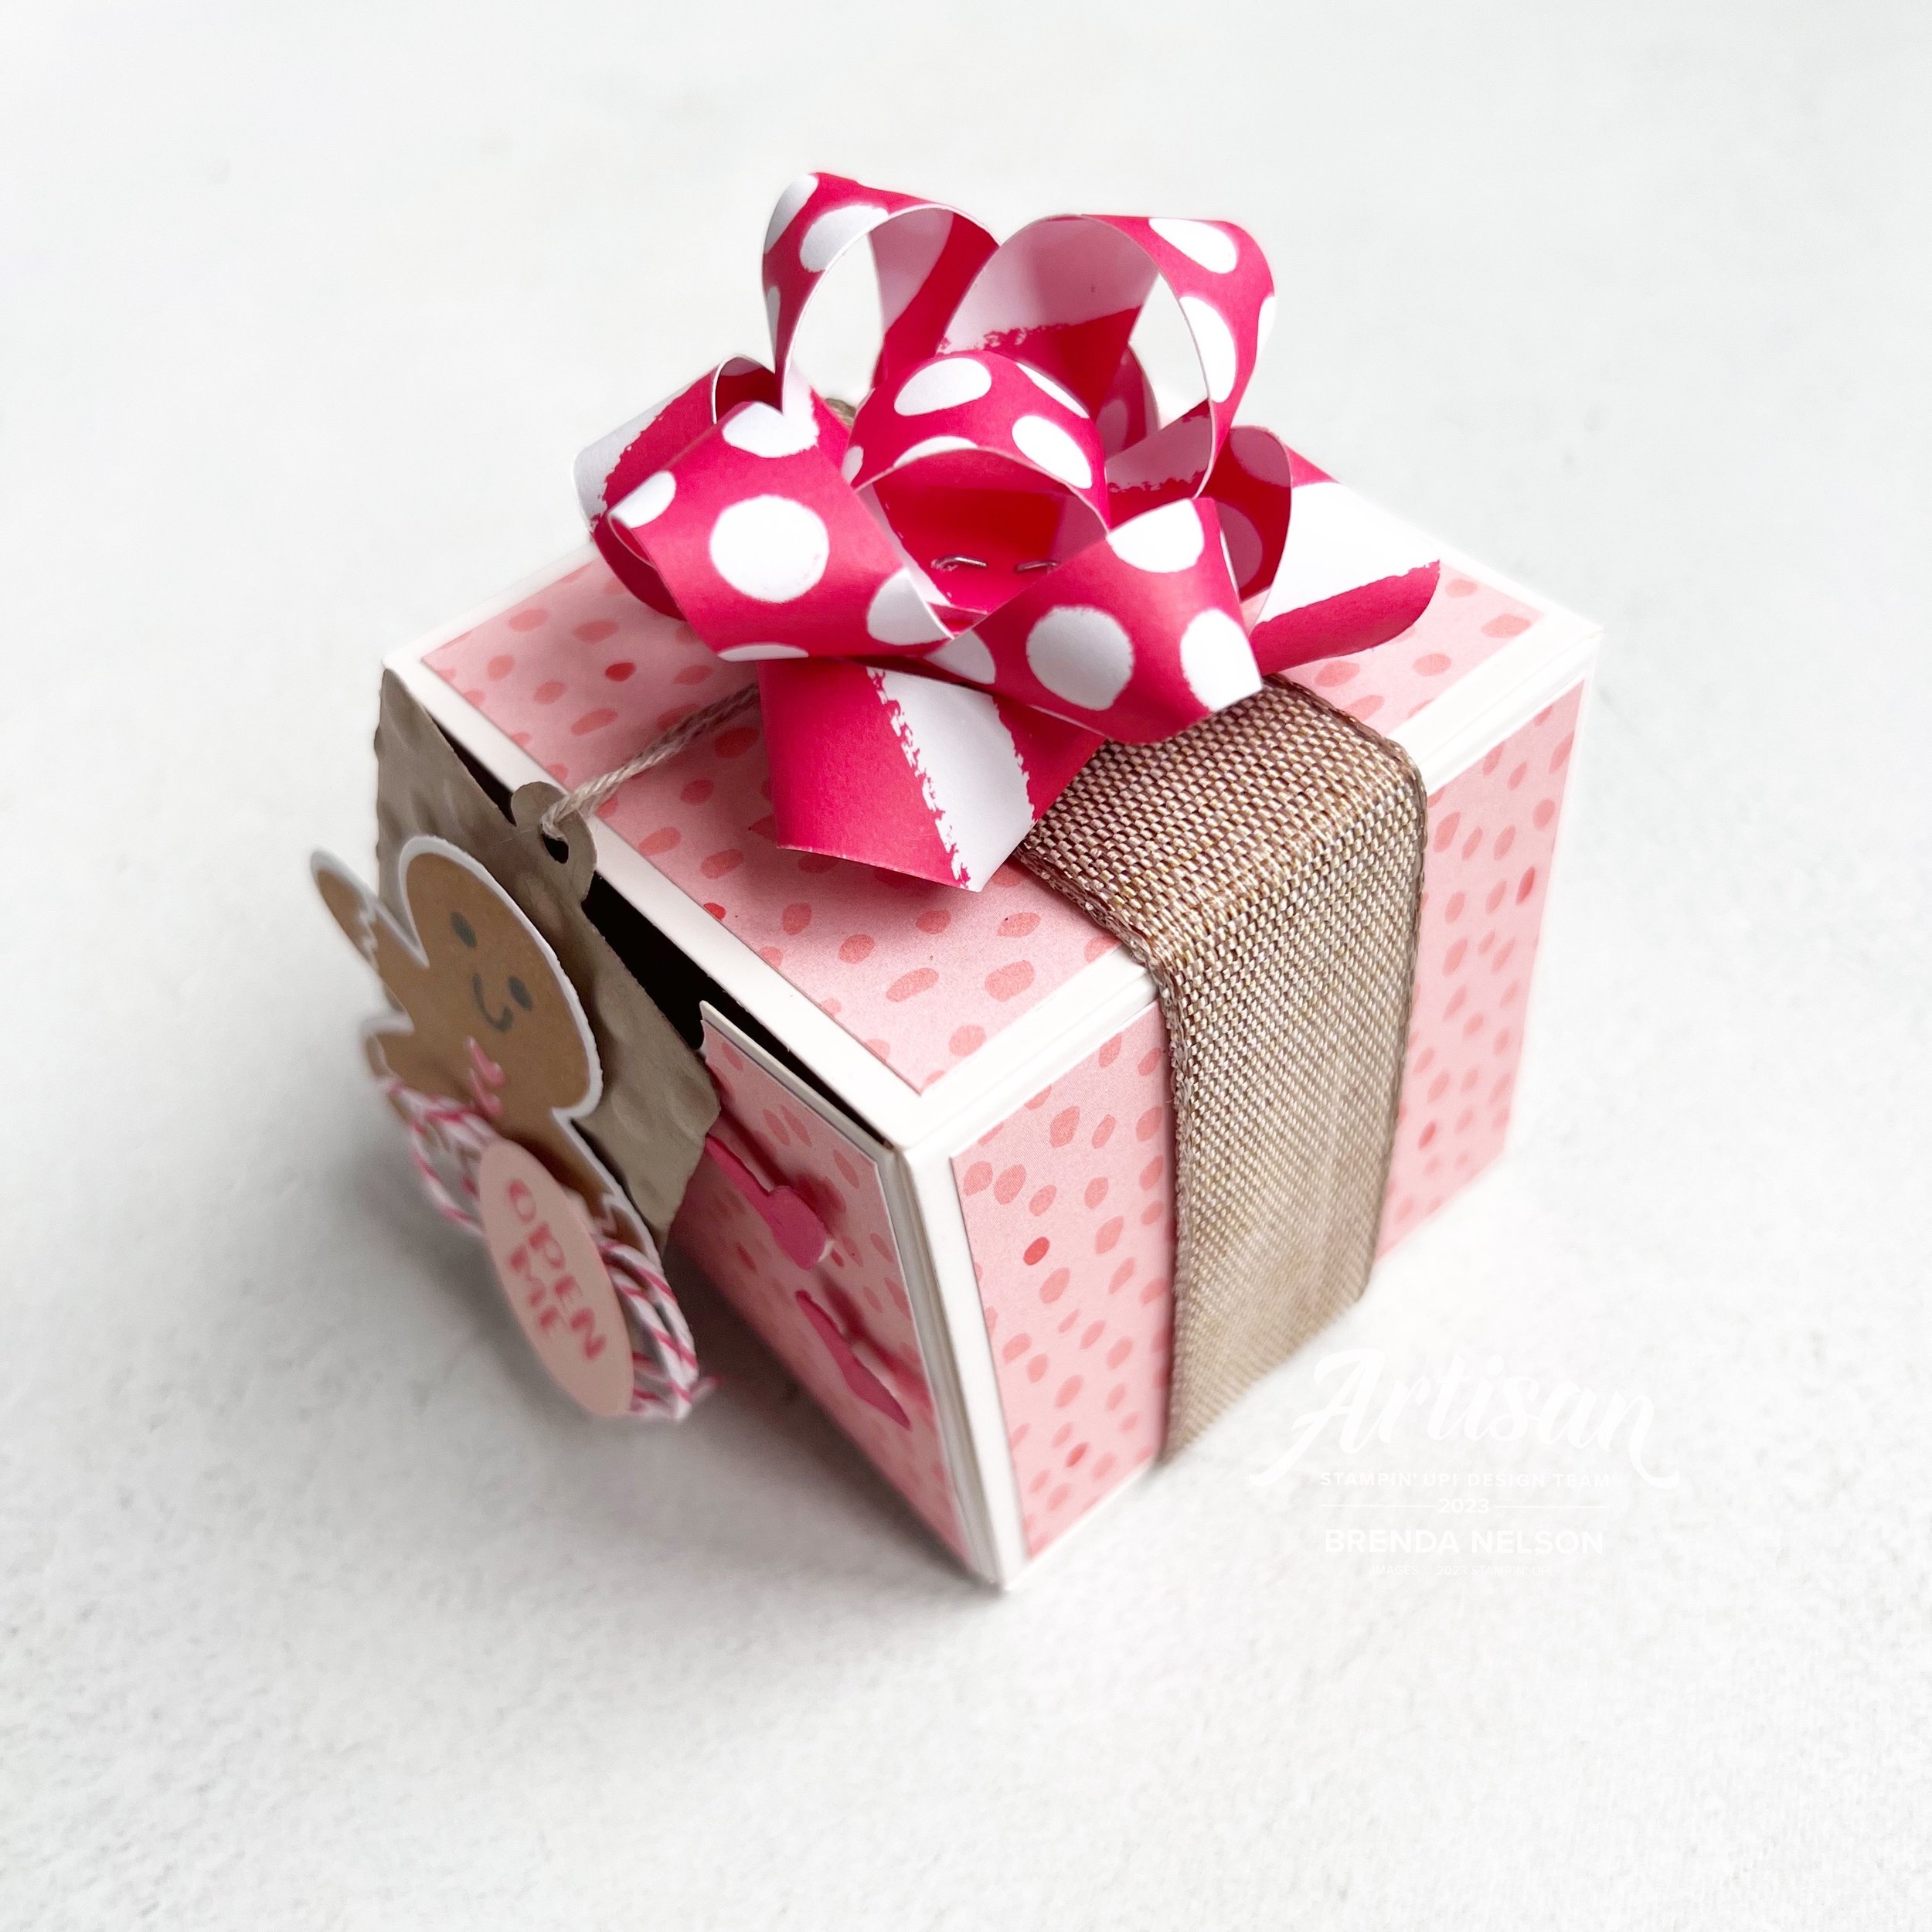
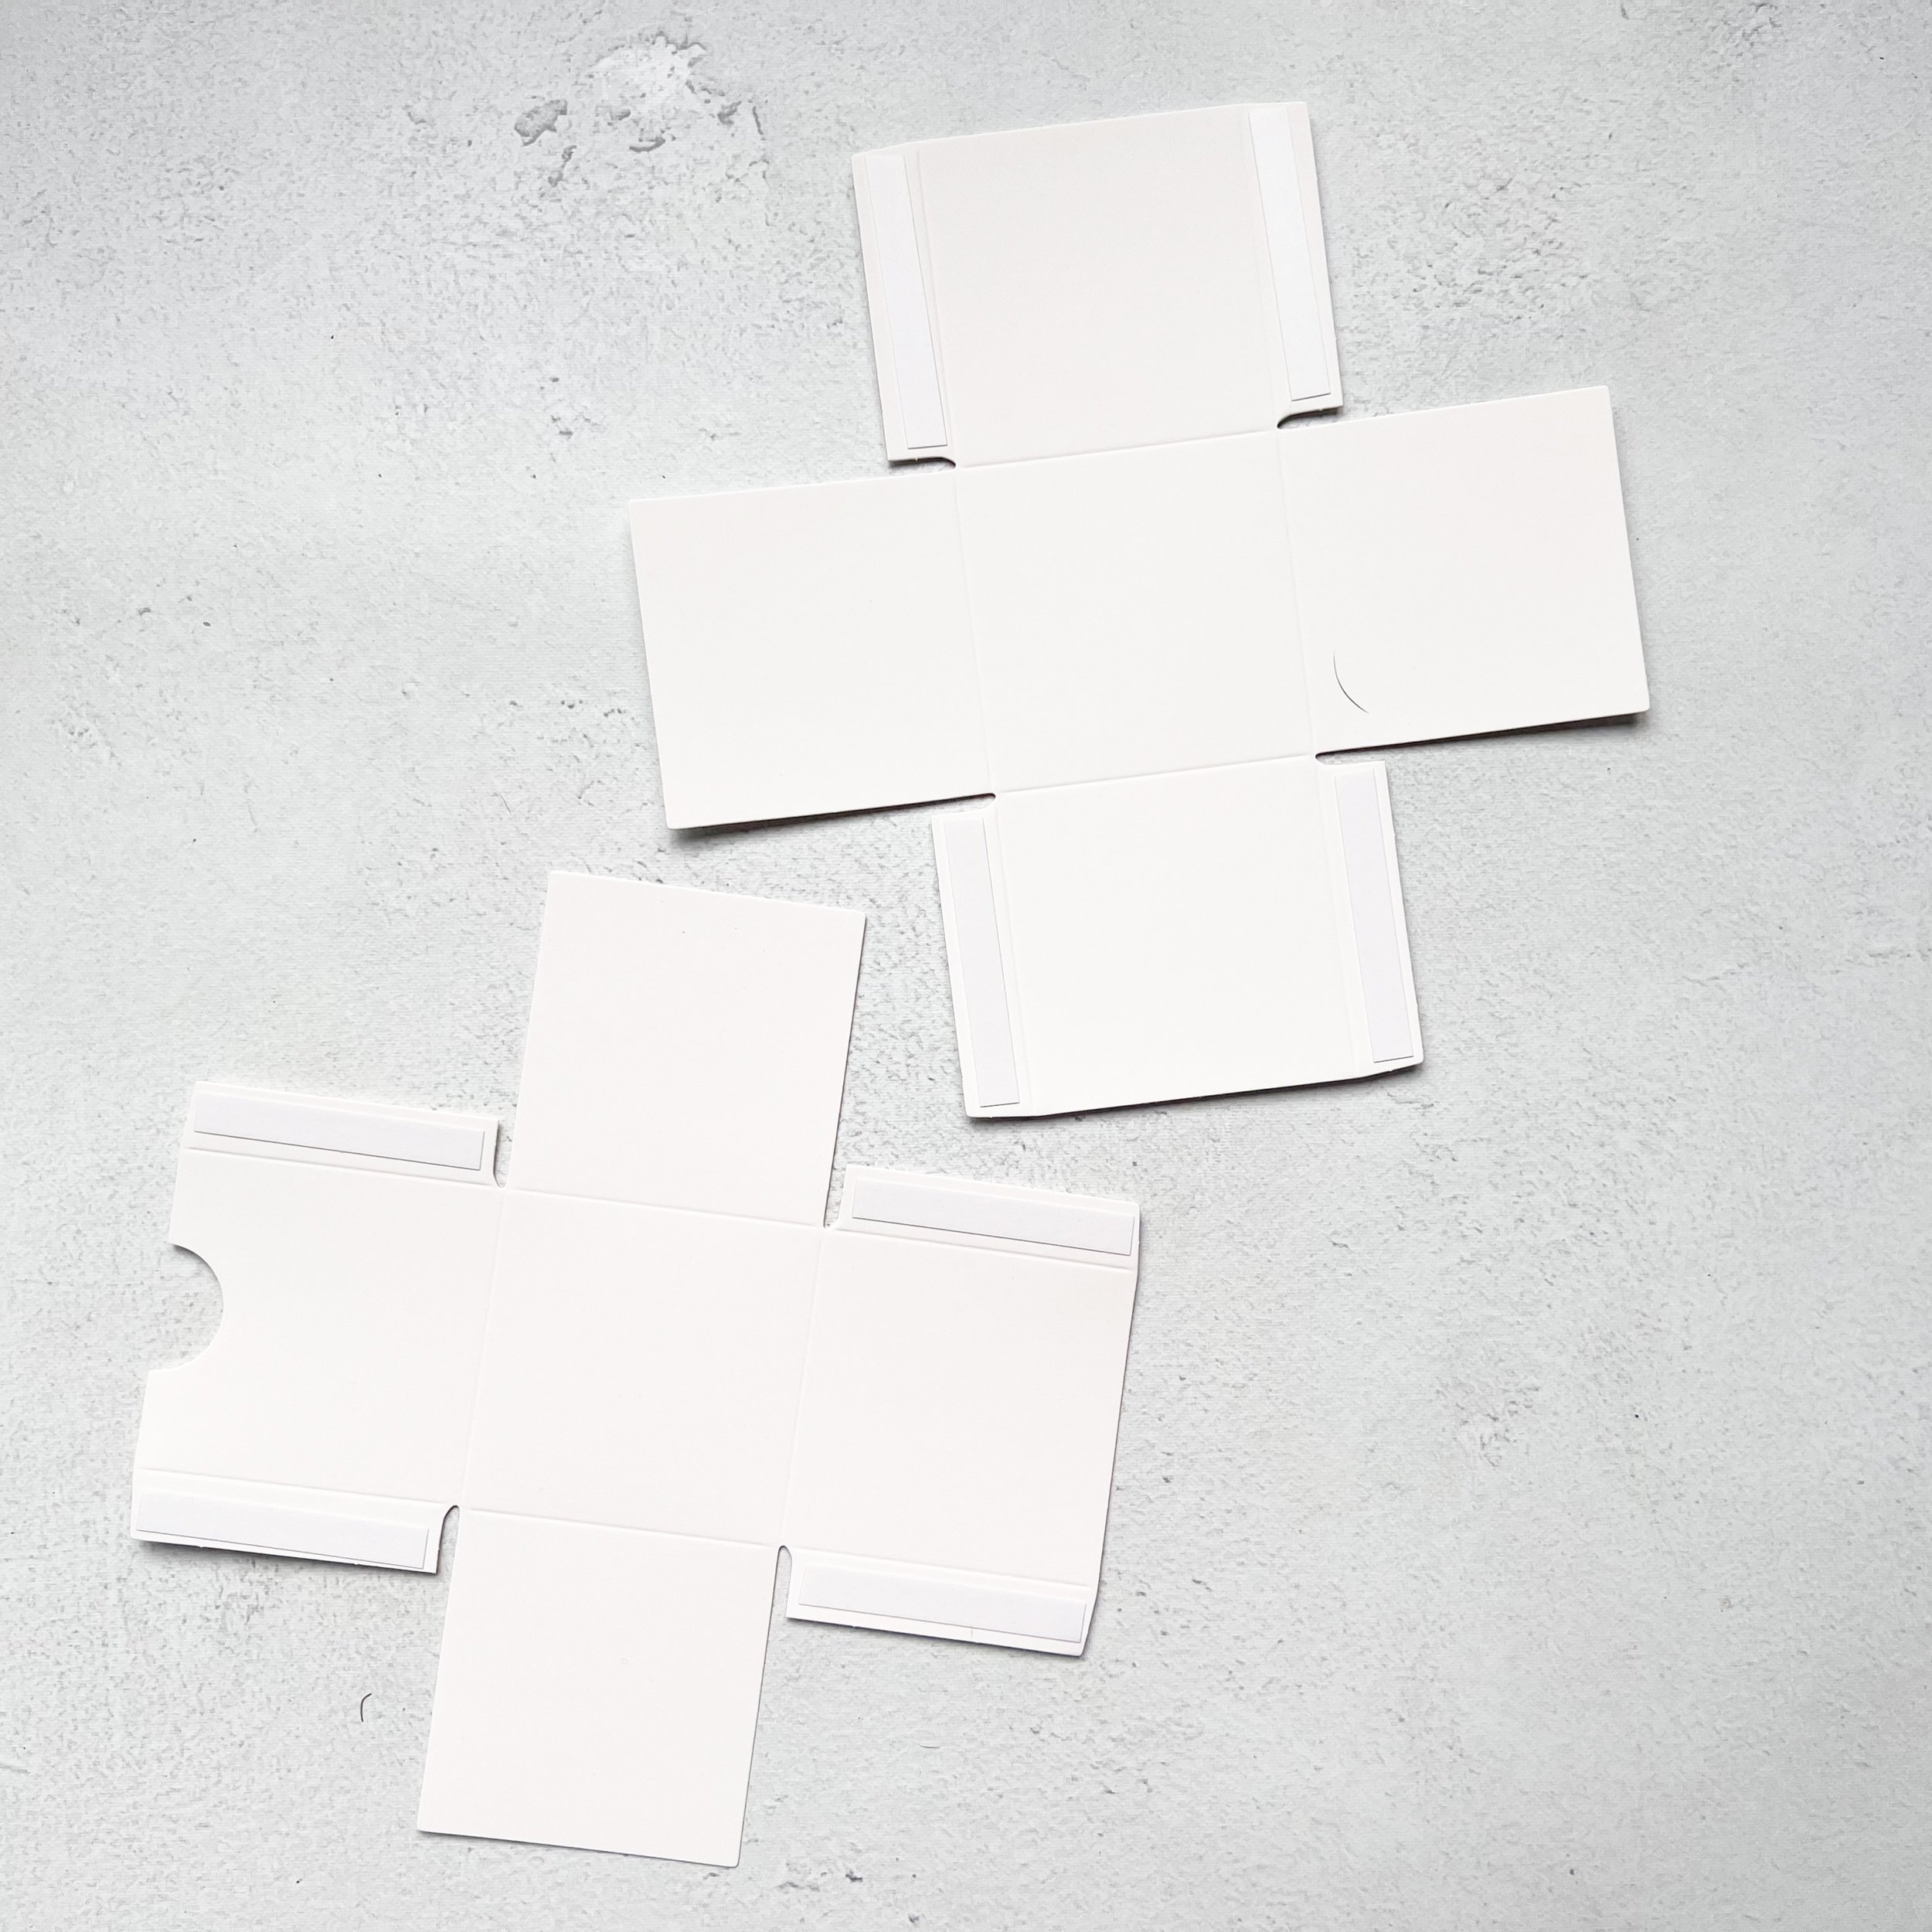
These Nested Treat Boxes are 2 1/2 x 2 1/2 wide so they can fit a variety of awesome surprises inside!

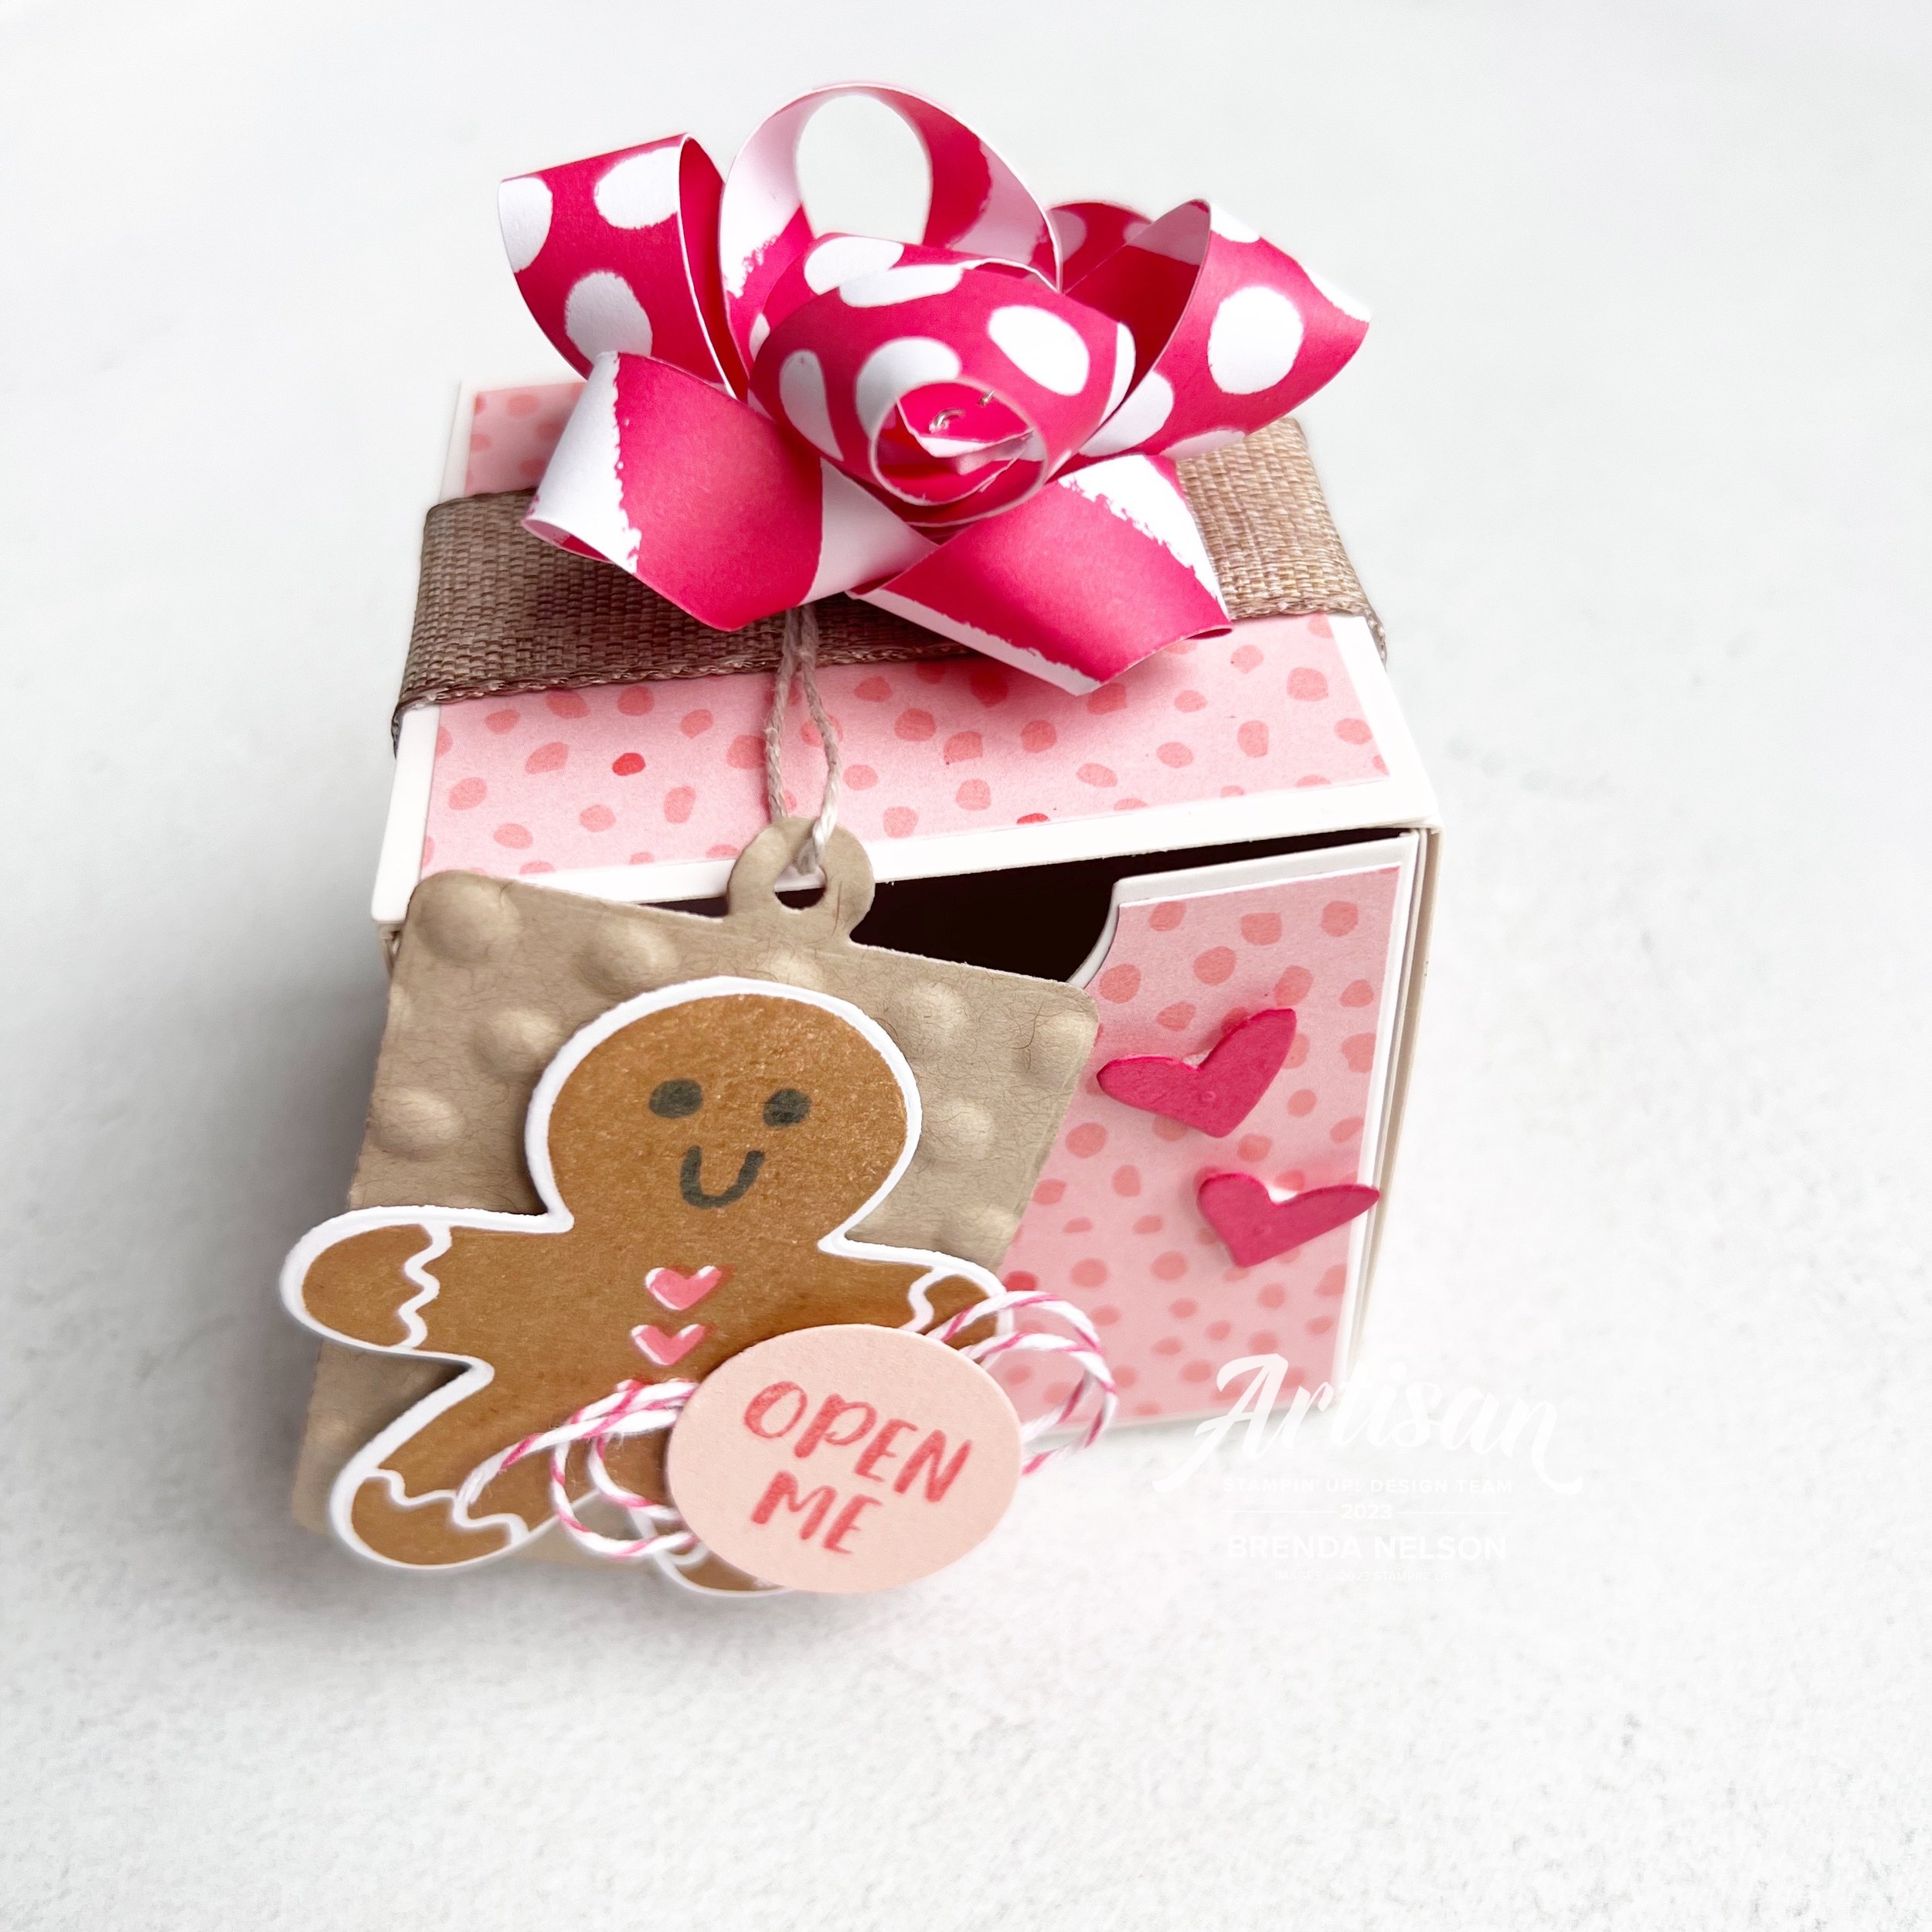
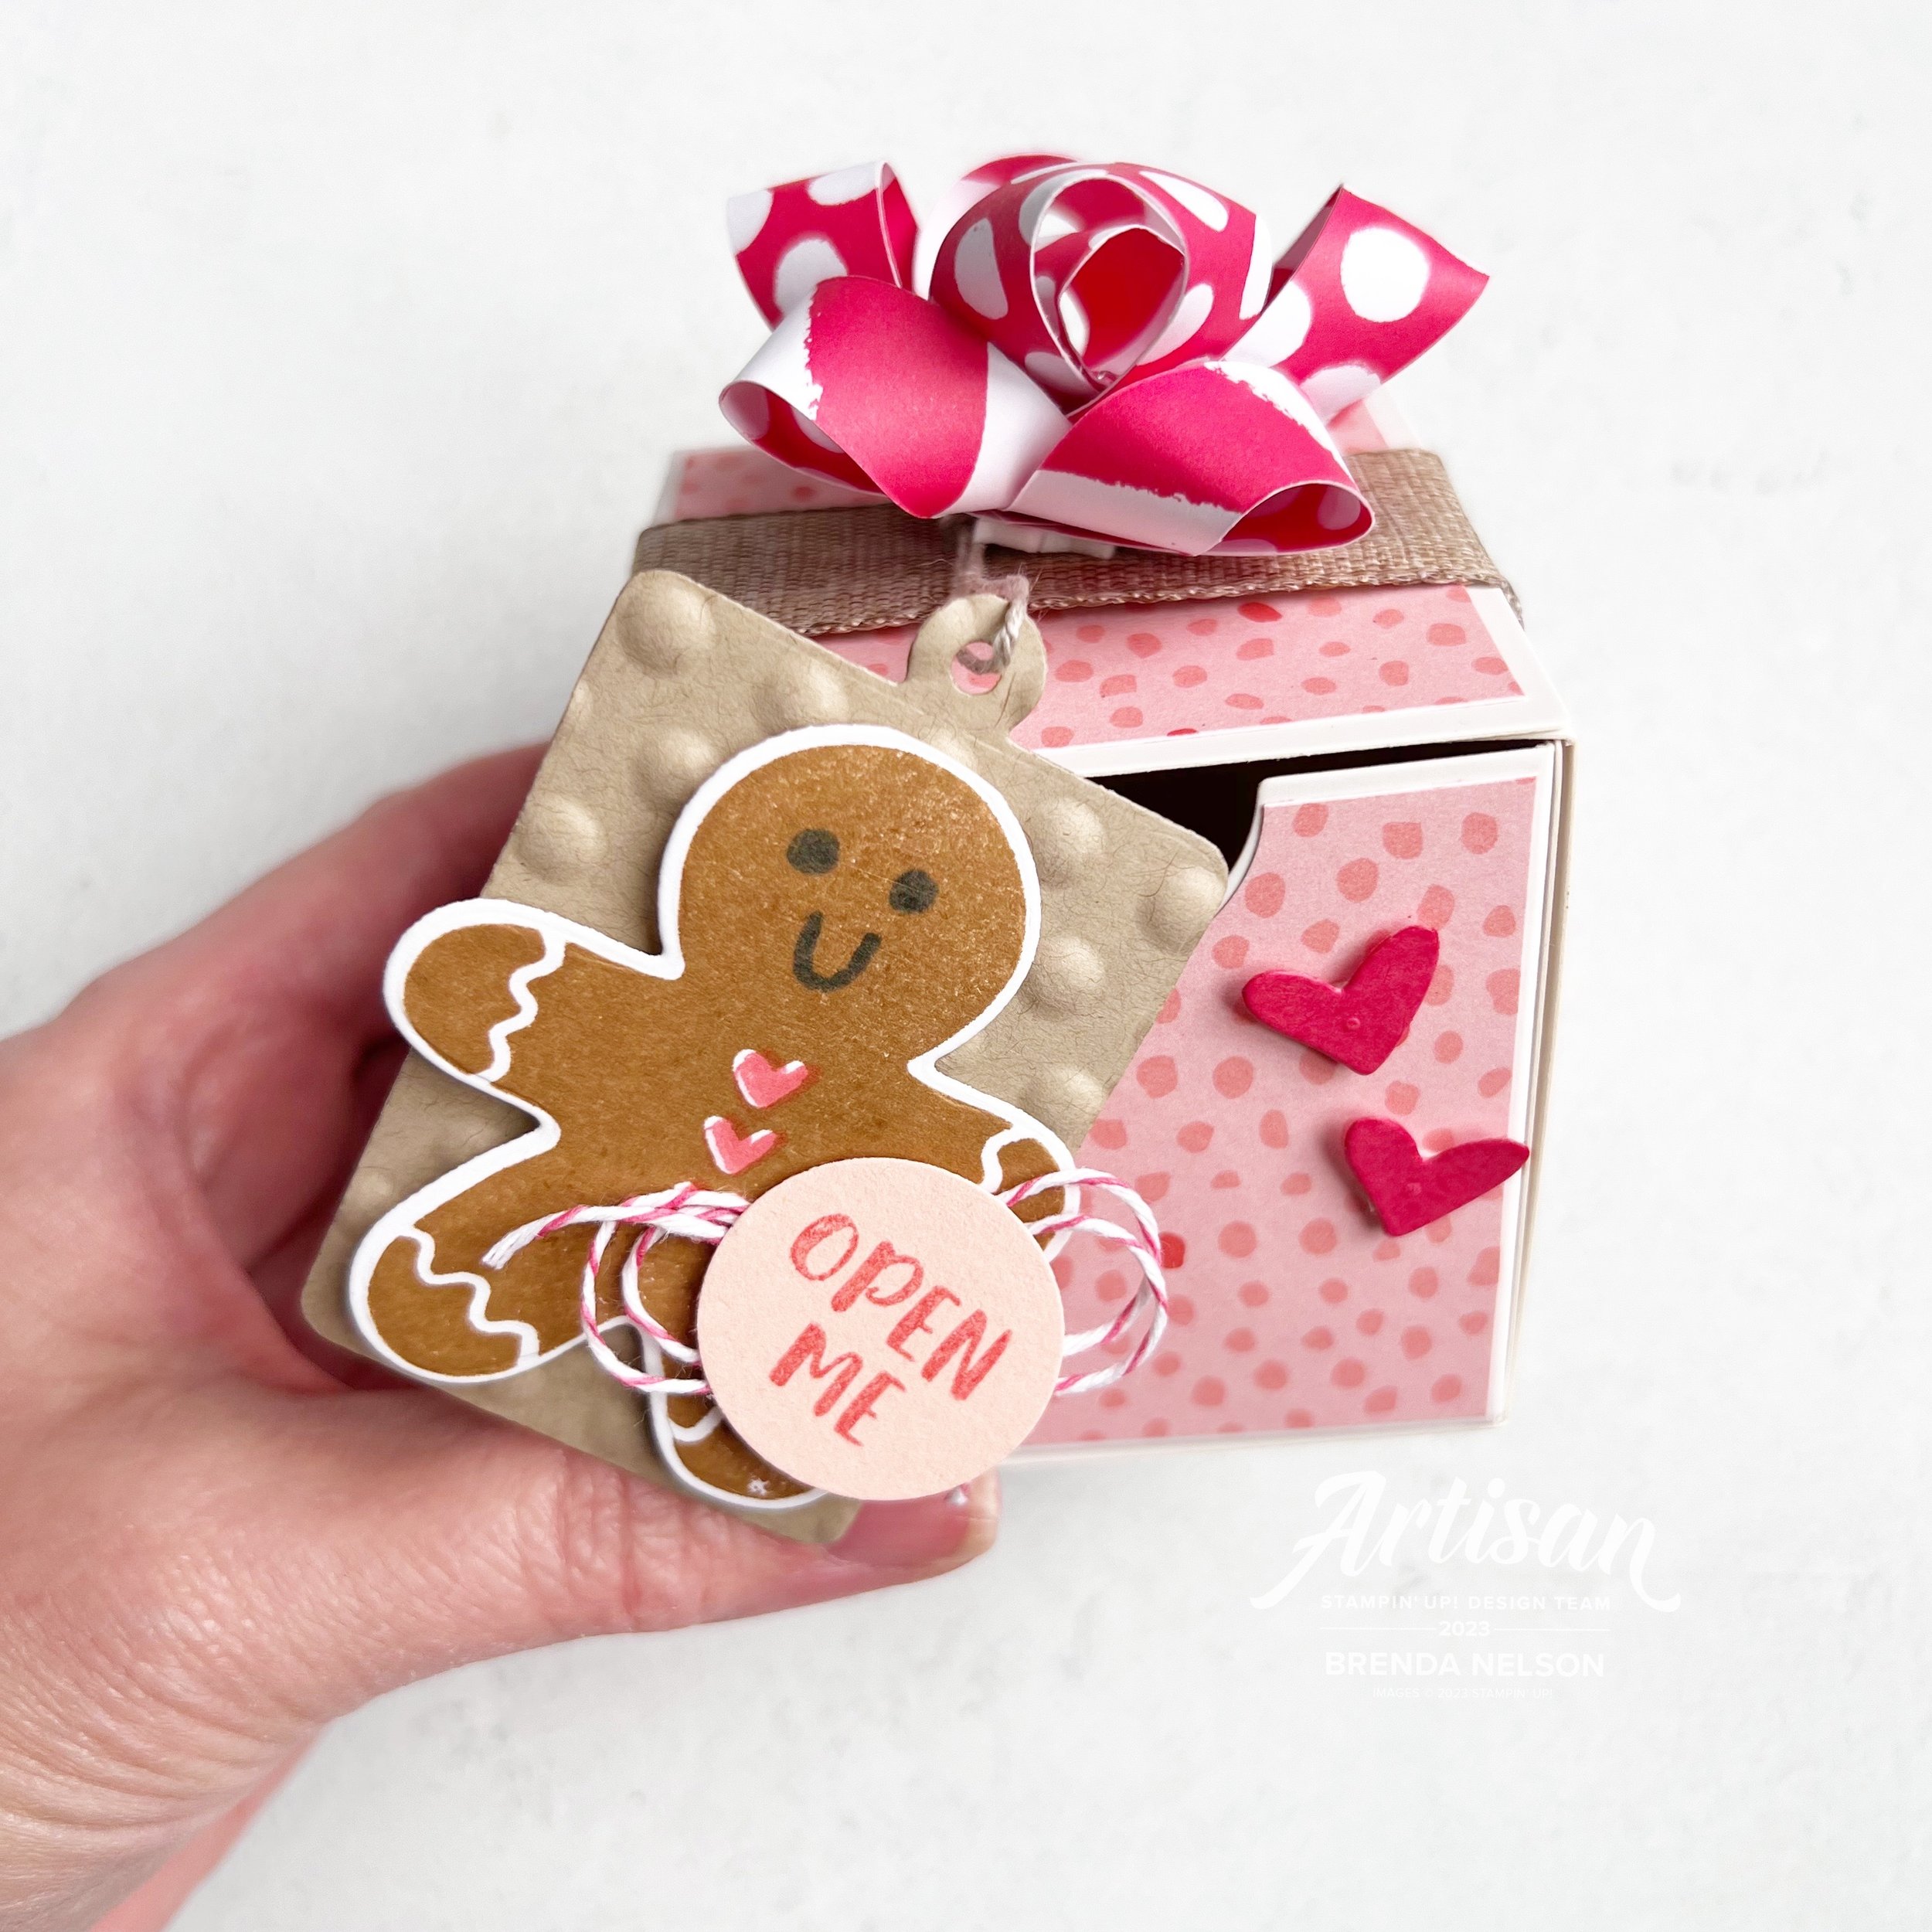
Instead of using this bundle to make a card, I thought it would be fun to use it to decorate the Nested Treat Boxes. I used squares of DSP from the Garden Walk 6x6 paper to cover the sides of the box and wrapped a length of the Natural Ribbon around the box.

The boxes come in two pieces—the outside and the inside and the inside box has a little notch out so you can get your finger in there to pull it free. You can take a 1 inch circle punch or die and snip out a section of the DSP so that it matches the box!

I love that this box glues itself together! It is a definite perk and makes assembly so easy!


The box was screaming for a mini bow so I made one using strips of DSP from the In Color 2022/24 collection in Sweet Sorbet. Sweet Sorbet is one of my favorite holiday reds! It plays so well with pink so it was a perfect fit to match this DSP! I reversed the patterns on each layer of the bow as well so you see both stripes and dots!

I cut a tag from the Sending Cheer Dies in Crumb Cake card stock and ran it through the polka dot embossing folder that is part of the Online Exclusive embossing folders.

I found Pecan Pie was the perfect color for a Gingerbread Man—you can add his face and fill in his heart buttons with 2 additional stamps in the set. There is a die for him too that is actually a tag, so just snip it off. Easy peasy!

I hope this cut little project inspires you to #addtocart the Nested Treat Boxes when they become available. I think they will make some fun holiday decor, are great for birthdays and little gifts that you want to give!

Creative Convention--Day 3!

Hi friends! Welcome back to Day 3 of my Creative Convention—a fun little blog sharing, creative inspiration, sneek peek week that I decided to create and put together while I am away at Backstage in Las Vegas!

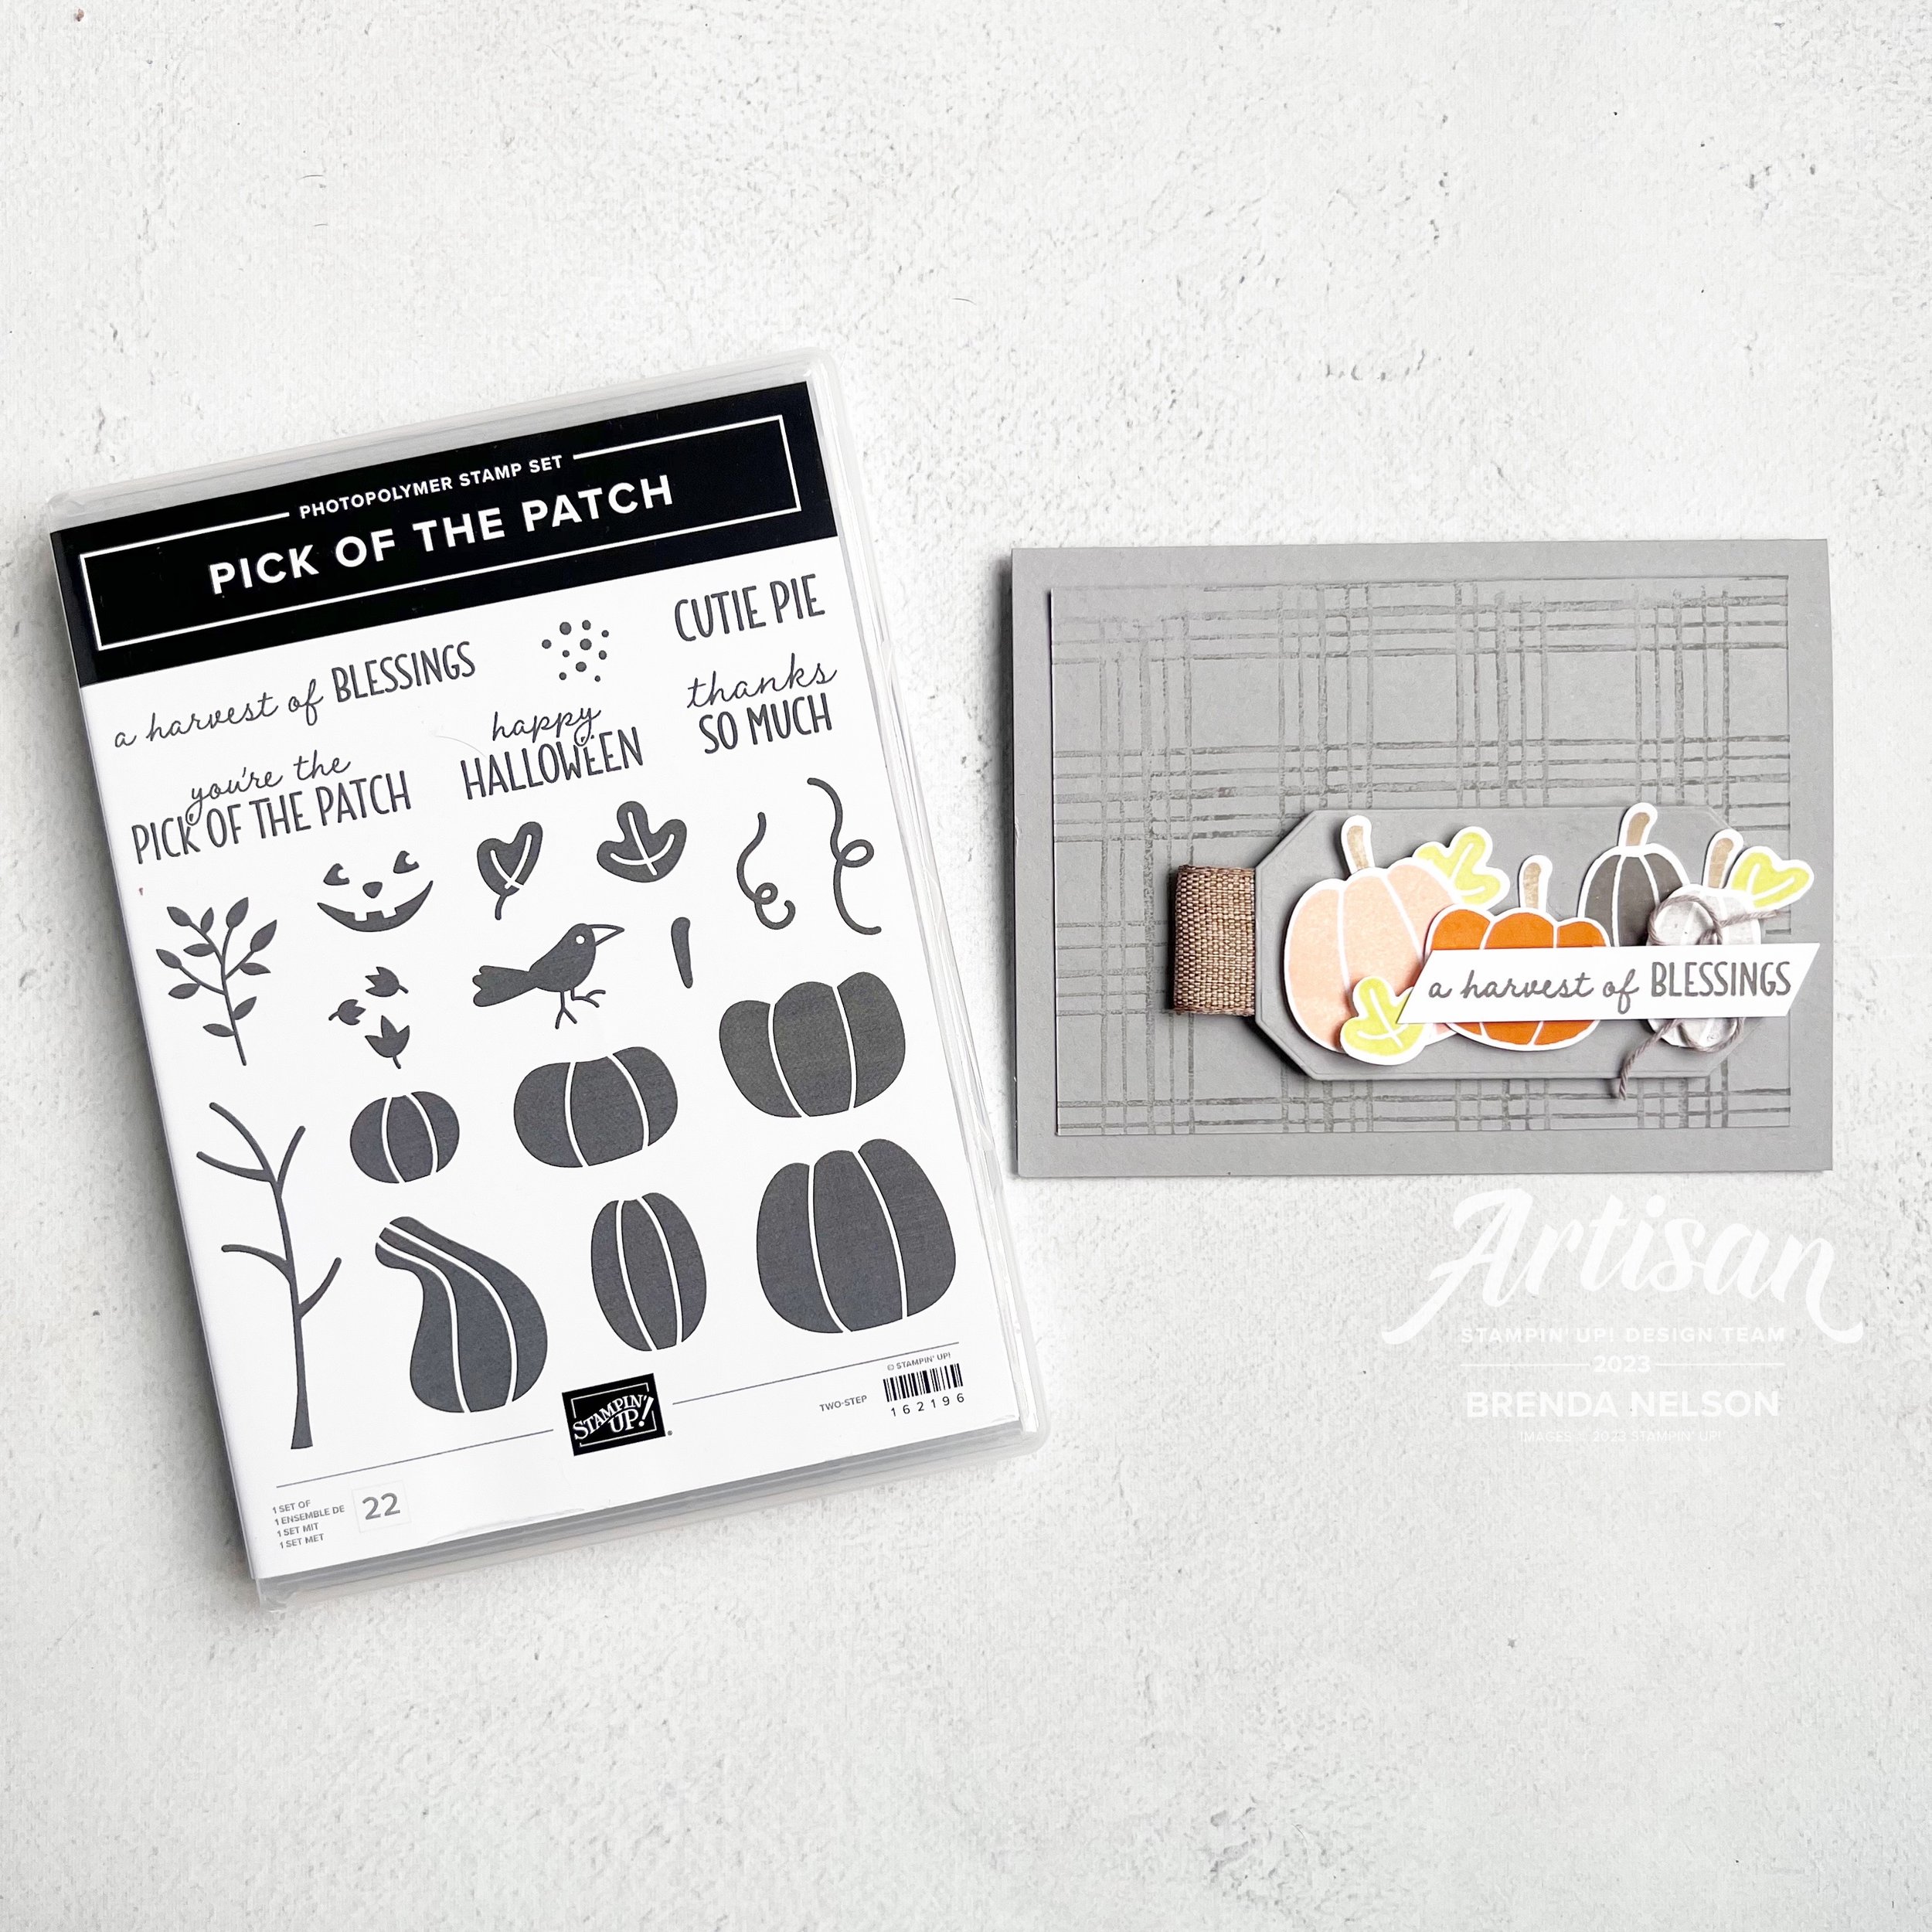
Today the project I want to share with you is one I decided for a recent swap I participated in with some of my demonstrator friends. The Pick of the Patch stamp set was one of the first sets on my list when we were able to put in our pre-order. I love pumpkins and Halloween and I LOVE the whimsical fun feel of the pumpkins and gourds in this stamp set. There is also a coordinating pumpkin punch too! SO much to love!

I decided to tie in the Pick of the Patch stamp set with some items that I love from our annual catalogue—so I reached for the Sketched Plaid stamp set and the Country Corners Dies. I have been using these dies ALOT—they are definitely a #craftroommusthave

If you haven’t already I would definitely #addtocart and you can do so by clicking on this link if you are interested!

I started with Smoky Slate as my base and stamped the Sketched Plaid onto my first layer using Pebbled Path ink—however, to soften it, I took my Blending Brush over top of the stamp to actually REMOVE some of the ink. I really like the finished look! And am glad I took this extra step!

I stamped the pumpkins ini Petal Pink, Pumpkin Pie and Pebbled Path ink that was stamped off. The leaves are in Lemon Lime Twist—so I used the Brights, Subtles In Colors and Neutral color families to make this awesome swap!

Now I had to make 24 of these cards…how do you prep for swaps?

I pulled out my little muffin tin to use for storing the different images I was stamping and cutting out! It makes keeping things sorted and easy for the assembly stage. Especially if I plan on working on the swaps over a course of a few days.

I added my little pumpkin patch to one of the Country Corner die cuts and some of the new Natural Ribbon to act like a little tab and popped this layer up with Dimensionals.

I am so happy to share this card as inspiration for you this week and I really hope everyone is excited to get my swap card in the mail!

Make sure to check back tomorrow to see my 4th project share!

Creative Convention--Day 2!

Hi friends! Welcome back for another fun inspiration project as I host my own little ‘Creative Convention’ this week! I thought it would be a fun way to celebrate with you as I am off in Vegas at Backstage!

I absolutely love fall—sweater weather, pumpkin spice lattes, fall crafting, the colors and smell of fall! So fun!

My project today is a fall inspired card featuring the Autumn Leaves Bundle and All About Autumn 6x6 Specialty Paper. I really love how this paper is foiled on one side and photography prints on the other. It is really unique paper! And the designers at SU added Moody Mauve into this fall mix and I really really love that!

My card features 3 shades of brown—Copper Clay as the base, Crumb Cake as the first layer and Pecan Pie as the base of the leaf! I love how awesome these 3 tones of brown all look together! And adding in some Moody Mauve is like a chef’s kiss!

I stamped the large maple leaf image on the bottom area of the card in Crumb Cake, did a little blending with my brush and ink, and then finally flicked my Crumb Cake Stampin’ Blend marker over top!

I cut a 1 1/4 x 5 1/4 inch strip of DSP from the All About Autumn DSP and added it to the front with just a teeny tiny sliver of Moody Mauve card stock tucked in behind. It was a subtle way to introduce this color into the palette.

I love when we have leaf dies. I love all the different cool grungy techniques that you can do to create leaves!

Option 1: CRUMPLE—thats right, crumple up that die cut and then slightly flatten it like I did here with Moody Mauve leaf

Option 2: TEXTURE—give your leaf texture by running it through one of our many Embossing Folders—in this case I used the new Distressed Tile 3D folder which is a part of this suite

Option 3: COLOR—add some color to the tips of your leaves with a Blending Brush, Dauber, sponge—you name it! It gives your die cut depth

Let’s talk about the large maple leaf die and the cool veining die you can cut to add on top. I die cut this leaf in Pecan Pie (swoon!) and ran it through the embossing folder, then added the veining over top. I cut this out using our Adhesive Sheets so that I didn’t have to worry about glue creeping out the sides. No sticky fingers for me!

If you are looking for the sentiment “thanks so much” you will find it in the adorable Pick of the Patch stamp set. It is stamped with Moody Mauve ink, with a little ribbon and a layered circle from the All About Autumn DSP. The two shiny gold pearls are from the Blooming Pearls embellishment.

I hope you are intrigued by todays project and will come on back tomorrow to see what else I am sharing!

Creative Convention--Day 1!

Hello friends! As I am leaving to attend Backstage in Vegas, a leadership conference being hosted by Stampin’ Up! I was inspired to host my own little ‘Creative Convention’ with you this week by sharing a week long blitz of inspiration projects featuring some NEW upcoming Stampin’ Up! products! I will share a mix of cards, scrapbooking and gift packaging ideas with you this week!

My first inspiration project I want to share with you today is a tie in with some of my Team Members—we have an Instagram Hop the 3rd Monday of each month— and this months theme is ‘Flowers’. I couldn’t resist making something with the new Modern Garden stamp set! The suite is one of my favorites in the new Holiday Catalogue!

I am also really loving the new Distressed Tile 3D folder so don’t be shocked if you see it on a bunch of stuff! haha! I don’t know about you but when I get hooked on something, I am HOOKED!

I wanted a crisp white card and first layer to highlight the wreath I wanted to make with the floral images in this stamp set. I love how this set allows you to make summery cards and transition your designs into holiday cards too.

I punched a 2 3/8 circle from some scrap paper and used it to trace a circle onto my card front as a guideline. I then ran this layer through the Distressed Tile folder.

I used 4 different flowers and stamped them in Calypso Coral, Flirty Flamingo, Poppy Parade and Wild Wheat. I stayed pretty true to the Garden Walk 6x6 DSP stack with my colors. The leaves are stamped in Garden Green along with the sentiment.

You do need to fussy cut these flowers, something that I actually find relaxing! Sometimes its worth the effort and I am so happy with how this design turned out!


I layered the flowers in a circle using the guideline, adhering some flat and other on Dimensionals. I finished off the card with a few of the new Blooming Pearls which are also a part of this suite!

I hope this card will inspire you to purchase this stamp, bundle or entire suite when it is available on Sept 6th!

Thank you for stopping by—come back tomorrow to see what else I have to share!