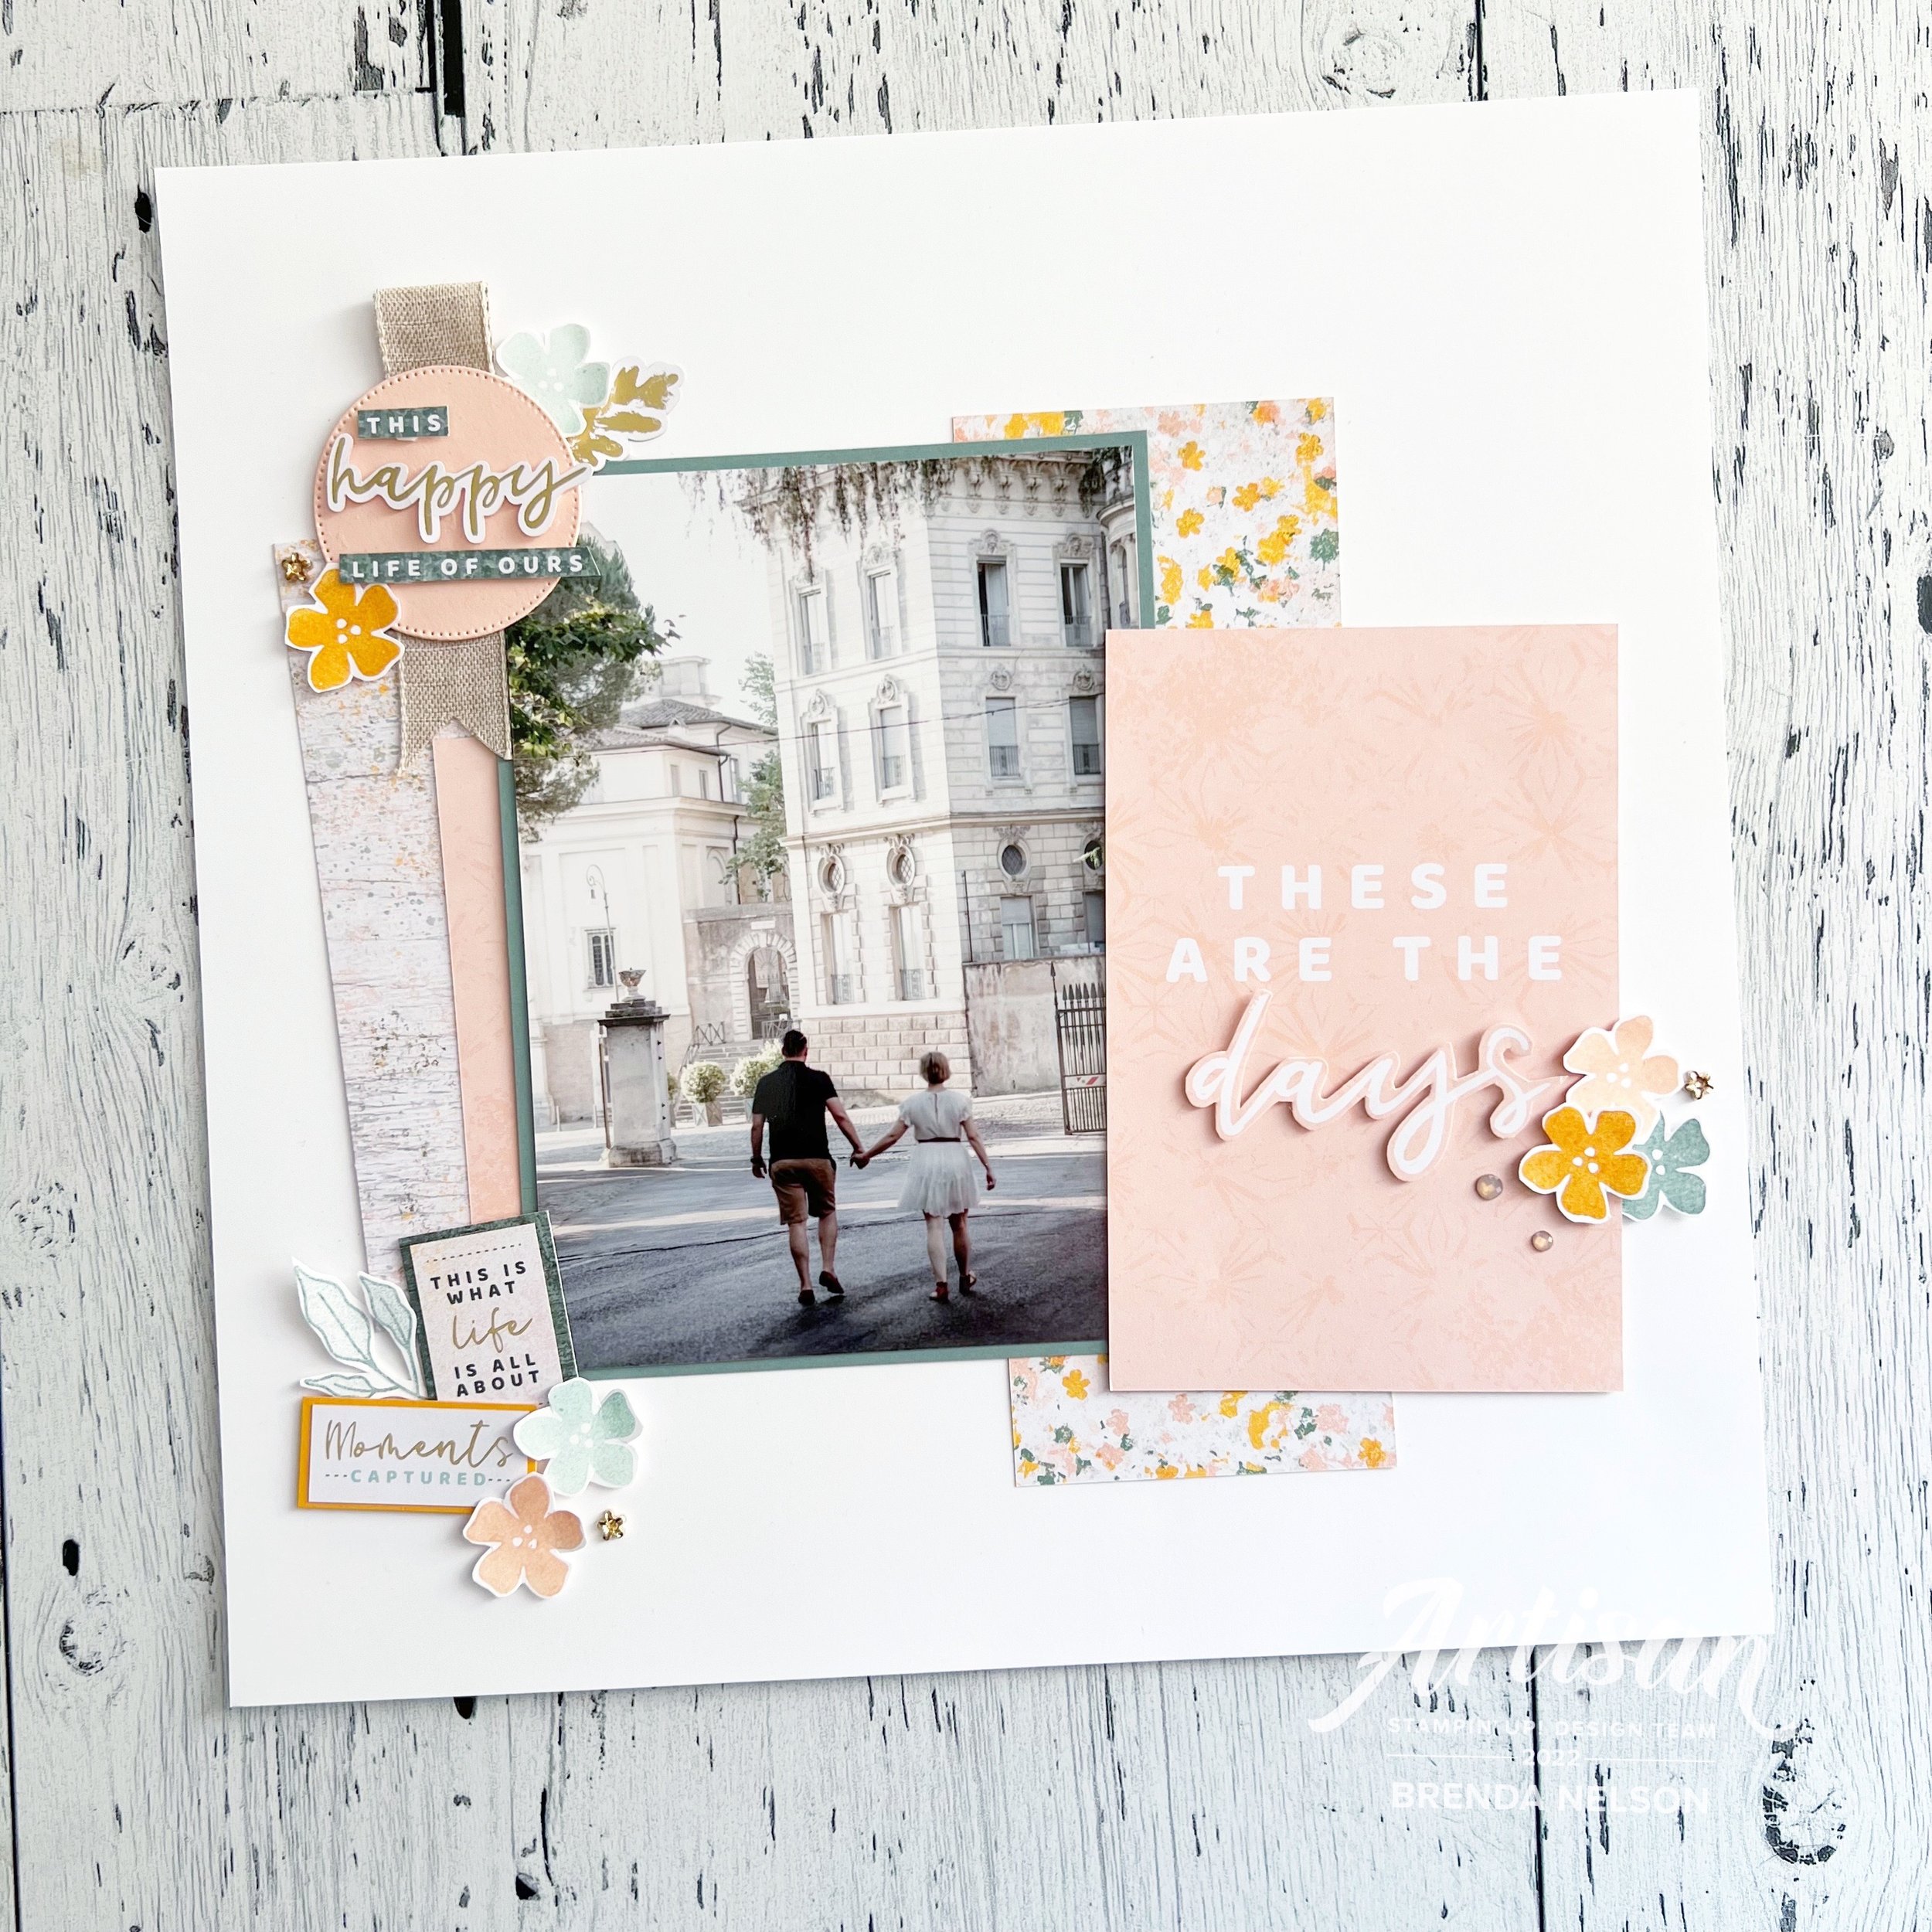
Seven Days of Scrapbooking--Day #2
/Hello friends and welcome back! If you missed the dozen amazing scrapbooking projects shared yesterday on my Instagram Stories just search the hashtag #sevendaysofscrapbooking and you can see all of the amazing projects! I am really excited to share my page today as it focuses on the Textured Chic Memories & More cards. I used these card packages quite frequently to make traditional scrapbook pages and I hope this sparks a creative idea in yourself!
With a few additional supplies I was easily able to make this amazing page to capture this moment in Rome with my husband. This picture was taken on the Greece Incentive trip using a photographer we booked through Flytographer and was one of the best experiences we have ever had on a holiday!
Fun Fact: We were at our photography location at 6 am to take these pictures! It was worth the early hour to not have a soul around in our pictures!
Let me start by saying what I LOVE about our Memories & More cards—the thickness and style of the cards, a little stiffer than our regular card stock and DSP so they immediately add texture. The VALUE of the cards is amazing! You get double of everything which allows you the freedom to cut up a card and layer it if you need to (on the word ‘days’ for example), and finally the variety of phrases and sentiments in the collection of cards. I find there are some really unique sentiments not found in our stamp sets. And the concept designers have been knocking the collections out of the park over the past few catalogues!
And if there are coordinating Cards & Envelopes, make sure to get those too! I often use them as layering pieces—the envelopes are decorative so cut them apart for layering!
For this page I actually did add in a few stamped florals and greenery from the Framed Occasions stamp set so this is actually a hybrid project of sorts. The top left corner of this page truly represents all that I love about M&M cards. For example, I have die cut a circle using Petal Pink card stock and the Stylish Shapes dies and on top have added a sticker (yes! the cards come with stickers too which is brilliant) and then CUT APART one of the 3x4 cards to make a whole new sentiment. I layered some of the new Natural Finish ribbon behind along with some stamped flowers, another sticker and the cute little Flower Trinkets!
On the bottom left of the page I used 2 more stickers (like seriously, how perfect are they?) that I mounted on a piece of Mango Melody card stock and part of the M&M card that was left over after I snipped out those words. Don’t let anything go to waste! A couple more flowers and some greenery tied this area together with the first one—this is a design key. You always want to have repeating elements on your scrapbook page (in my opinion or style of memory keeping at least). :)
My favorite thing to do with this style of memory keeping is to cut one of the duplicate cards apart to layer on top of the original. By adding ‘days’ that is hand cut and popped up with a Dimensional we have truly brought this one dimensional card to life. And don’t get rid of the extra left over, if you look along the left side of the photo mat I have tucked it there to bring this color across the page! Its a pro tip for sure!
I also added a few of the Elegant Faceted Gems to this section with more stamped flowers and a Flower Trinket. Its the best way to add this color trio over to this side of the page.
If you haven’t tried Memories & More cards yet on a traditional scrapbook page I really encourage you to give it a try! The investment isn’t steep and its fun to play around with the many card options in your design!
Make sure to check out my stories so you can see what everyone else is creating and sharing! If you are in Canada and would like to order anything, please visit my store with sincere thanks in advance and send me a message if you are interested in joining in any of my classes!
#sevendaysofscrapbooking
Click any photo to shop my store
Product List


