Color Fusers--August Blog Hop!

IMG_0110.jpg

Hello friends and welcome to another fun hope featuring the Color Fusers Design team and this awesome color combo! I really love purples and Just Jade has been permanently living on my craft table lately so I was super excited to create something with these four colors!

final 13.jpg

This card is all about the layers beginning with a base of Basic Grey! I cut a base layer out of Basic Grey as well and stamped some little flowers from the In Bloom stamp set in Basic Grey ink. A great tip for background stamping is to add all of the images , in this case little bitty flowers, on the block at once! It is a great time saver!

final 14.jpg

This card is an eclectic mix of items from the Annual Catalogue, the July-January Holiday Catty and Sale-a-bration! I just couldn’t resist using a little bit of something from all three of our publications!

The next layer on top of the Basic Grey is some Just Jade DSP from the Penguin Playmates collection in the Sale a bration catalogue. Off set to that I added some Basic White card stock that I ran through the new Timber 3D Embossing Folder from the July-January Catty and lastly, the Highland Heather DSP print is from the Hand-Penned collection.

final 10.jpg
 

Have you ordered this new Highland Heather 1/2 Grosgrain Ribbon yet? If not add it to your cart now! I love the shimmer to this ribbon and its easy to fold and tie and was the perfect add on behind the sentiment “Congrats You’re so Fancy Now”.

I die cut flowers from the Pierced Blooms dies in Gorgeous Grape and Highland Heather. A few of the purple toned pearls from the Pastel Pearls were an awesome finishing touch!

I also die cut some leaves for a little more Just Jade using the In Symmetry DSP and the Pierced Blooms dies.

final 8.jpg

I hope this card inspires you to play around with this fun color combo. If you look through our many fantastic Designer Series Papers you will see how many awesome options you have to create with!

Up next on the Hop is Melanie! I love her style and am always inspired by her creations! You can visit her next by clicking on the button below!

If you are just joining in her too you can always go back and see what Bonnie has designed as well! Either way, make sure you go all the way around our Design Team!

Create with Connie and Mary-Yellow Submarine Theme!

Hello friends! Thank you for checking in this week! This week our design theme was ‘Yellow Submarine’ and I decided to create a project that features the many yellow colors that Stampin’ Up! makes. This is actually a great card design to feature any of our colors, especially our upcoming new In Colors, so you might see this design again in the future!

21DesignTeamBadge.png
final (4) 4.jpg

I started my card on a Basic White base and added a layer with a stitched star die cut. I love stars and I am happy these dies are carrying forward.

Behind this die cut is where I added strips of all the yellow colors that Stampin’ Up! makes! I started with So Saffron, then Daffodil Delight, Bumblebee, Crushed Curry and Mango Melody. Now the Mango might be controversial (is it yellow or is it orange?) but in this configuration I think that it works.

final (1) 4.jpg

The sentiment is from the Pierced Blooms stamp set and is stamped in Bumblebee ink on So Saffron card stock. I added two ribbons behind—Bumblebee Gingham and Daffodil Delight Ruched Ribbon. And a few Artistry Blooms Sequins and voila! A fun sunny yellow card!

I can’t wait to see what the other Design Team members come up using this theme. You can go BACK to see what Melissa has made and NEXT to see what Connie has created! Please feel free to comment or use my Hostess Code if you live in Canada for any of your ordering needs.

Color Fusers-March 2021 Blog Hop

Welcome to the Color Fusers March Blog Hop! We have sort of a masculine color combo to work with this month but I put a bit of a girly spin on these colors—Seaside Spray, Grey Granite and Early Espresso!

03_2021 Graphic (1).jpg

I knew that I wanted to use Early Espresso as my base and to create some extra texture to the cards I decided to add some strips of Early Espresso card stock in 3/4 inch widths across the base of the cards. It almost looks like panelling! I have been watching a lot of HGTV lately so maybe that is what influenced me! ha ha ha!

final 13.jpg

I cut a Basic White Stitched Rectangle to use as my focal point on the card. Using my Blending Brush (new favorite tool alert!) I added a bit of Grey Granite to the base and flicked my Grey Granite Stampin’ Write Marker over top. I love the look of a good marker spray over your projects!

final 15.jpg
 

The In Bloom bundle was used to embellish the rest of this card. The dies are AAAMAZING! I haven’t even put them away since I got them! I cut a few flowers in Seaside Spray, the stitched detail in the flowers plays into the stitched rectangular layer which I really like.

I added a few small Early Espresso flowers with some Silver Metallic Pearls.

I stamped and hand trimmed a couple of flowers in Grey Granite ink. You might wonder why I didn’t use a die and that is because the stamped images in this set do not have dies. The dies are all independent stitched shapes that coordinate with the stamped images.

The sentiment is from the In Bloom stamp set and is stamped with Early Espresso ink on Grey Granite card stock. I added a strip of the Seaside Spray Metallic Ribbon (found in the annual catalogue) behind it and popped it up on Dimensionals for a little lift.

final+%281%29+2.jpg

Whenever you use a dark card stock color as a base you need to add a lighter layer on the inside so you can write a message. I added in a Basic White base and of course had to do a little stamping. I stamped some little Grey Granite flowers and ‘You Mean so Much to Me’ in Seaside Spray. I added a few more teeny flowers in Early Espresso and a Silver Metallic Pearl to pull all of the outside elements of the card inside.

I can’t wait to see what the other members of the team have created with this color combo! I love to challenge myself with color combos and I hope this Hop inspires you as well!

The fantastic Melanie Hockin is up next so let’s see what she has designed!

If you are starting here you can always go back as well to see what Bonnie O’Neill has designed! I know you will find inspiration all through this hop!

Artisan Design Team January Share!

OMG friends! I can’t believe I can actually TYPE the word ARTISAN…its literally been a dream of mine for the last few years and a GOAL (big difference) over the last 18 months. I started my blog with the purpose of having a platform to apply for the team and to create a digital archive of things I love. Scrapbook pages, recipes, cards and experiences. I joined some blog hops which has been exciting and has helped me grow and develop, meet deadlines, improve my photography and so much more! My blog is a place where I can be somewhat interactive with you (I love comments) and I am still learning and wanting to add more features!

So when I got the call on September 16th, yes I know the date as it was my 20th wedding anniversary, I cried. Like ugly cry and was so so happy. My daughter was in the car with me and had no idea what was going on!!! Haha! My biggest hope for my kids is they can set a goal, work and strive toward it with vision and purpose and achieve it. It is actually quite amazing. So I am SO HAPPY to be on the 2021 team and to share my creations with you!

My very first Artisan project featured the In Bloom Bundle and Paper Blooms Designer Series Paper (from Sale-a-bration 2021).

My very first Artisan project featured the In Bloom Bundle and Paper Blooms Designer Series Paper (from Sale-a-bration 2021).

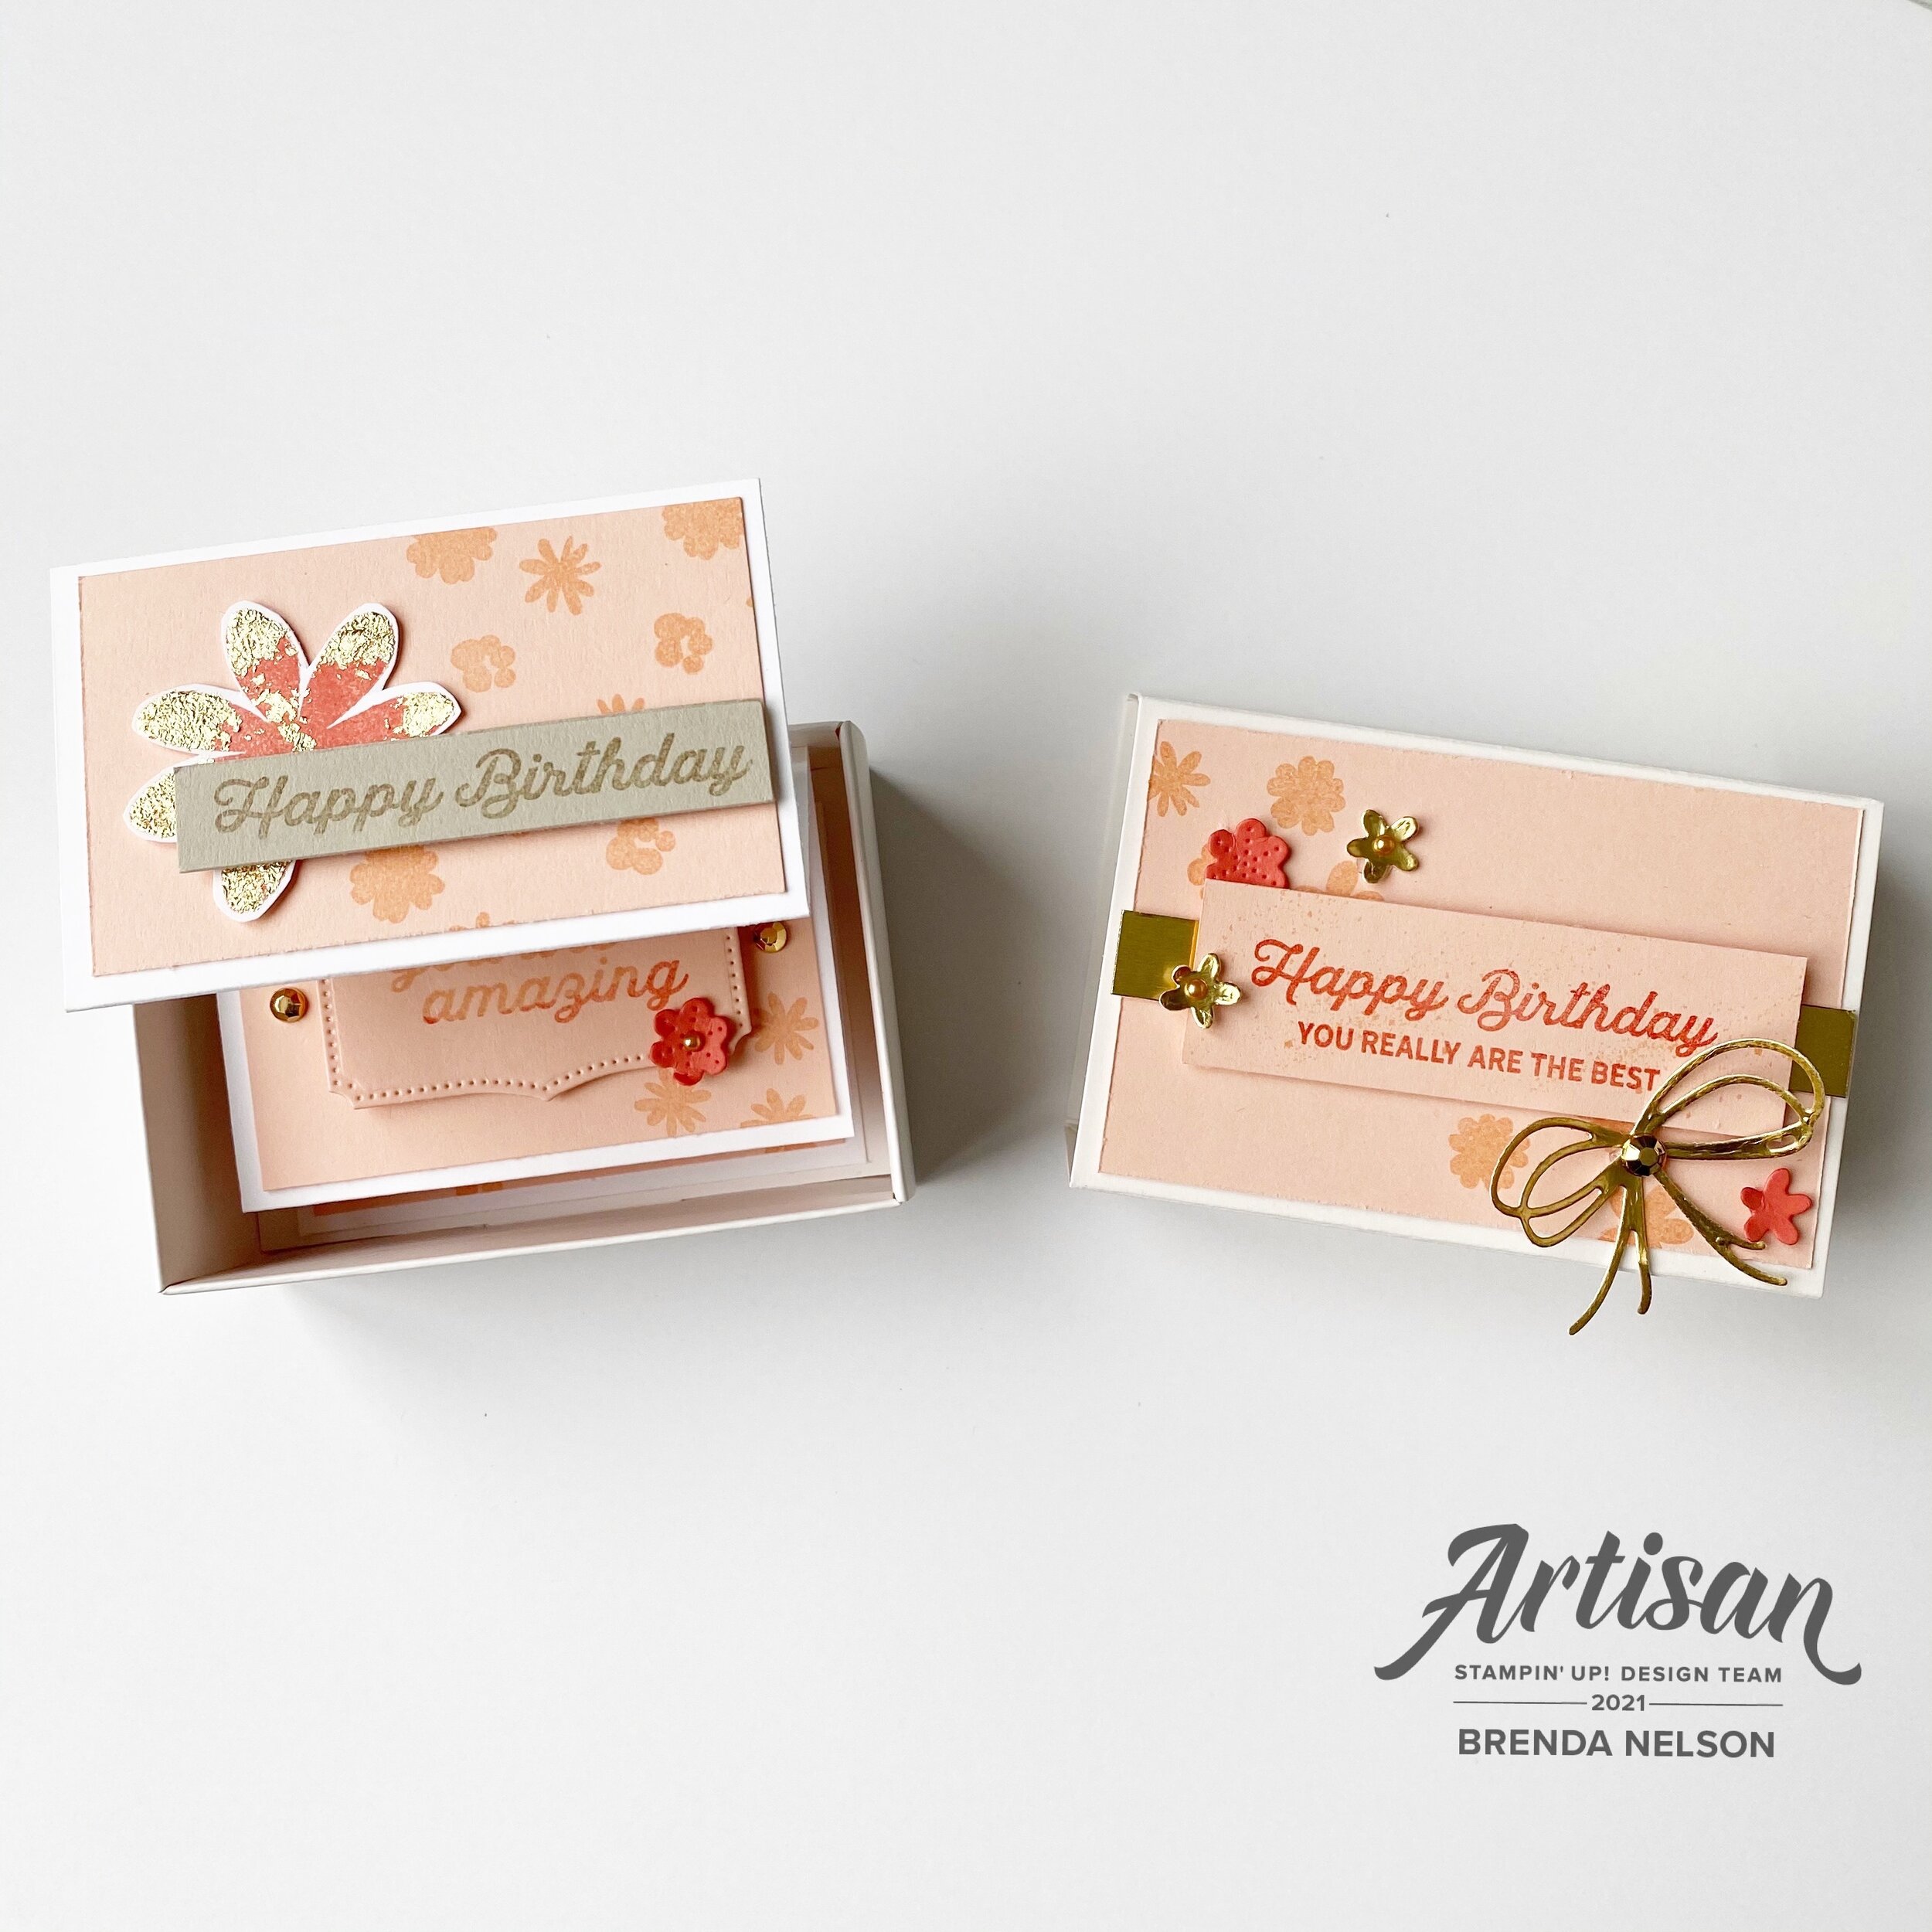
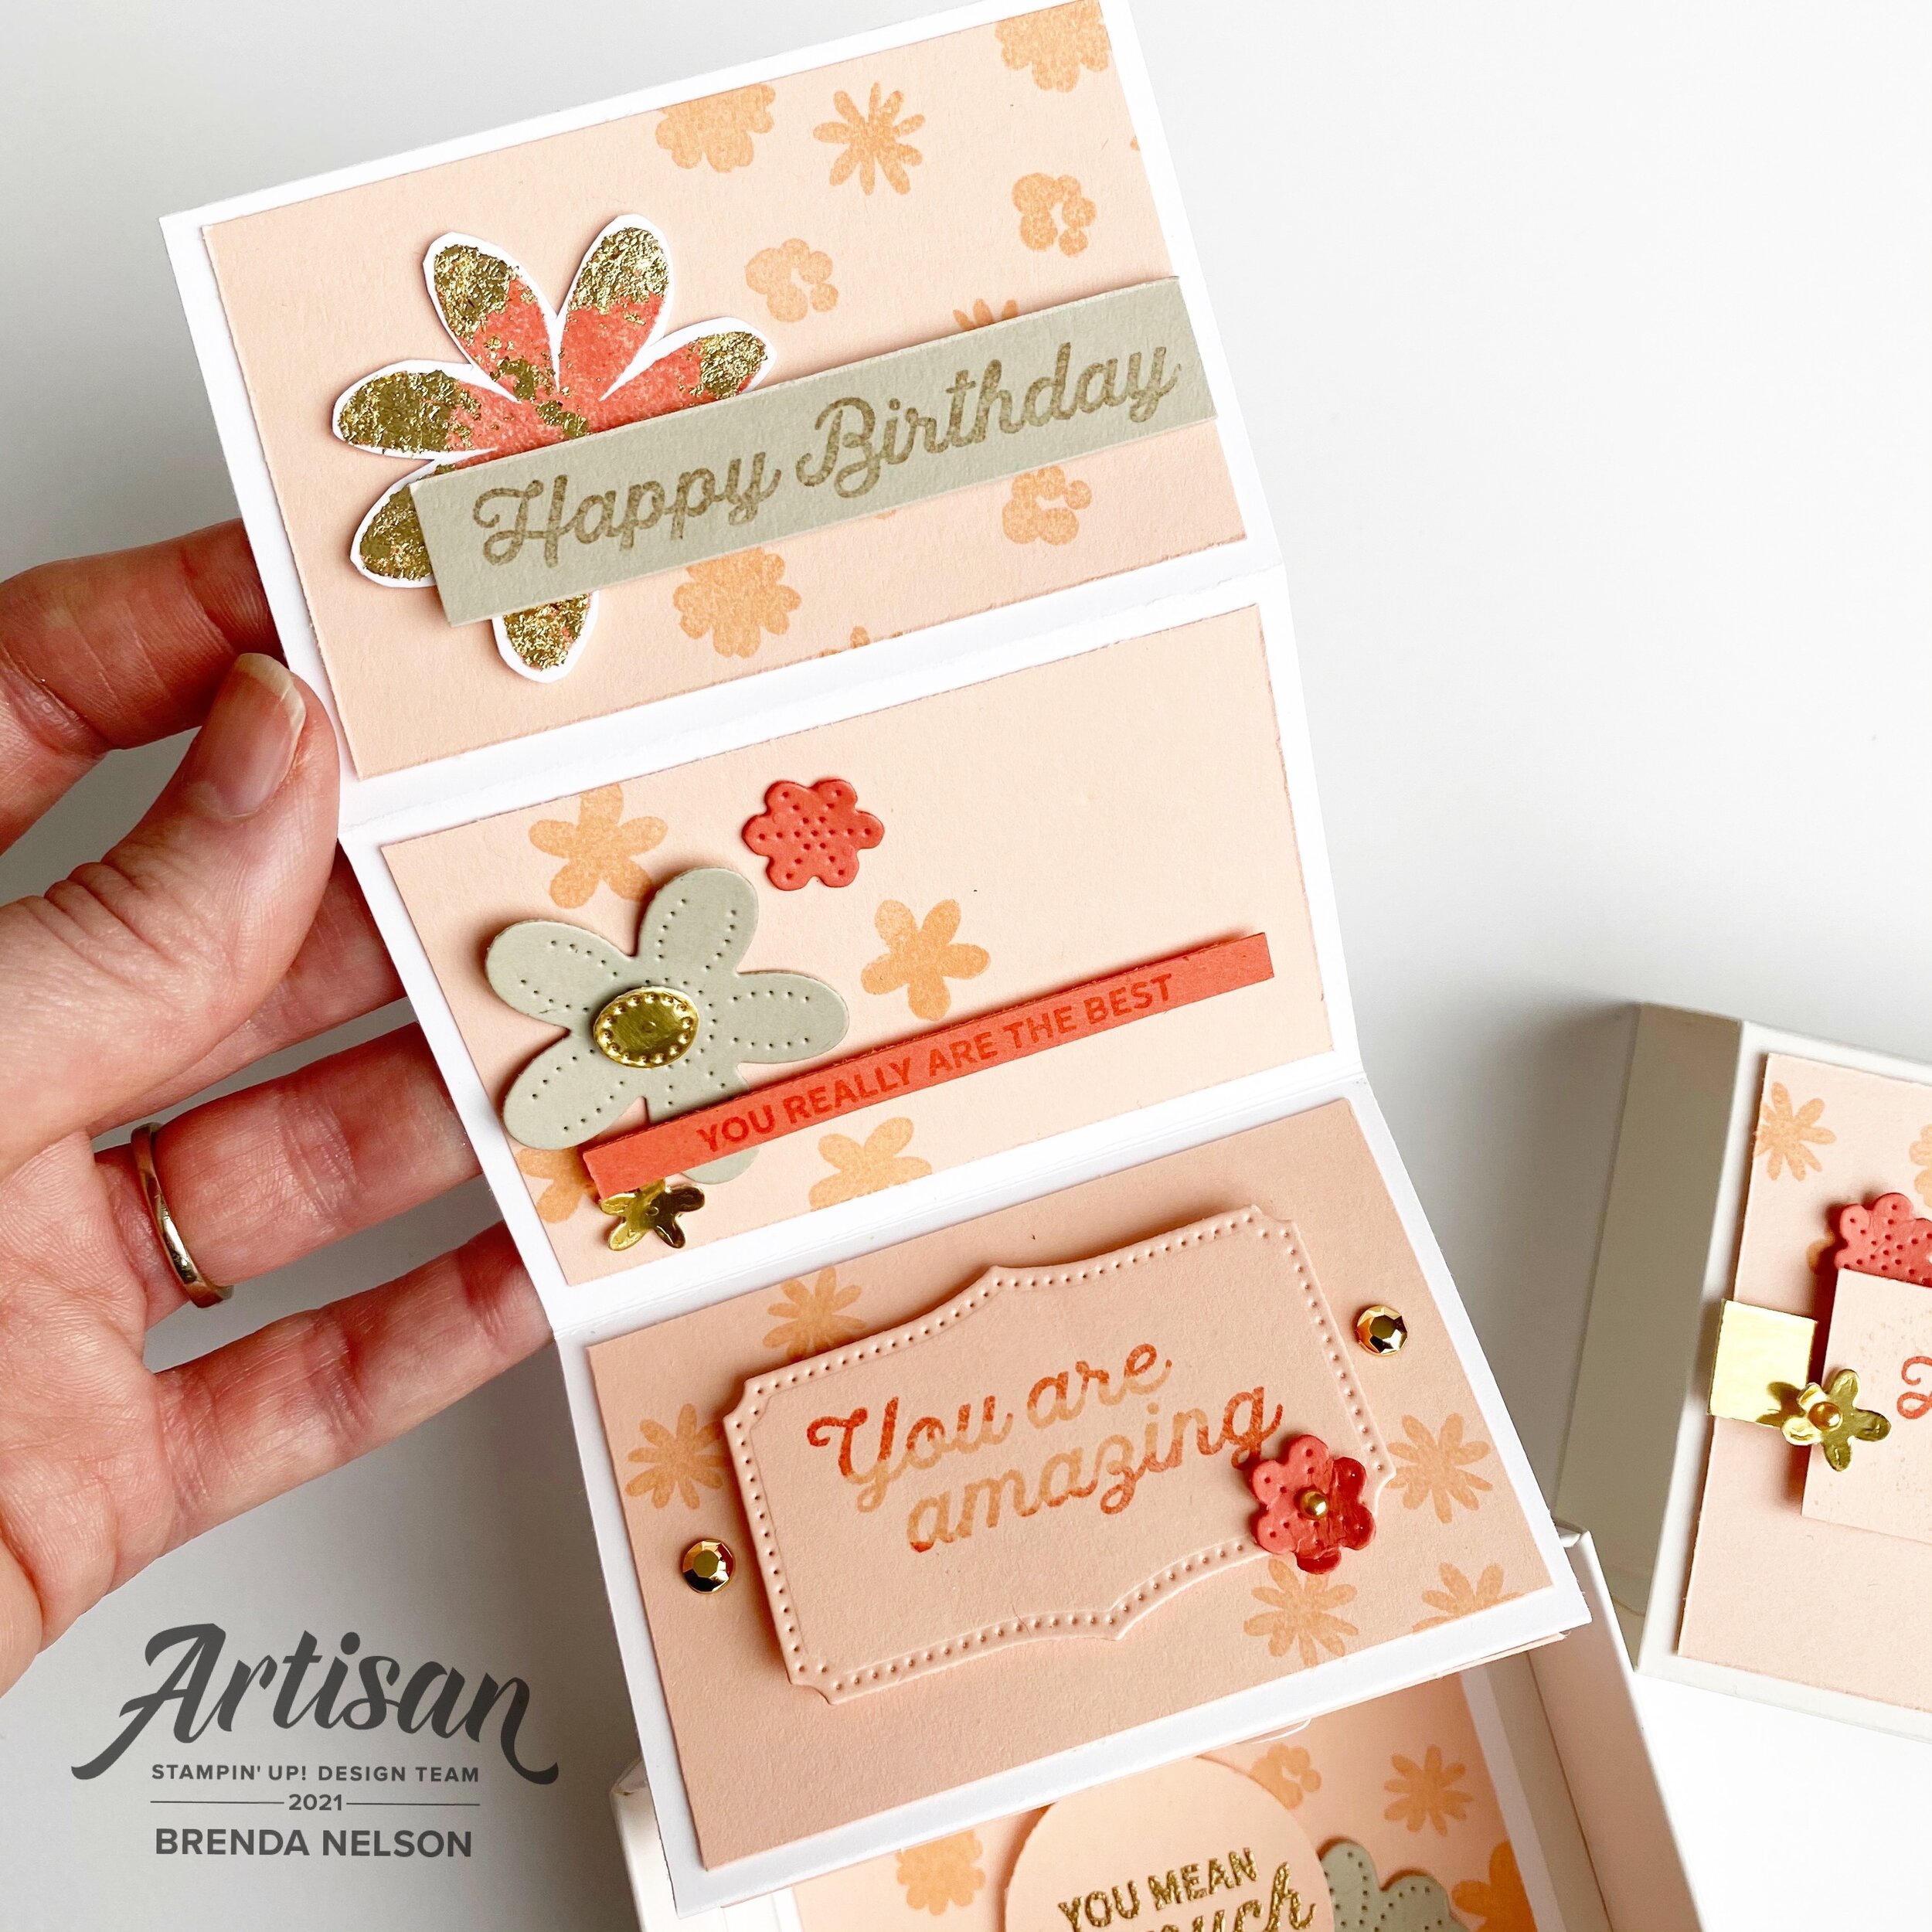
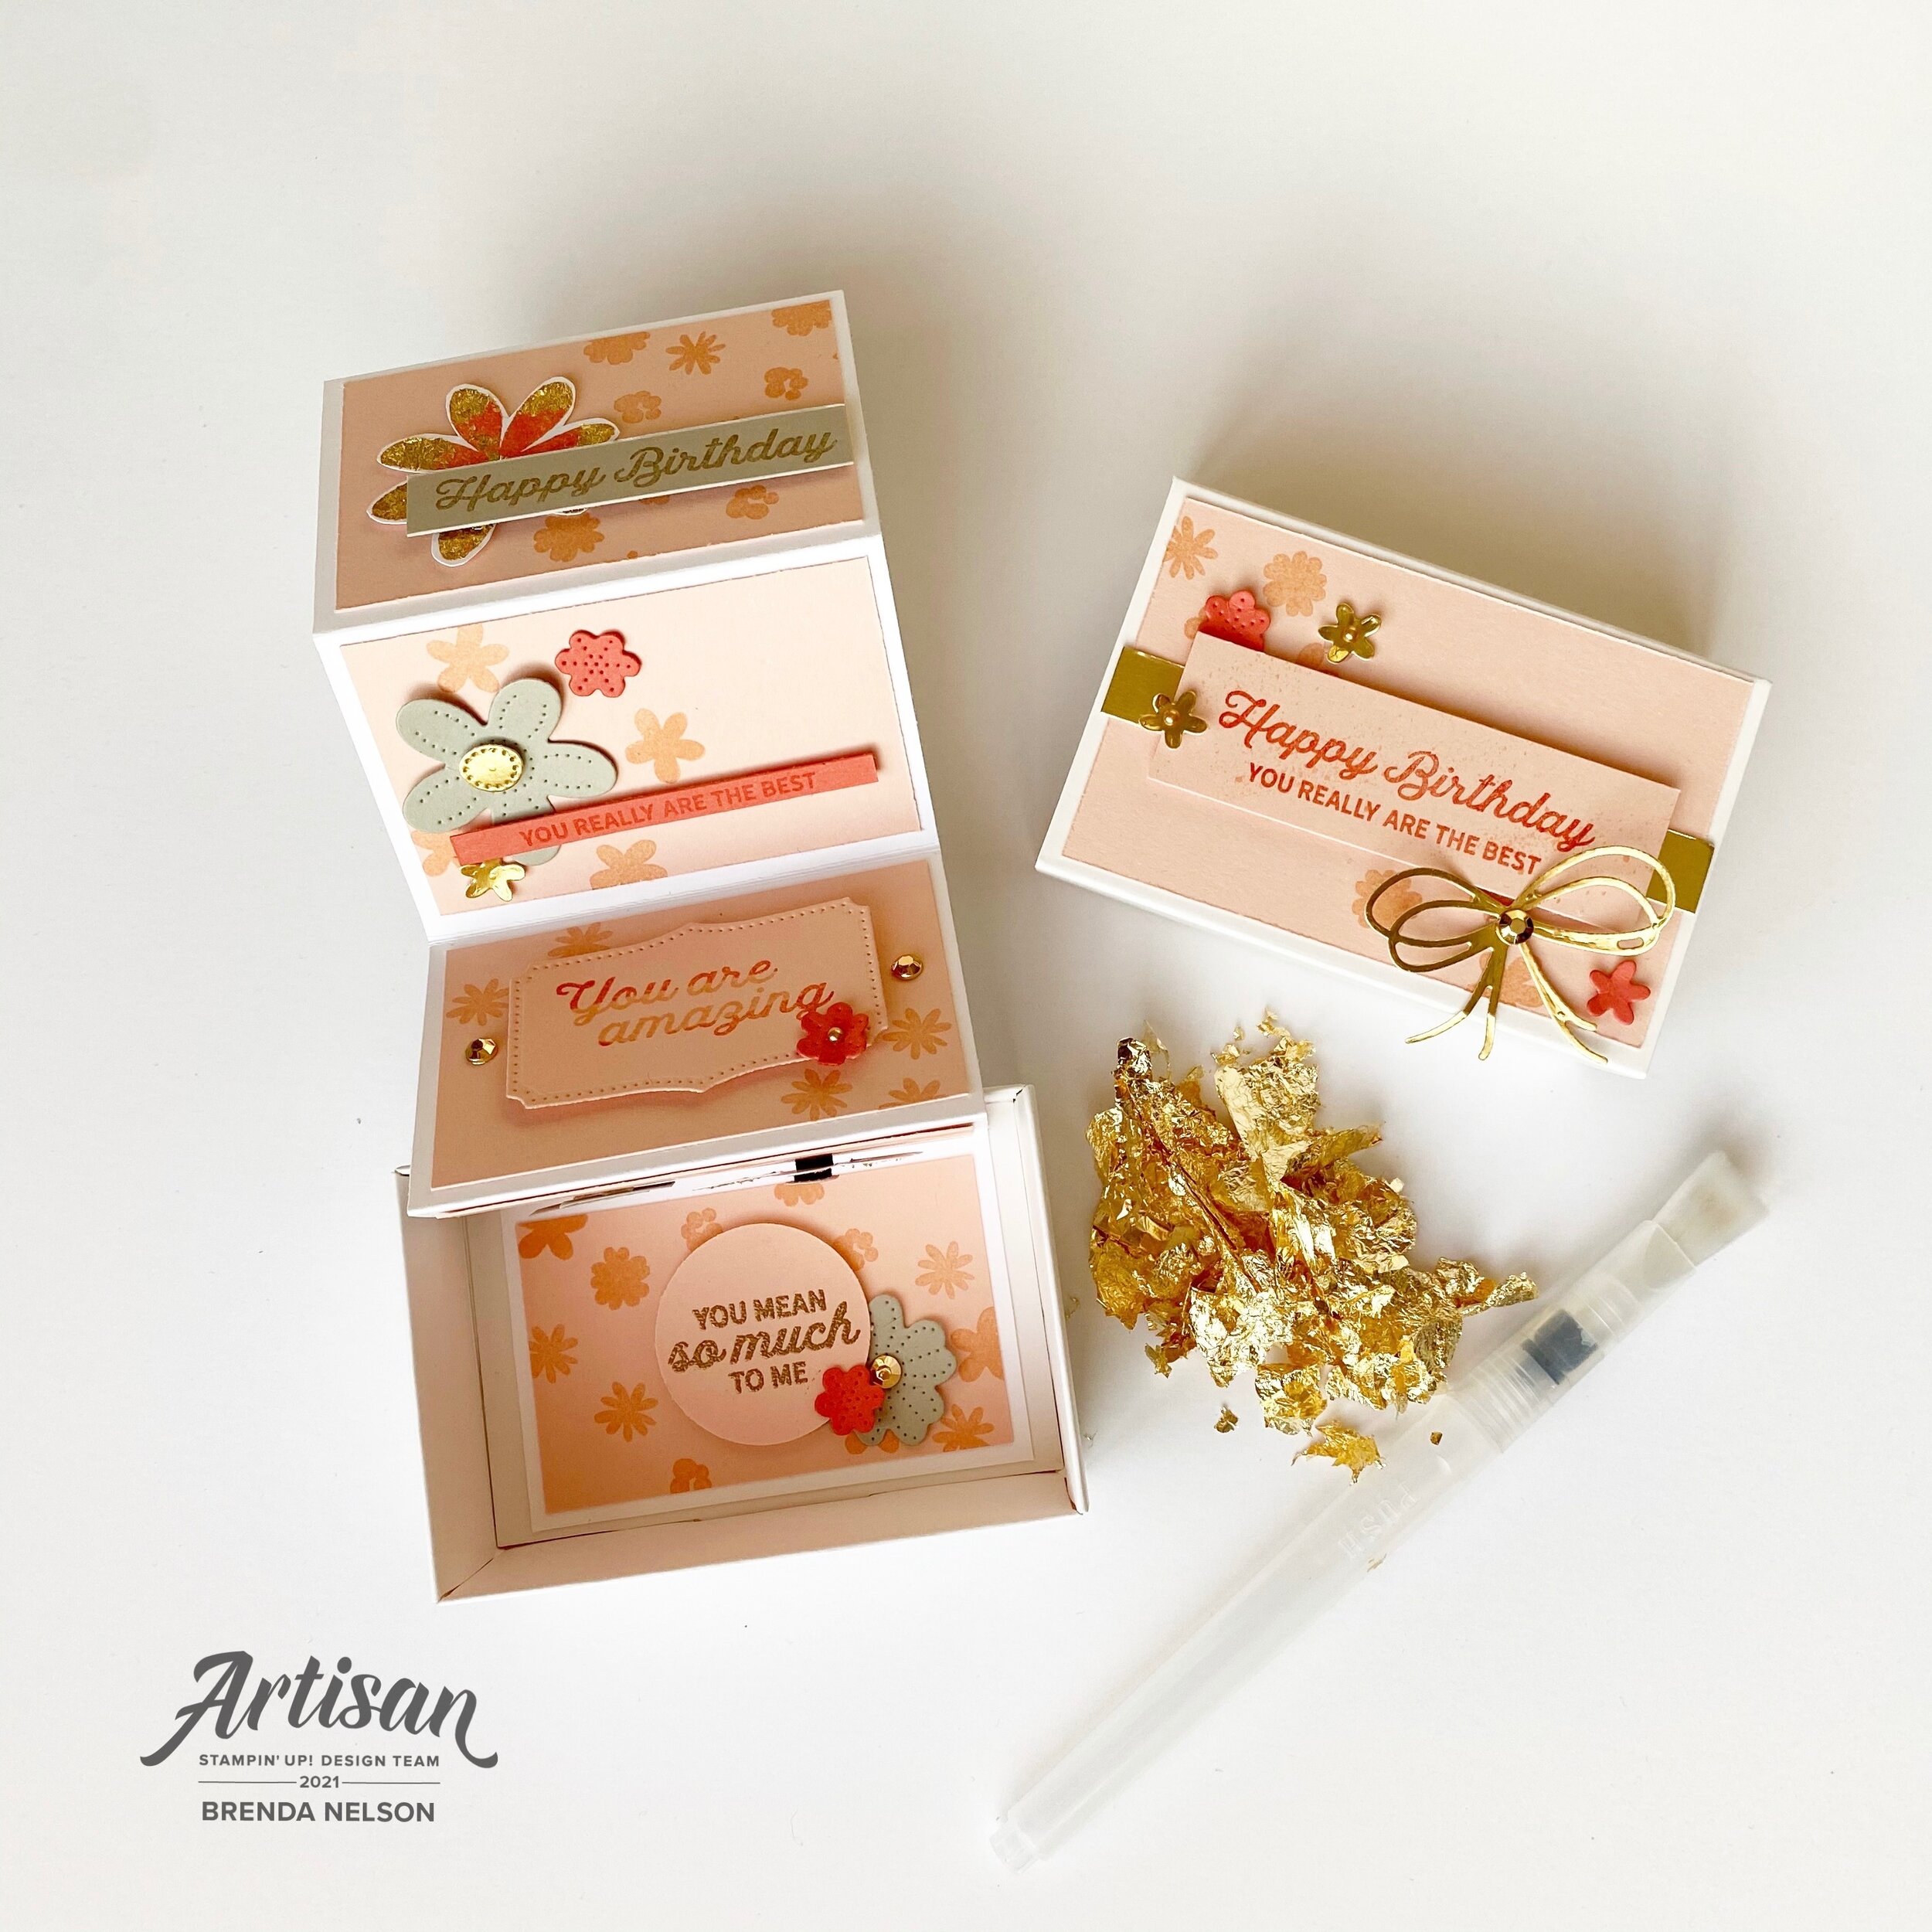
Let’s start with the fun pull out birthday card in the Love You Always Treat Boxes! As soon as I saw how these treat boxes worked I knew I wanted to create some kind of pull out project. I decided on a birthday card after seeing all the fantastic sentiments in the In Bloom stamp set.

The boxes are easy to assemble which is awesome. To create the pull out feature you need a piece of Basic White card stock measuring 3 1/2 x 11 1/4. Score at 2 1/4, 4 1/2, 6 3/4 and 9. Accordion fold it and add the Petal Pink panels on measuring 2 x 3 1/4. You need 5 panels.

Then you can stamp and embellish as desired!

The colors I used to create this pull out birthday card are Petal Pink, Calypso Coral, Sahara Sand, and Gold Foil accented with the Gilded Leafing. To add the Gilded Leafing to my flowers I used Heat’n Stick Powder with a finger dauber. The dauber allows you to have more control over where you want to apply the Heat’n Stick powder. Once you heat set the powder (do not over heat as it will lose the stickiness) press it into your Gilded Leafing and use the large Water Painter to brush off the excess and reveal the details.

Of course I also had to create a scrapbook page to feature this fantastic Paper Blooms Designer Series Paper and my sons 16th birthday!

Of course I also had to create a scrapbook page to feature this fantastic Paper Blooms Designer Series Paper and my sons 16th birthday!

I chose the dark pattern from the DSP because I thought the Night of Navy would really pop against a Basic White background. I flanked each side with strips of Calypso Coral card stock. I didn’t want to use 12x12 paper (I covet for page bases) so I cut the strips from 8 1/2 x 11 and pieced them together behind the photo mat. I also popped the Gold Foil photo mat up on Dimensionals.

You may notice some circles on the layout and those are cut with punches from the DSP.

I applied the same technique to the flowers on this page as the pull out birthday card with the Gilded Leafing.

final 3.jpg

This layout combines flowers cut using the Pierced Bloom dies, stamped flowers and flowers cut from the DSP. You will notice in this picture that I stamped the “You are Amazing” right on the circle cut from the DSP and embossed it in gold. I love this feature!

I used the new Resin Hearts, Gilded Gems and Gold Metallic Pearls as accents on the page. I love the fun bow cut with the dies and Gold Foil paper.

I hope you enjoyed my first official Artisan Design Team showcase projects! Make sure to check out Stampin’ Up!’s Facebook page to see everyone’s creations and follow me over on Instagram @stampwithbrenda

I hope you enjoyed my first official Artisan Design Team showcase projects! Make sure to check out Stampin’ Up!’s Facebook page to see everyone’s creations and follow me over on Instagram @stampwithbrenda

If you live in Canada and would love to create these projects yourself you can shop my Online Store or use the Hostess Code to have items sent direct to you! Just confirm it says “Shopping with Brenda Nelson” in the shopping bag :)