Create with Connie and Mary--Favourite Christmas Project!
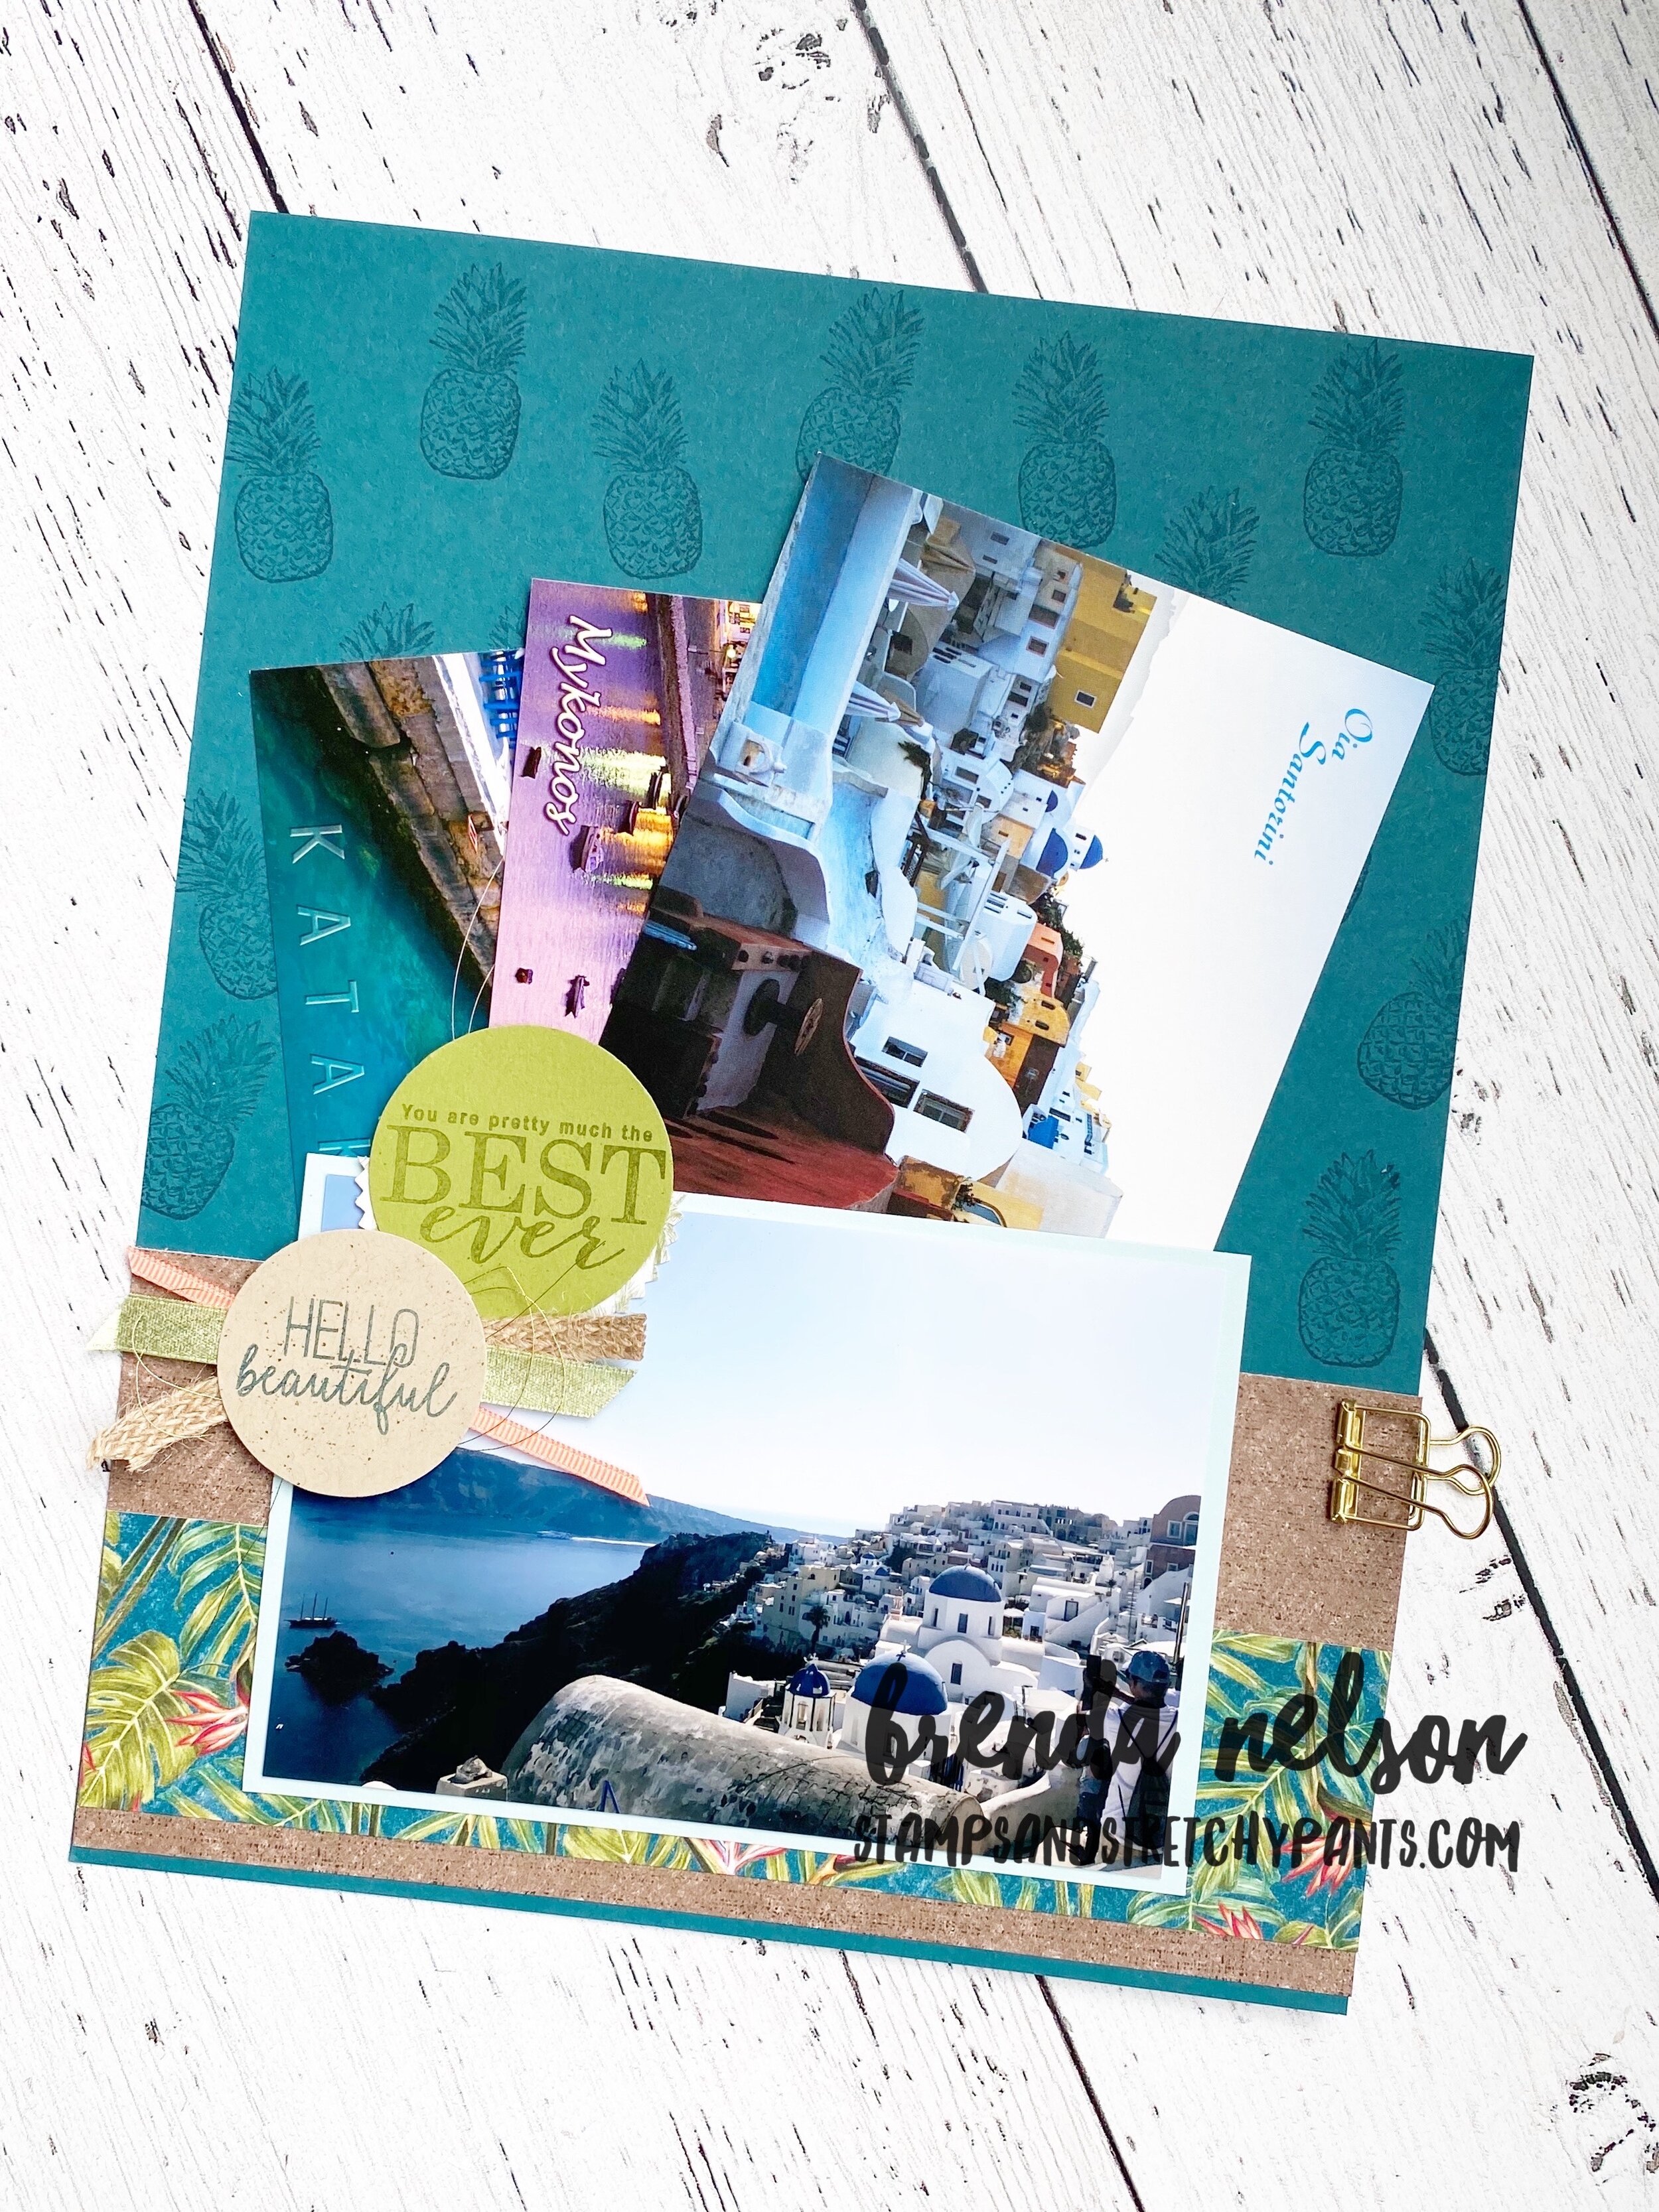
Welcome to our weekly blog hop! If this is your first time joining in make sure you go around the whole group! Everyone is so talented and has unique and distinct crafting styles. I tend to make variety of projects including scrapbook pages, memory albums, 3D projects and cards. In fact today for our “Favourite” Christmas project I have created a Christmas Mini Album!

Design Team.png

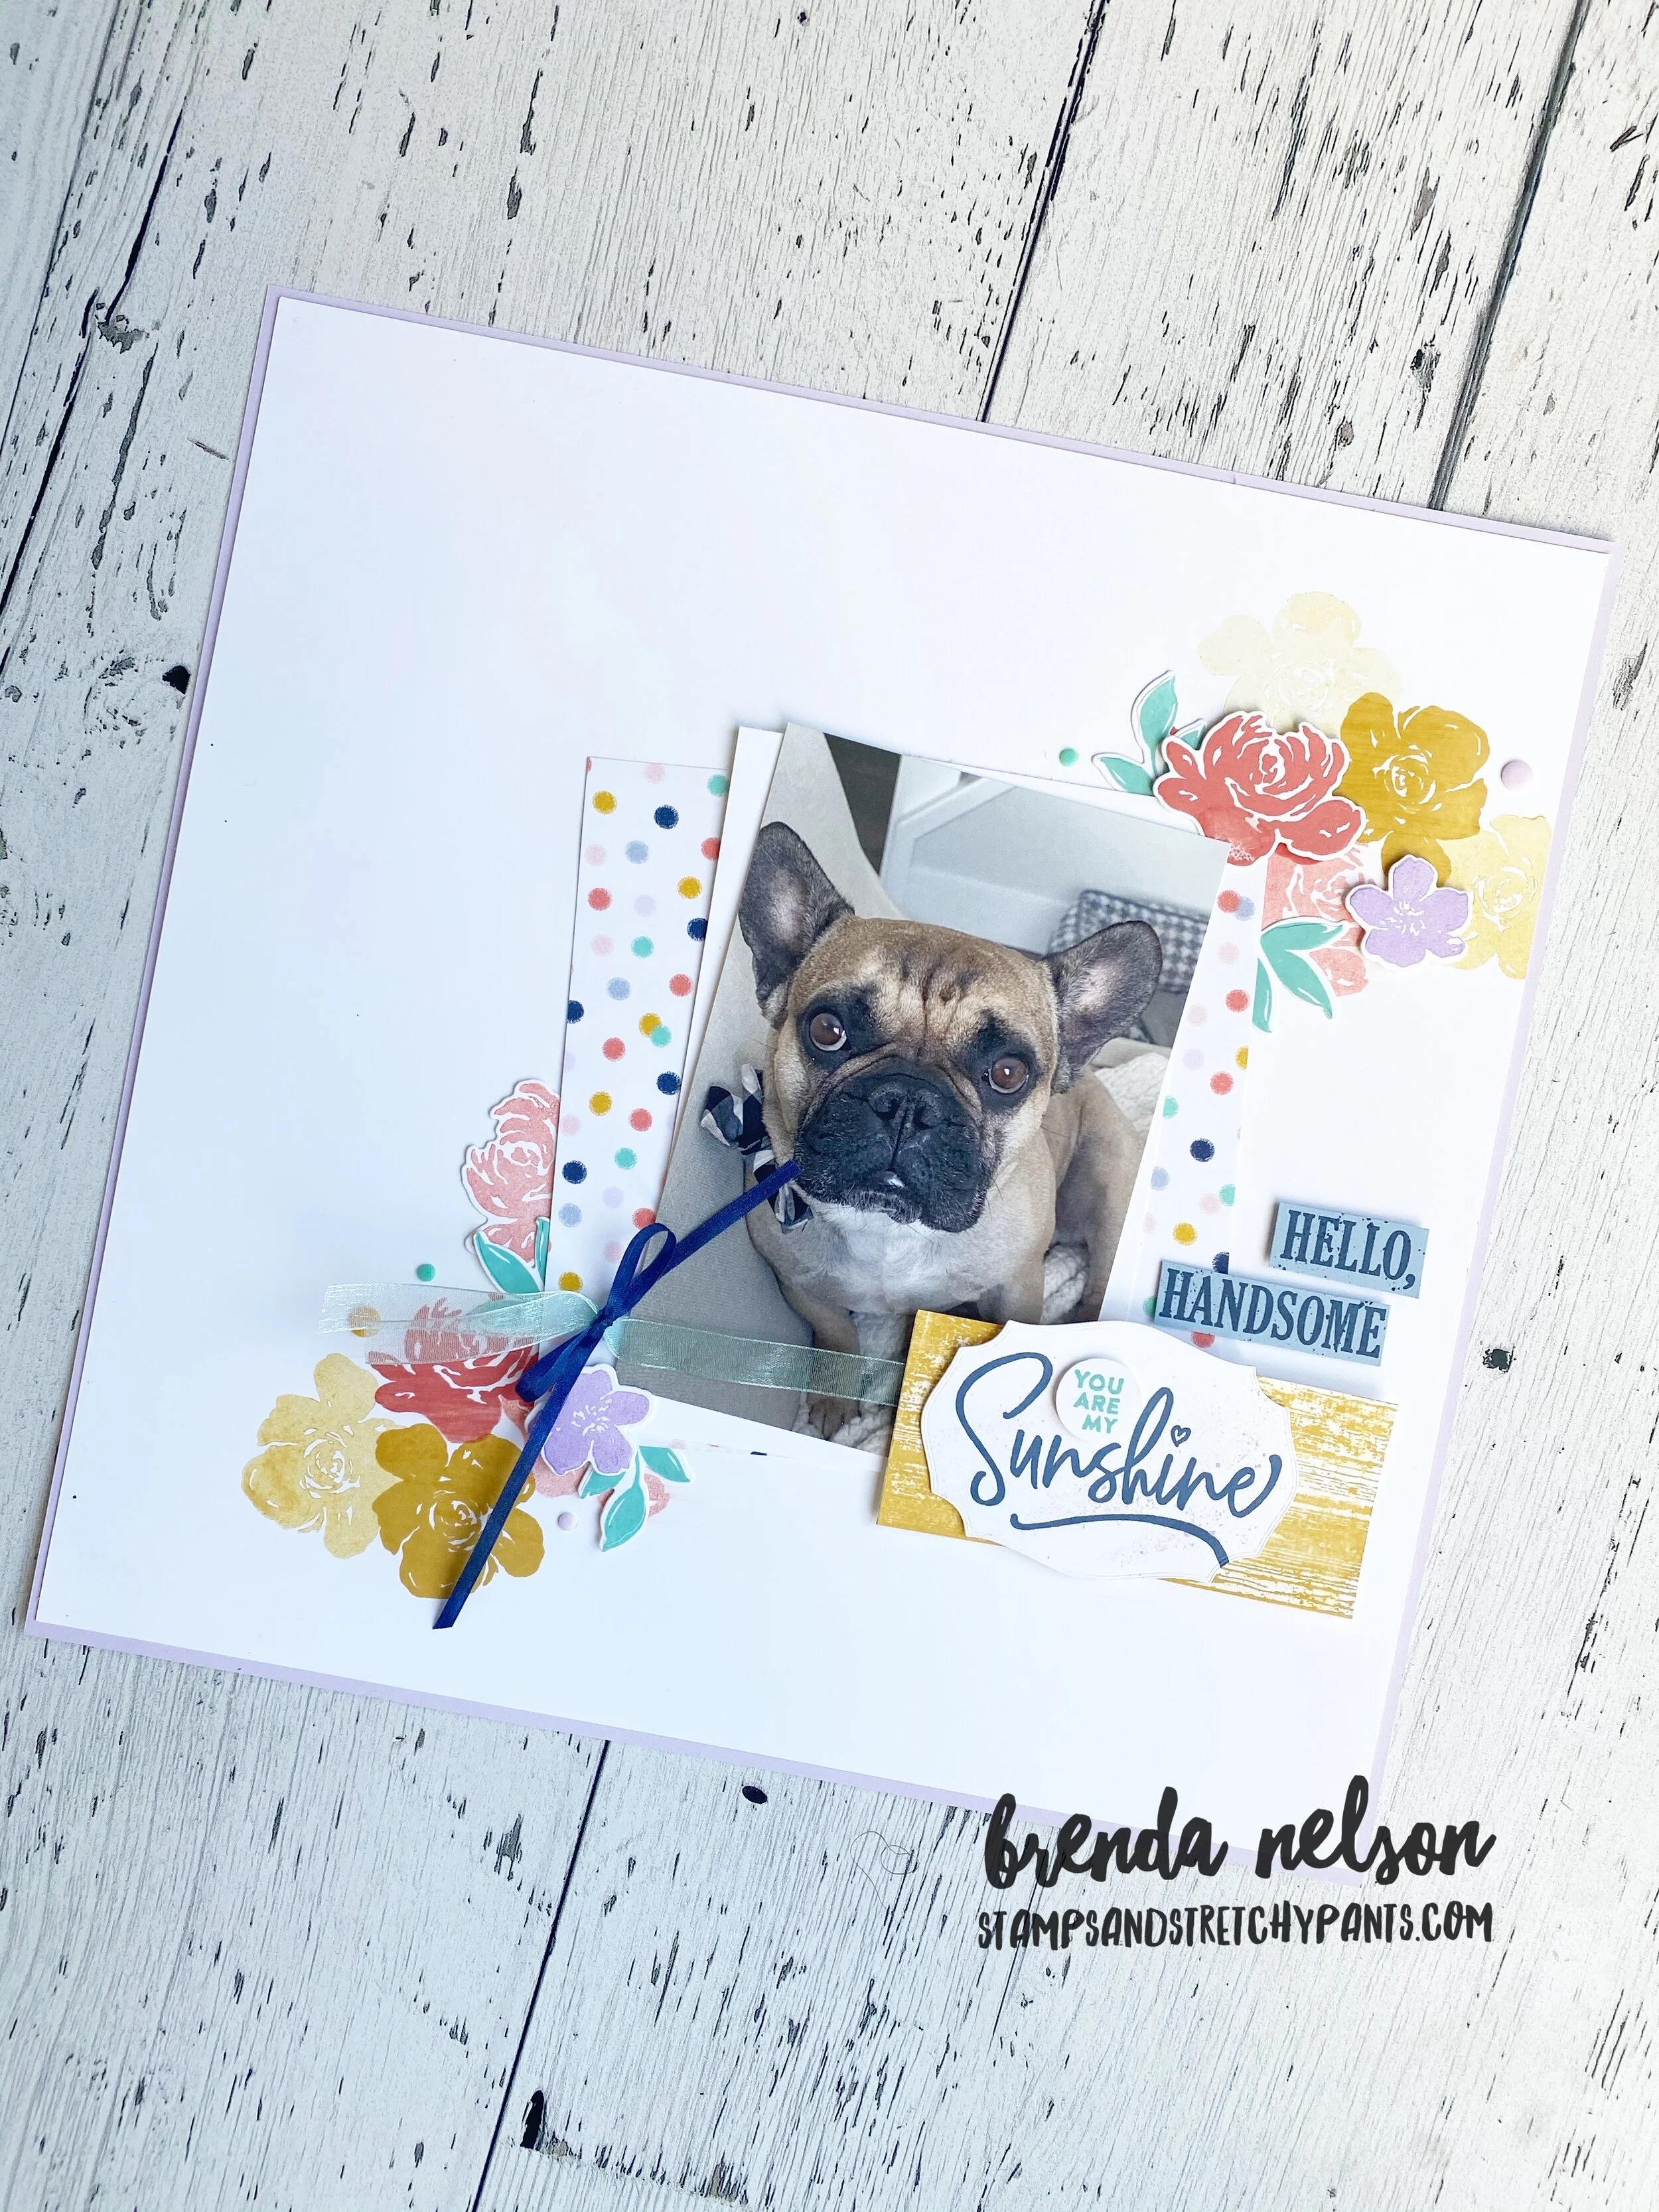
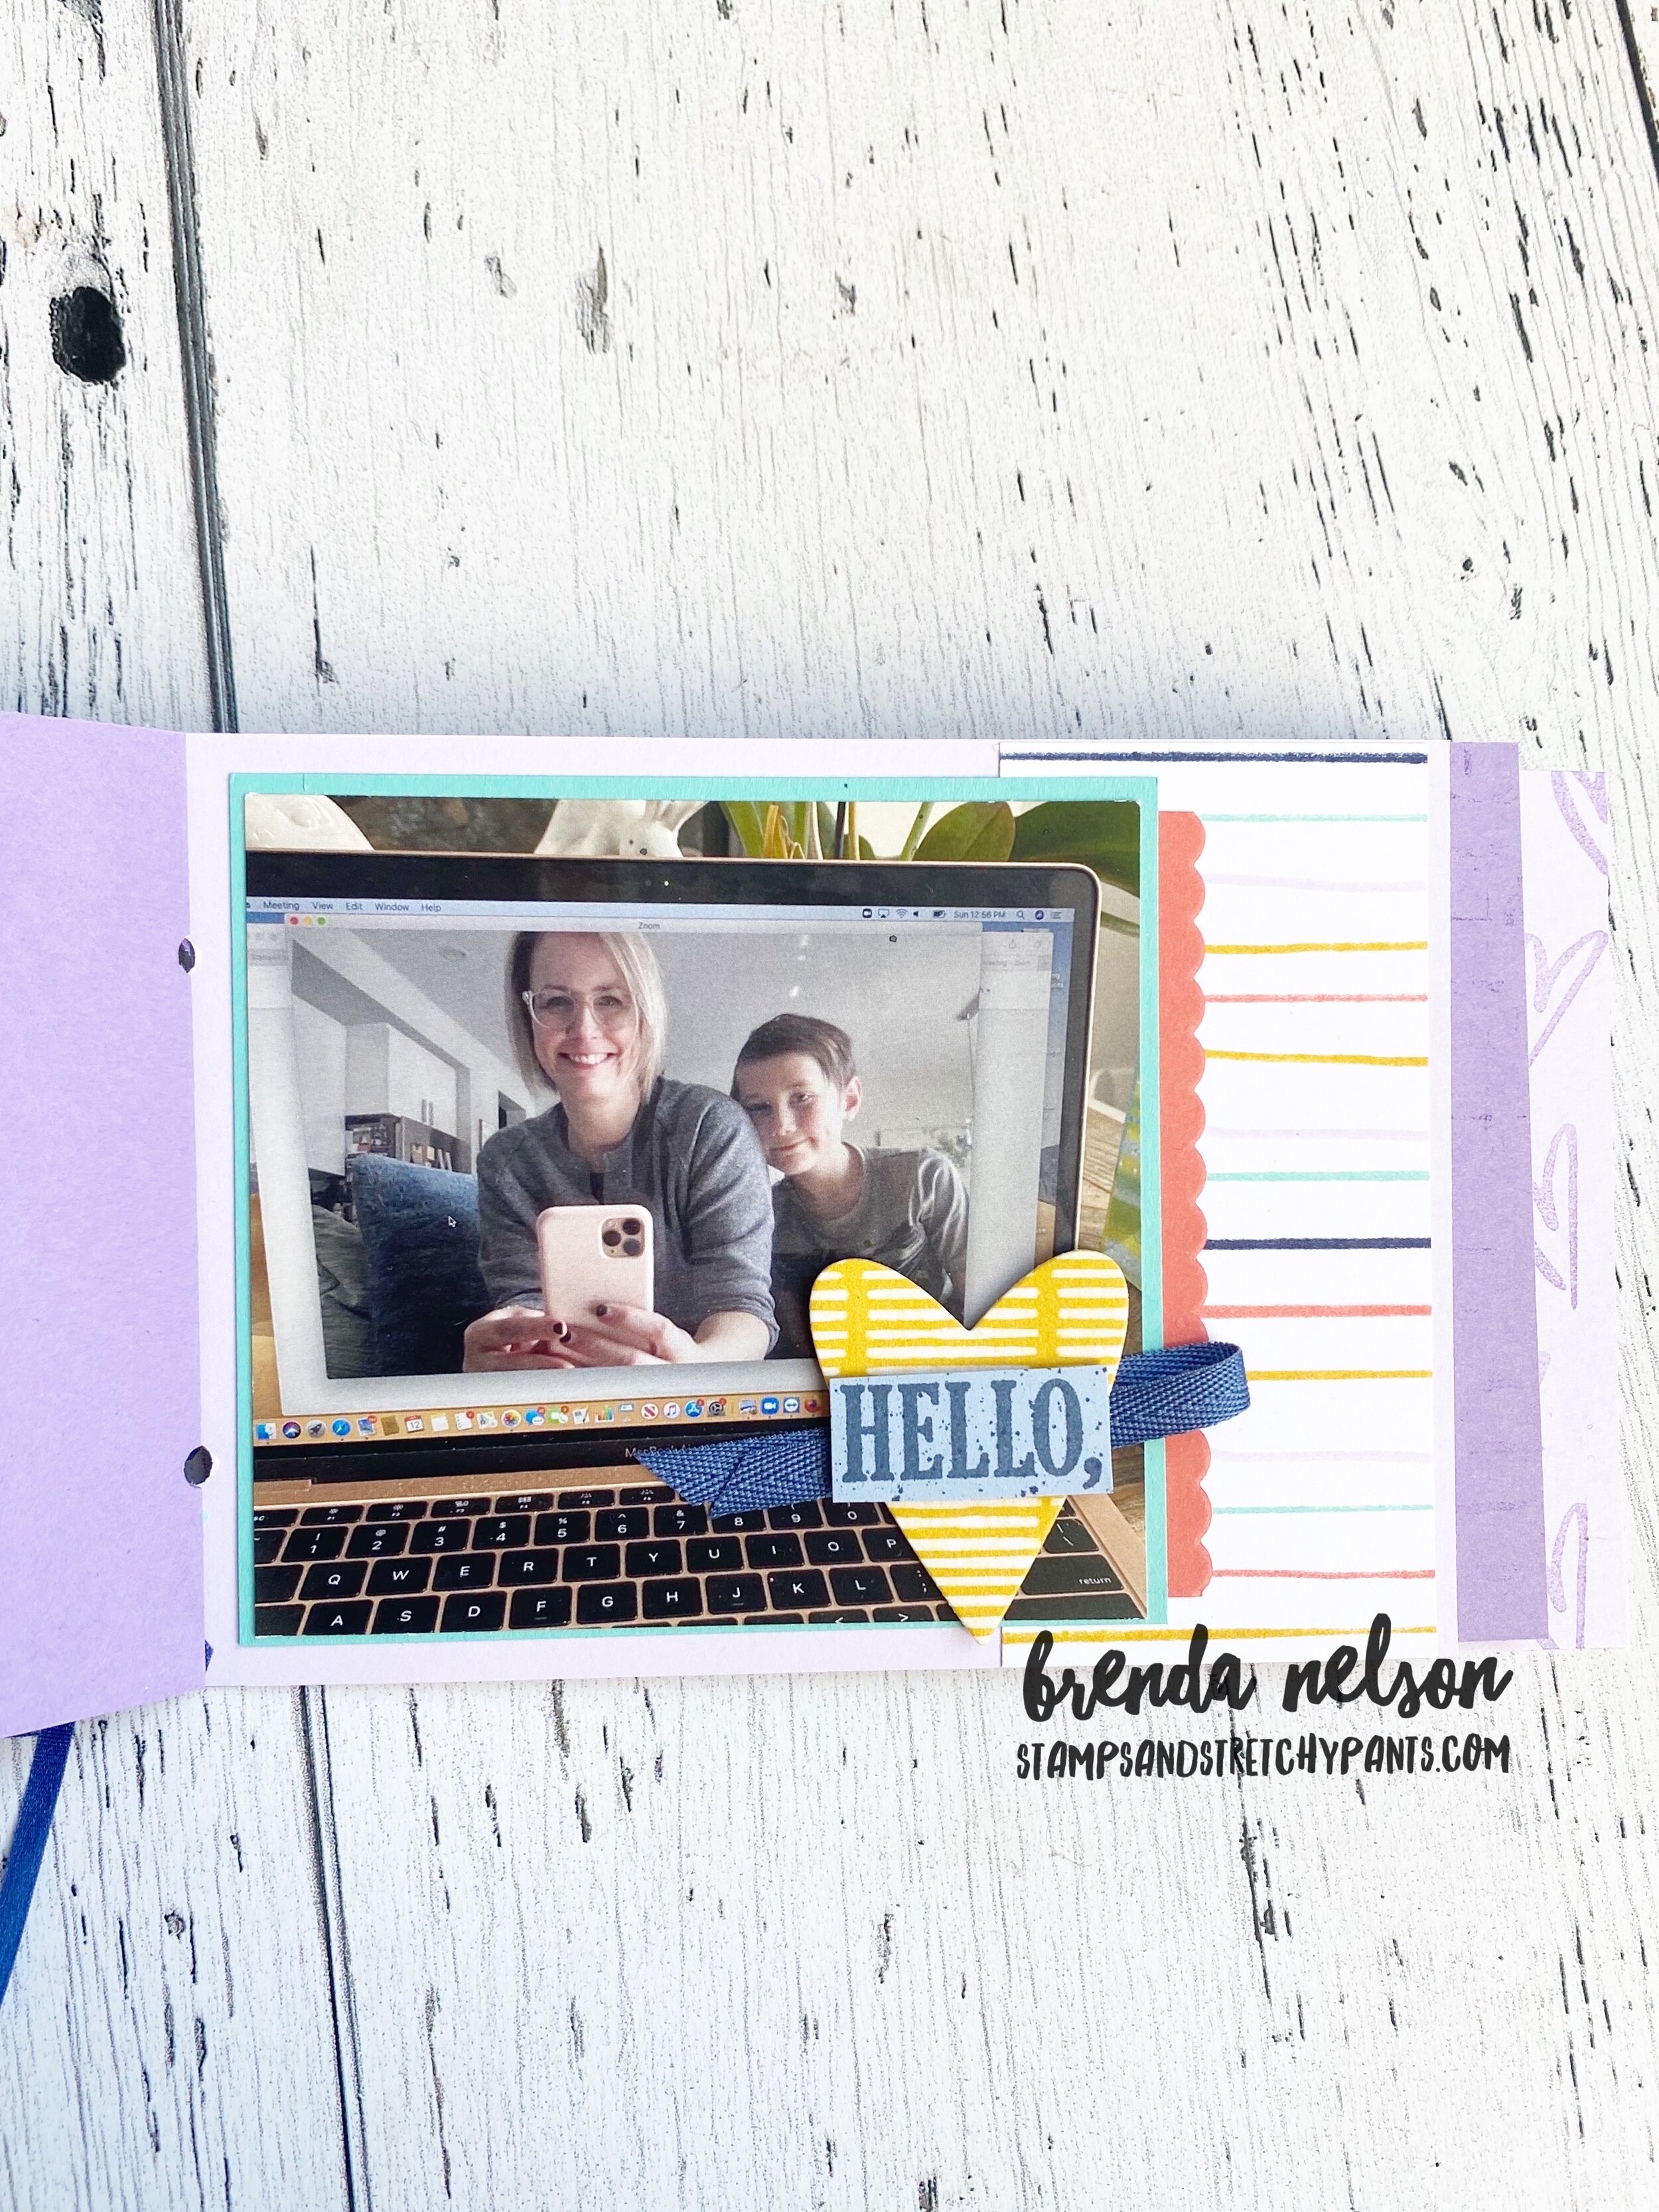
This mini album is created using 5 pieces of 5 1/2 x 8 1/2 pieces of Crumb Cake card stock. Instead of scoring the card stock in half to make a card I just kept as is.

final (7) 15.jpg

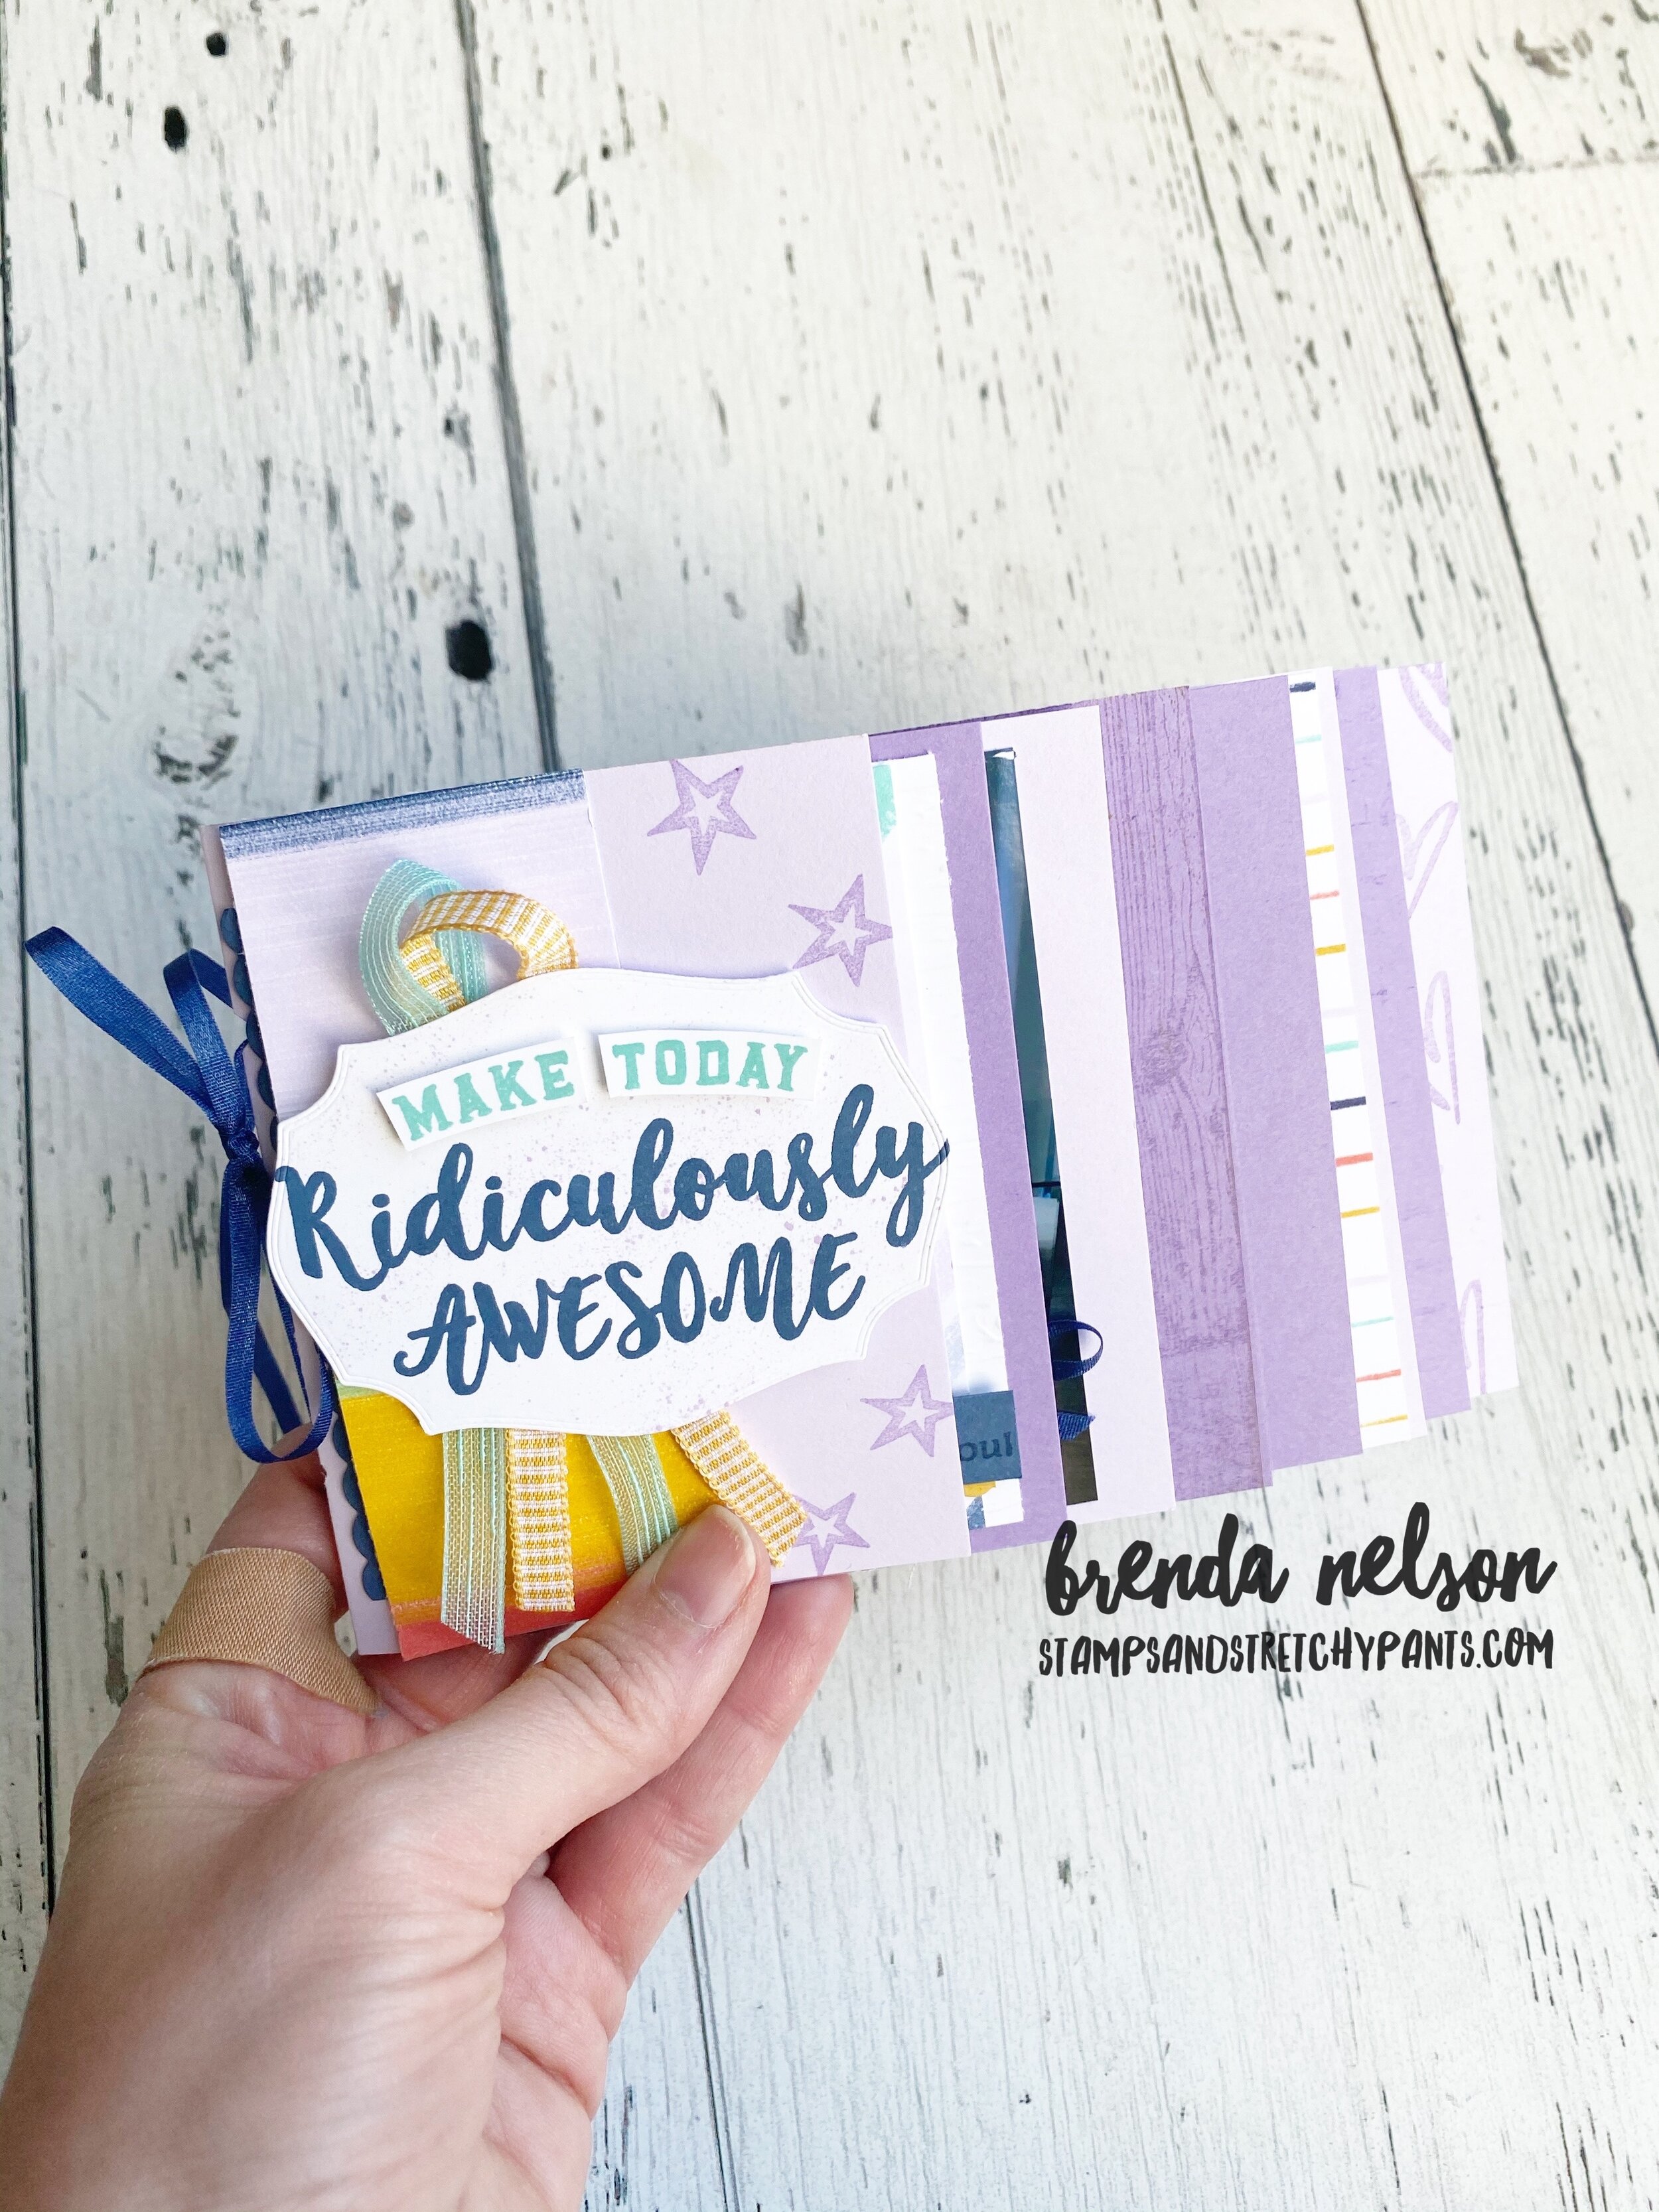
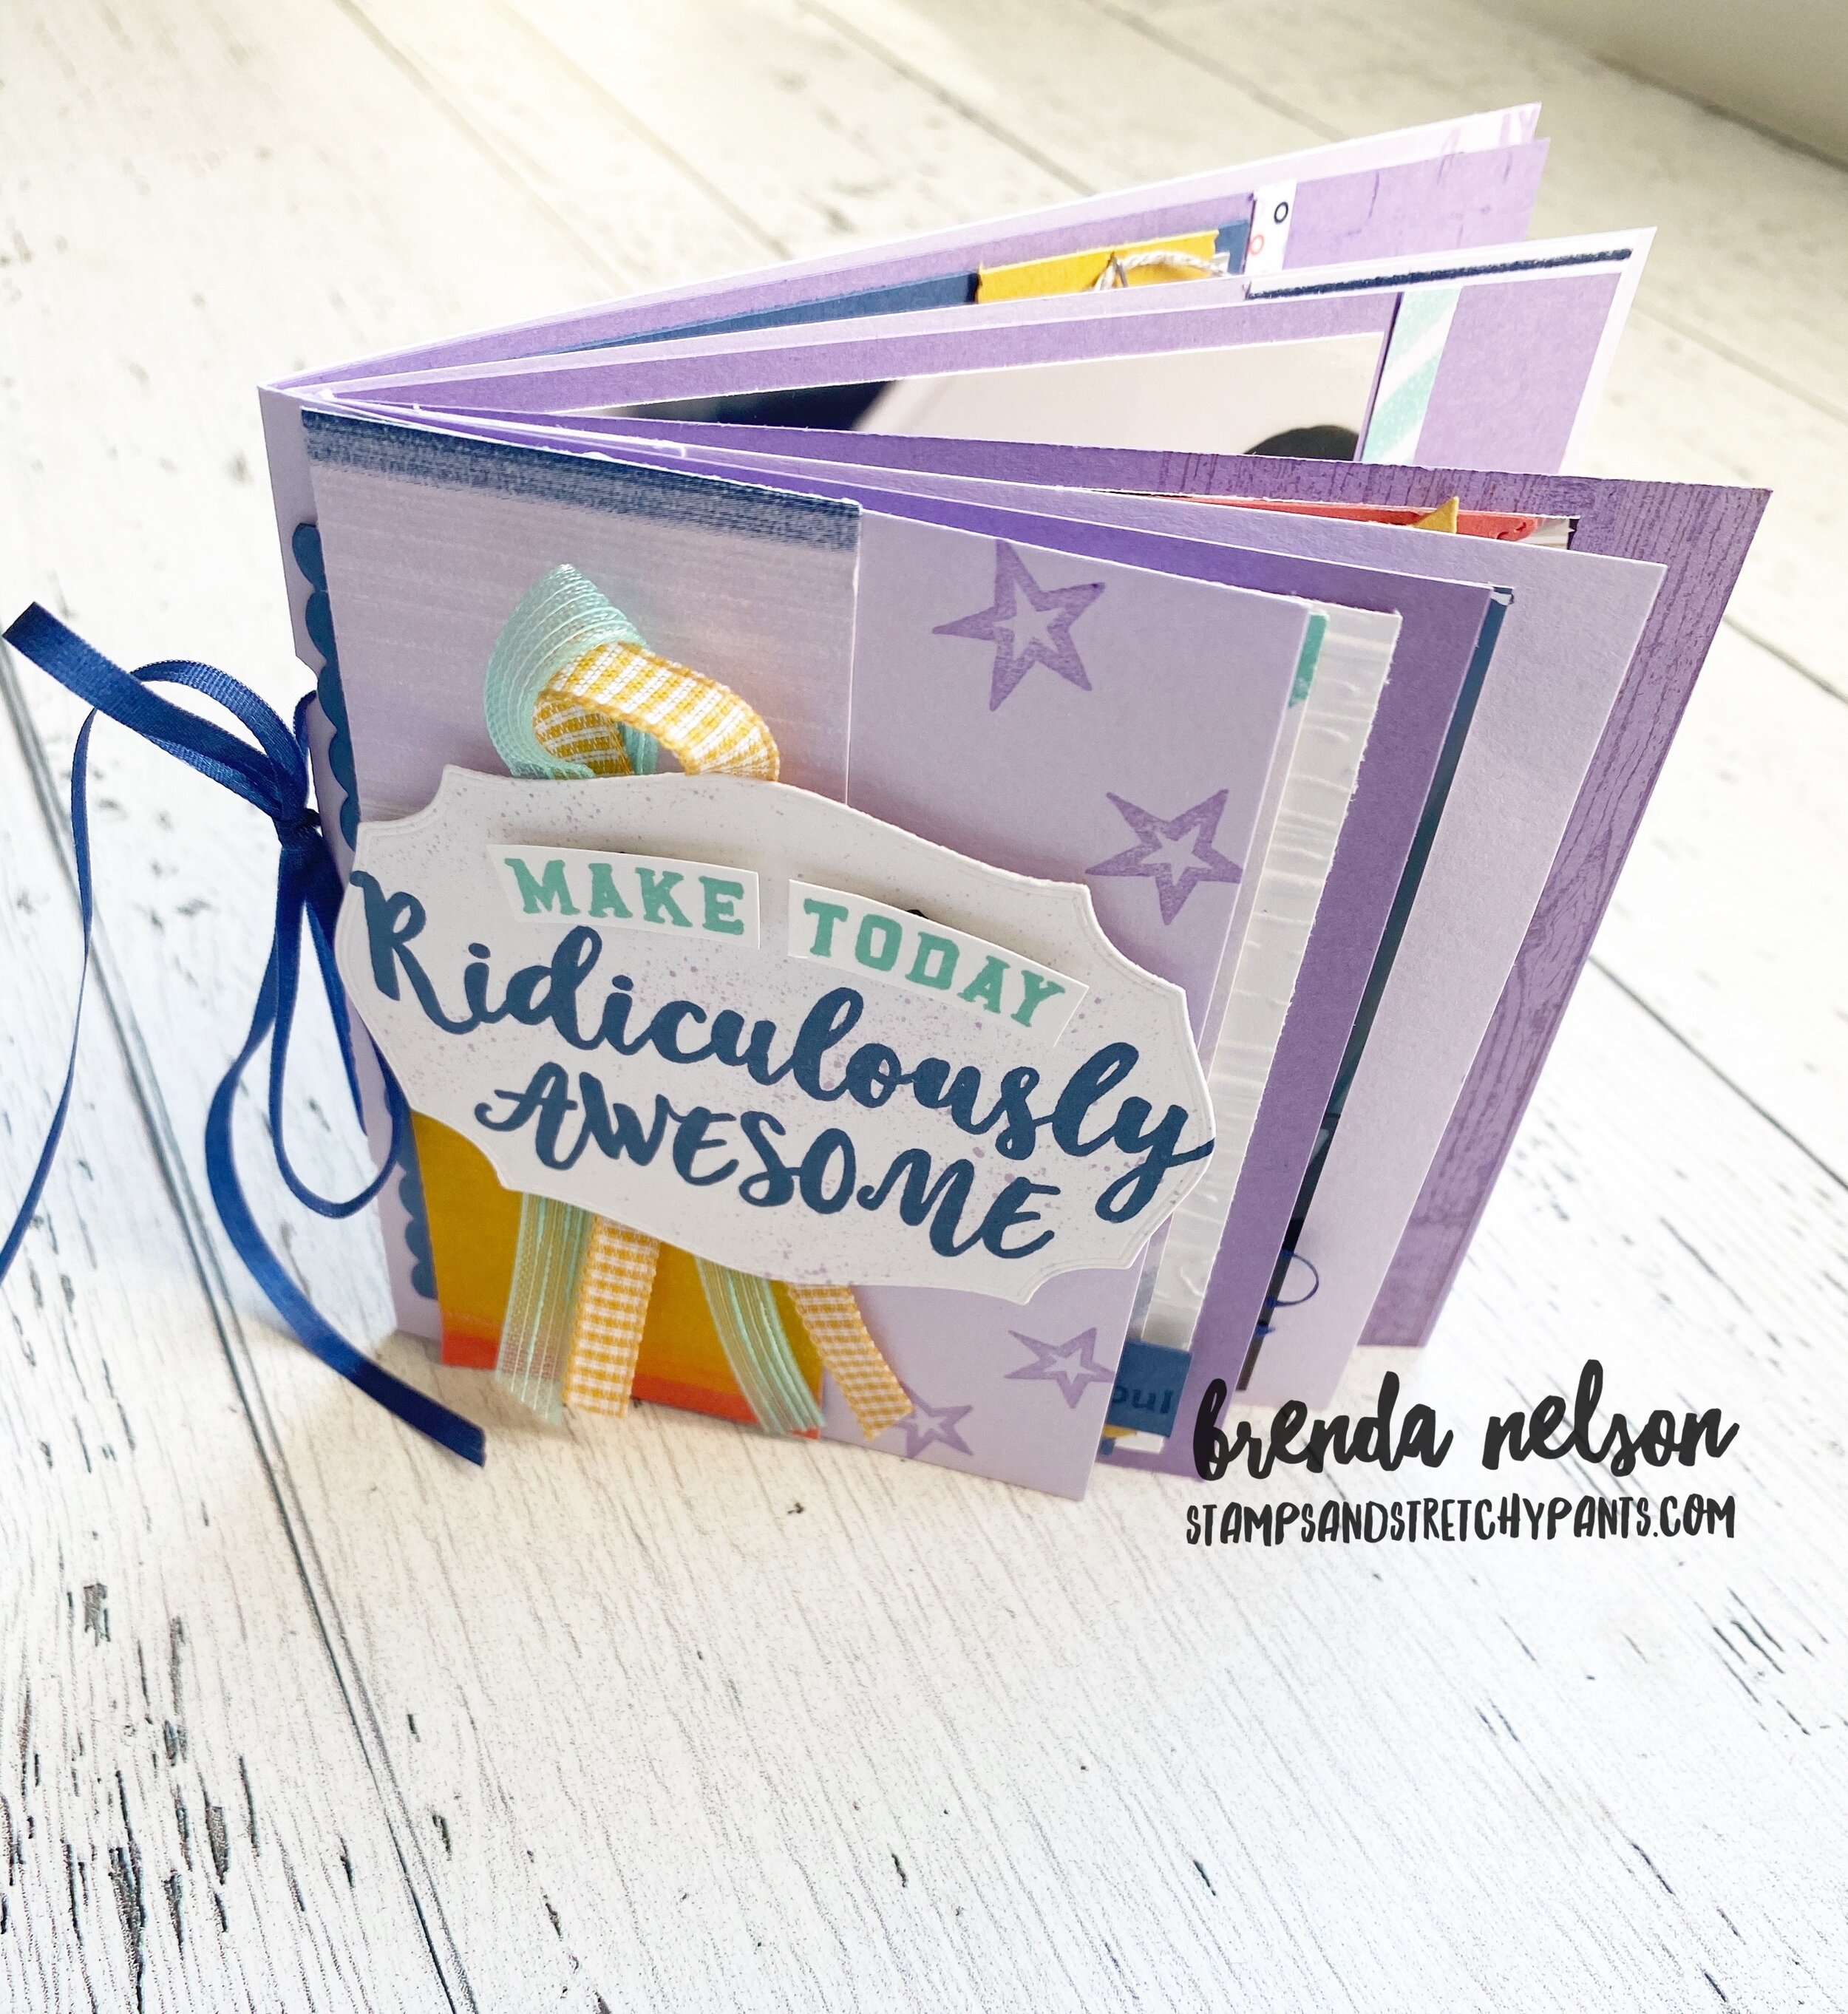
The album is kept together with two 1 inch binder rings that are found easily at any office supply store and are jazzed up a bit with a variety of ribbons. I love how many options Stampin’ Up! has for us to choose from.

I added a Soft Suede piece to mimic a book binding. The scallop edge is created using the Peony Dies.

What is really awesome about this album is the whole project uses only ONE stamp set! The Wrapped in Christmas stamp set was perfect for this project!!


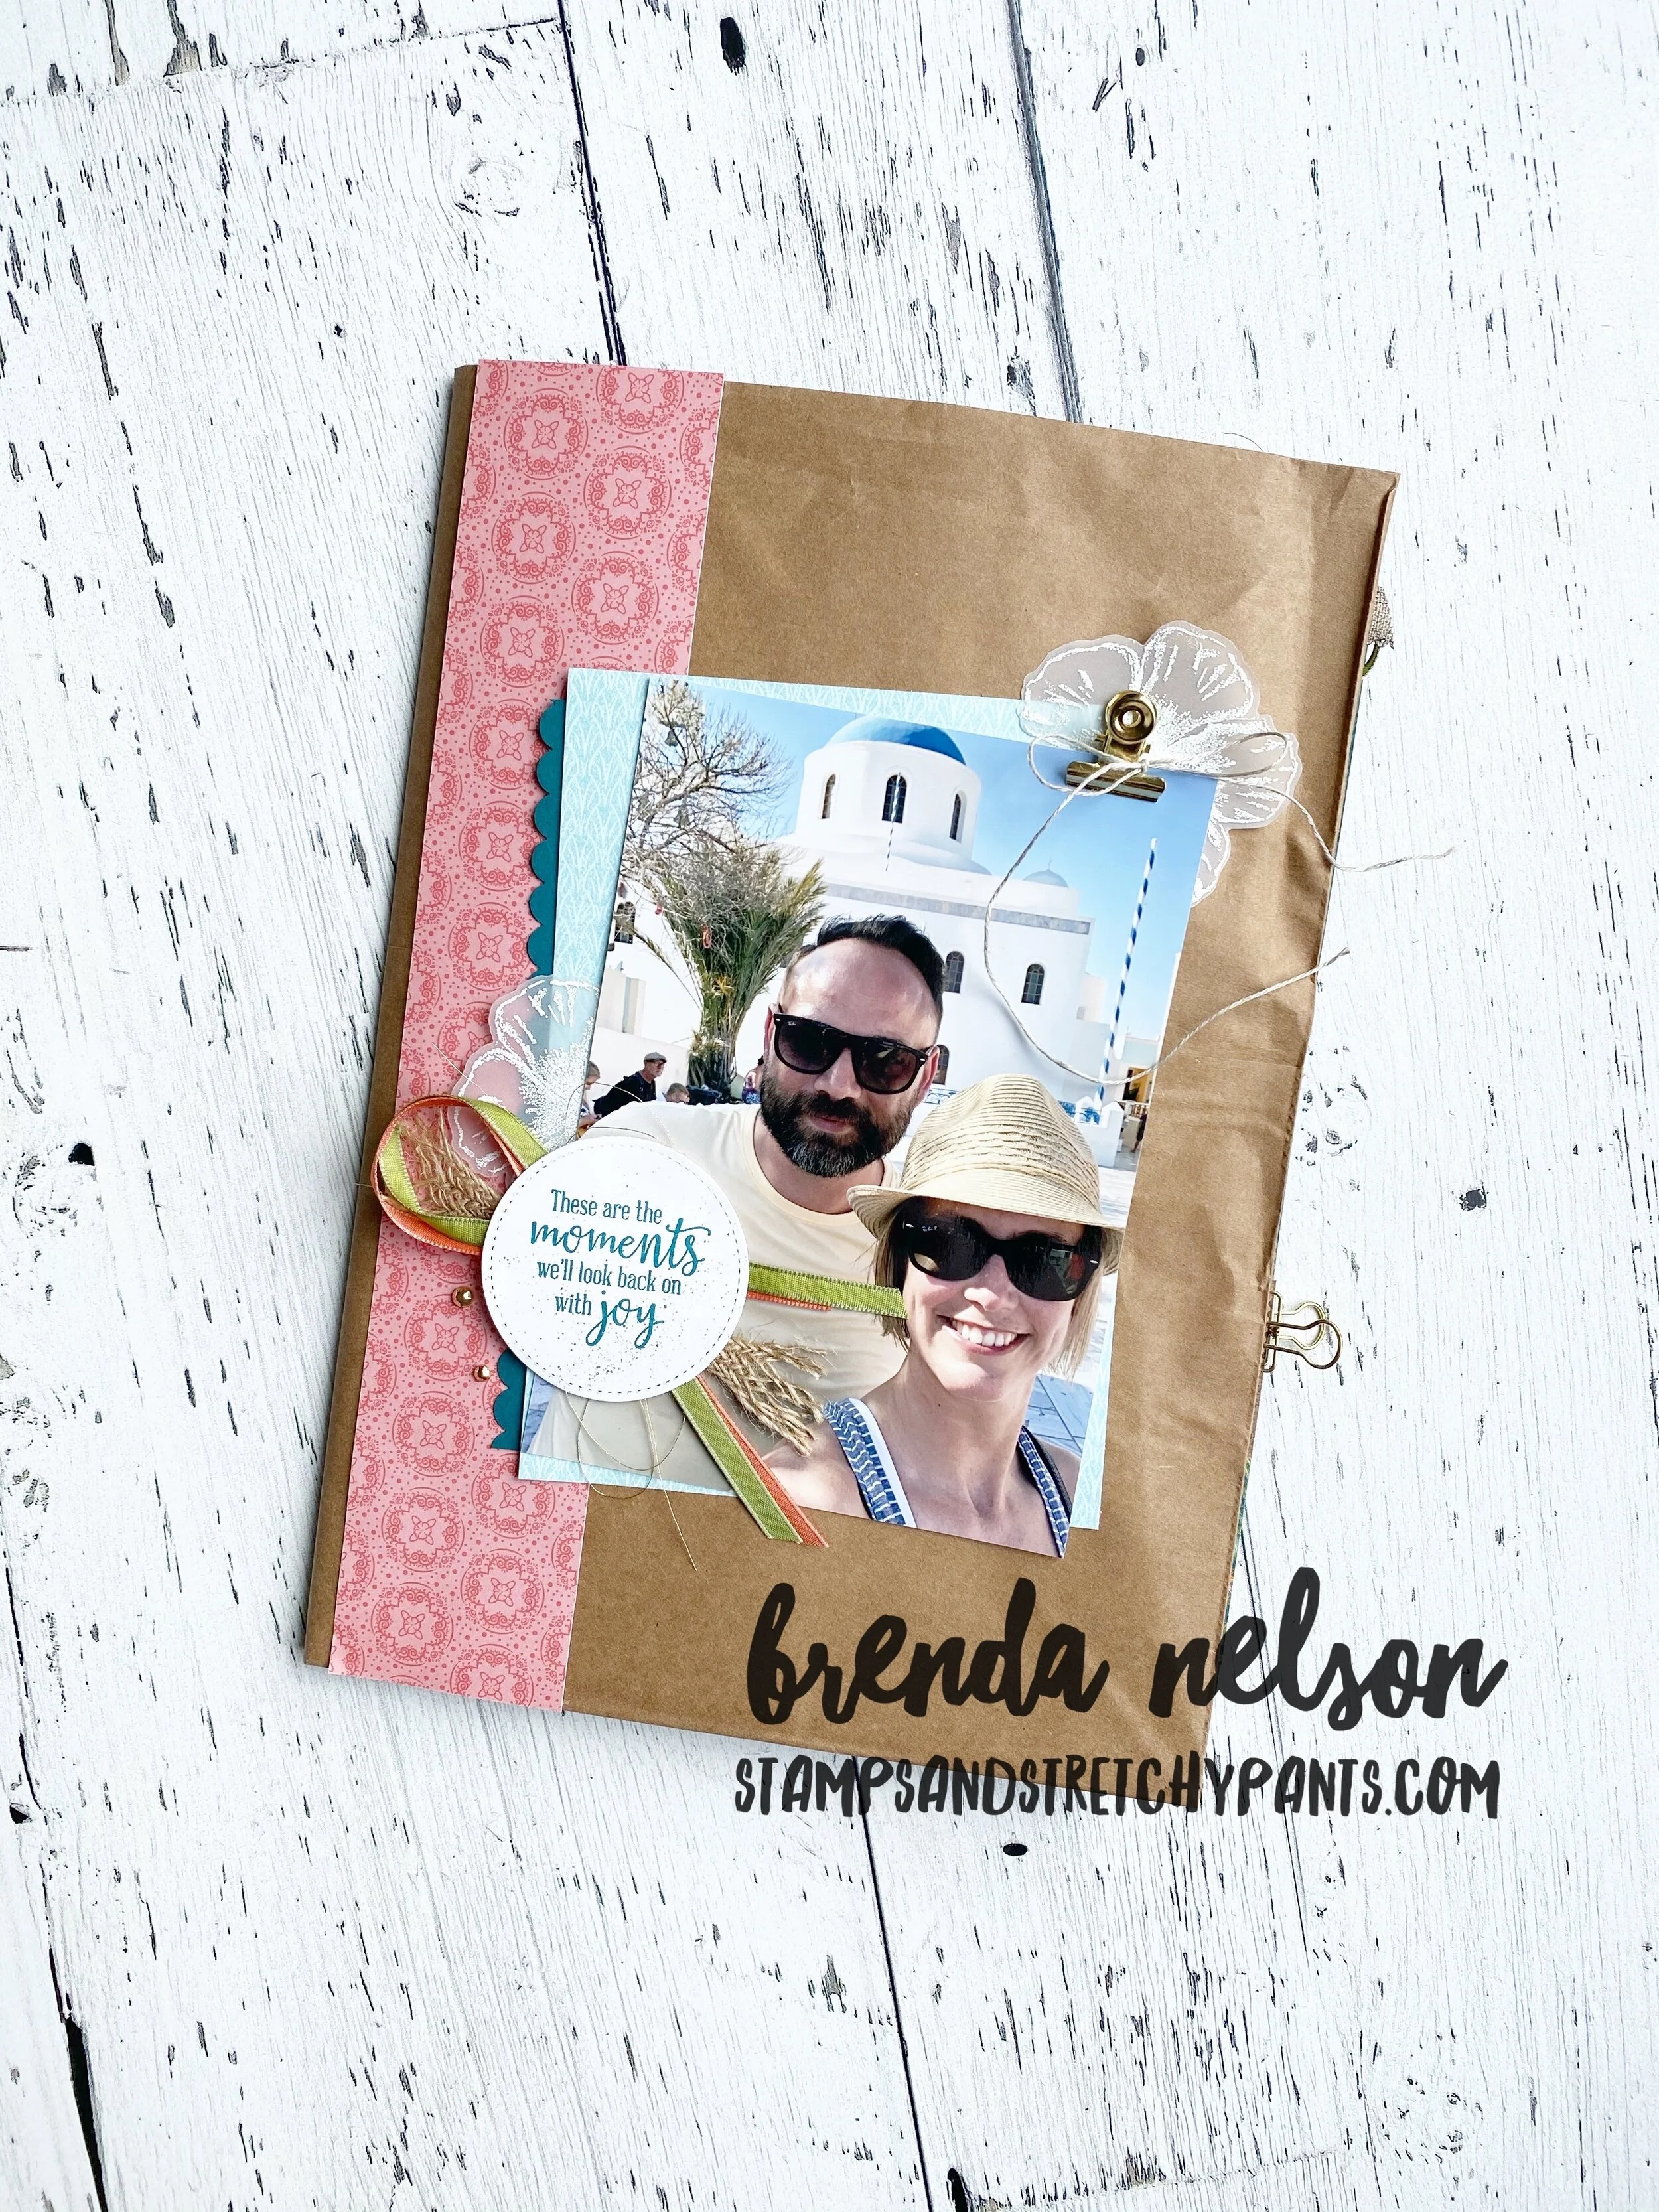
I used two different stamps to create a lovely cover page. My idea was that this album could become a piece of holiday decor that the recipient (yes, I made this for my mom) could have on display year after year.

I used some of the Mossy Meadow Diagonal Stripe ribbon paired with Linen Thread and some Red Rhinestones to bring the sentiment “Let the Joy..” come to life. It is stamped on a shape from the HIppo & Friends dies.

final (2) 4.jpg
final (20).jpg

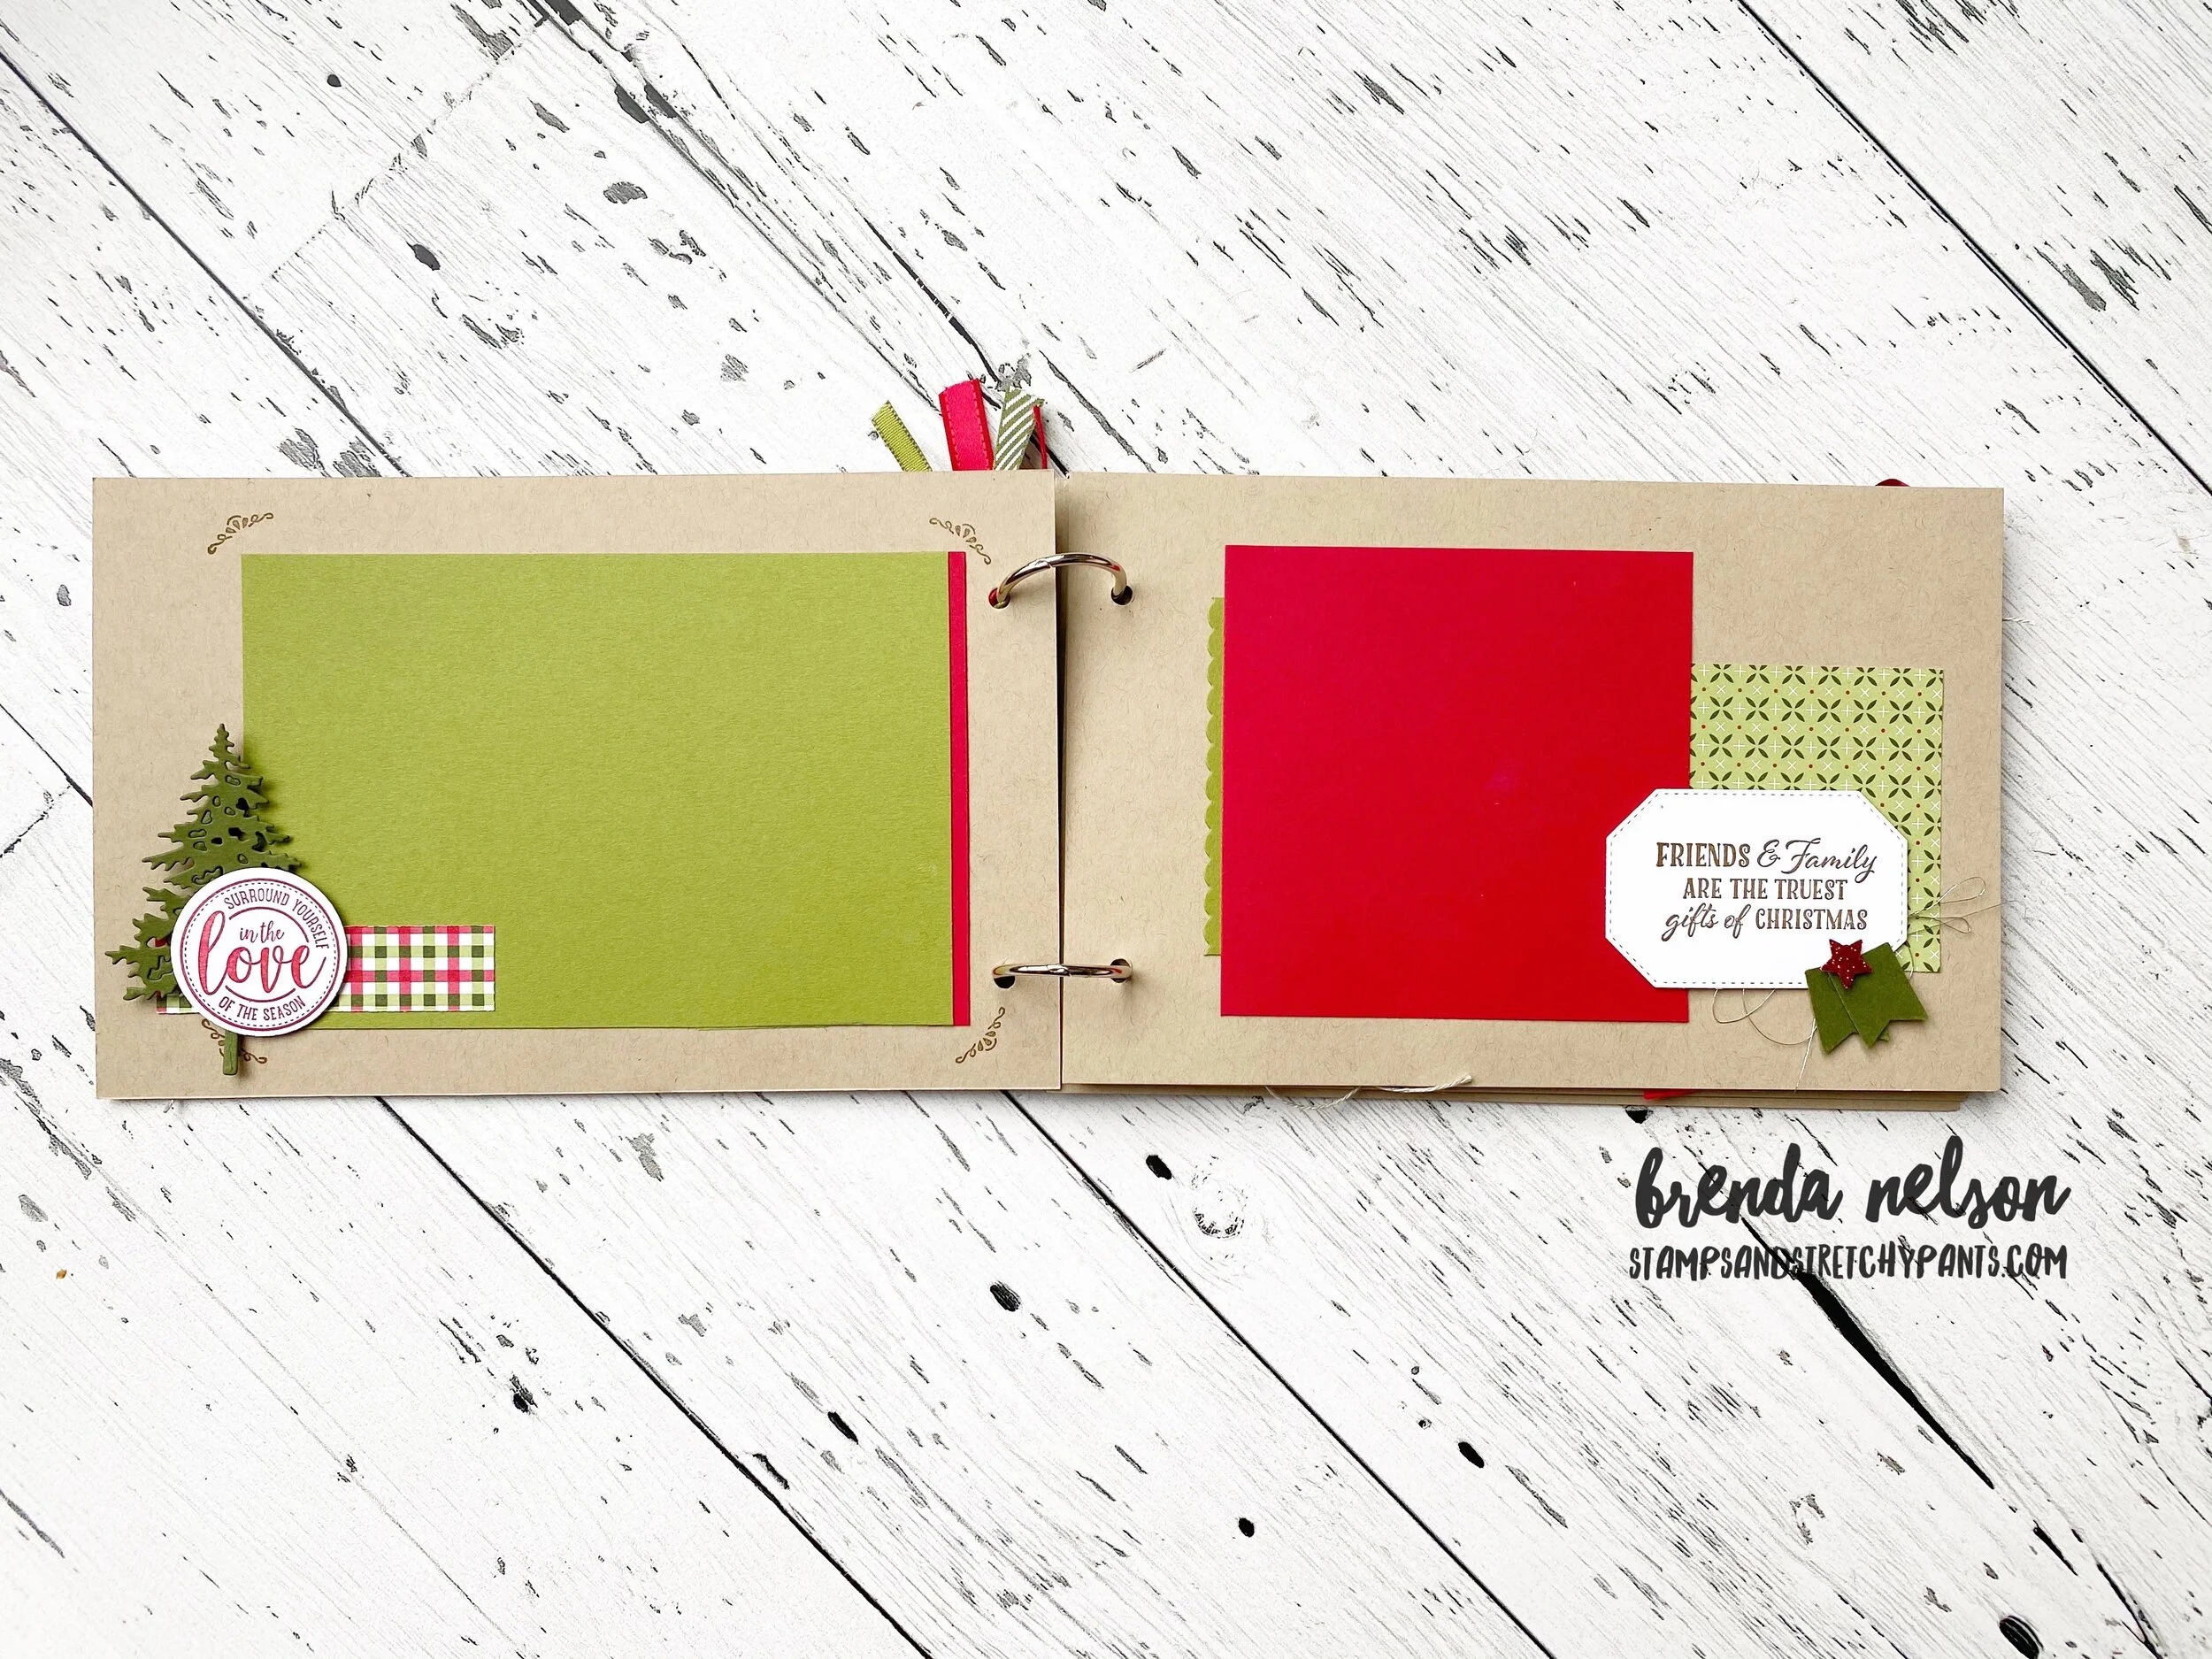
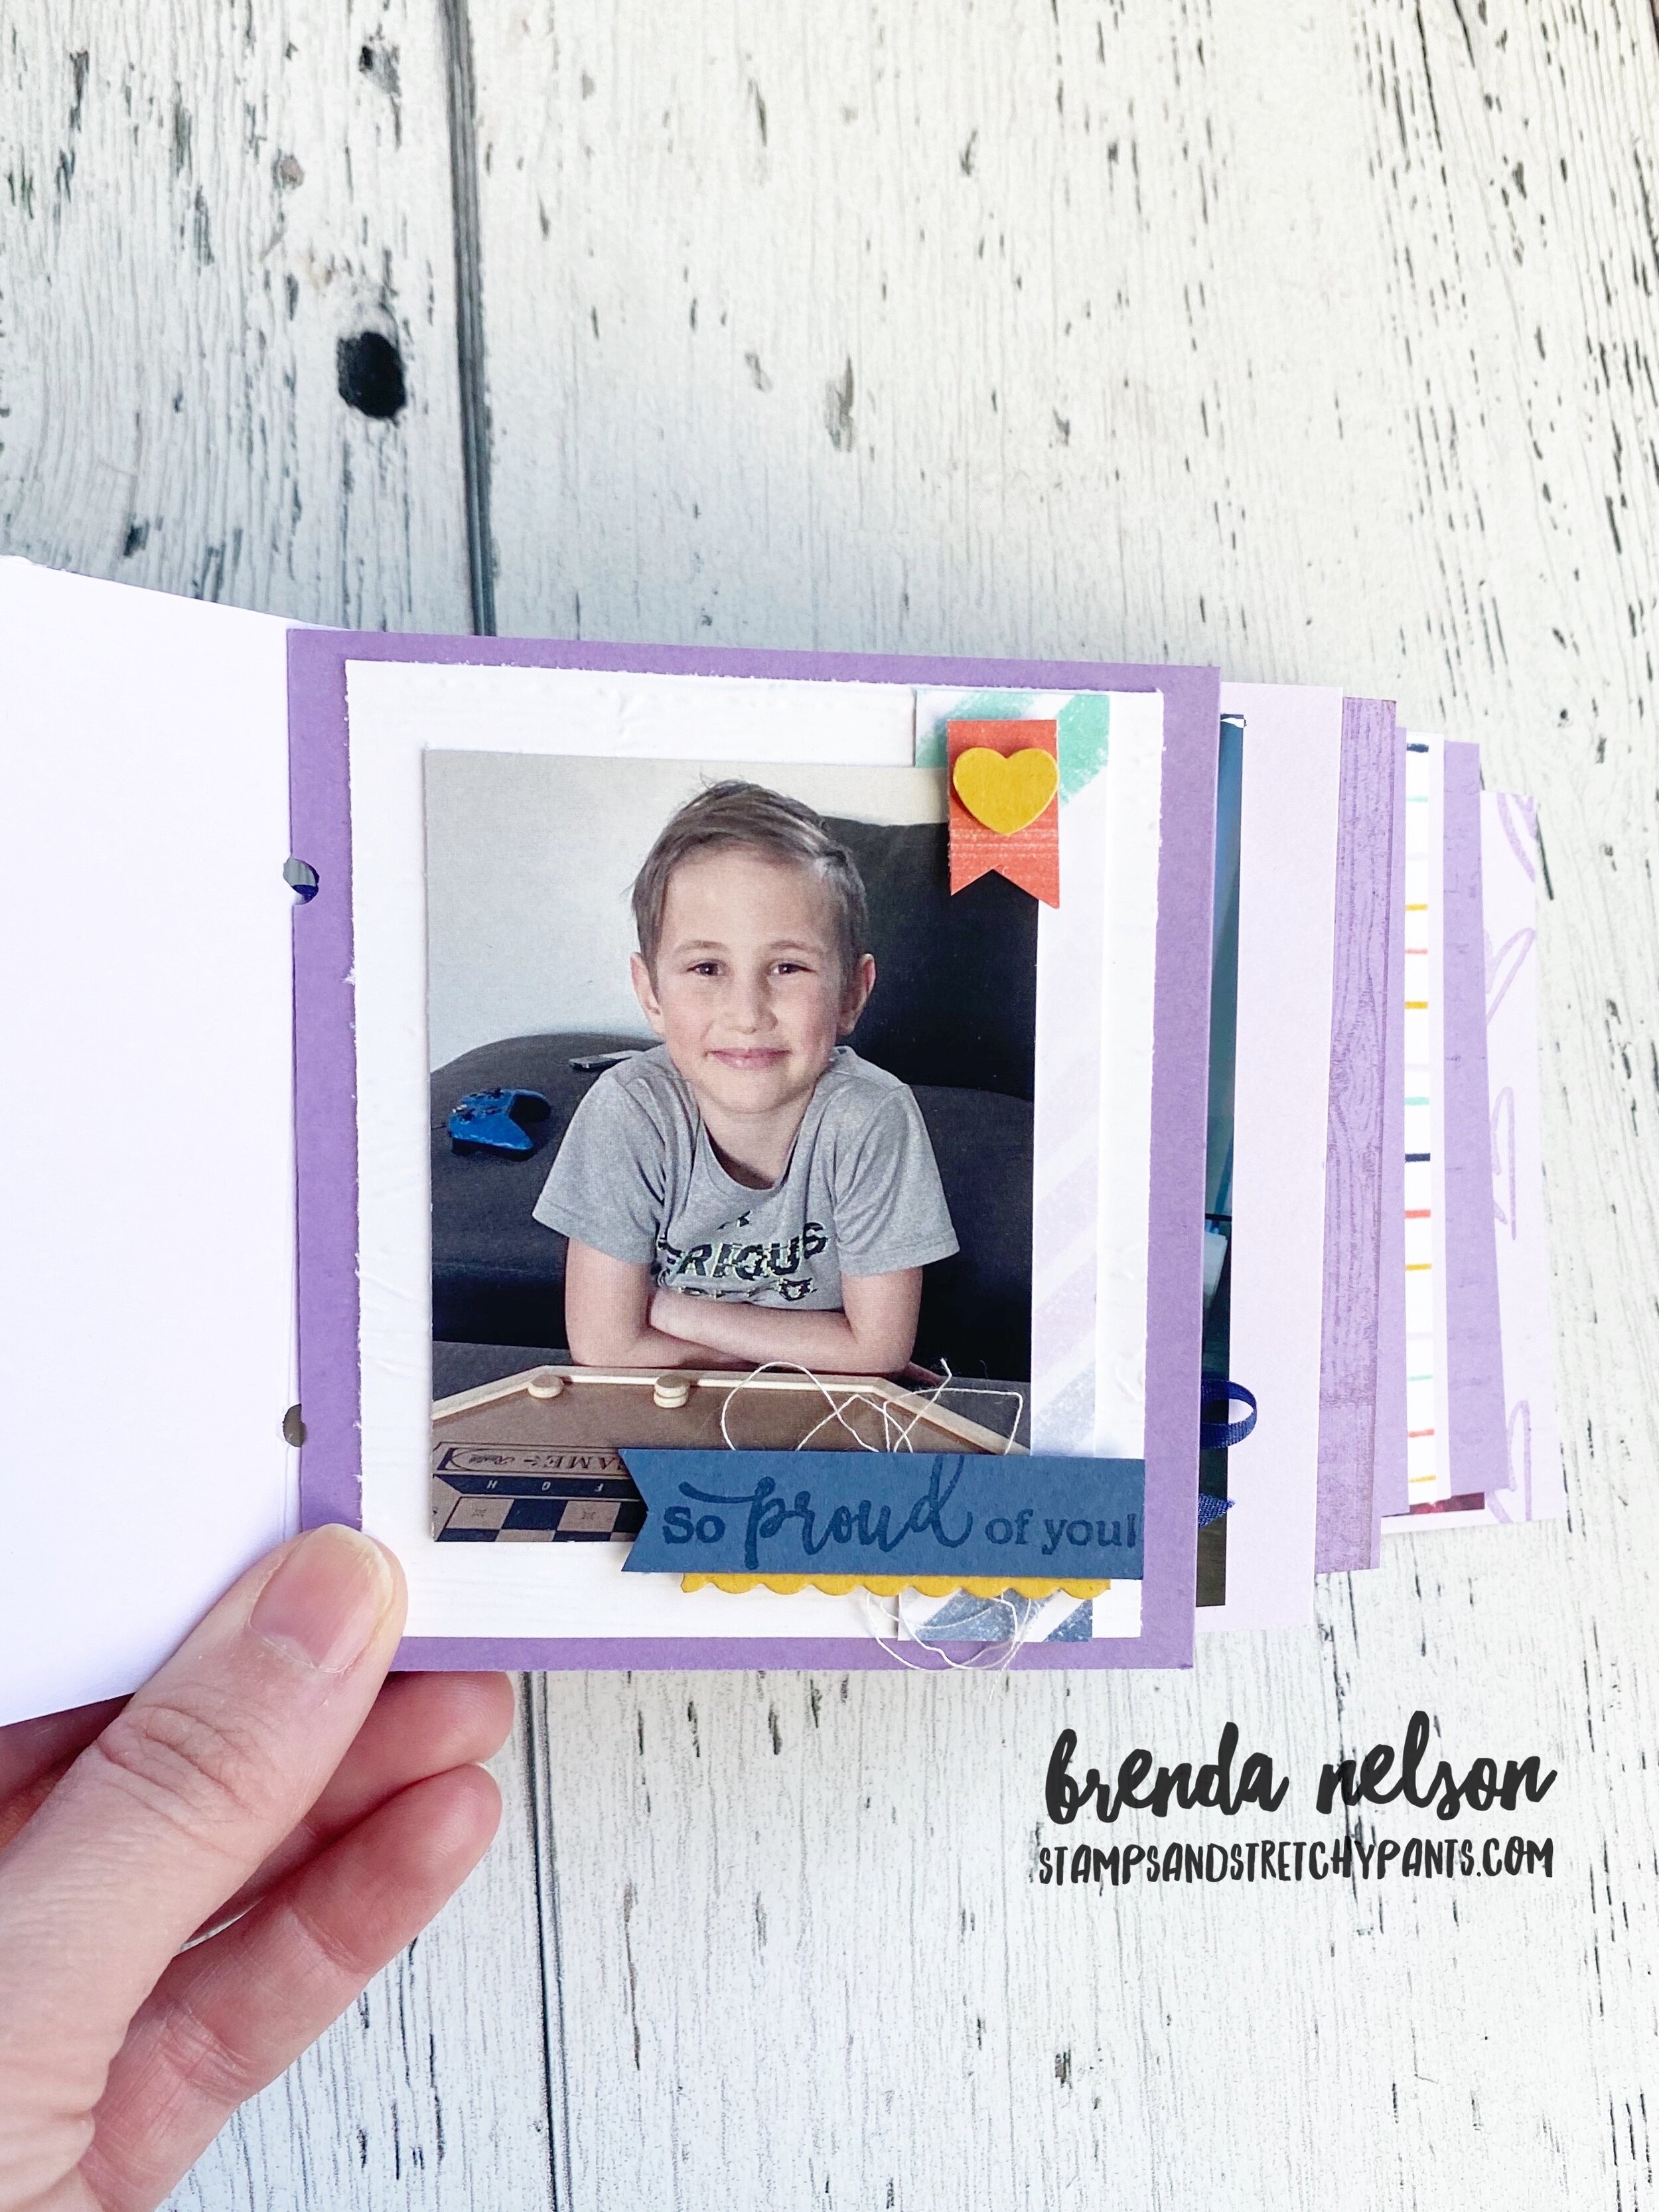
I added in elements from the Pine Woods Dies and the Warm Wraps Dies throughout the album. The color palette is paired to the Heartwarming Hugs Designer Series Paper.

final (1) 4.jpg

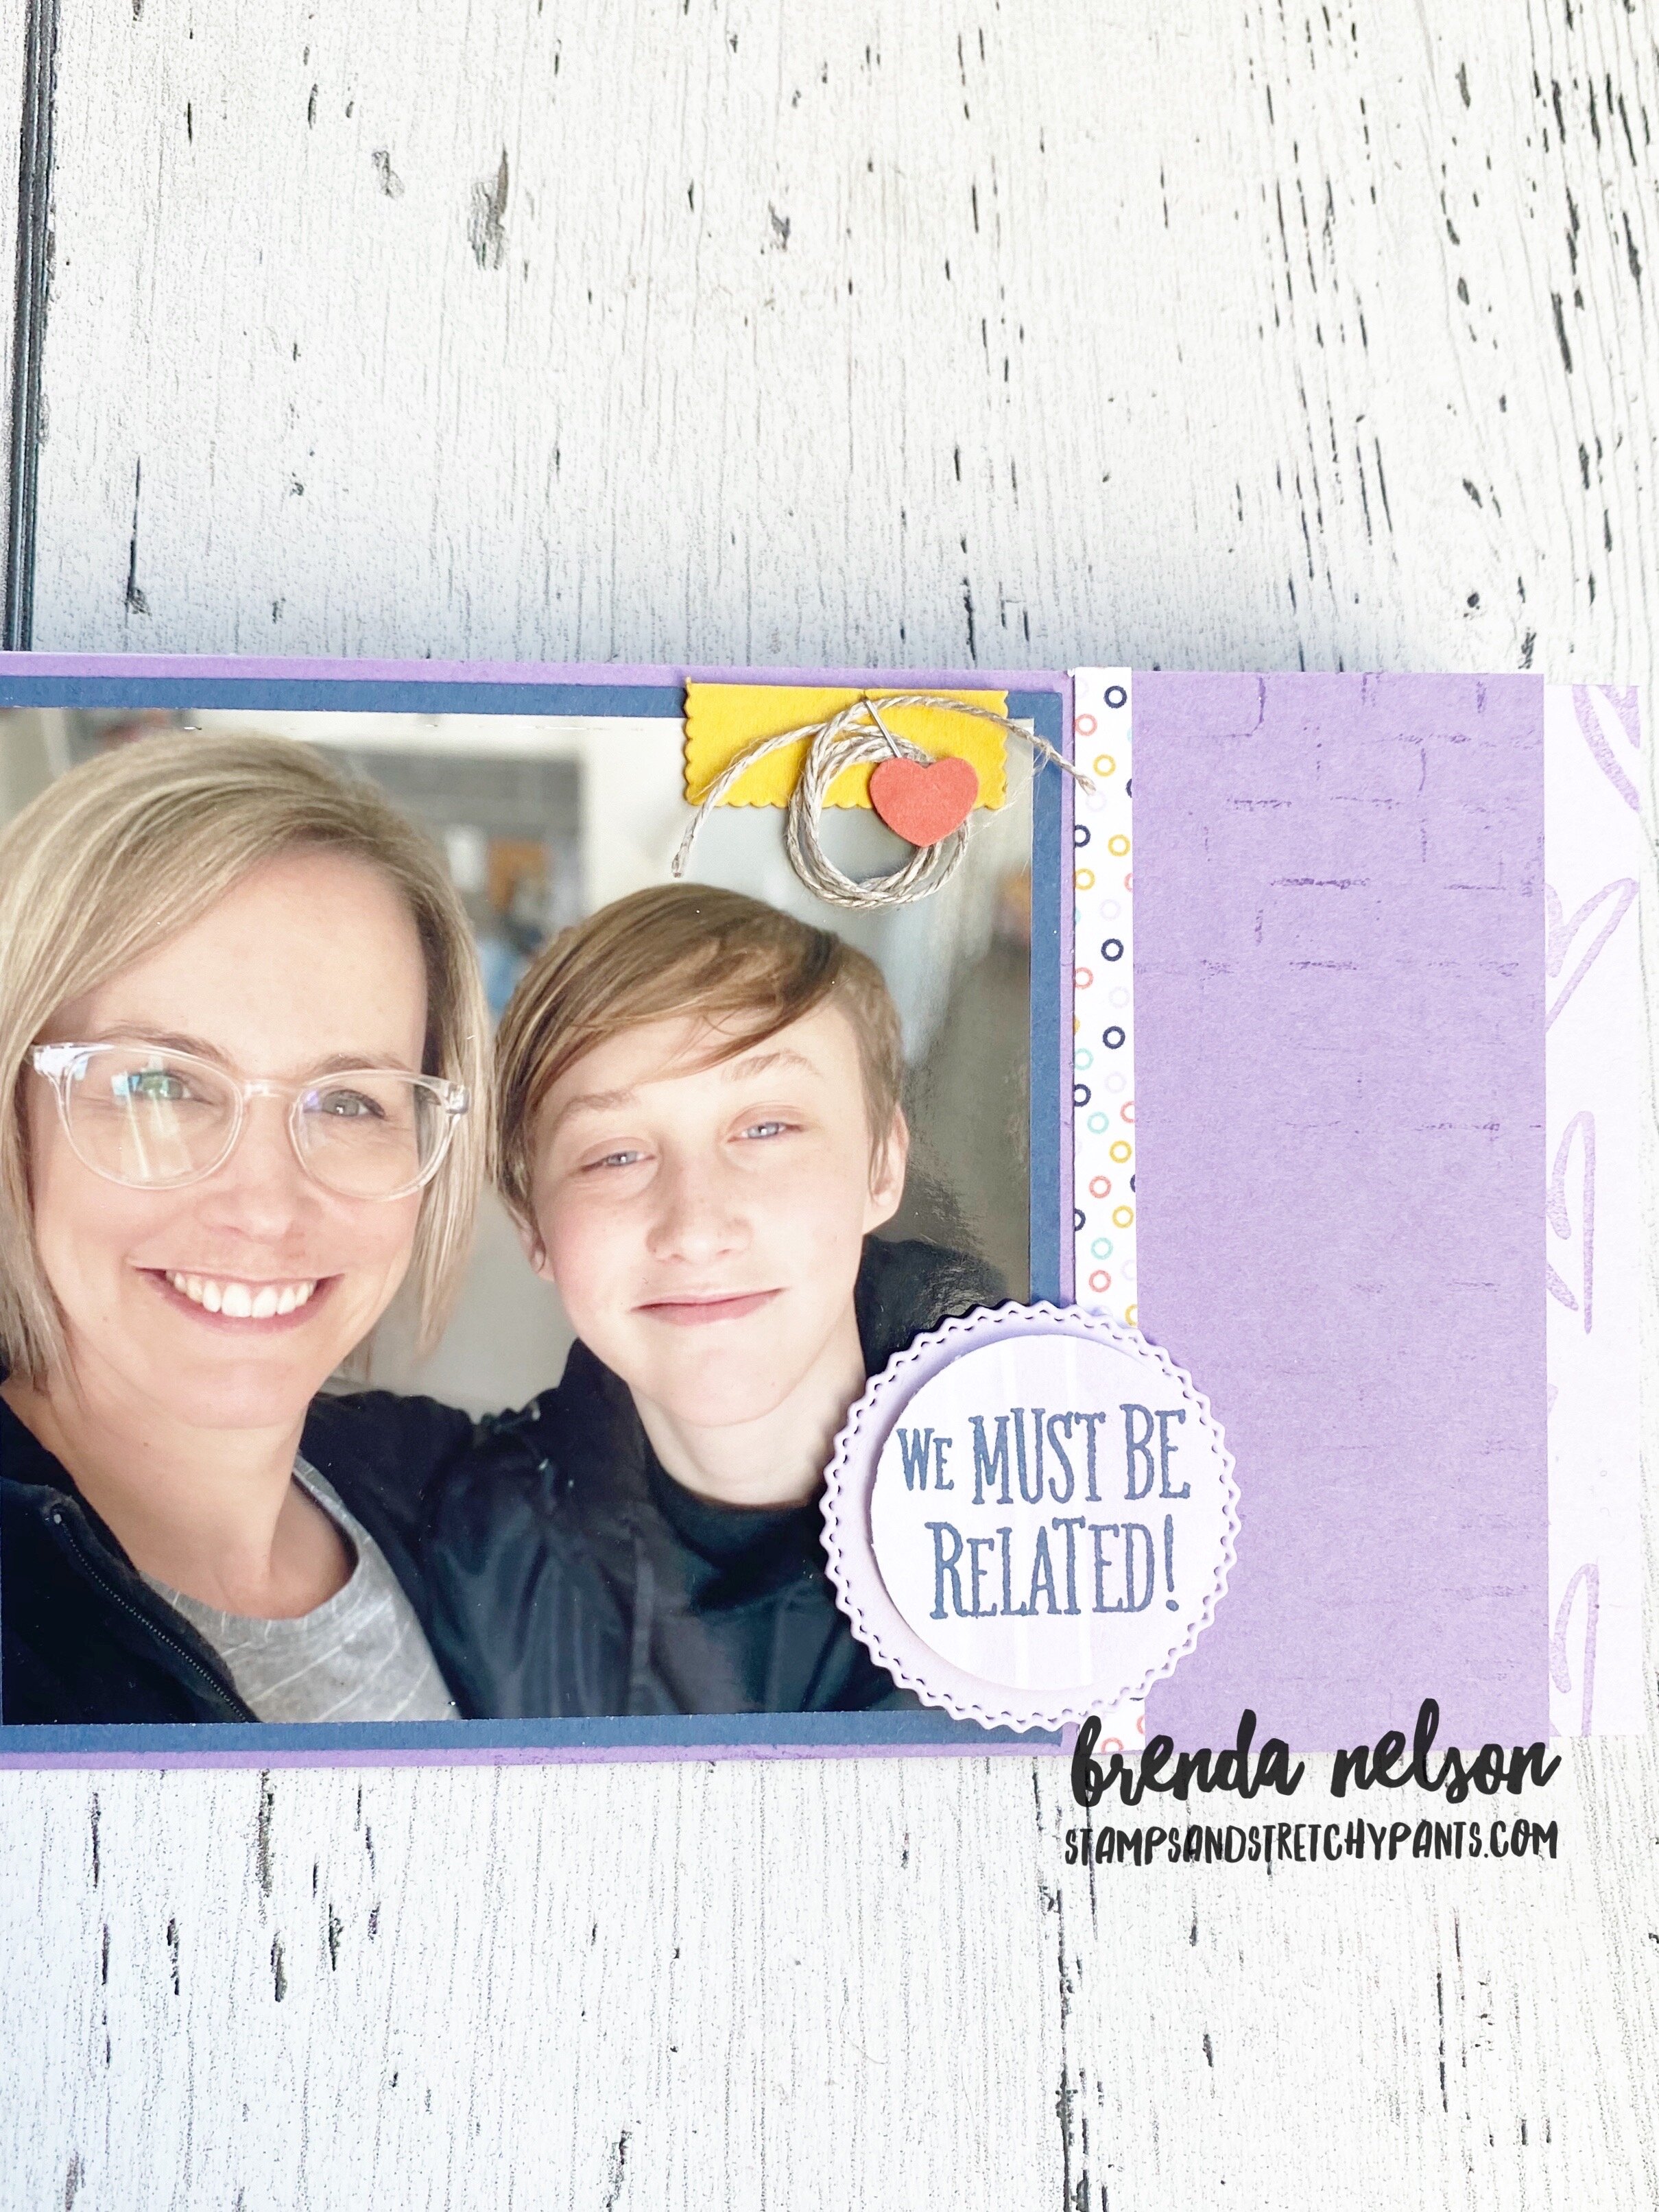
I love how you can layer up elements from the Warm Wraps dies and add in a few simple embellishments such as the Real Red Braided Linen Trim and Linen Thread.

final 6.jpg

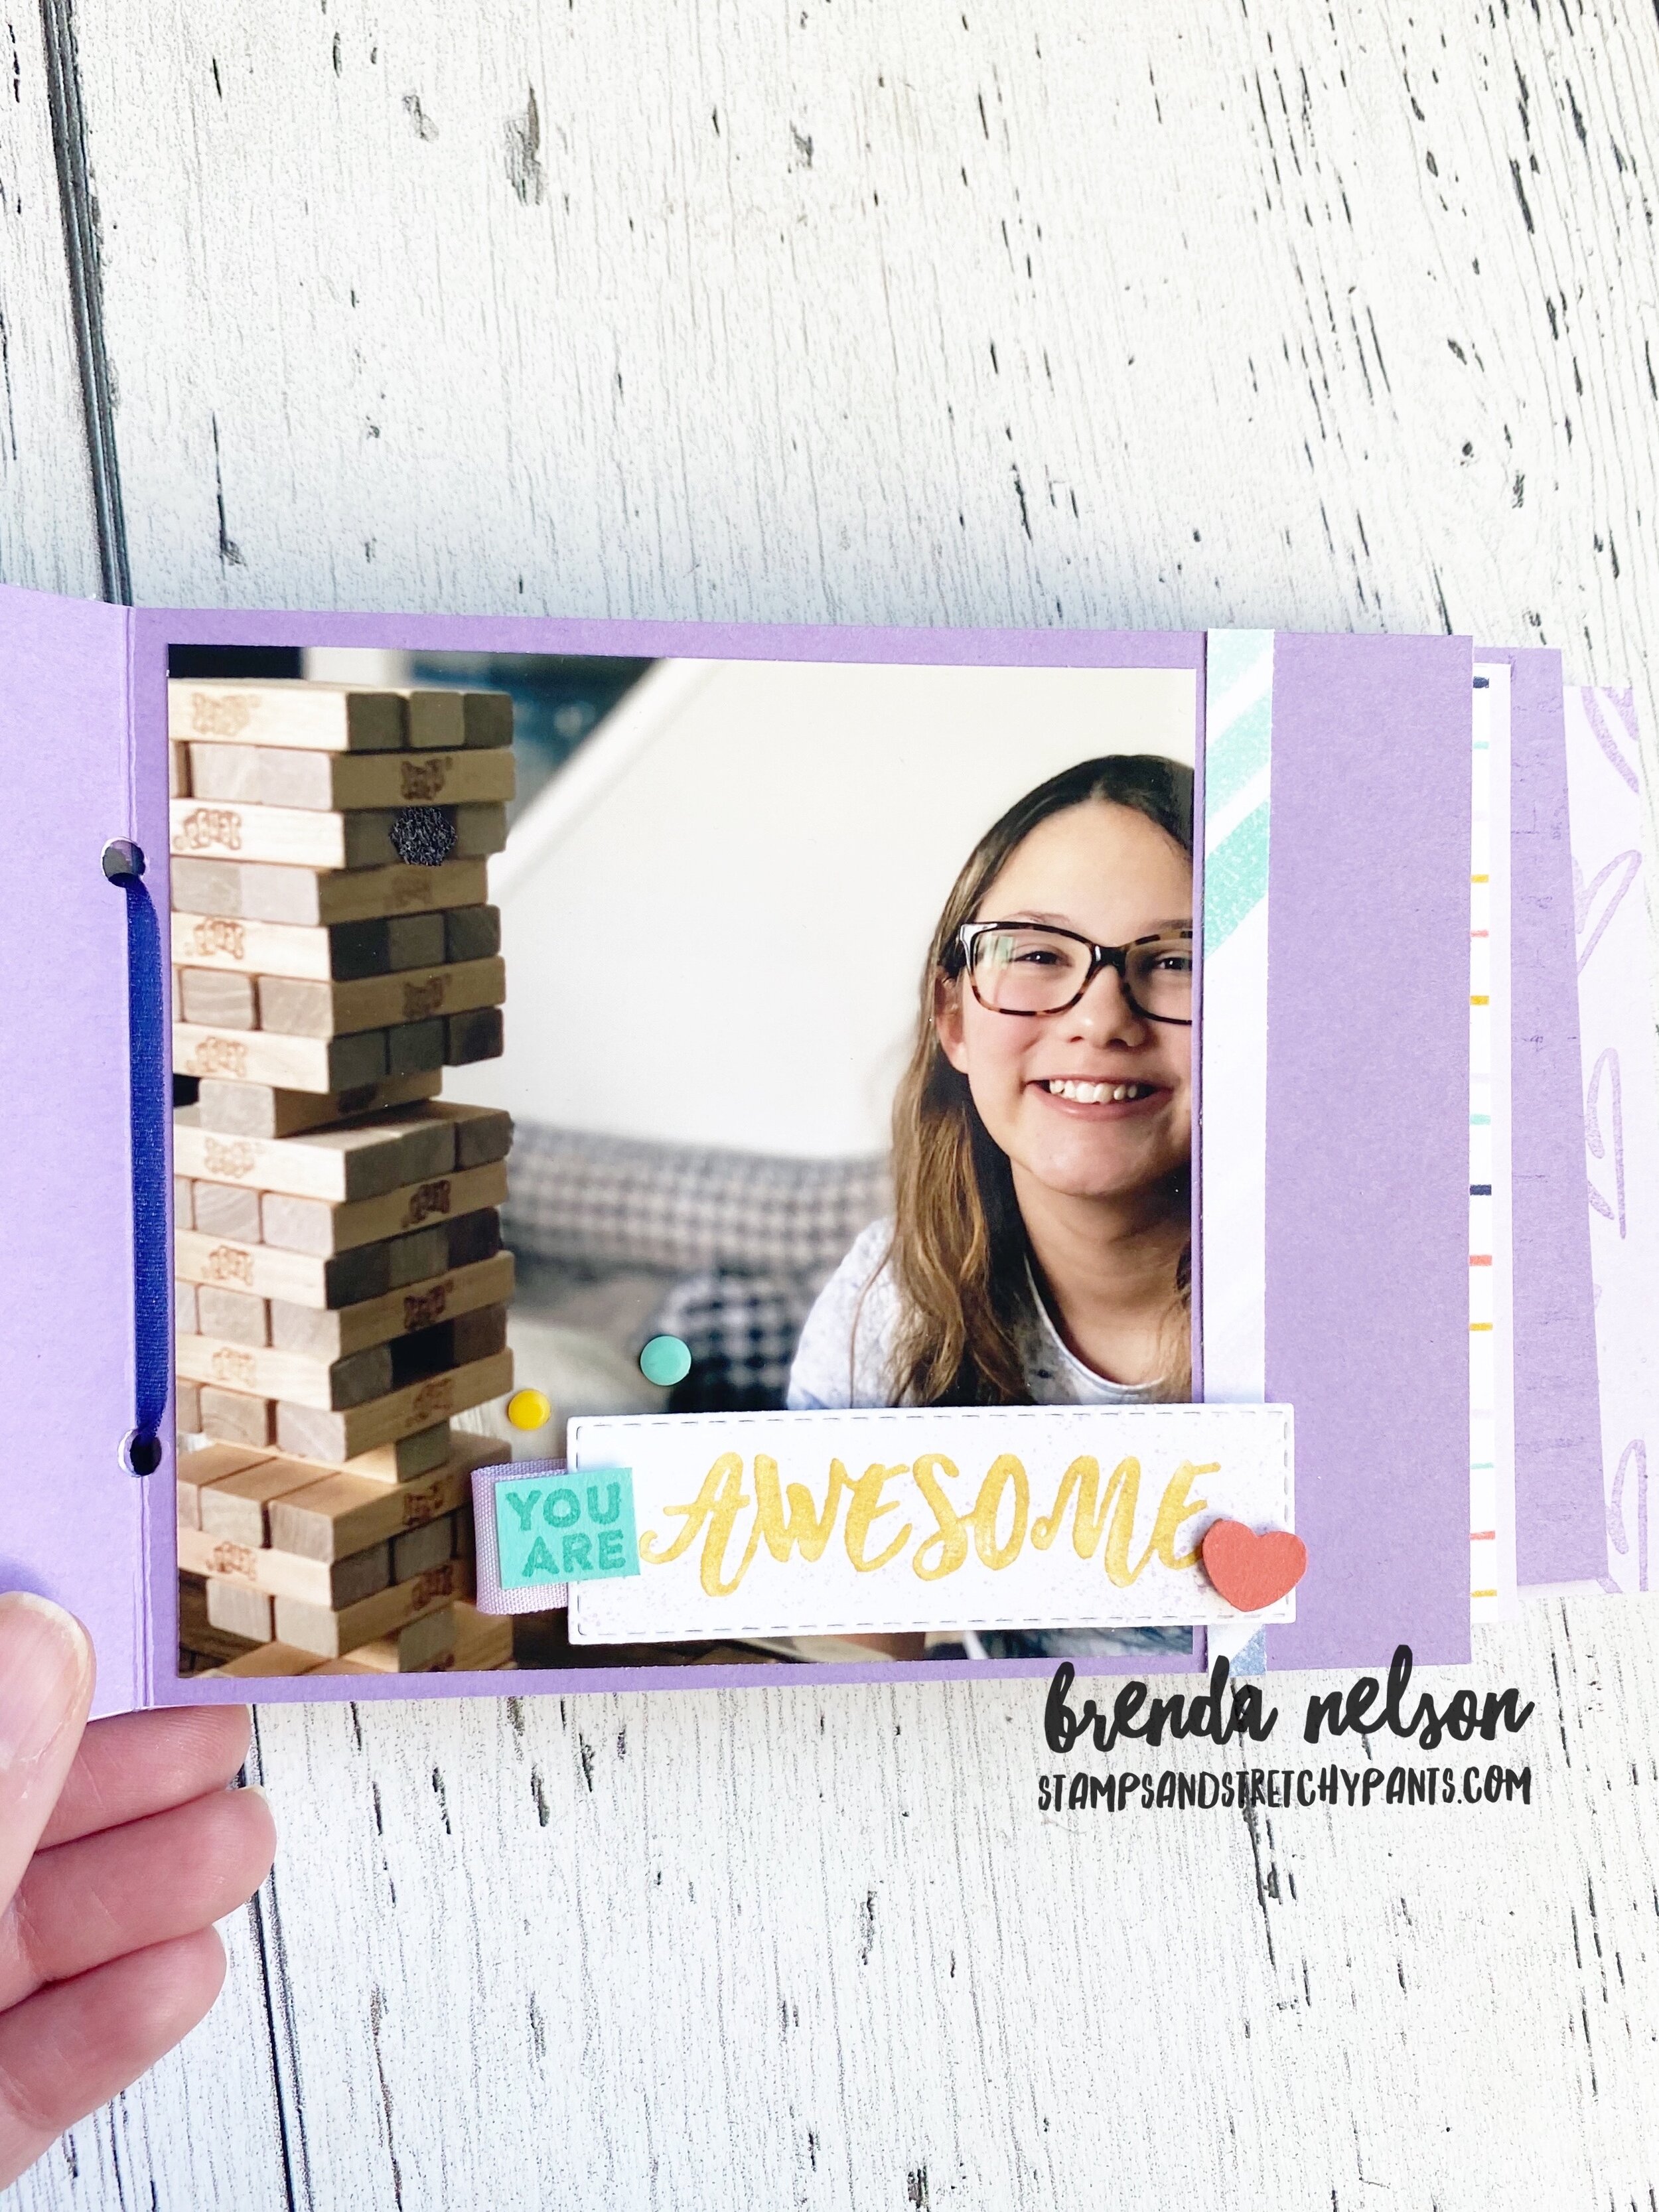
The Stitched Stars Dies were another great choice to embellish this album. I also stamped out many of the images and cut by hand certain words that I wanted to highlight or isolate. A perfect example of this is pictured above on the JOY page (right hand side).

final (11) 10.jpg

I was able to use every stamp in this set except for one…can you figure it out?

I hope this project inspires you to think about making a mini album! They don’t have to be complicated or require a ton of time. I really just looked at this project like designing card fronts!


You can go BACK to see what Melissa has created or NEXT to see what Connie has designed. Please feel free to leave a comment :)

Around the World with the NEW Catalogue!

This might be the most exciting Around the World on Wednesday blog hop in 2020 as we are all featuring things from the brand new catalogue! Its like an early Christmas! The suite that I was the most excited about was the Playing with Patterns suite on page 100. I absolutely loved the color pallet and after playing around with the Playing with Patterns Designer Series Paper I might go on record and saying is my favourite DSP of all time. That is quite the commitment but to me it is perfection!

91442295_10216484369808661_2887014979863576576_n.jpg
 

I knew right away I wanted to create a scrapbook page layout with this suite adding in a few other stamp sets I was excited about. I love a good floral set and I was drawn to the images and sentiments of this new bundle, All Things Fabulous on page 121.

And look at my subject matter! Could he be even cuter? Hawkins has been my faithful companion and my best buddy during the past few months. As soon as I saw the Pallet Thoughts stamp set with “Hello, Handsome” I knew it would be the perfect set to use when scrapbooking my dog, sons or husband! And I love the distressed wood stamp in this set as well. It is the perfect layering piece!

The whole page is designed around the colors of the Playing with Patterns suite—Purple Posy, Night of Navy (however, I substituted our new In Color Misty Moonlight), Coastal Cabana (my favourite color of all time), Crushed Curry (once again I substituted Bumblebee), and Calypso Coral.

final.jpg
fullsizeoutput_11f66.jpeg
I really love the flowers on this page combined with the soft colors.  The enamel dots are an awesome finishing touch that helps add dimension to the page. I like my pages to have lots of layers and textures.  I used the largest Water Painter brush …

I really love the flowers on this page combined with the soft colors. The enamel dots are an awesome finishing touch that helps add dimension to the page. I like my pages to have lots of layers and textures. I used the largest Water Painter brush to swipe over top of the Bumblebee flowers right after I stamped them. I did the same thing on the barn wood piece to soften things a bit and spread out the color slightly. I also stamped the flowers multiple times to give a gradient look to them as well. That is one of the easiest ways to create different colours. Ink once and stamp repeatedly!

I was so excited and inspired by this page layout that I took all of the same elements to create this adorable mini album. I used photos of our ‘quarantine times at home’ as my subject matter. Ridiculously Awesome is a new mlllion dollar achiever se…

I was so excited and inspired by this page layout that I took all of the same elements to create this adorable mini album. I used photos of our ‘quarantine times at home’ as my subject matter. Ridiculously Awesome is a new mlllion dollar achiever set co-designed by Ronda Wade with artwork contributed by Sean Douglass. I LOVE the oversized fonts which makes this a dream set for memory keeping!

For the album shown below, I used all of the same products (minus the flowers) to create this project. I also added in the stamp set A Grand Kid. I love the phrases in it and can see myself using it a lot even though I don’t have ‘grand kids’. Its definitely not a set to be overlooked because of the title.

Click through these photos to see some different views of this fun mini album :)

The next stop on our awesome blog hop of 24 participants is Cindy Schuster from Nutmeg creations! Cindy works at Stampin’ Up! and is one of the amazing co-founders of Stampin’ Through the Catalogue. You can follow them on the Gram @stampinthroughthecatalog


Paper Bag Scrapbook Album

Hello my friends! I am so excited to share this project with you as it is another throwback to an album I used to make about 8 years ago! Way back when It was easier to find large or oversized paper bags and then our society went to full on plastic bags and I couldn’t find these paper bags anymore. Well, its a new time and we are all about paper bags again! I got this at my grocery store and asked for a few extras to craft with! I decided to create a Paper Bag Travel Album to hold mementos and postcards from our recent SU Incentive Trip to Greece (my favourite out of all the places I have been blessed to travel to with Stampin’ Up!). I am a collector, so when I do go on trips I always buy postcards, and keep tickets and receipts and stuff so all of this was perfect to add into this album!

I used the Tropical Oasis and Ornate Gardens DSP as they have complimentary tones and colors as the basis for my album. And then I blended in embellishments from both suites. Some of the stamps are old favorites and some are new additions to the SU lineup.

This album came together pretty easily, as you can tell its not that complicated! I think they would also make great school memory albums (which was what I was making them into 8 years ago!), or gifts of friendship or family memories! The storage pockets are a great way to add in memorabilia without needing a lot of 'pages’.

This is one of my favourite pictures of us in Santorini

This is one of my favourite pictures of us in Santorini

You will have to use Tear and Tape or Tombow to glue the bottom of the bag flat as seen on the left side page. I then created a pocket to store memorabilia such as train tickets, a few pictures, a bag with a postcard in it etc. I added in a book mar…

You will have to use Tear and Tape or Tombow to glue the bottom of the bag flat as seen on the left side page. I then created a pocket to store memorabilia such as train tickets, a few pictures, a bag with a postcard in it etc. I added in a book mark I had picked up along the front of the pocket too! The right side features some fun pictures of us.

Because this is an oversized paper bag it has an option for a pull out page (or more!) as you can see here with the Pretty Peacock pull out page poking out. Say that six times, hahaha!

Because this is an oversized paper bag it has an option for a pull out page (or more!) as you can see here with the Pretty Peacock pull out page poking out. Say that six times, hahaha!

I decided to add another pocket at the bottom of this pull out page for more storage. I included one of my favourite pictures I took on this trip of the iconic blue roofs of Santorini, I still have to pinch myself that I was actually there! The stor…

I decided to add another pocket at the bottom of this pull out page for more storage. I included one of my favourite pictures I took on this trip of the iconic blue roofs of Santorini, I still have to pinch myself that I was actually there! The storage pocket allows me to add more postcards collected on this trip.

final 10.JPG

Ornate Garden Mini Album

When cleaning and reorganizing my craft room lately, I came across a mini album I had made a few years back and was inspired to recreate it with some new supplies. I used the Copper Dotted Treat Bags as the base. I love using a bag or envelope as a mini album base because it comes with built in storage for pull outs so to speak. I decided to use the Ornate Gardens Specialty DSP and colour palette to embellish my album. Of course you can use any DSP and coordinating colors.

To make this album you will need 5 Copper Dotted Treat Bags. This will allow you to have 8 pictures in your album as the cover bag does not hold any photos.

The spine to wrap around your album is a 4 3/4 x 4 piece of card stock scored @ 2 on the short side. I then ran each edge through the Ornate Layers die to give it a bit of detail. You can use a punch or any die to add a decorative edge. I stacked all of the bags together and used Tombow adhesive to glue the spine to the front and back bags. I then secured each inside bag with Tombow. The ribbon died around the spine is purely decorative, it does not hold anything together. It is the new Ornate Garden ribbon from the Ornate Garden Suite. It comes in a two pack with Old Olive and Terracotta Tile.

The outside photo mats are 4 1/4 x 4 1/4 so you can add a 4 x 4 photo to them. I always try and keep my measurements simple for my stampers. I then embellished each page with pieces of DSP and some floral images and sentiments that spoke to the pictures. The Gilded Gems are awesome and I couldn’t resist adding a few into the album. Overall, the album is very flat, I did not want a lot of bulk.

The pullout pages are 4 1/4 x 5 1/2 and I trimmed the photos to fit. I added tabs using the Circle Tab punch in Whisper White so they blended into the album. And I kept all of the embellishments flat (no dimensional, a real challenge for me!) so they could slide in and out of the album easily.

I chose a sentiment for the front that was neutral for whatever photos I wanted to add to the inside. It is from the Capture the Good stamp set in the Idea Book & Catalogue. I layered it with some circle punches and the Label Me Lovely Punch (from the Occasions Catty).

final.jpg
final.jpg
This album features photos from our Nelson Family camping trip each summer to Greenwater Lake, Saskatchewan

This album features photos from our Nelson Family camping trip each summer to Greenwater Lake, Saskatchewan

final.jpg
This image shows the pullout pages that are tucked inside the Copper Dotted treat bags

This image shows the pullout pages that are tucked inside the Copper Dotted treat bags

I used a mini stapler to secure the tab punches to the base so there was no risk of them tearing free

I used a mini stapler to secure the tab punches to the base so there was no risk of them tearing free