Create with Connie and Mary--Favourite Christmas Project!

Welcome to our weekly blog hop! If this is your first time joining in make sure you go around the whole group! Everyone is so talented and has unique and distinct crafting styles. I tend to make variety of projects including scrapbook pages, memory albums, 3D projects and cards. In fact today for our “Favourite” Christmas project I have created a Christmas Mini Album!

Design Team.png

This mini album is created using 5 pieces of 5 1/2 x 8 1/2 pieces of Crumb Cake card stock. Instead of scoring the card stock in half to make a card I just kept as is.

final (7) 15.jpg

The album is kept together with two 1 inch binder rings that are found easily at any office supply store and are jazzed up a bit with a variety of ribbons. I love how many options Stampin’ Up! has for us to choose from.

I added a Soft Suede piece to mimic a book binding. The scallop edge is created using the Peony Dies.

What is really awesome about this album is the whole project uses only ONE stamp set! The Wrapped in Christmas stamp set was perfect for this project!!


I used two different stamps to create a lovely cover page. My idea was that this album could become a piece of holiday decor that the recipient (yes, I made this for my mom) could have on display year after year.

I used some of the Mossy Meadow Diagonal Stripe ribbon paired with Linen Thread and some Red Rhinestones to bring the sentiment “Let the Joy..” come to life. It is stamped on a shape from the HIppo & Friends dies.

final (2) 4.jpg
final (20).jpg

I added in elements from the Pine Woods Dies and the Warm Wraps Dies throughout the album. The color palette is paired to the Heartwarming Hugs Designer Series Paper.

final (1) 4.jpg

I love how you can layer up elements from the Warm Wraps dies and add in a few simple embellishments such as the Real Red Braided Linen Trim and Linen Thread.

final 6.jpg

The Stitched Stars Dies were another great choice to embellish this album. I also stamped out many of the images and cut by hand certain words that I wanted to highlight or isolate. A perfect example of this is pictured above on the JOY page (right hand side).

final (11) 10.jpg

I was able to use every stamp in this set except for one…can you figure it out?

I hope this project inspires you to think about making a mini album! They don’t have to be complicated or require a ton of time. I really just looked at this project like designing card fronts!


You can go BACK to see what Melissa has created or NEXT to see what Connie has designed. Please feel free to leave a comment :)

A Card a Day in December--Day #14

Thanks so much for being a part of my stampin’ journey! I love that I have this platform to share my creative ideas with you! I have enjoyed challenging myself to share A Card a Day in December—25 Christmas cards and a week of New Years cards!

This is my 14th card marking 2 weeks of crafty projects! If you have missed some of my other cards please go back through the month! Lots of inspiration!

final (11) 7.jpg

Sometimes I like to create cards with unusual color combos and I think this card reflects that. Not your traditional holiday card!

I started with a base of Mint Macaron and added a strip of Designer Series Paper from the Poinsettia Place collection. I cut a stitched rectangle in Whisper White to add another panel.

I have loved creating with the In the Pines Bundle this holiday. I stamped three trees in Mint Macaron, Rich Razzleberry and Rococo Rose. When you are adding in the filler stamp, make sure to stamp it off on your grid paper so that the ink is lighter. This makes the perfect contrast between the outside and inside.

The sentiment is from the Tag Buffet stamp set and is stamped in Rich Razzleberry ink on the coordinating card stock. It is then cut with a stitched circle.


Behind the sentiment I added two strips of plaid Rococo Rose DSP from the In Color 6x6 paper stack. A bit of Mint Macaron ribbon and some silver metallic thread finishes off this piece.

I added a little bling with some Rhinestones—a craft room must have!

Did you know you can customize the color of rhinestones with our Stampin’ Blends?

If you are in Canada please feel free to shop with you! I appreciate your business as it helps me LOVE WHAT I DO :)

final (16).jpg


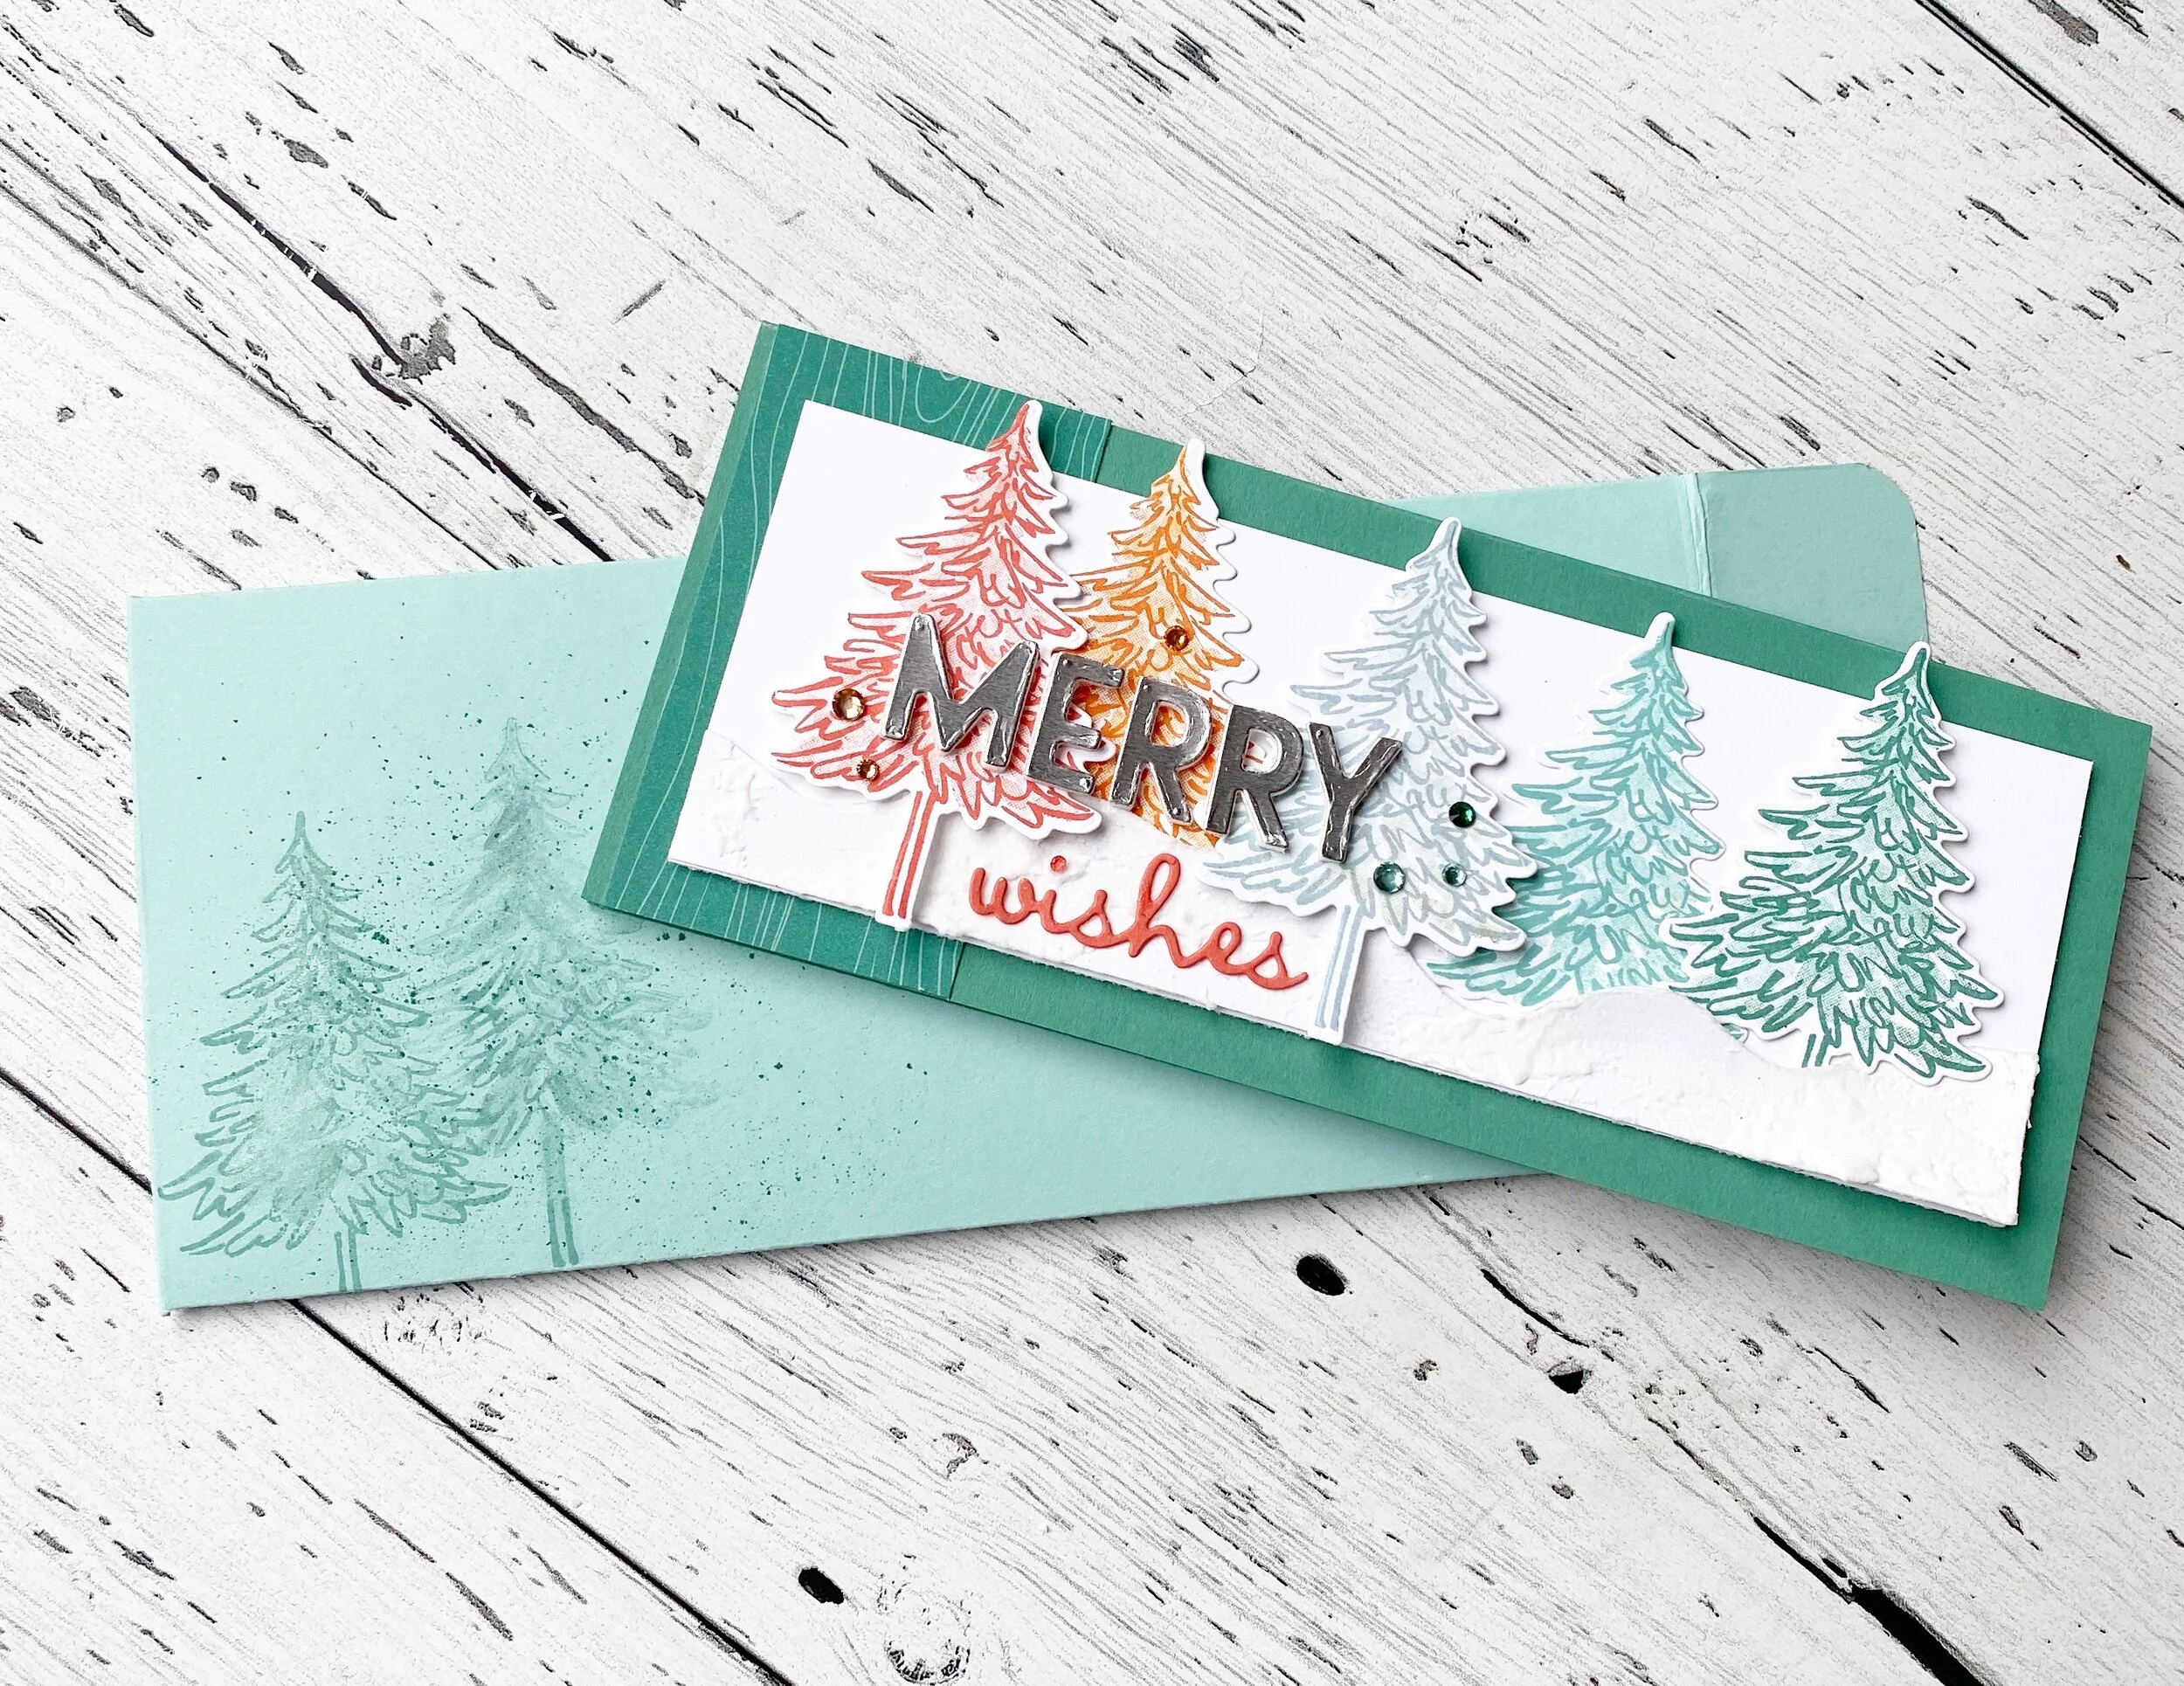
Merry 'Slimline' Wishes

Hello friends! Have you seen the new card trend that is circulating around? This design style is called “slimline’ and there are several size and dimension variations. I designed this ‘slimline’ card to showcase the In the Pines Bundle from the Handmade for You catalogue.

final.jpg

I absolutely LOVE the color palette on this card. It isn’t what you would call traditional in the holiday color scheme sense, but I love the soft colors and the idea of the trees transitioning from fall into winter colors.

I started with Calypso Coral, then Pumpkin Pie and moved into the blue green family of colors with Pool Party, Coastal Cabana and finally Just Jade which is also the base color of this card.

final.jpg

I stamped the outline of each tree in full strength ink and the ‘filler’ of the tree I stamped ‘off’ on my scratch pad so the ink was a tone lighter.

I wanted a snow drift so I used the curved snow drift die from the Pine Wood Dies and added some embossing paste on top to give it some texture and to help it mimic snow. I actually know a lot about snow because where I live, we have snow for at least 5 months of the year! Haha! Unofficial expert over here!

The base of my card is 7 x 8 1/2 and on the 7 inch side you are going to score at 3 1/2. There are several size variations to this card style so there is lots of room to play around and have fun. The Whisper White layer is 2 3/4 x 7 3/4 .

Naturally a card of this size needs a custom envelop too! I stamped the trees on the left corner and did a little marker spritzing. And on the inside flap, I added a piece of silver foil paper to play off of the silver Merry on the front of the card.

fullsizeoutput_13522.jpeg

The create both this card and envelop you will need a full sheet of card stock to start. So just keep that in mind if you are planning to offer the slimline card as a class.

To create the envelop score your 8 1/2 x 11 on the 8 1/2 (vertical side) at 2 1/2 and 6 1/2. Rotate and on the long (horizontal) side score at 1 1/2 and 10 1/2. Now you want to trim away the 4 little side pieces as shown in the photo below. I then rounded the panels at the top and bottom using the Detailed Trio punch. It can round your edges, punch out a little flower detail as shown and small oval hole perfect to turn your project into a tag!

final.jpg
final.jpg

I cut the word ‘Merry’ using the Playful Alphabet dies with Silver Foil paper and the Foam Adhesive Sheets. ‘Wishes’ is cut from Calypso Coral card stock using the Well Written dies. I added on some fun bling using the Holiday Rhinestone Basic Jewels and the Champagne Rhinestones. And a little strip of the In Color 6x6 Designer Paper on the left edge helps ground the card and the wood grain pattern plays off of the trees.

I hope you are excited to give this card style a try! I absolutely LOVE it!


In the Pines

One of the amazing things about where I live, Edmonton, Alberta is how close to the Rocky Mountains I am and all of the beautiful forests. As soon as I saw this stamp set, In the Pines, in the catalogue I knew it needed to be on my first order! It reminds me of an Albertan Winter!

final.jpg

I used Misty Moonlight as my base and first layer. I stamped the little ‘dots’, which could be snow, around the perimeter of the card base layer. Notice the embossing folder? LOVE! It is called the Evergreen Forest 3D Embossing folder. It’s actually tucked away in the Handmade for You catty, so make sure you don’t miss it on page 35. It works perfectly with this bundle.

I decided to mix stamping and die cutting on this card. The stamped tree is in Just Jade, with the filler layer stamped off to achieve a slightly lighter tone of the ink. The wider of the two trees is cut out of Shaded Spruce card stock using the Pine Wood Dies. Shaded Spruce and Just Jade look so so good together. Its definitely a color combo I will be leaning into this holiday season! The smaller tree is cut with another die from Just Jade card stock.

final.jpg

The sentiment is stamped in Early Espresso on Crumb Cake and cut out with the Timeless Label punch—its looks different than its original form because the paper is only wide enough for the curved section of the punch! I love to use punches in a unique way!

The Night of Navy ribbon is from the Playing with Patterns Ribbon Combo Pack and was the perfect width and texture for this card.

You could easily turn this into a Christmas card by using the other phrase in the stamp set ‘Seasons Greetings’

You could easily turn this into a Christmas card by using the other phrase in the stamp set ‘Seasons Greetings’