A Card a Day in December--Day #14

Thanks so much for being a part of my stampin’ journey! I love that I have this platform to share my creative ideas with you! I have enjoyed challenging myself to share A Card a Day in December—25 Christmas cards and a week of New Years cards!

This is my 14th card marking 2 weeks of crafty projects! If you have missed some of my other cards please go back through the month! Lots of inspiration!

final (11) 7.jpg

Sometimes I like to create cards with unusual color combos and I think this card reflects that. Not your traditional holiday card!

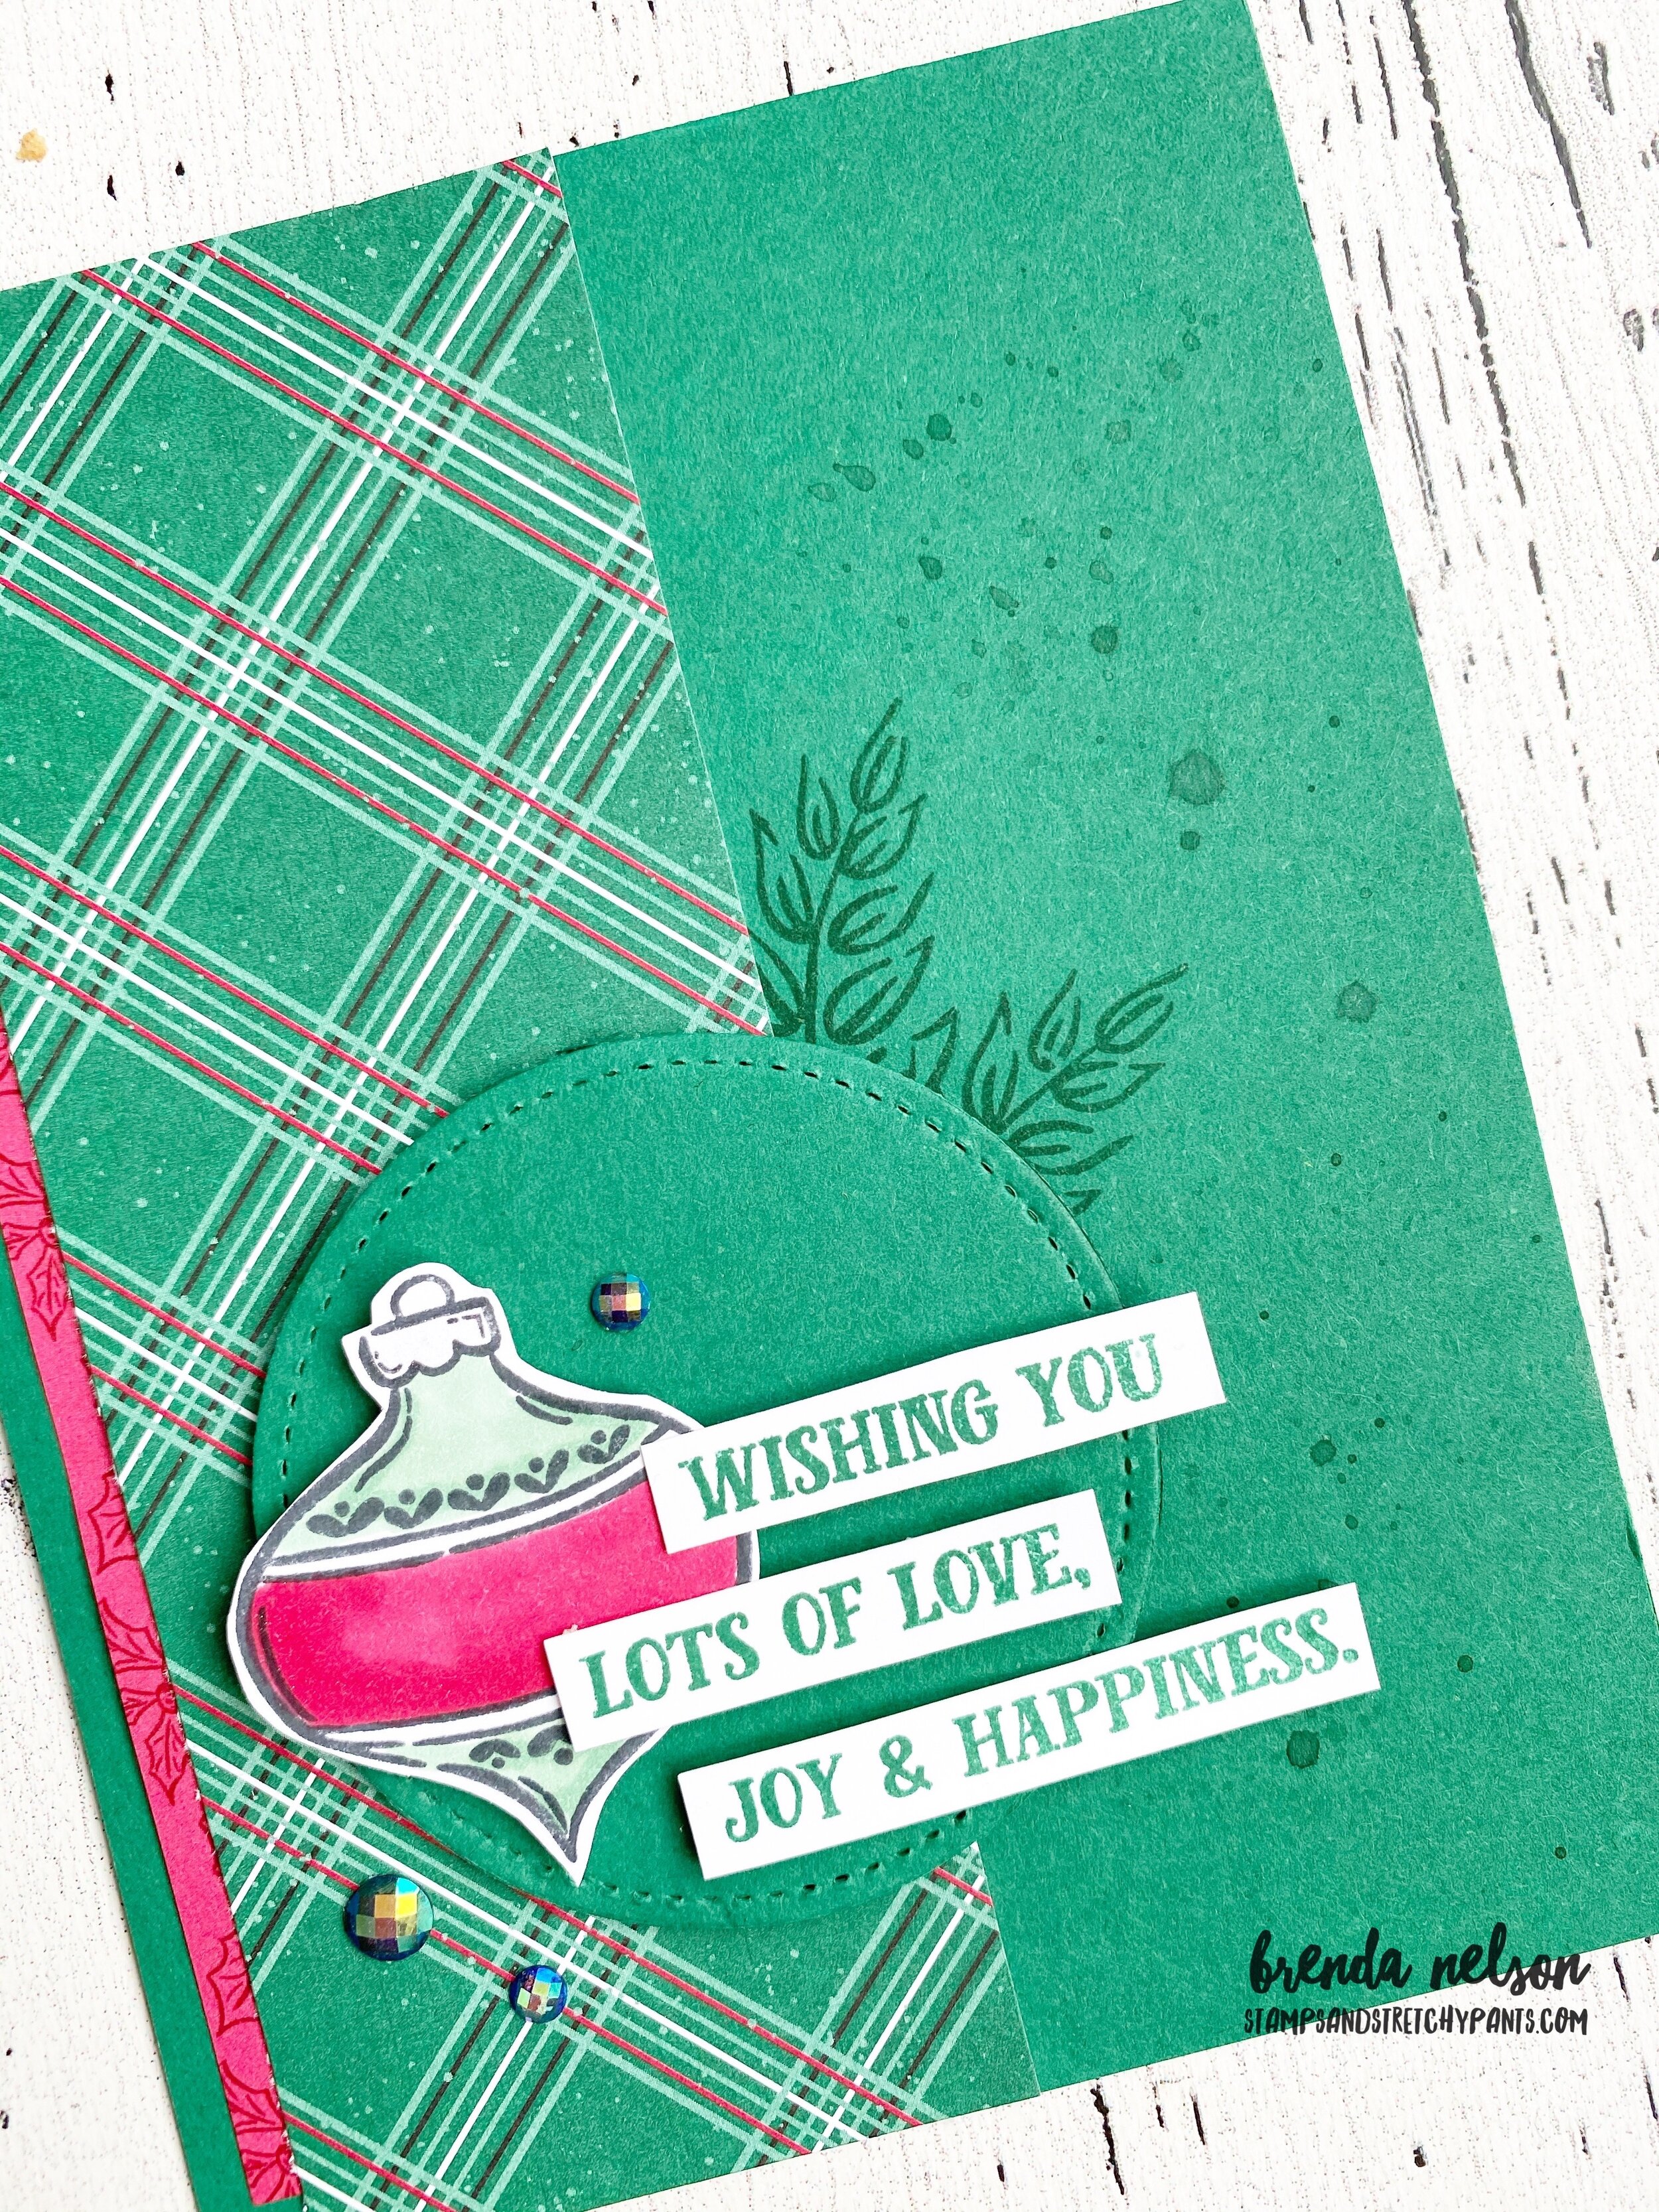
I started with a base of Mint Macaron and added a strip of Designer Series Paper from the Poinsettia Place collection. I cut a stitched rectangle in Whisper White to add another panel.

I have loved creating with the In the Pines Bundle this holiday. I stamped three trees in Mint Macaron, Rich Razzleberry and Rococo Rose. When you are adding in the filler stamp, make sure to stamp it off on your grid paper so that the ink is lighter. This makes the perfect contrast between the outside and inside.

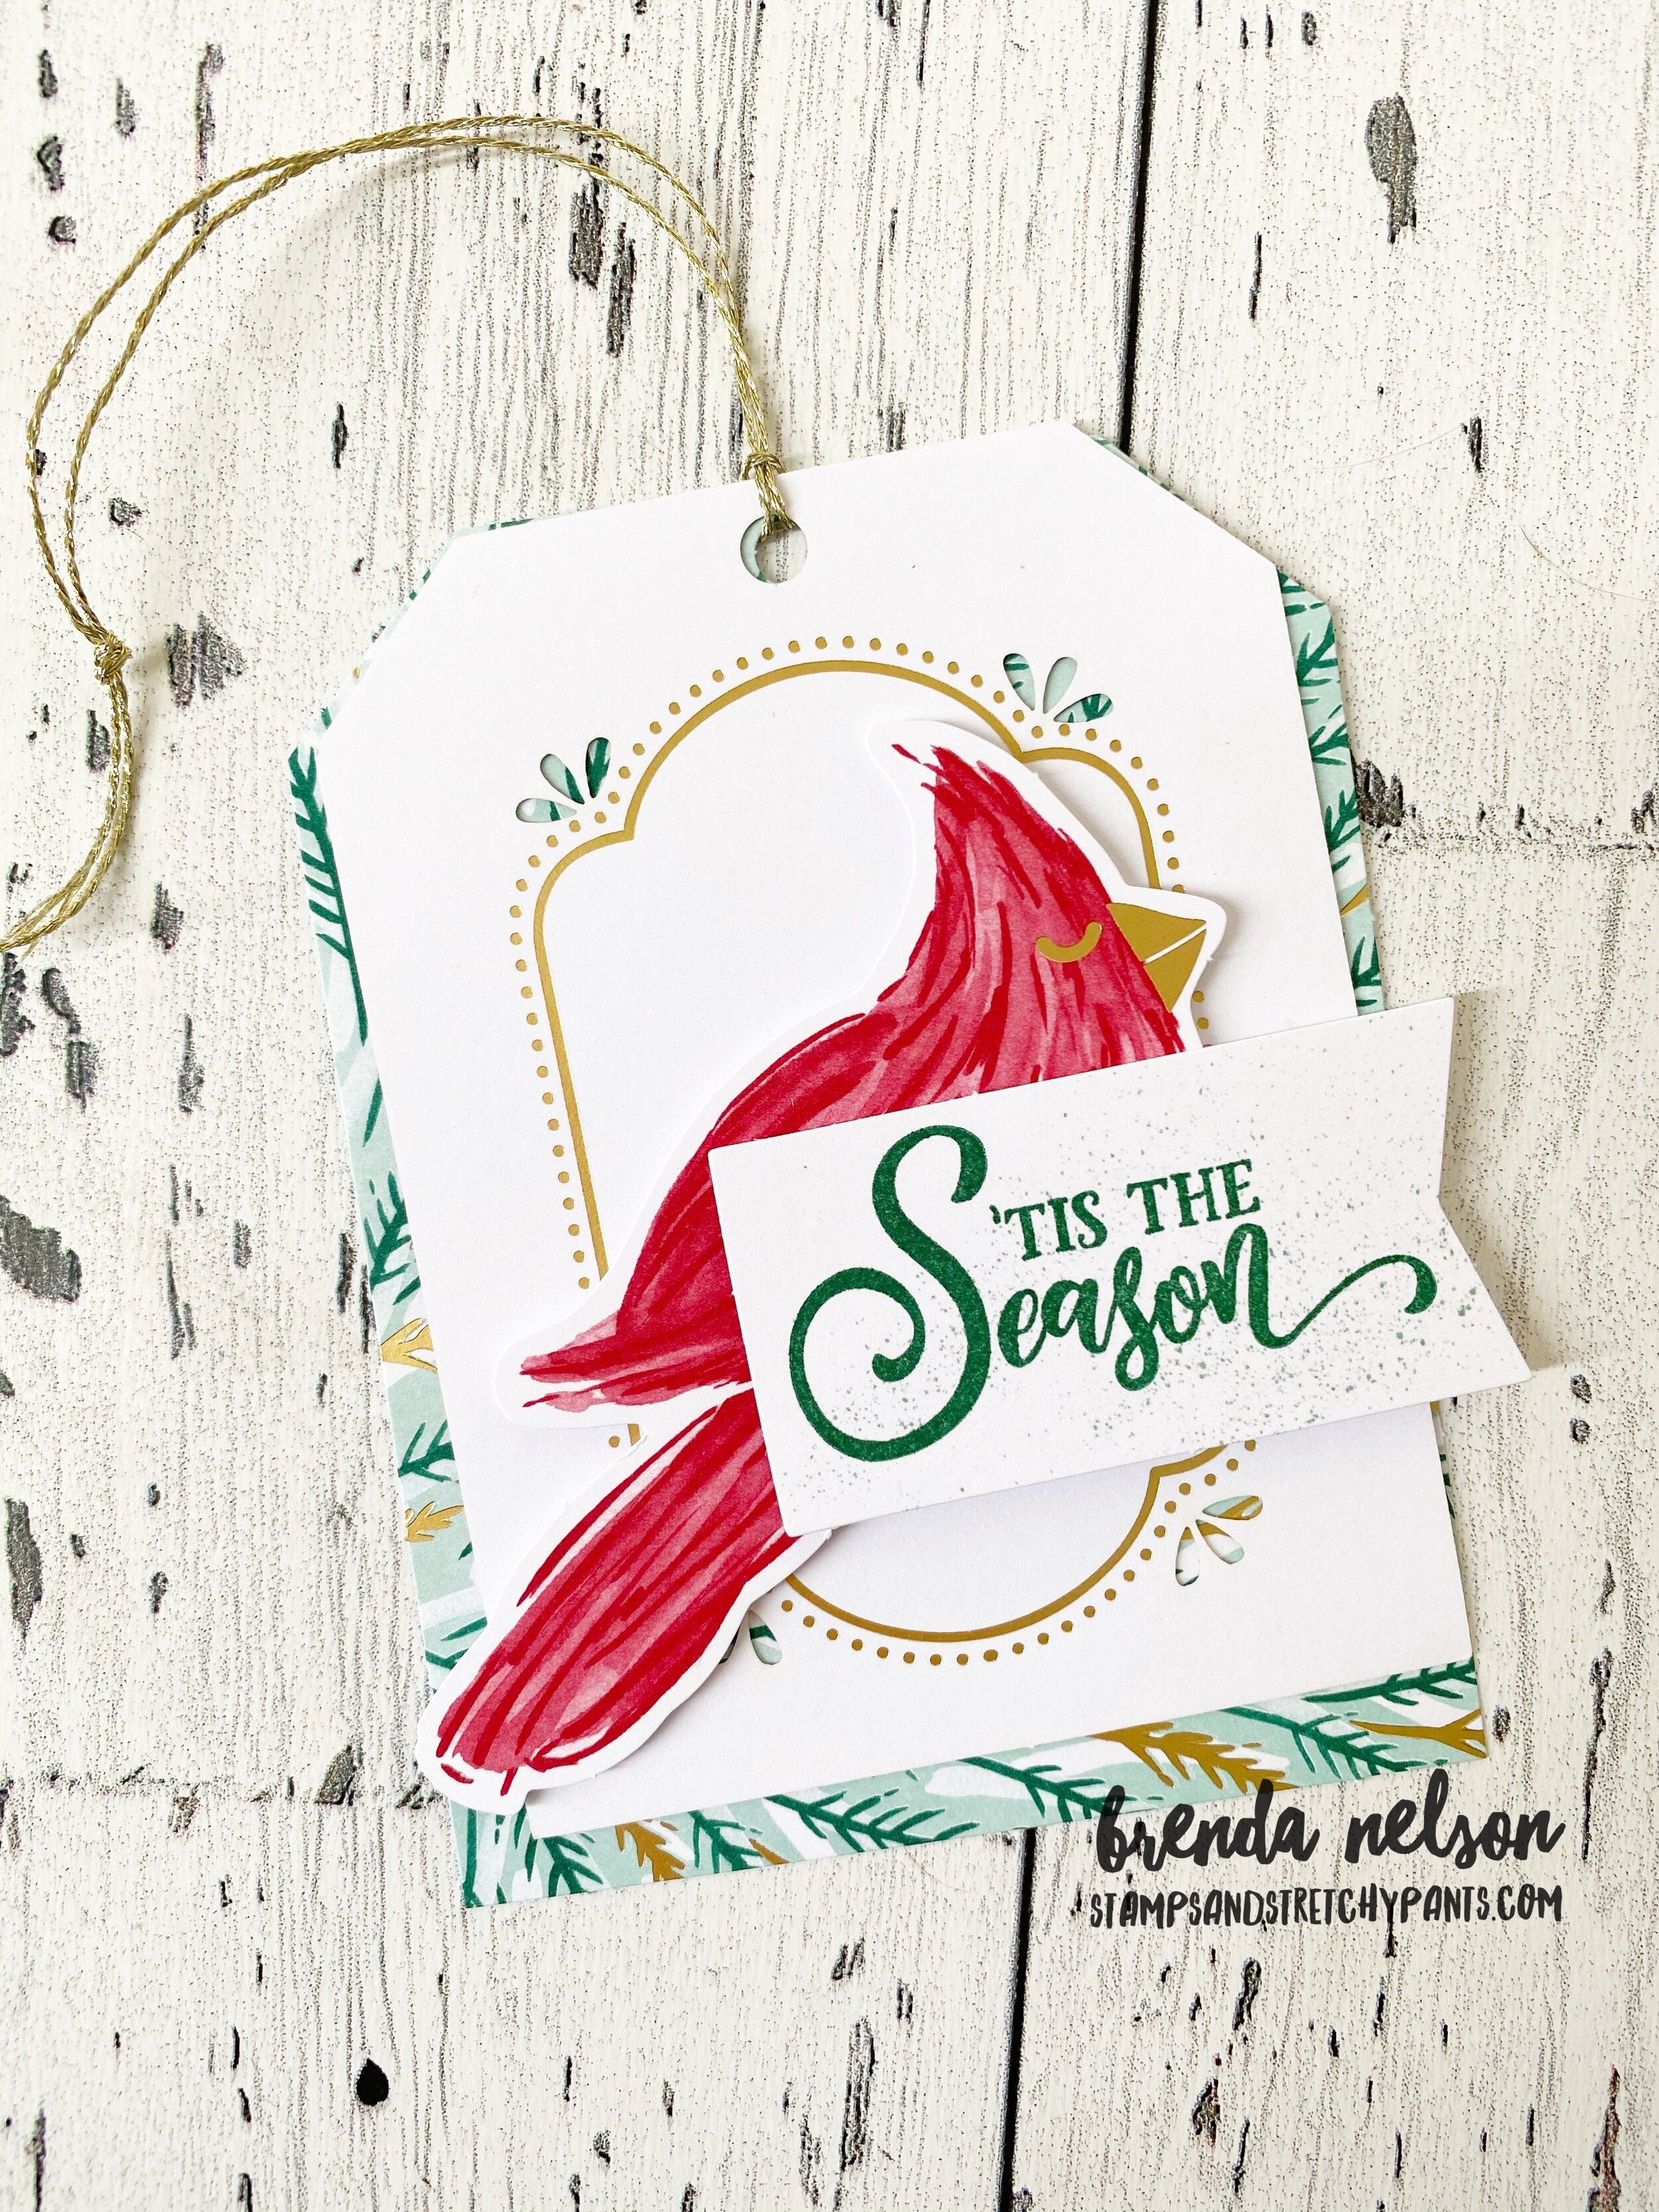
The sentiment is from the Tag Buffet stamp set and is stamped in Rich Razzleberry ink on the coordinating card stock. It is then cut with a stitched circle.


Behind the sentiment I added two strips of plaid Rococo Rose DSP from the In Color 6x6 paper stack. A bit of Mint Macaron ribbon and some silver metallic thread finishes off this piece.

I added a little bling with some Rhinestones—a craft room must have!

Did you know you can customize the color of rhinestones with our Stampin’ Blends?

If you are in Canada please feel free to shop with you! I appreciate your business as it helps me LOVE WHAT I DO :)

final (16).jpg


Create with Connie and Mary--Home for the Holidays!

Hello and welcome to our weekly Saturday Blog Hop! This week we are sharing projects with the theme “Home for the Holidays” so naturally I thought of the Trimming the Town suite as it has stamp images to create a bunch of different homes!

Design Team.png

Recently my team had a virtual meeting and we made a Cube Card together! Have you tried this fun fold style yet? I actually thought it would be complicated but its actually surprisingly easy!

This is my ‘Home for the Holidays’ themed Cube Card! I really enjoyed designing the panels and putting this project together.

This is my ‘Home for the Holidays’ themed Cube Card! I really enjoyed designing the panels and putting this project together.


To create a cube card you will need a piece of 12x12 card stock. I used Poppy Parade as my base because its coordinated with the Trimming the Town DSP.

On your trimmer cut down one side of the 12x12 to 11 1/2 inches. On this side (11 1/2) SCORE at 2 3/4, 5 1/2, 8 1/4 and 11.

Rotate the paper so your 12x12 length is across the top and CUT at 2 3/4, 2 3/4 and 5 1/2. Thus creating 3 strips of paper—-2 will be at 2 3/4 width and one at 5 1/2 width

.

final.jpg

You will notice that you have a 1/2 inch section and this will be where you will add your adhesive to fold your paper into cubes. You will have two cubes that are 2 3/4 wide and one that is 5 1/2. The largest one is the base.

final.jpg

You will attach each of the smaller cubes to the largest cube, ONLY adding adhesive to the bottom cube. If you glue the whole thing is will not pop up into the cube card shape.


Hopefully this visual helps you as well. There are a bunch of YouTube videos you can also watch on how to create a Cube Card.

Once you have the basic design mastered, decorating and embellishing is all up to you! I decided to mix up some of the panels with DSP and card stock that I ran through the Wrapped in Texture embossing folders from the Heartwarming Hugs suite.

I added in Merry Christmas and ‘Tis the Season from the Tag Buffet stamp set.

final.jpg
fullsizeoutput_1363e.jpeg

I hope you are inspired to give this fun Cube Card design a try! My team had a lot of fun putting its together and I challenged them to share their finished design on our group page.

I can’t wait to see what the other gals create this week! You can go BACK to see what Melissa has designed and NEXT to see what Connie has created!


Just Tag it! Create with Connie & Mary!

Happy Christmas in July! Are you having fun hopping with us and getting some holiday inspiration? Stampin’ Up! has really knocked it out of the park with the new upcoming Handmade For You (Holiday) catalogue. Once August hits our stampin’ friends will be able to order! I was able to get my hands on some products because of my demo status #myfavoritething! Getting my hands on new stuff early is super exciting for me!

Image+2020-04-27+at+6.31+PM+(1).jpg

One of the things I was super excited about was the Tag Buffet Project Kit—it is right at the start of the Handmade For You catalogue so you cannot miss it! And you won’t want to! I have been a demonstrator for a long time and I think I can safely say this is the BEST tag kit we have had yet! I love the oversized tags, the traditional Christmas colors and the volume of tags this kit makes—-30 in all of 6 designs! Everything you need is inside a cute decorated box, similar in size to our mini Paper Pumpkin boxes (which I love!).

final.jpg
 

As soon as I put these tags together I knew I needed to create a scrapbook page! It might be the fastest page I have ever made!

final.jpg

There is a separate and coordinating stamp set to purchase to accompany this kit—called Tag Buffet. I used it to stamp the sentiments on the tags and ‘Tis the Season’ on my page. The font is fun and whimsical and perfectly suits this tag kit.

Scrapbooking doesn’t always have to take hours to put together a page! When you have great elements like these in the Tag Buffet kit, fabulous pages can come together in a snap!

Scrapbooking doesn’t always have to take hours to put together a page! When you have great elements like these in the Tag Buffet kit, fabulous pages can come together in a snap!

Isn’t the size of these tags perfect? Great for gifts giving, easy card embellishments and memory keeping!

Isn’t the size of these tags perfect? Great for gifts giving, easy card embellishments and memory keeping!

 
final.jpg
fullsizeoutput_1245a.jpeg

I added a bit of background splatter with my Water Painter and Shaded Spruce ink pad. Just smash your ink pad on an acrylic block, drop a bit of water in and flick the Water Painter across your background. It creates a really easy background.

final.jpg
 

You will notice that I did not pop the holes out on the tags I used on the layout. This helped them look more like shapes versus tags. I added a few of the Gold Glitter Gems to the page and few twigs/leafs stamped in the background here and there!

I hope by sharing all of these fabulous tags you are inspired to purchase this Tag Kit! I cannot wait to offer it as a class when it gets closer to the holidays! You can hop back to see Melissa’s Christmas in July projects and hop forward to see what Connie has created!

Christmas in July--Joy of Sets Style!

It is Christmas in July over here! Stampin’ Up! is adjusting their catalogue release dates which means that the new Holiday Catalogue Demonstrator pre-order period began July 1st! Just in time for me to create some fun cards for this Joy of Sets Blog Hop!

 
81540689_10215726056411300_2006779918087618560_o.jpg

I had so much fun designing and creating these cards once I got into the Christmas mindset!

I used a new stamp set called Tag Buffet. It is actually the complimentary stamp set to create the Tag Buffet project kit. I thought it was a unique set to use for this blog theme.

final.jpg
final.jpg

To create this first card I started with a new Designer Series Paper called ‘Tis the Season. It is a 6x6 medley that features the colors Cherry Cobbler, Garden Green, Real Red and Shaded Spruce. I decided to add our new In Color, Just Jade into the mix as it looks SO GOOD with Shaded Spruce.

All of the elements on the 3 cards I designed were cut by hand, yes OLD SCHOOL, as there are no dies or punches that coordinate with this stamp set. I also used our Stampin’ Blends in Just Jade and Cherry Cobbler to color the stocking and ornament.

In the card above I stamped the sentiment in Cherry Cobbler and then flicked my marker over top to take away the white. I added a small strip of Shaded Spruce card stock that had been run through the Tasteful Textile 3D folder. And the gems I used on all 3 of the cards are, surprise, Blue Adhesive Backed Gems! There are two tones in this embellishment and one had a green feeling to me so I decided to add them in!

final.jpg
final.jpg

To create the second card I used Just Jade as the base and added a panel of Shaded Spruce card stock with some coordinating DSP from the ‘Tis the Season medley. I stamped some of the sprigs behind and used my water painter in the Just Jade ink to add a spray of color. I stamped two ‘leaves’ on Just Jade paper and used one of the blends to give them a bit more detail before cutting them out. The sentiment is also a part of the stamp set and is stamped in Cherry Cobbler with a spray of Just Jade ink. And once again I added in some of those Blue Adhesive Backed Gems.

final.jpg

The 3rd and final card in this cute little trio features a plaid DSP option from the ‘Tis the Season medley. I flicked a water painted across the Shaded Spruce card base and stamped a couple of leaves in the same ink color. I thought the little ornament was so cute and I decided to cut apart one of the larger phrases in the stamp set to be the greeting on the card.

final.jpg
final.jpg

I hope you love this trio of Christmas Cards, I am thrilled with how they turned out and can’t wait to offer them as a class when it gets a little closer to holiday season!

The next stop on our Christmas in July blog hop is with Libby Fens! I know you will love her creations and I hope our hop inspires you with projects and ideas!