12 Days of Christmas--Day 2!

Welcome to Day 2 of our 12 Days of Christmas Blog Hop! This is my and Melanie’s second time offering this fun blog hop and we each have a ton of fun projects line up for you—in total you will get to see 24 super inspiring holiday projects!

My second project is one inspired by two of my fellow Artisan Design Team members—Tammy Wilson for the cool tree idea and Charlet Mallet for the fun pop up portion on the inside!

The base and first layer of this card are Basic White and I ran the first layer through the new Snowflake Sky embossing folder. I love how the little snowflakes on the folder are on scale with this project!

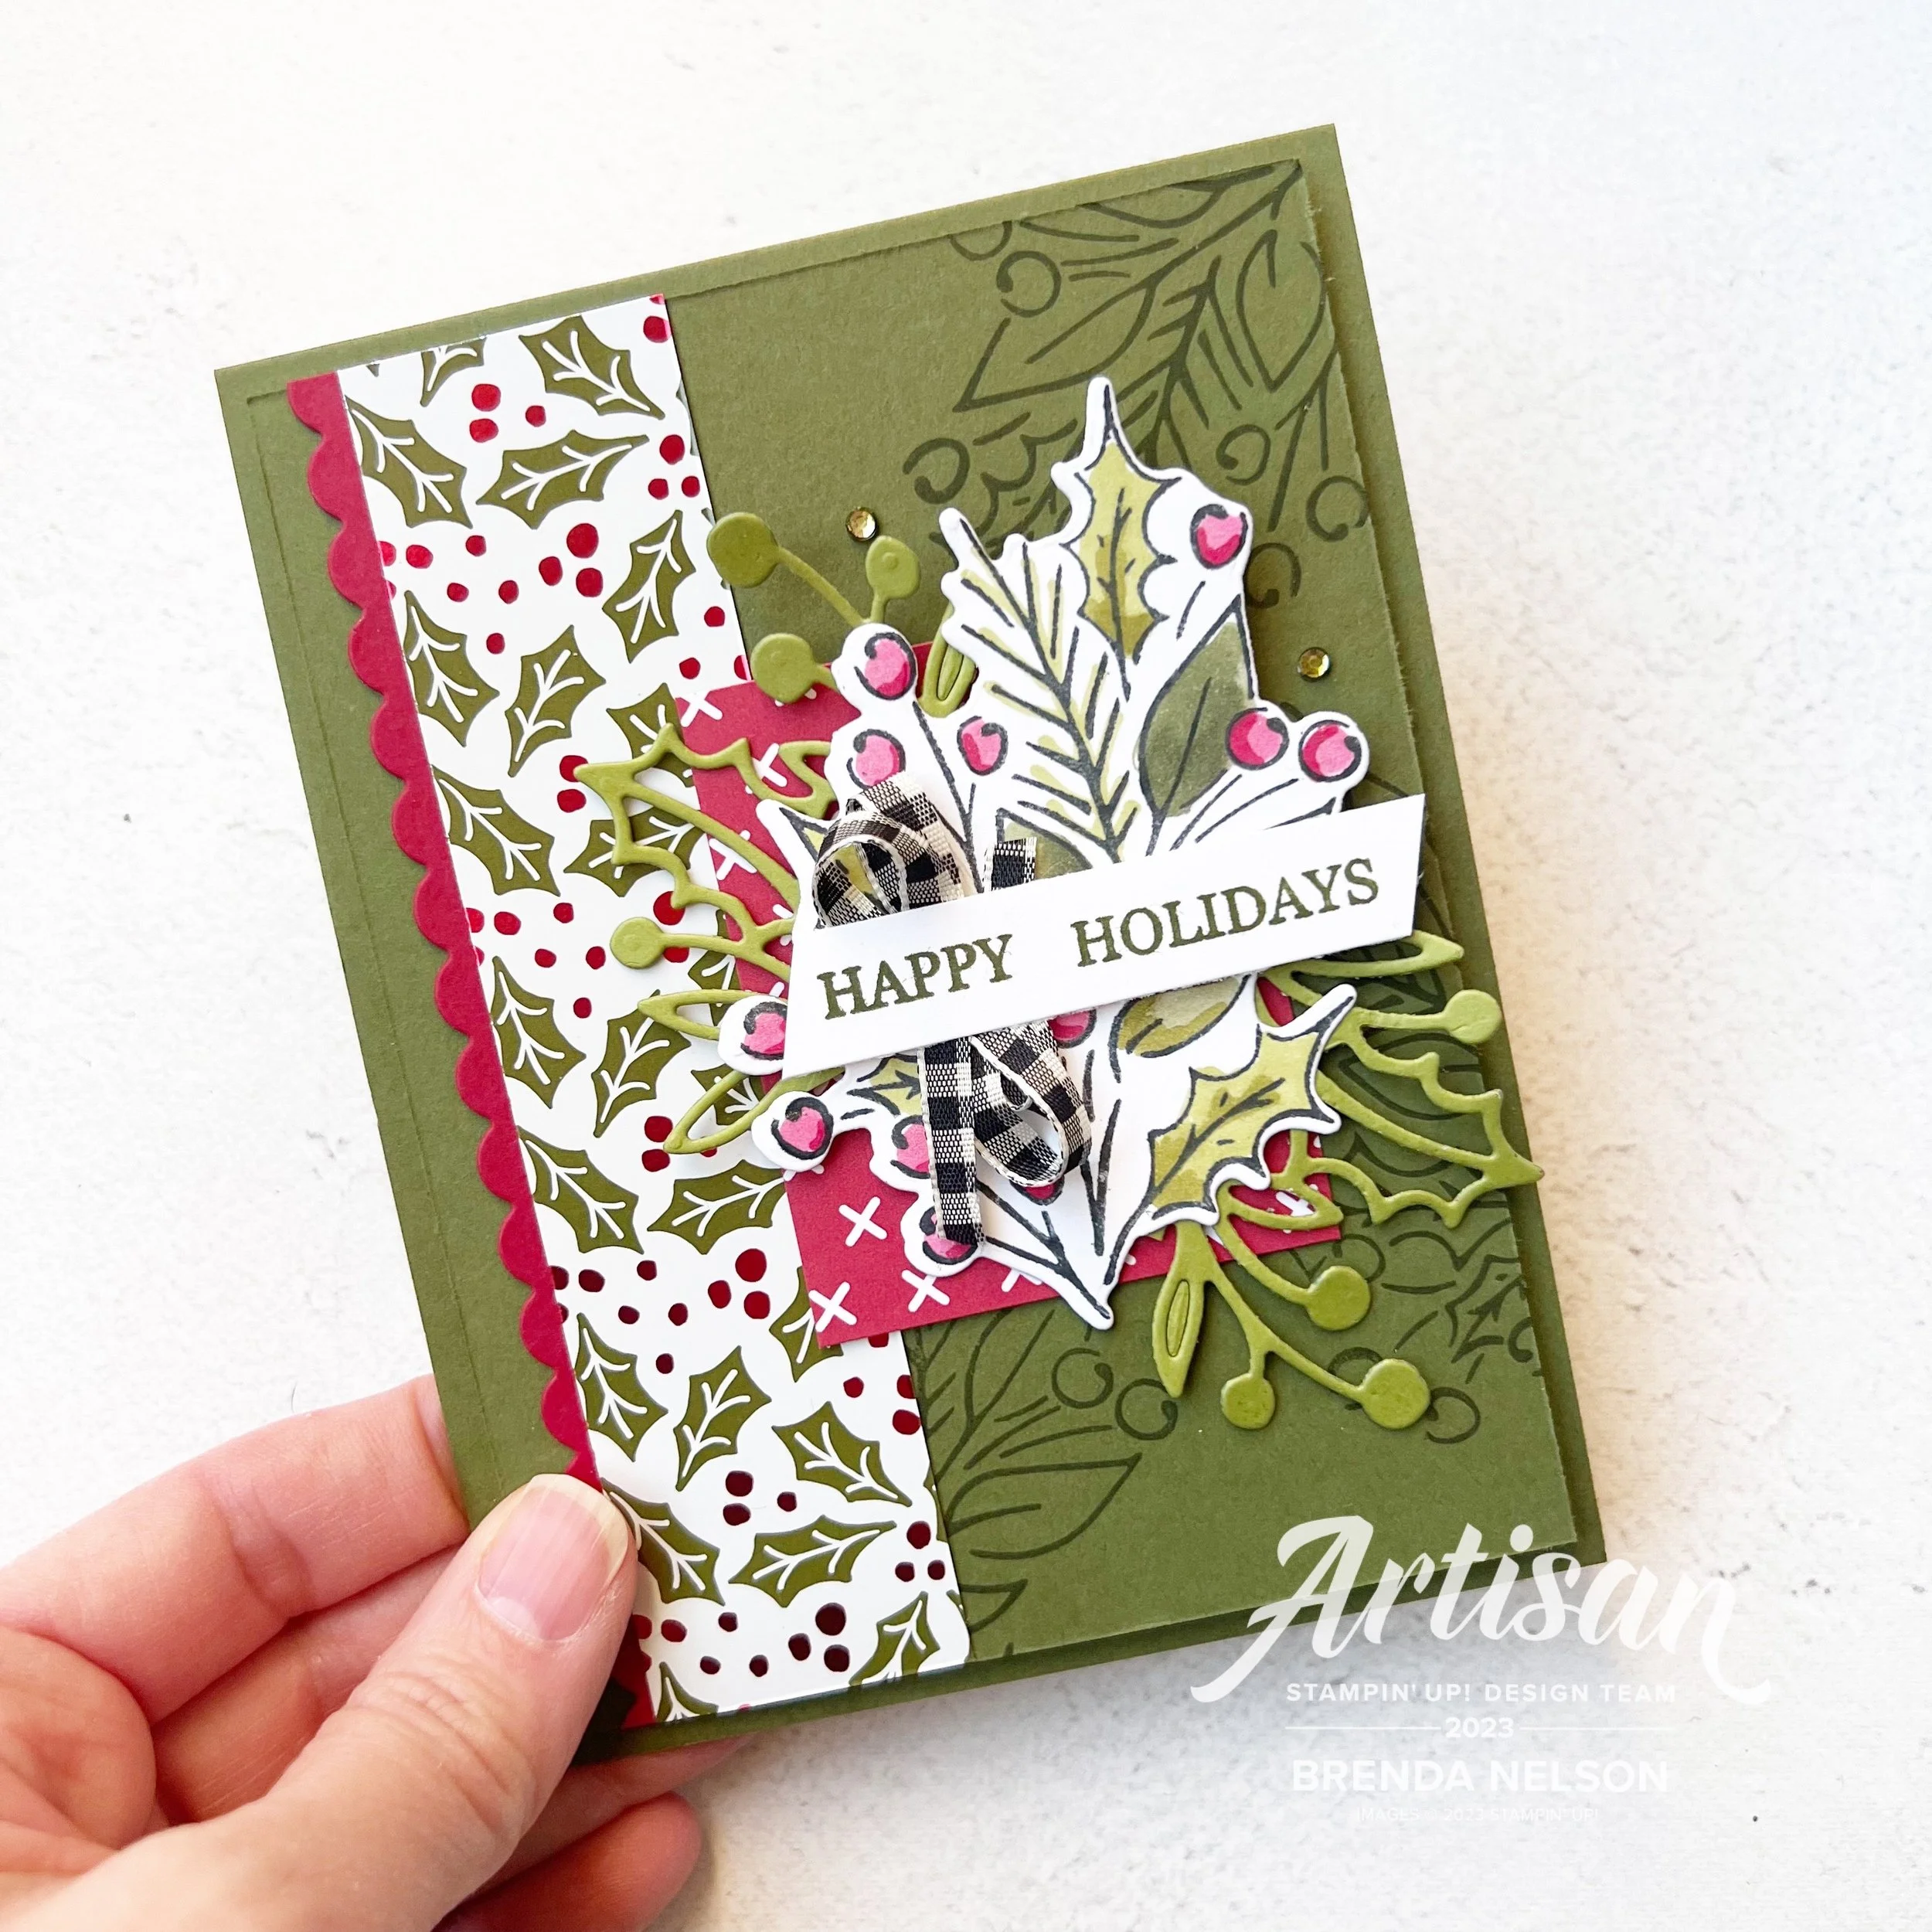
The sentiment is from the Throughout the Year stamp set in the Holiday catalogue—its a perfect stamp set as it covers off so many wonderful occasions throughout the year in a variety of fonts.


I cut the tree from the Merriest Trees Dies and used my Blending Brush with three colors—Lost Lagoon, Pretty Peacock and Garden Green.

After blending I flicked my water painter over top—the water acts like an eraser of sorts. I then took some Whisper White re-inker, squeezing a small amount onto a block. Using another water painter (I have one designated to this craft ink) I flicked a few sprays of white over top of the tree. What I love about this fun technique, is that every tree you blend will look different!

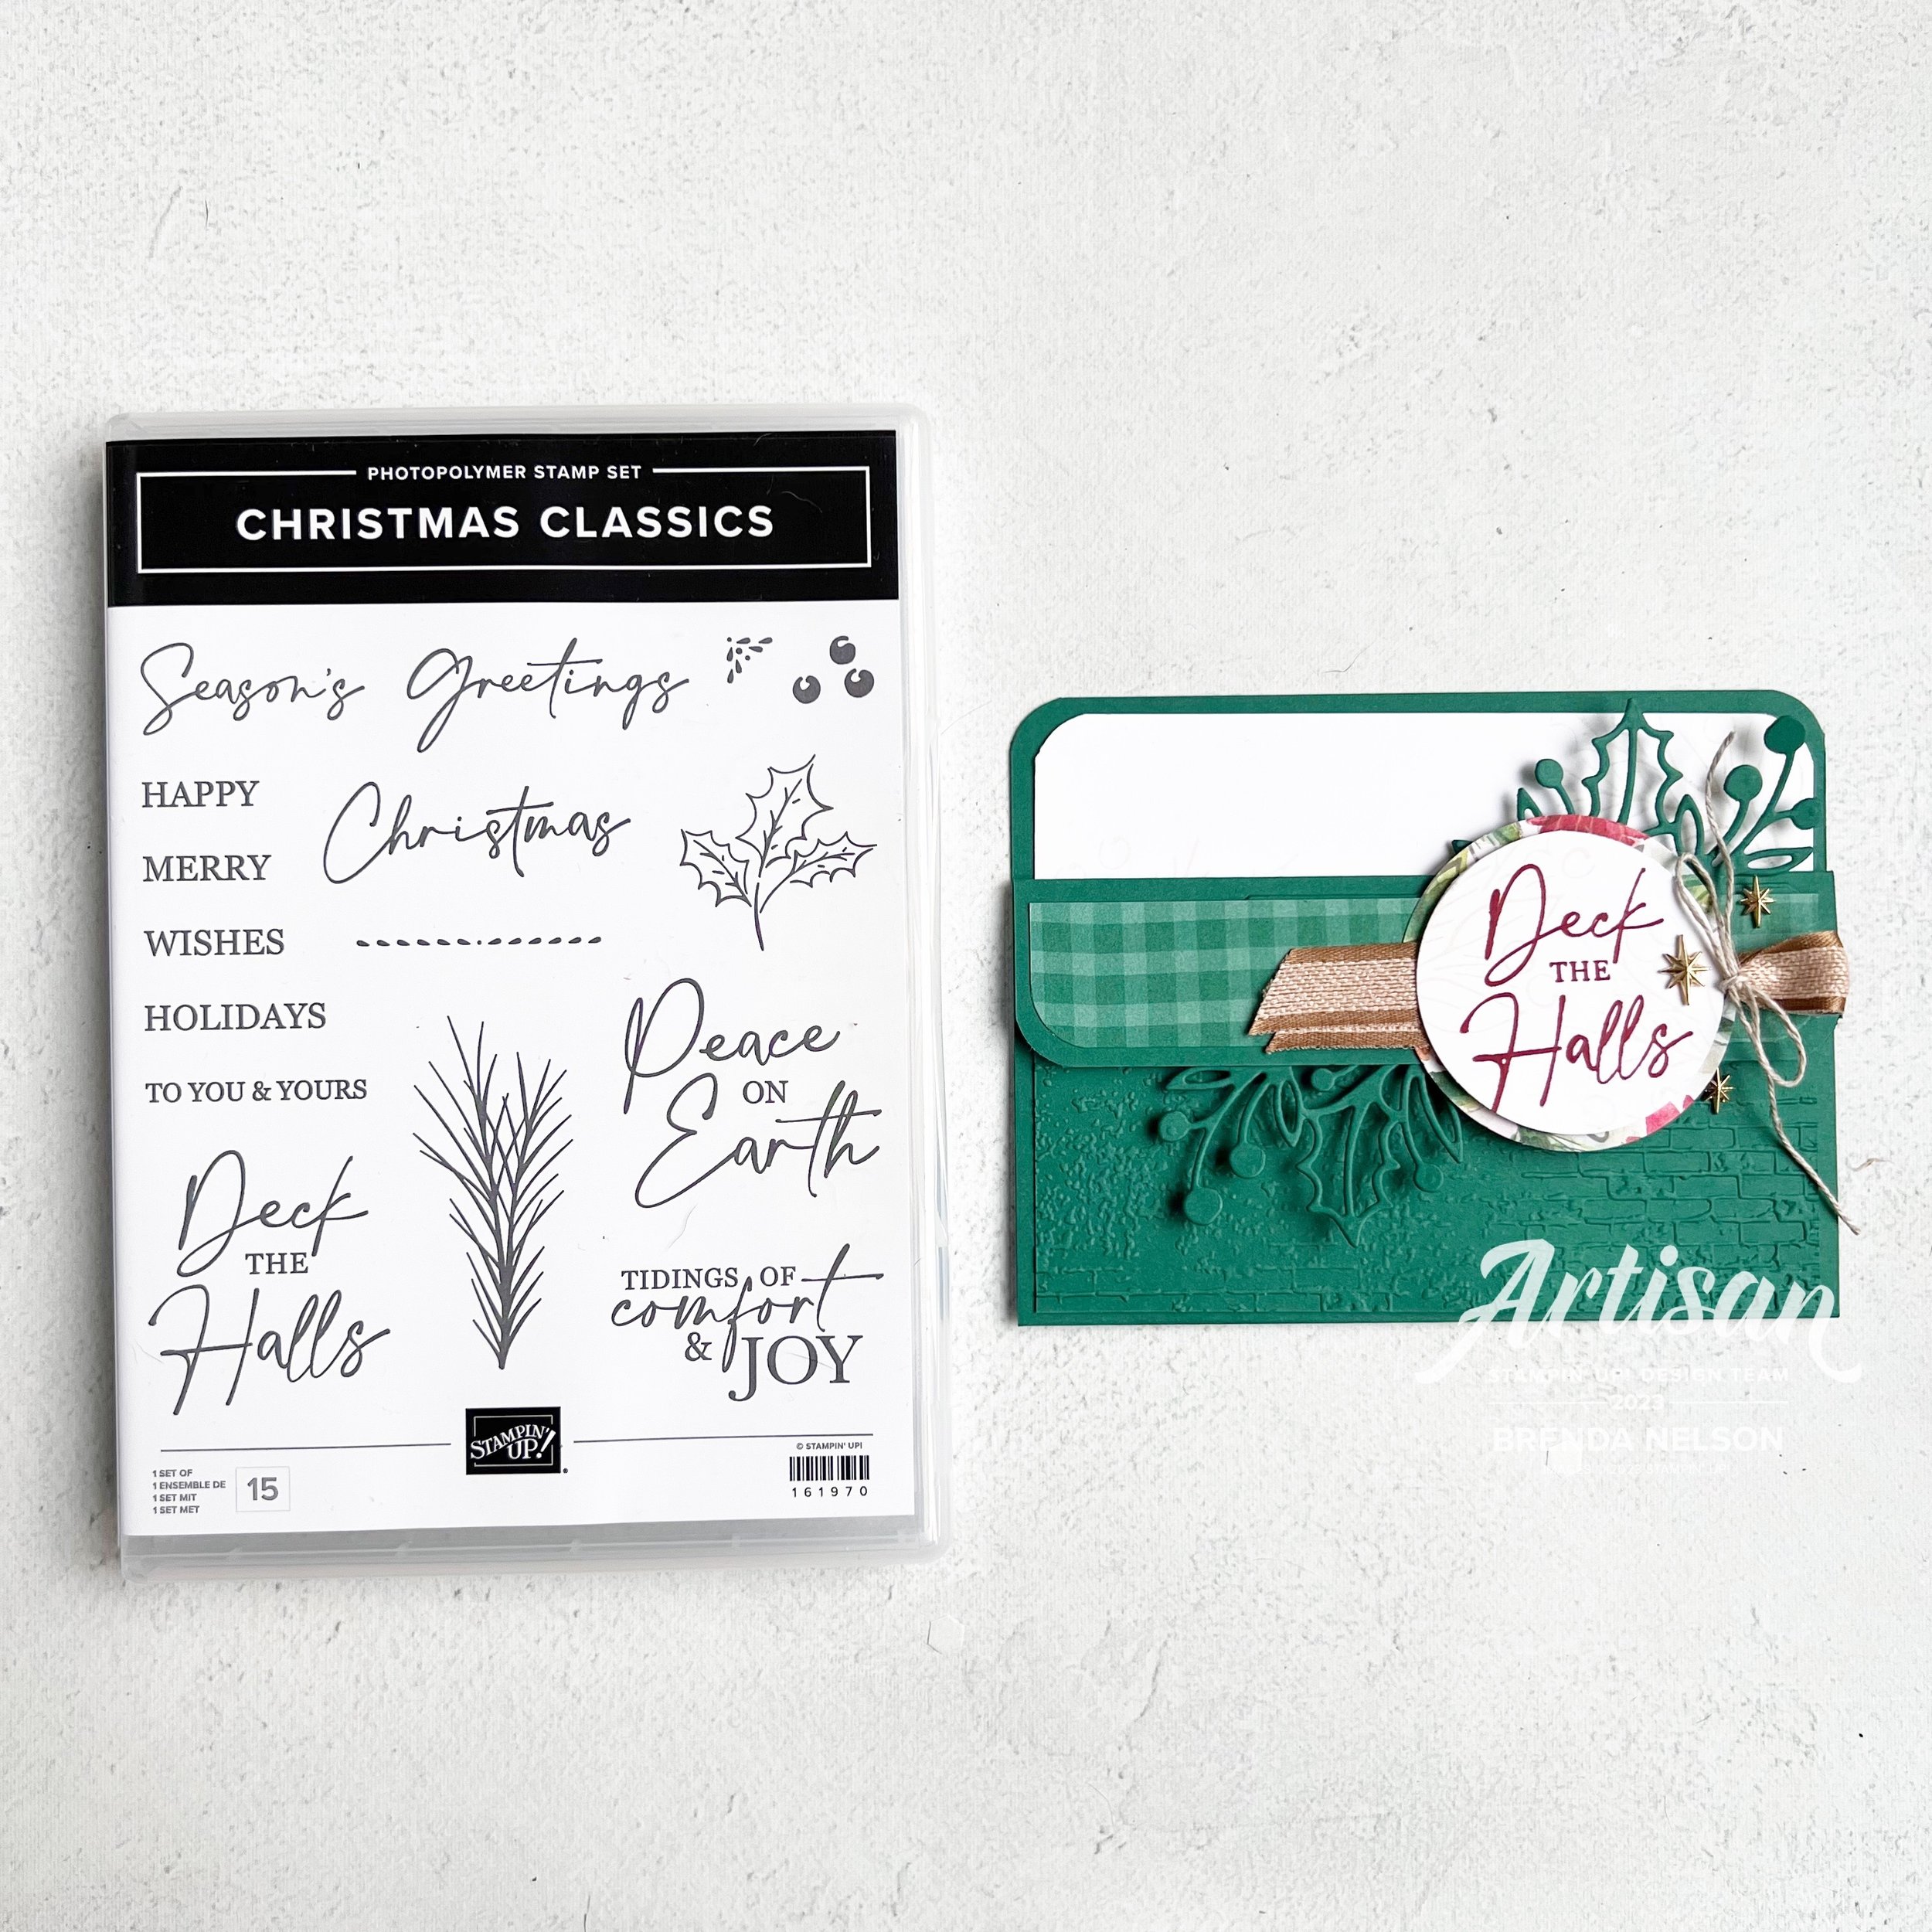
I cut some of the sprigs from the Christmas Classics Dies—including the sentiment. I used Pretty Peacock and Garden Green card stock with a little bit of the Vanilla & Black Check ribbon behind the sentiment. Note the color of ribbon!

TOP TIP: Use your Stampin’ Blend markers to color ribbon to your liking to match your projects!

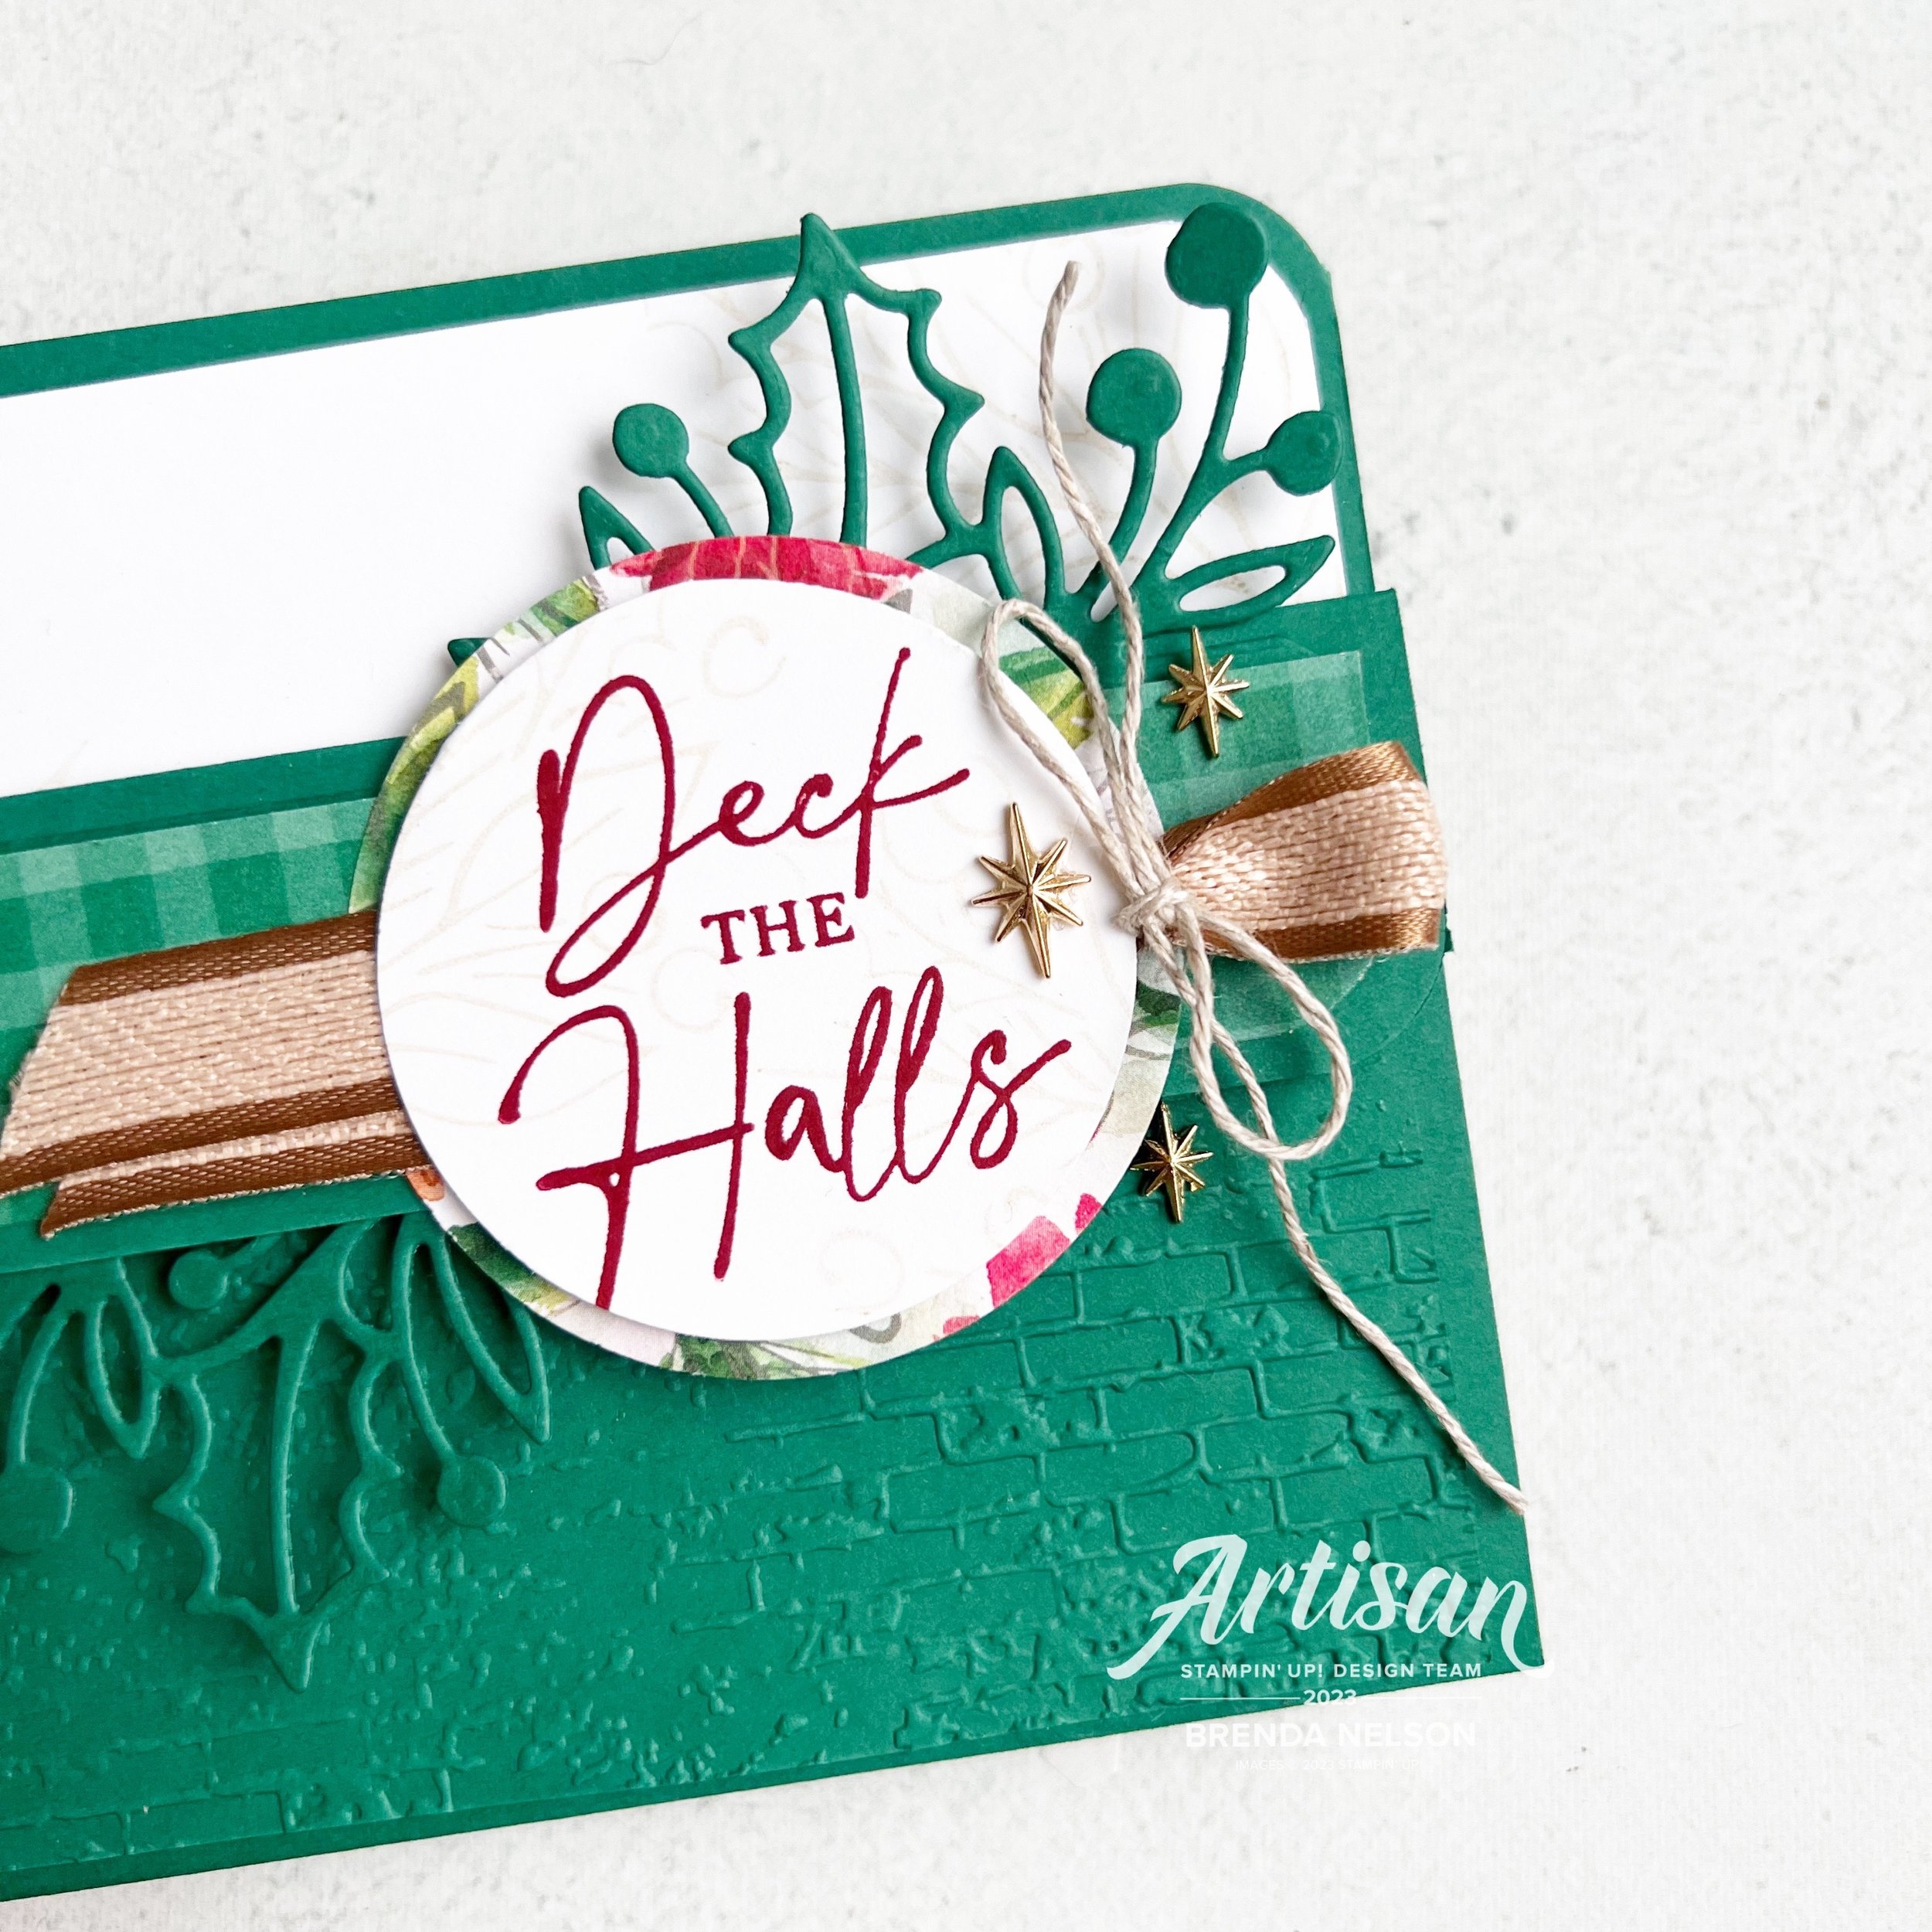
A few sequins from the Adhesive-Backed Sequins Trio from the Annual Catalogue, finished off the front of the card!

But remember I mentioned something fun for the inside? Earlier this year Charlet shared this super fun tip on how to create a little pop up in the cards! The sentiment from the Merriest Trees ‘We Wish You a Merry Christmas’ was perfect, die cut with one of the smaller trees from the dies.

Isn’t this little pop up tree so cool? Thank you for such a cool tip charlet!

To make the fun pop up, according to Charlet’s awesome instructions, is to cut a piece of card stock, that matches your card base, to 3 x 3 inches and score this in half. Fold. Line up the folded edge on your trimmer and at each 1 inch mark cut a 1 inch snip. Unfold and score from snip to snip at the 1/2 mark.

Pop the center fold out. Line up interior fold and adhere to the center of card at the fold line.

I used some Tear’n Tape on each side of the pop up to keep it in place on the top and bottom.

I stamped the sentiment in Pretty Peacock and used some Lost Lagoon ink to softly blend over top so that the tree stood out a little bit more.

I hope this card inspires you to try a fun pop up on the inside of your next card!

I can’t wait to see what Melanie has created for you! You can click on this image to go visit her blog!

If my projects inspire you and you are needing some supplies, please consider shopping my online store so I can continue to do what I love!

Around the World on Wednesday--Sketch Challenge!

Hello friends and welcome to Around the World on Wednesday, a fun Blog Hop with amazing Stampin’ Up! creators from ‘Around the World’! I am so proud to be in a Hop with so many amazing designers!

This month, we have a sketch challenge! I always love a sketch challenge to see how people interpret the sketch!

I will admit, I did stick pretty true to the original sketch and I focused on the Joy of Christmas suite with a twist on the DSP!

I decided to use the new DSP which is an Online Exclusive called Shining Christmas, instead of the DSP included in the suite. One side of the DSP has a glossy appearance and the other side is more matte.

The two primary colors in the DSP are Cherry Cobbler and Mossy Meadow, so I decided to focus on Mossy Meadow as my base and first layer. I did some background stamping with the large image from the Joy of Noel stamp set in Mossy Meadow ink.

I added a side strip of the holly leaves pattern from the Shining Christmas DSP and used a retired die to add a scallop strip in Cherry Cobbler as an accent.

Instead of 4 separate squares (as shown in the sketch) I chose to just cut one larger piece of DSP in a Cherry Cobbler X pattern. I used this as the base to add all of my other elements.

I stamped out the same image as the background in Momento ink and used my Stampin’ Blends in Mossy Meadow, Old Olive and Cherry Cobbler to color the image. I added some Wink of Stella to the berries as well.

One of my favorite dies sets is the Christmas Classics —I LOVE the label die with the greenery! You can easily snip the greenery separate from the label tot use as accents pieces, which I have done here on my card in Old Olive. I tucked it behind my colored image.

Happy Holidays is stamped from the Christmas Classics stamp set with a little bit of the Black & Very Vanilla Large Check Ribbon.

TOP TIP: If the ribbon feels to big or wide for your project—cut it in half! By doing so on this card, it felt more on scale with the sentiment.

I wanted a little bling so I took some Basic Rhinestones and gave them a quick wash of color with the Mossy Meadow Stampin’ Blend so they would have the perfect color.

I can’t wait to see what the other members of the Team have designed using this sketch! Please make sure to hop all the way around so you don’t miss any fabulous ideas!

Next up on the Hop is Theresa McEntee from the United States, I know you will love what she has made!


Creative Convention--Day 6!

Welcome back friends! I hope you are enjoying everything I am sharing so far! I have had some much fun preparing all of these “Creative Convention” project ideas for you in anticipation of the new upcoming Holiday Catalogue! We are getting so close to the happiest time of year (which is my world is Sept-Dec!)

My project for today is a card with a fun fold that I make EVERY SINGLE YEAR! Its just one of my go to favorites as its a great way to give a gift card inside or hide some money or even a flat little chocolate.

This project is a combo one that uses both of the stamp sets from the Joy of Christmas Suite collection!

I love how these bundles work together so that you can build off of each one of them and I do appreciate the traditional aspect of this suite. I knew I wanted to add the Shaded Spruce gingham pattern from the Joy of Christmas 12x12 paper so I decided to make the card base the same color.

This is a standard card that is scored at 4 1/4, and then you score one side at 1 1/4 to make the flap that folds down creating the ‘pocket’. I also rounded the pocket on the flap and base for a little extra touch.

I added a 2 1/4 x 5 1/4 layer of Shaded Spruce that I ran through the Exposed Brick 3D folder in the annual catalogue—if you do not have this folder you need #addtocart now as its awesome and works with SO MANY things!

Both the Joy of Noel and the Christmas Classics stamp sets are a part of a bundle and the Christmas Classics dies have all the labels and some greenery, while the Joy of Noel dies of the word ‘Noel’ and some larger greenery. I am going to say that you will just need them both, hahaha!

The fun part of this card for me is the greenery that you see emerging from the top and bottom of this fold. I die cut this shape, which is really designed to be a label with the greenery and I cut it in half!


I then tucked this greenery under the DSP on the right and under the flap more in the middle leftish.

I sealed the card with 2 staples that you don’t see, to make the pocket. The I sealed the flap down with some Dimensionls.

Sometimes to keep the card closed I will use twine or ribbon. However, this time I wanted the Pecan Pie ribbon to be more of an accent in between the layers of my sentiment.

The sentiment is stamped in Cherry Cobbler and then I used one of the large images from the Joy of Noel set to stamp some imagery behind the sentiment. I used Crumb Cake ink that I stamped off on my scratch paper (or grid paper) so that it would be faint. I added the sentiment onto of a 2 1/4 inch circle of DSP to bring in a few color just peeking from the outside ring.

Lastly I added some embellishments, Adhesive-Backed Star Trinkets, from the O Holy Night suite. I thought they were a more unique touch to this project than just a gold sequin or such.

I am really really pleased with how this card turned out and I will no doubt be sharing it at my upcoming ‘Joy of Christmas’ Virtual Stamp Camp/Retreat.

Joy of Christmas Stamp Camp —co hosted with Tricia Schaelow from @stampint—if you are not following her, please do!

When: Saturday, Oct 21 at 10:30 am on Zoom (which is awesome as anyone from Canada can join in the fun with us)

Fun Stuff: The stamp camp is $75 and includes everything you see below —Joy of Noel stamp set, full roll of Black & Very Vanilla ribbon, and half a pkg of the Joy of Christmas 12x12 paper PLUS a special guest demonstration from my friend Julie @thepaperhaven and 6-8 make’n takes! These won’t be your ordinary make’n takes either—they will be a mix of 3D, holiday decor and cards!

Registration closes on Sept 30th for this event and your kit can be shipped anywhere in Canada at your expense! Please reach out if you are interested in registering (one of these days I will figure out how to take payment through Squarespace!)

I have one more project to share with you tomorrow as a part of my ‘Creative Convention’ weeklong extravaganza! I hope you will come back and please feel free to leave any comments!