Creative Convention--Day 6!

Welcome back friends! I hope you are enjoying everything I am sharing so far! I have had some much fun preparing all of these “Creative Convention” project ideas for you in anticipation of the new upcoming Holiday Catalogue! We are getting so close to the happiest time of year (which is my world is Sept-Dec!)

My project for today is a card with a fun fold that I make EVERY SINGLE YEAR! Its just one of my go to favorites as its a great way to give a gift card inside or hide some money or even a flat little chocolate.

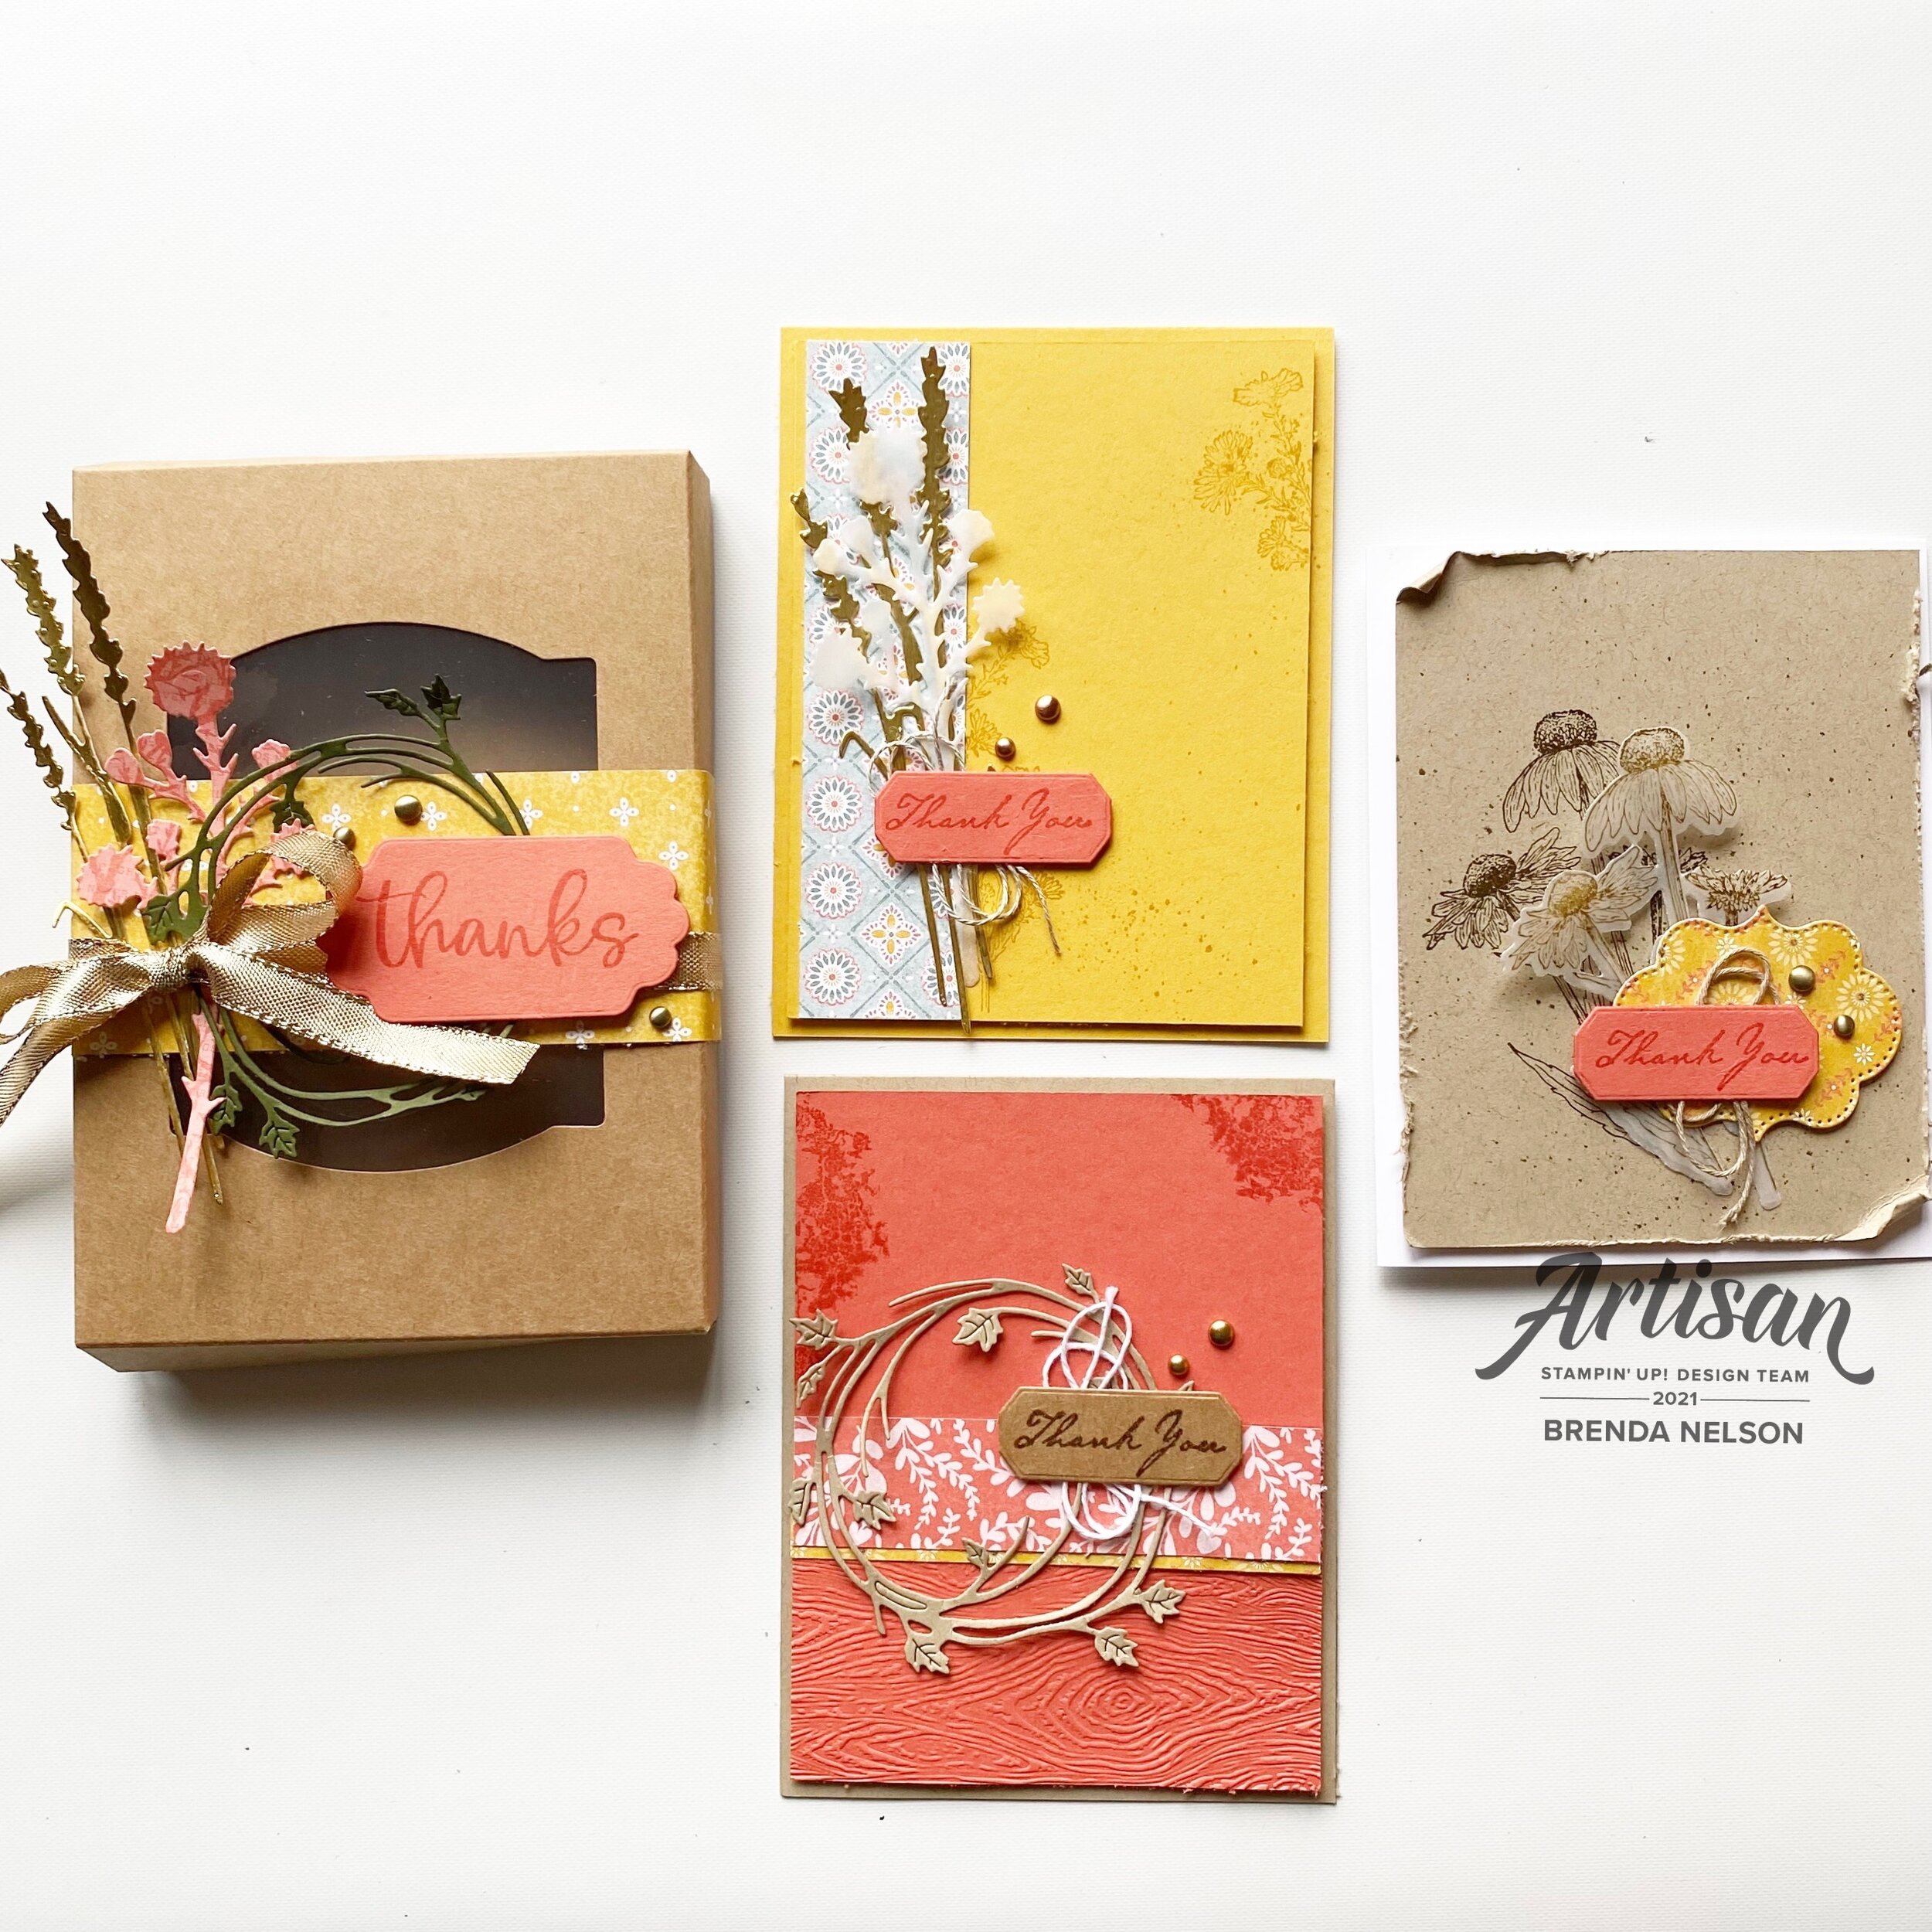
This project is a combo one that uses both of the stamp sets from the Joy of Christmas Suite collection!

I love how these bundles work together so that you can build off of each one of them and I do appreciate the traditional aspect of this suite. I knew I wanted to add the Shaded Spruce gingham pattern from the Joy of Christmas 12x12 paper so I decided to make the card base the same color.

This is a standard card that is scored at 4 1/4, and then you score one side at 1 1/4 to make the flap that folds down creating the ‘pocket’. I also rounded the pocket on the flap and base for a little extra touch.

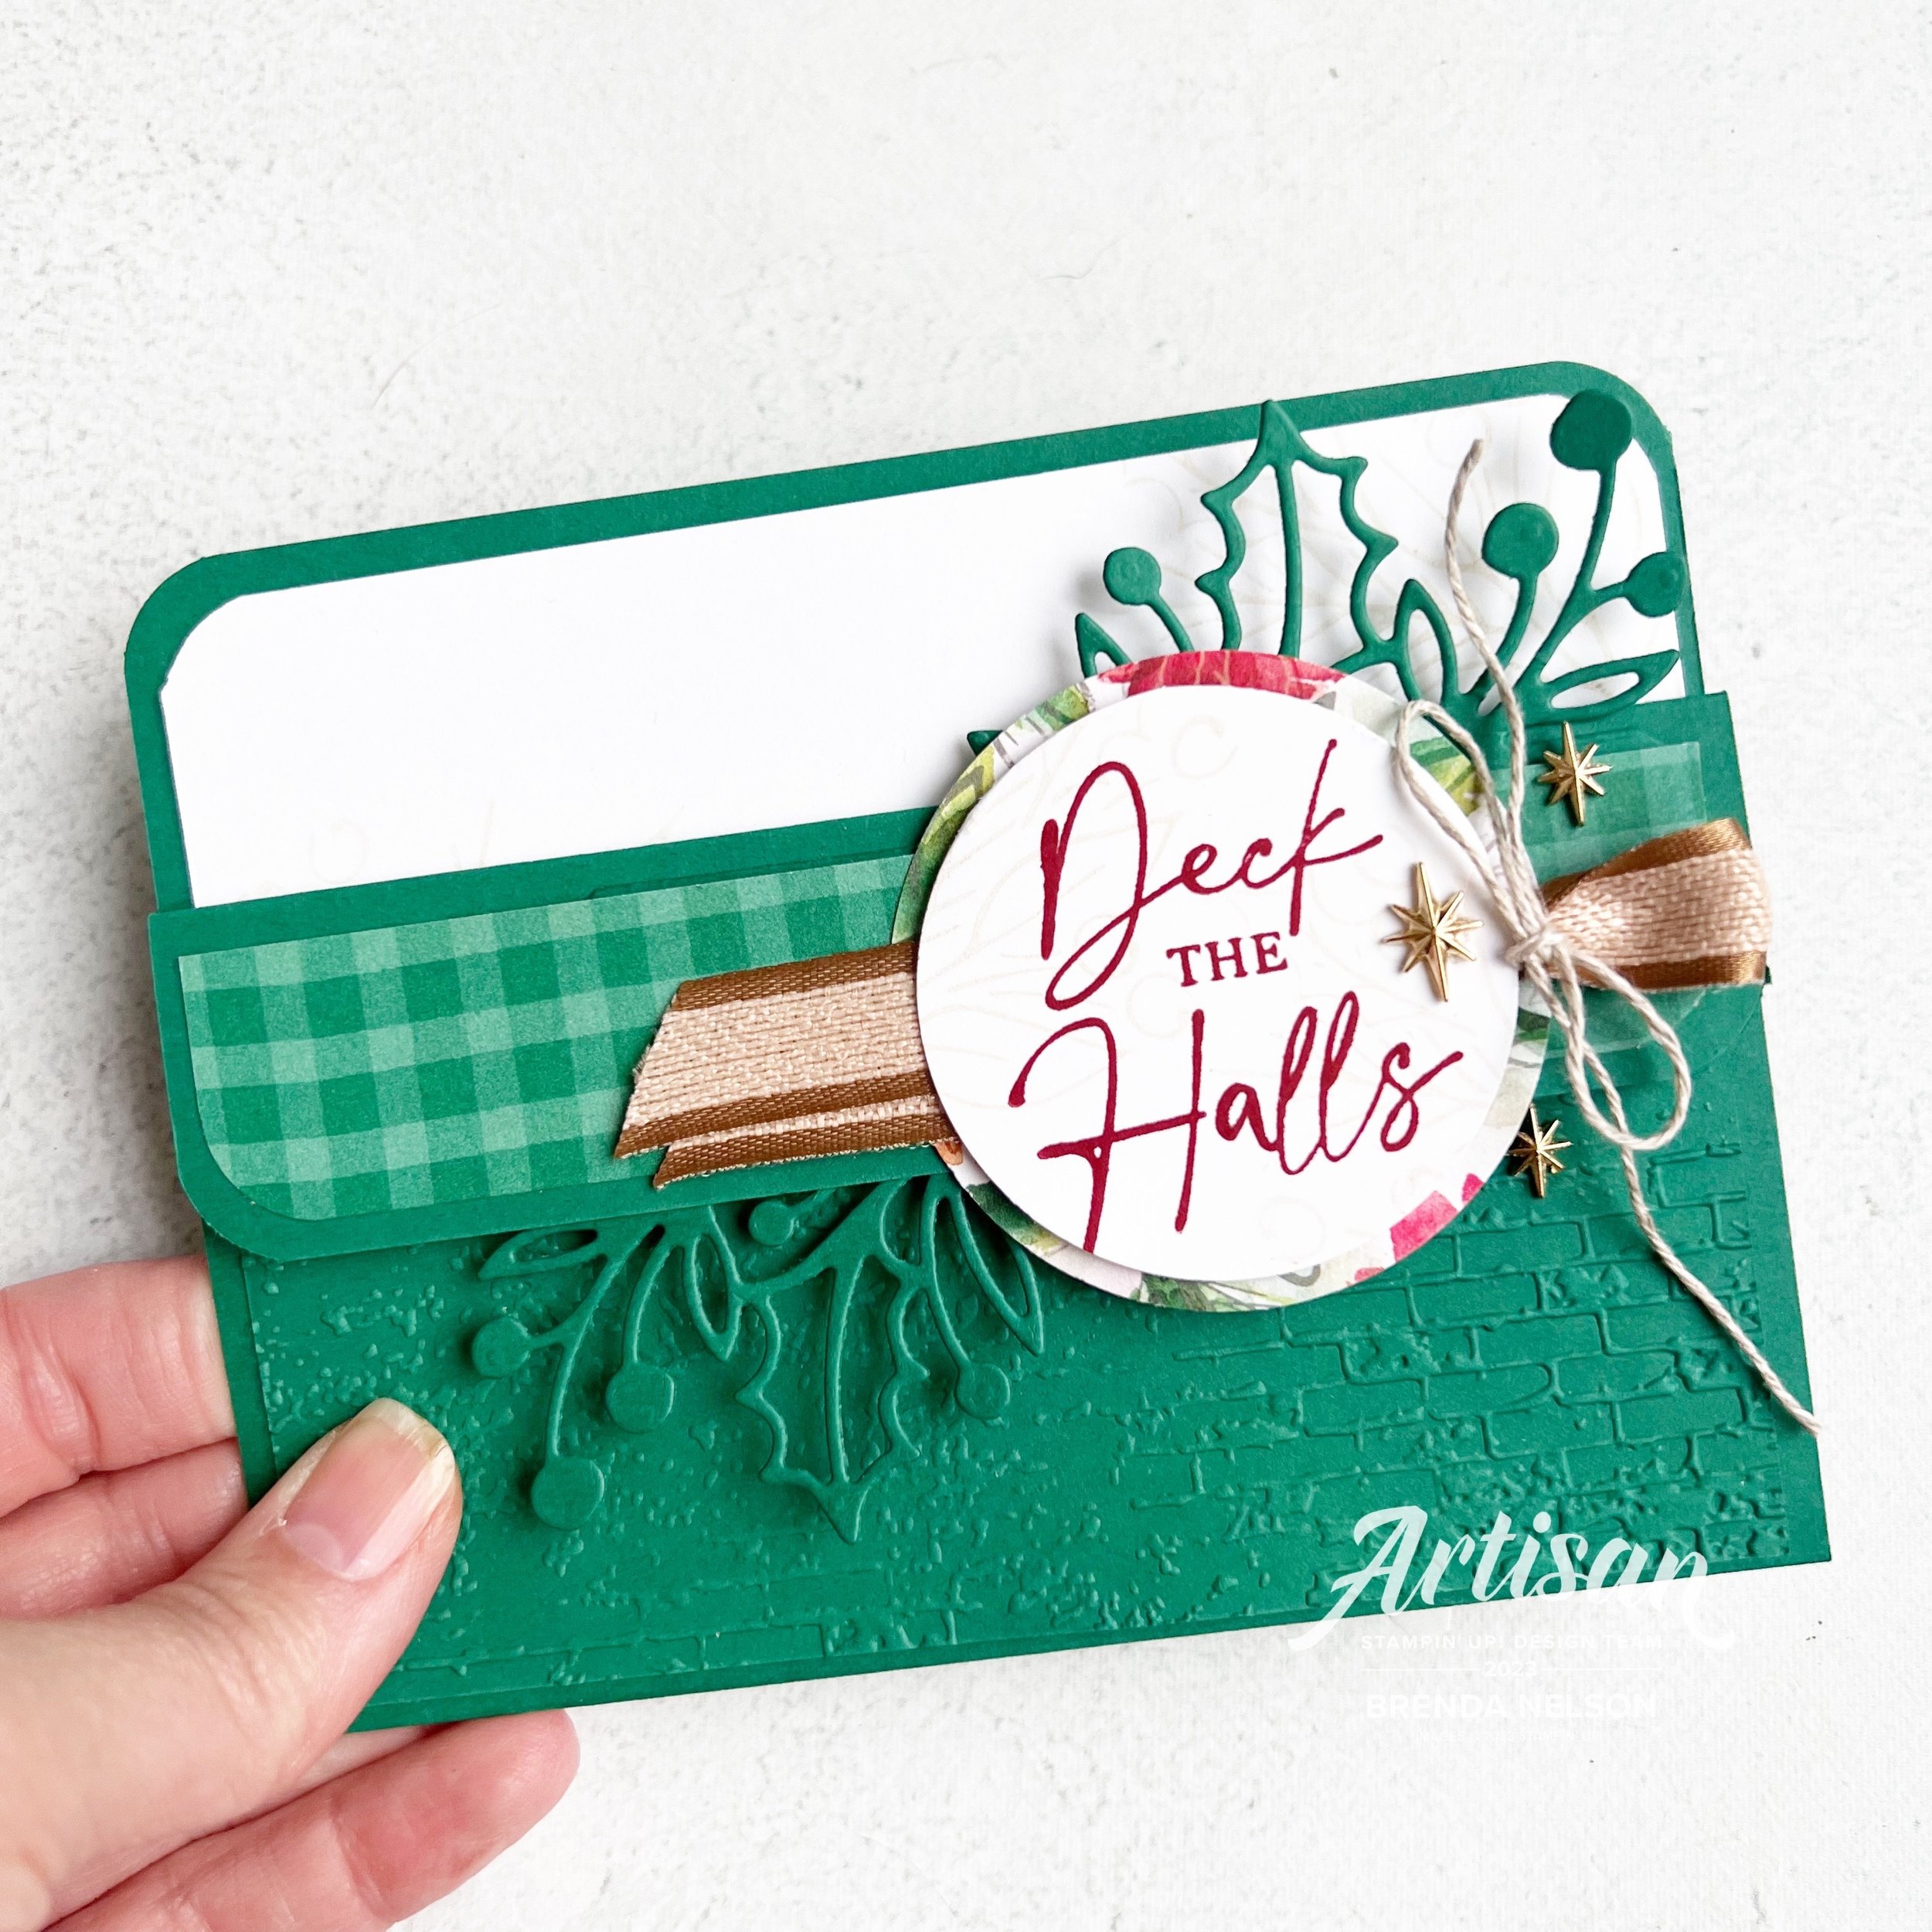
I added a 2 1/4 x 5 1/4 layer of Shaded Spruce that I ran through the Exposed Brick 3D folder in the annual catalogue—if you do not have this folder you need #addtocart now as its awesome and works with SO MANY things!

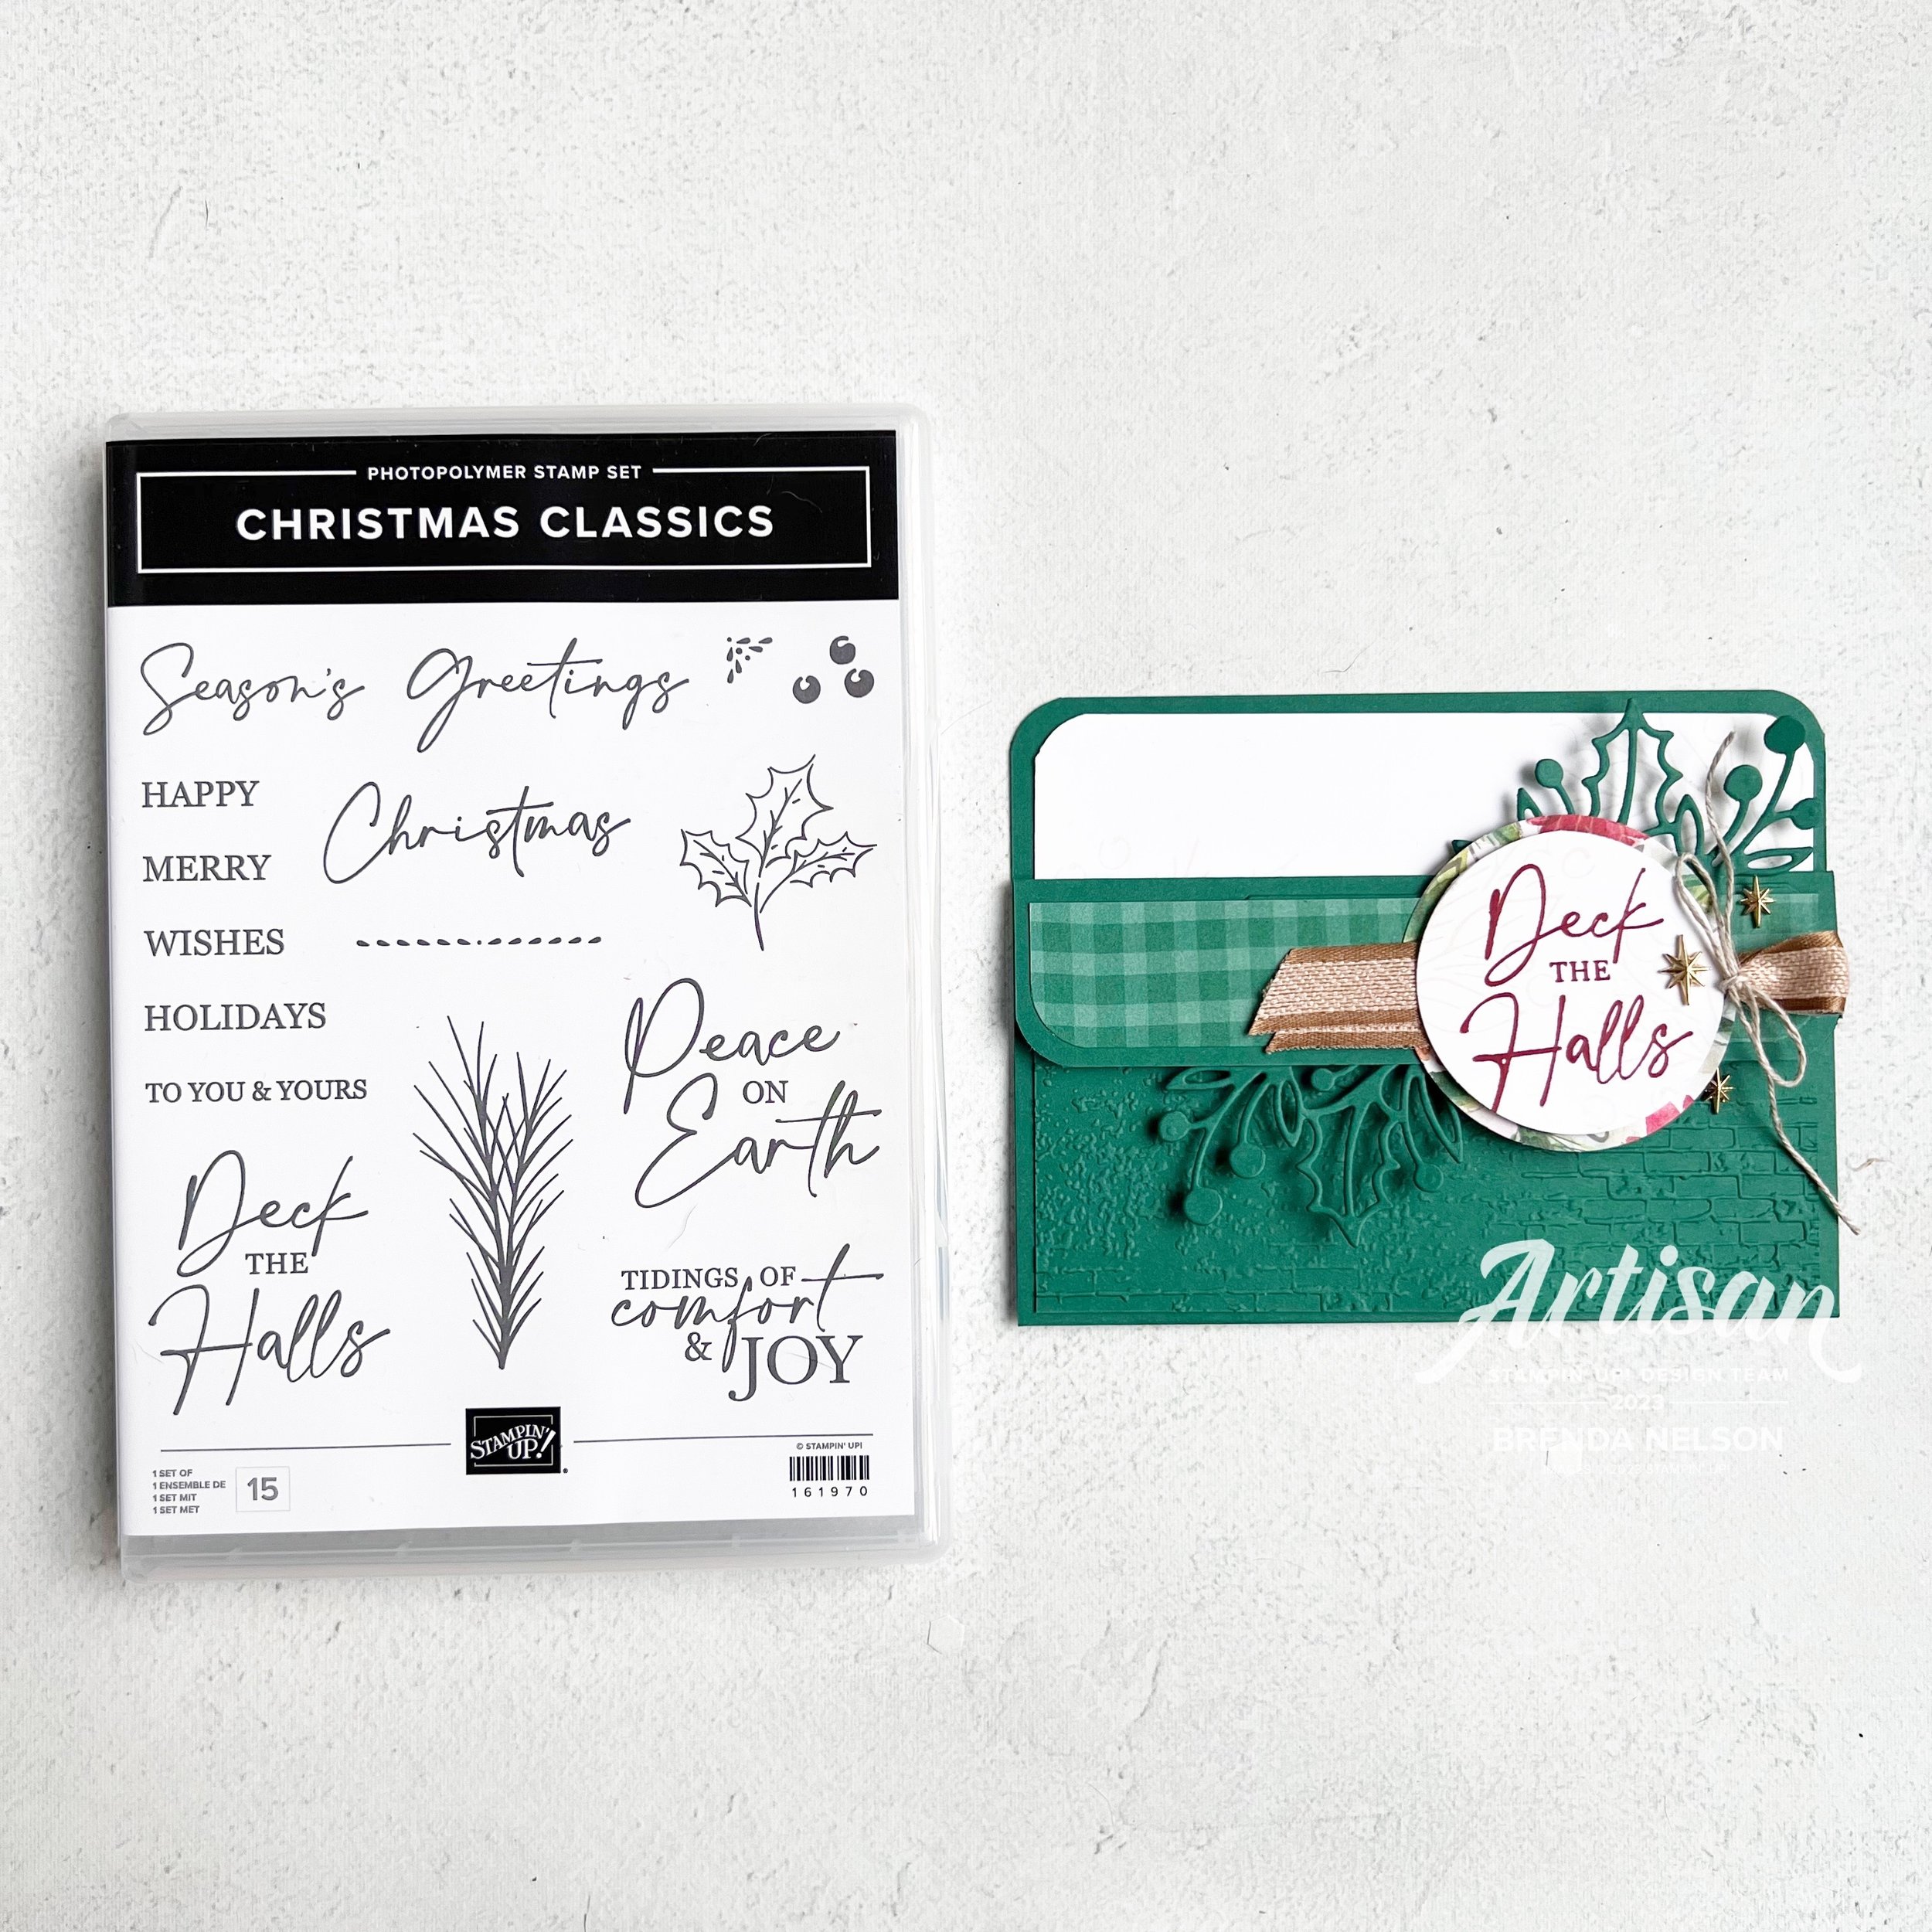
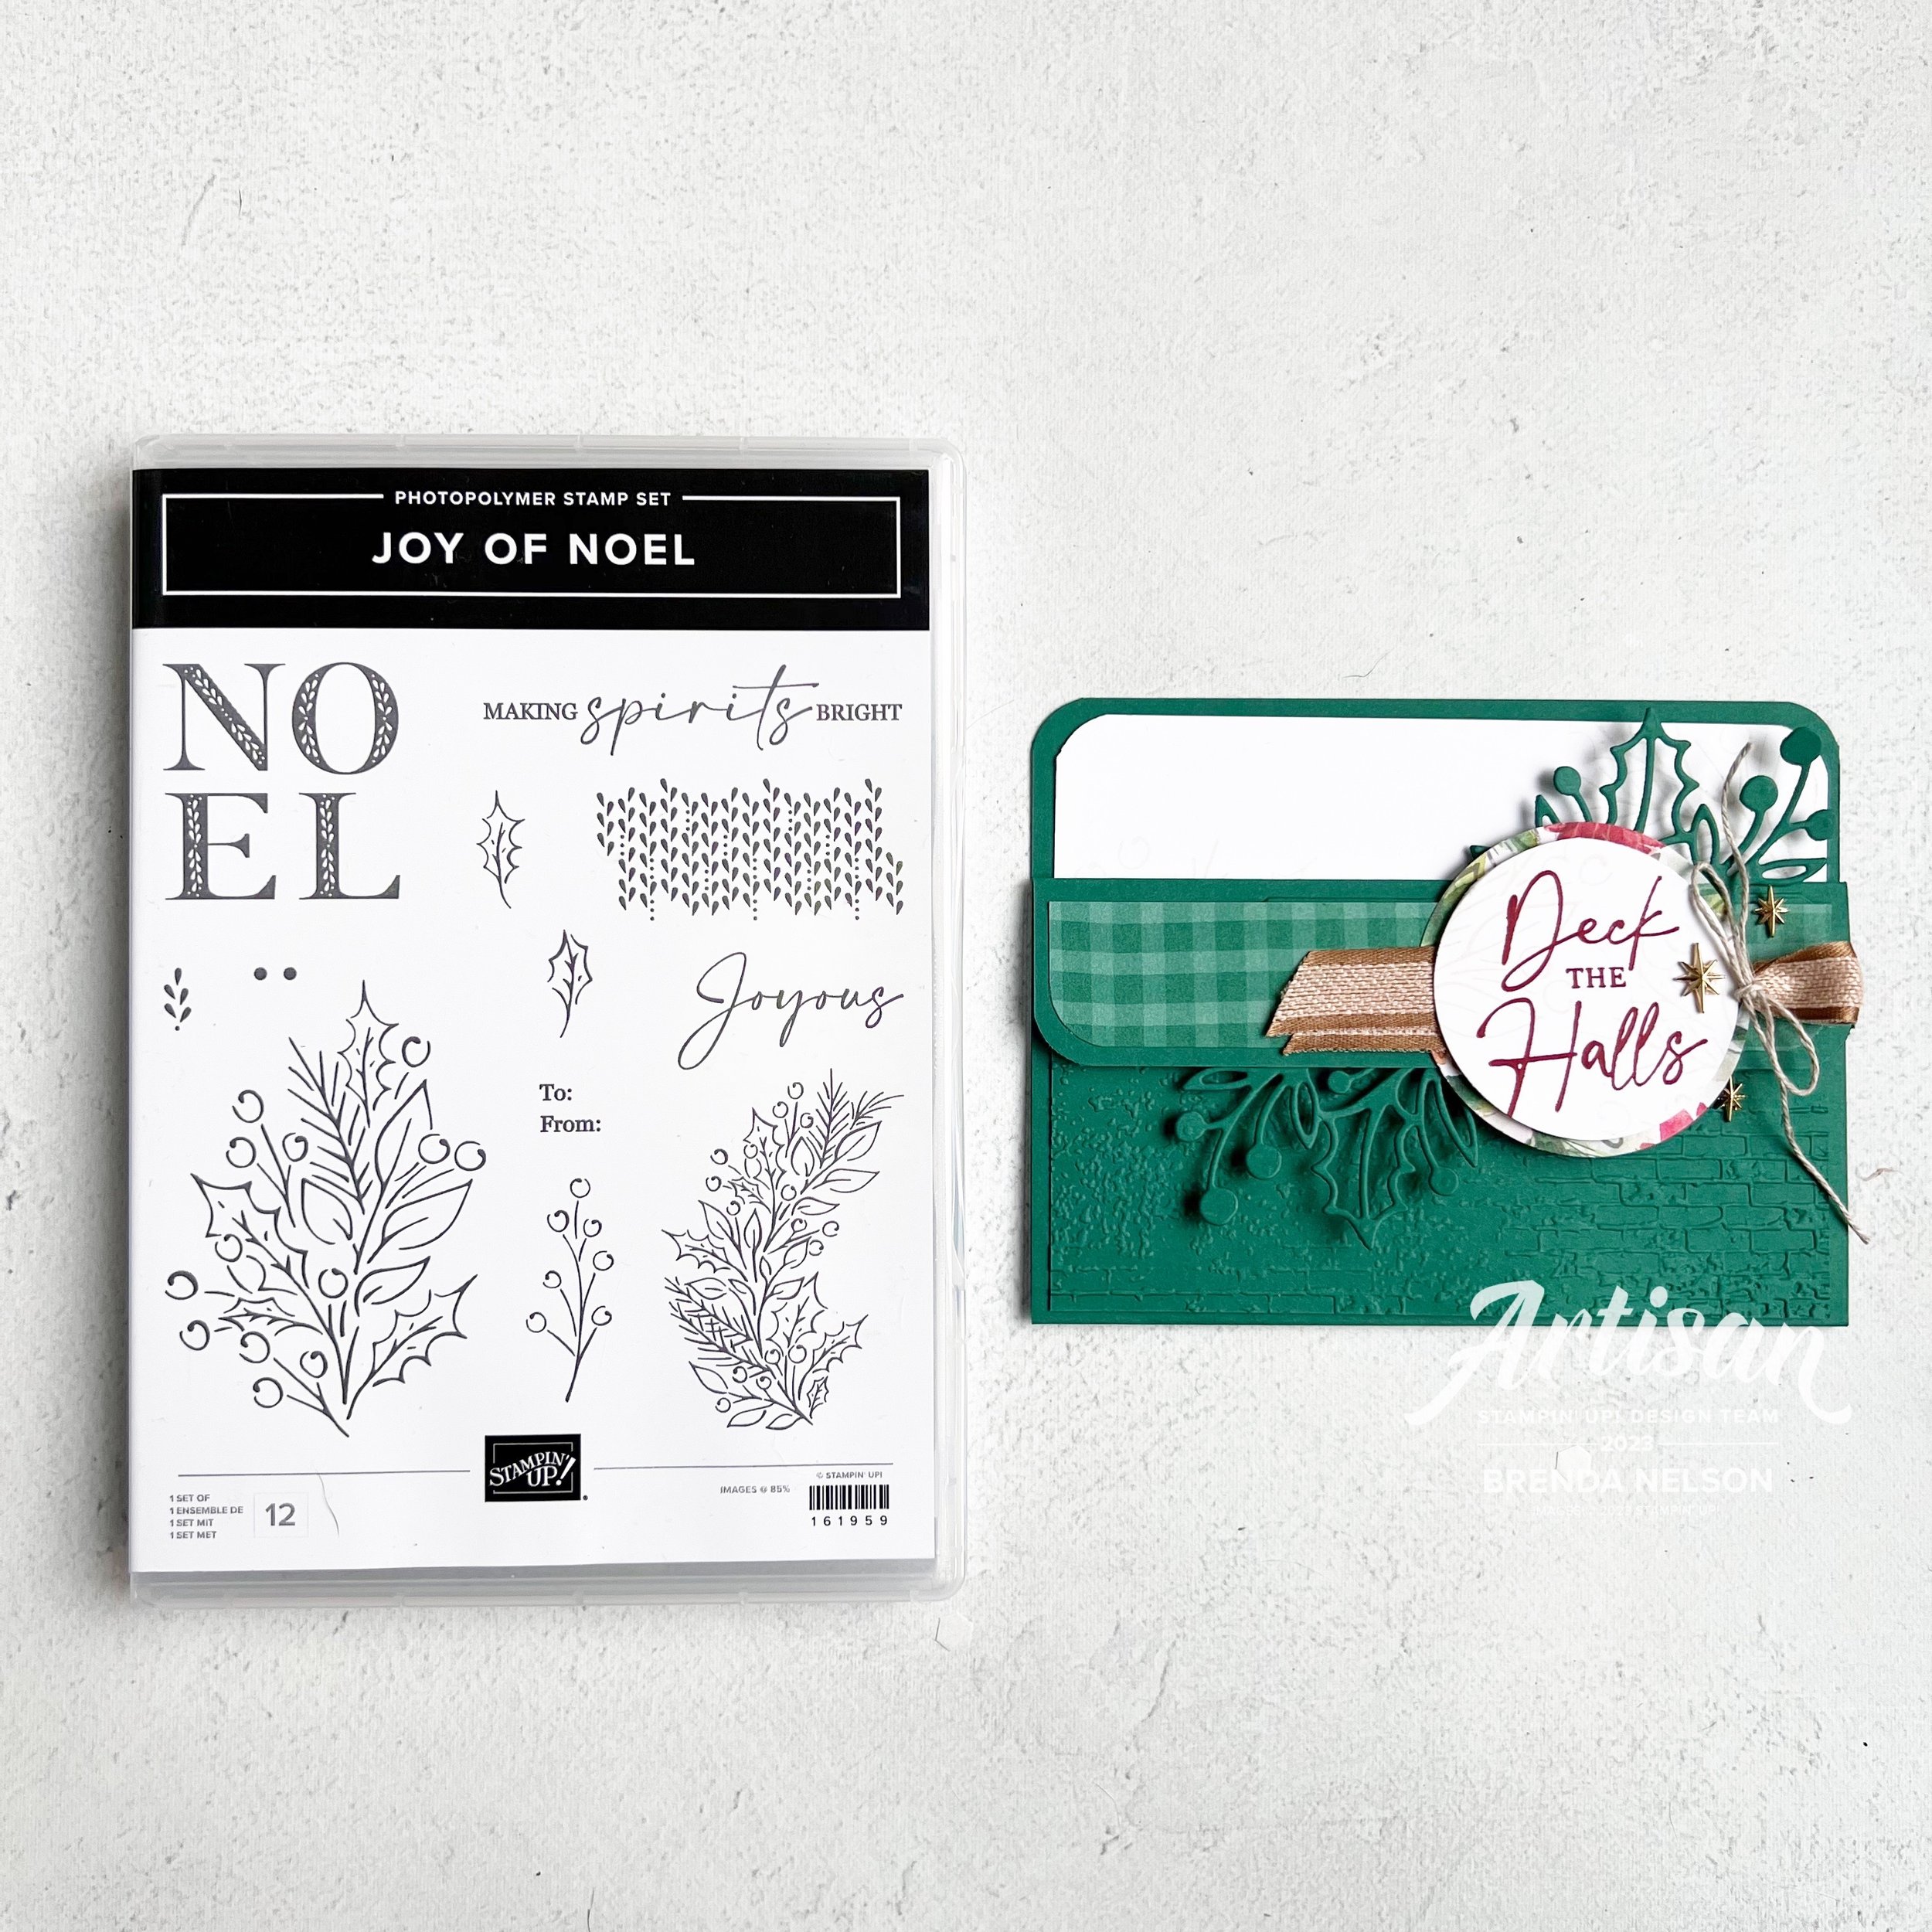
Both the Joy of Noel and the Christmas Classics stamp sets are a part of a bundle and the Christmas Classics dies have all the labels and some greenery, while the Joy of Noel dies of the word ‘Noel’ and some larger greenery. I am going to say that you will just need them both, hahaha!

The fun part of this card for me is the greenery that you see emerging from the top and bottom of this fold. I die cut this shape, which is really designed to be a label with the greenery and I cut it in half!


I then tucked this greenery under the DSP on the right and under the flap more in the middle leftish.

I sealed the card with 2 staples that you don’t see, to make the pocket. The I sealed the flap down with some Dimensionls.

Sometimes to keep the card closed I will use twine or ribbon. However, this time I wanted the Pecan Pie ribbon to be more of an accent in between the layers of my sentiment.

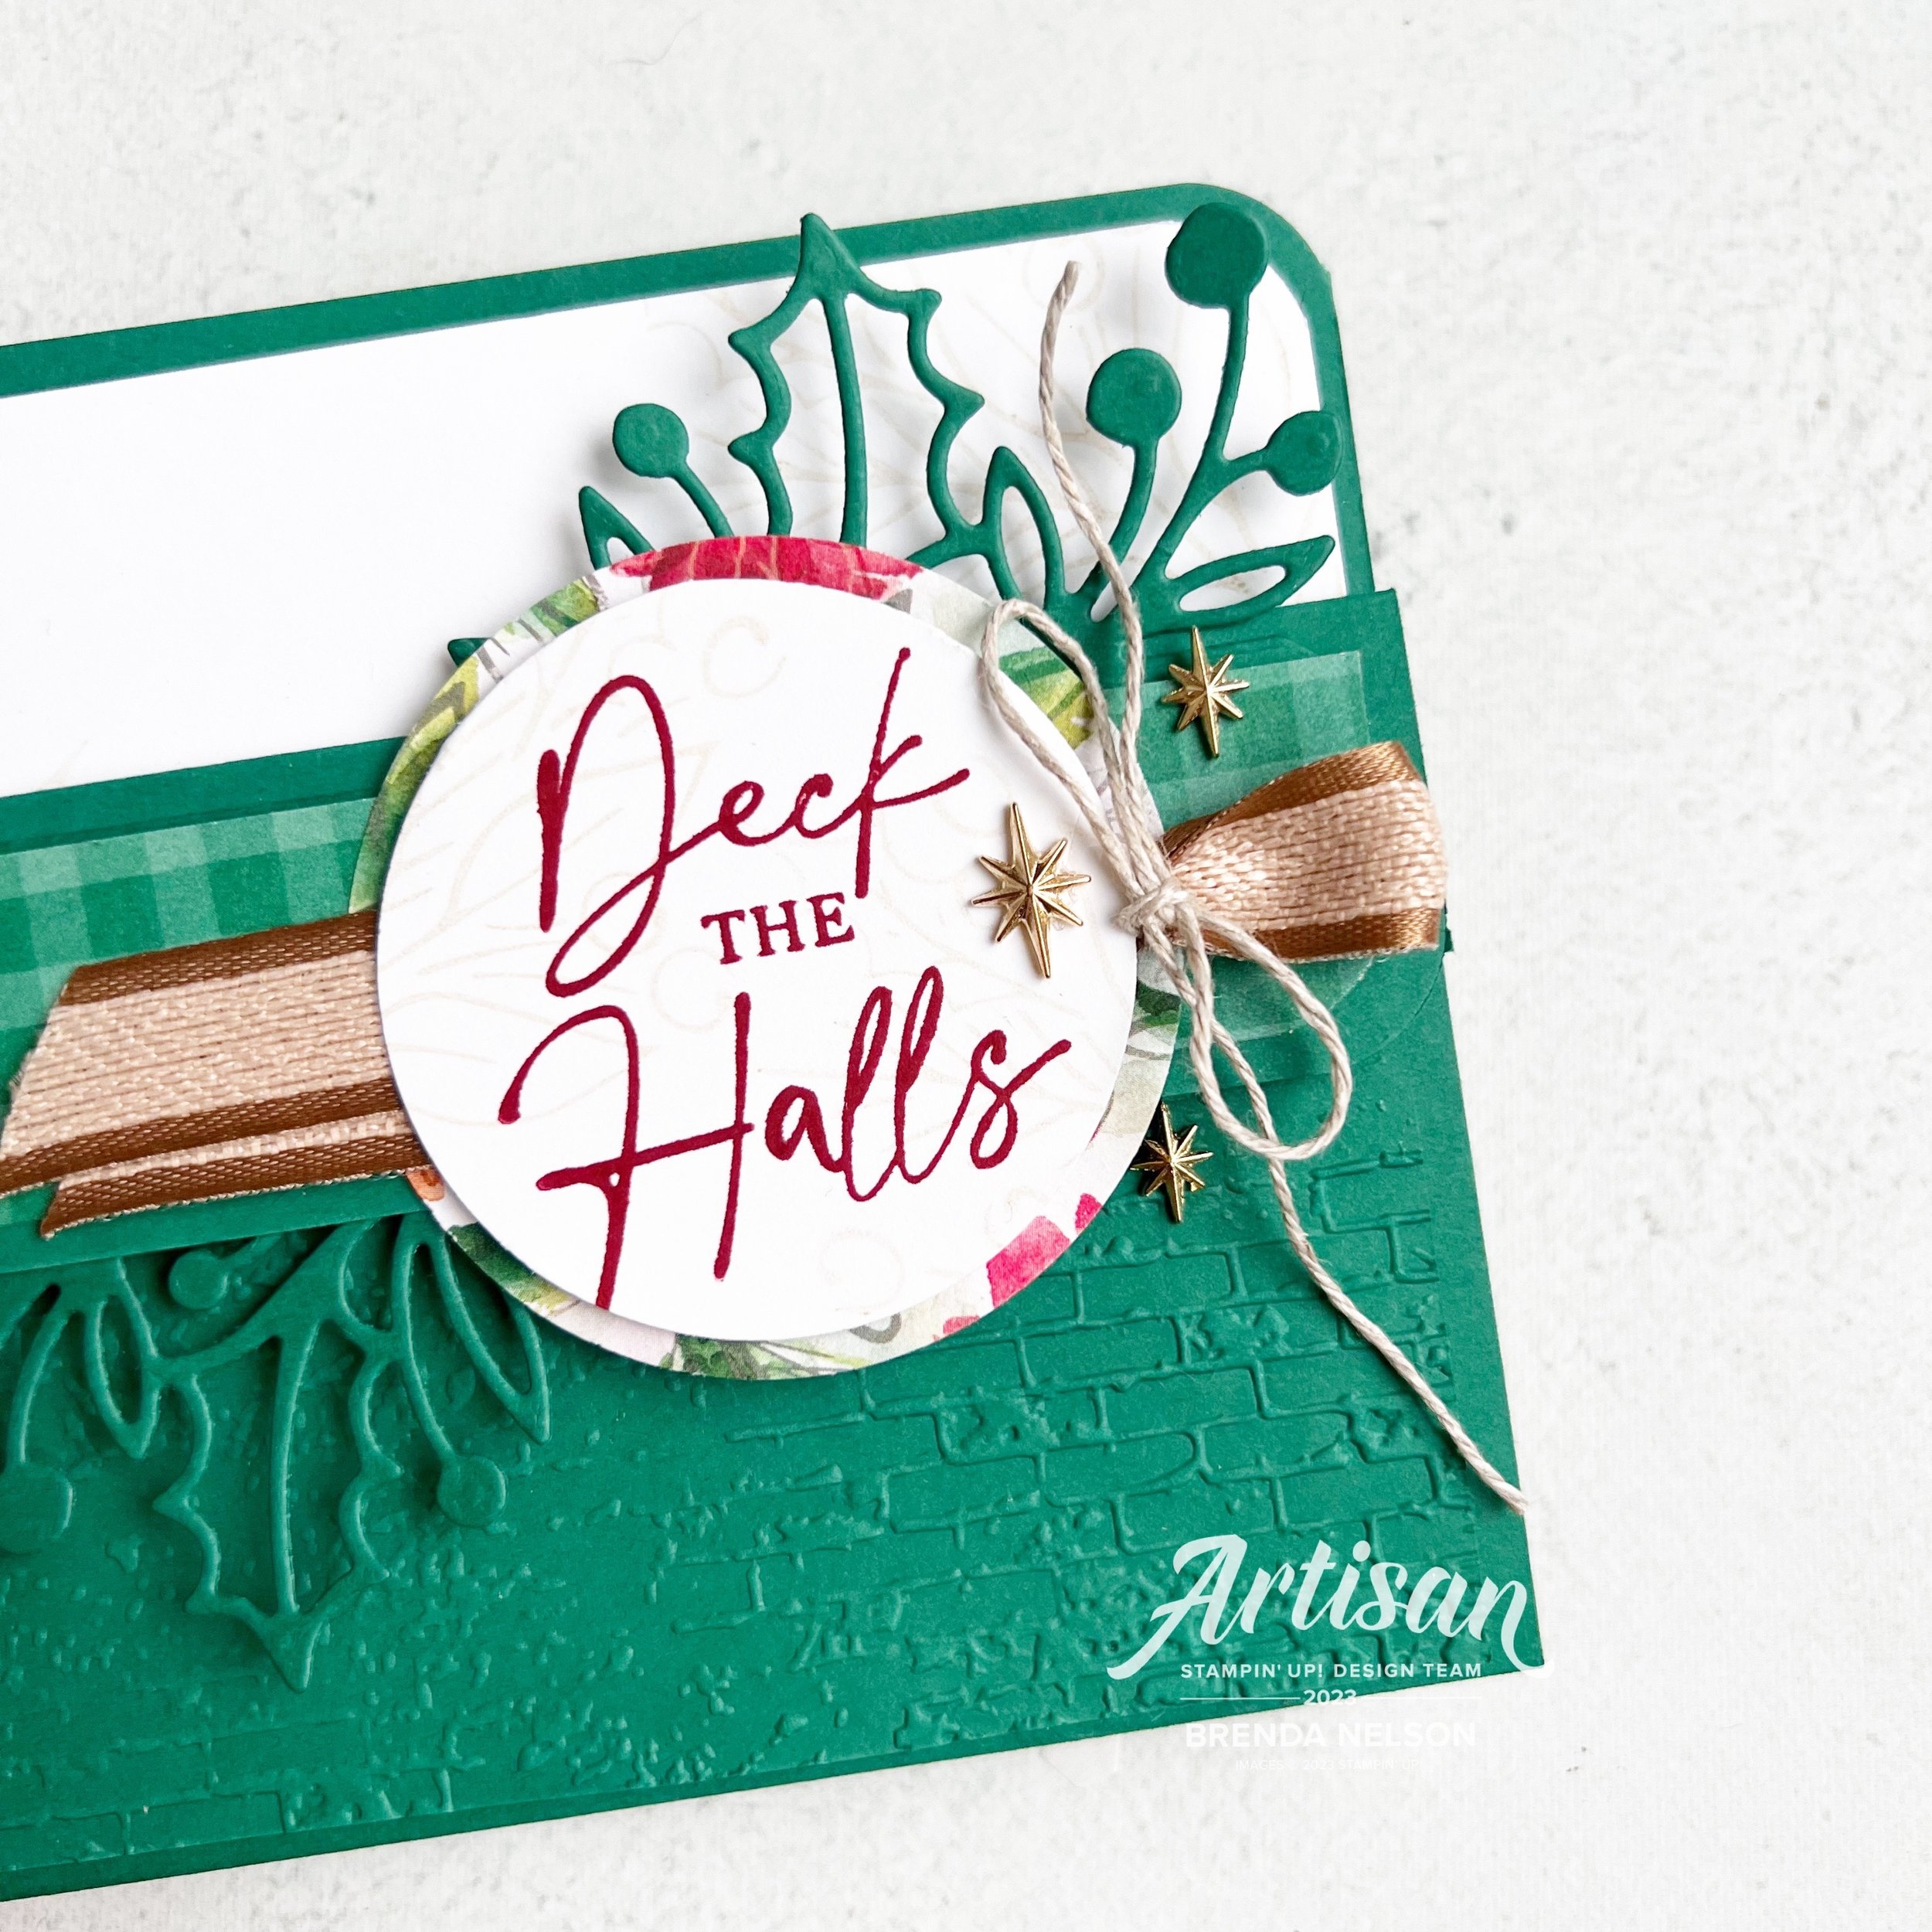
The sentiment is stamped in Cherry Cobbler and then I used one of the large images from the Joy of Noel set to stamp some imagery behind the sentiment. I used Crumb Cake ink that I stamped off on my scratch paper (or grid paper) so that it would be faint. I added the sentiment onto of a 2 1/4 inch circle of DSP to bring in a few color just peeking from the outside ring.

Lastly I added some embellishments, Adhesive-Backed Star Trinkets, from the O Holy Night suite. I thought they were a more unique touch to this project than just a gold sequin or such.

I am really really pleased with how this card turned out and I will no doubt be sharing it at my upcoming ‘Joy of Christmas’ Virtual Stamp Camp/Retreat.

Joy of Christmas Stamp Camp —co hosted with Tricia Schaelow from @stampint—if you are not following her, please do!

When: Saturday, Oct 21 at 10:30 am on Zoom (which is awesome as anyone from Canada can join in the fun with us)

Fun Stuff: The stamp camp is $75 and includes everything you see below —Joy of Noel stamp set, full roll of Black & Very Vanilla ribbon, and half a pkg of the Joy of Christmas 12x12 paper PLUS a special guest demonstration from my friend Julie @thepaperhaven and 6-8 make’n takes! These won’t be your ordinary make’n takes either—they will be a mix of 3D, holiday decor and cards!

Registration closes on Sept 30th for this event and your kit can be shipped anywhere in Canada at your expense! Please reach out if you are interested in registering (one of these days I will figure out how to take payment through Squarespace!)

I have one more project to share with you tomorrow as a part of my ‘Creative Convention’ weeklong extravaganza! I hope you will come back and please feel free to leave any comments!

A Card a Day in May--Day 3!!

Hello my friends! Instead of seeing a card project first you are going to have to look at my happy face as its NEW CATALOGUE DAY! I hope by the time you get to this post you have placed your first of many orders from this fabulous new Annual Catalogue!

I was telling my coworkers its like Christmas, its exciting and fun, and when my box arrives its literally THE BEST DAY EVER!! I am so lucky to love what I do and have so much doing it! This is also a great time to join the SU family and community of crafters. Its been 16 years for me and I still going strong!

My card share for today features some brand new products, which is so fun! And I have to say the Hues of Happiness is probably my favorite new suite in the catalogue. The color palette of the Designer Series Paper is my jam, like literally my personality in a paper. If that could be a thing!

This card is actually a part of my May Class to Go Kit which means if you love it and live in Canada, you can purchase my Class to Go Kit until May 15th! I will have all the details ready to share under my Class to Go Tab underneath the Stamp with Brenda tab. And if you are wondering what is under my Lifestyle tab it has fun stuff like recipes!

I love how crisp and light this card feels, don’t you? The base is Basic White with a nice layer of Night of Navy and another layer of Basic White that I ran through the Timber 3D Embossing Folder. I added a small strip of the Hues of Happiness DSP and a underneath that I tucked a piece of Basic White that I ran through one of the amazing die strips in the Blossoming Happiness Dies.

The sentiment is stamped and die cut with the Stylish Shapes Dies accentuated with a bit of the Starry Sky Bakers Twine.


The flowers from the Happiness Abounds stamp set are stamped in Momento Ink and then colored with a technique that I like to call ‘Lazy Watercoloring’.

I use my Water Painter with the ink colors in Parakeet Party, Fresh Freesia, Blushing Bride and Pool Party to color the flowers and leaves. Its fast and furious and just how I like to make cards! hahaha

Add a few of the Glossy Dots Assortment and In Color Opal Rounds and this card is perfect!

I hope this card inspires you to take a peek in the new catalogue and start your wish list! If you are inspired or would like to purchase my May Class to Go Kit please send me a message or click on Shop Now to be directed to my online store!

September Class to Go Kit!

Hello friends! Wow, what a summer right? Its officially fall, Pumpkin Spice season, sweater weather, and my favorite time of year for crafting! I don’t know why, but I just love the colors of fall, they feel cozy and like home. I grew up on the prairies and fall is absolutely gorgeous. I got married in September and the leaves had started turning but the weather was still warm!

I think all of these things helped to inspire this September Class to Go Kit featuring the Harvest Meadow Bundle found on page 54-55 of the Holiday JJ 2021 Catalogue. This gorgeous Thank You card project features fantastic embellishments such as vellum, Gold Foil paper and Metallic Dots. It is a perfect gift to give or to have waiting at your Thanksgiving table!

final (13) 3.jpg

Historically my Class to Go Kits have only included a written tutorial with photos, however, in the spirit of trying something NEW I am going to make a video of how to assemble these gorgeous projects as well! SO you will get both options with all 3 registration options. Only 3 ink pad colors are required to make these amazing cards—Calypso Coral, Bumblebee and Soft Suede!

Option 1: Stamp Set Only $39. This option includes the Nature’s Harvest stamp set and supplies to create 2 of each card shown, for a total of 6 cards. You will receive all of the die cut pieces and embellishments

Option 2: Bundle (stamp set and Harvest Dies) for $82. You will receive all of the card making supplies PLUS the Kraft Gift Box and products to make the belly band! This is an amazing add on value!

Option 3: Kit Only $25. This option includes only the materials you will need to create the cards and the Kraft Gift Box.

final (10) 4.jpg

As you can see this is a gorgeous Thank You card project. The design of the cards provides you with inspiration for further crafting projects and the Kraft Gift Box has become one of my favorite projects as you will see over the month with some other projects being shared on my social channels!

I can ship this kit for a nominal expense anywhere in Canada or you can partake in local pick up! Please bear with me as I am working to get my website more order efficient. In the meantime, leave me a comment or click on SIGN UP NOW and I will reach out to you with payment arrangements. You can message me on Instagram @stampwithbrenda or by email at bsparkles@me.com as well!