12 Days of Christmas--Day 7!

Hello friends! And welcome back to Day 7 of 12 Days of Christmas with myself and Melanie @melsinkyfingers! Really, you are getting 24 awesome projects for inspiration!

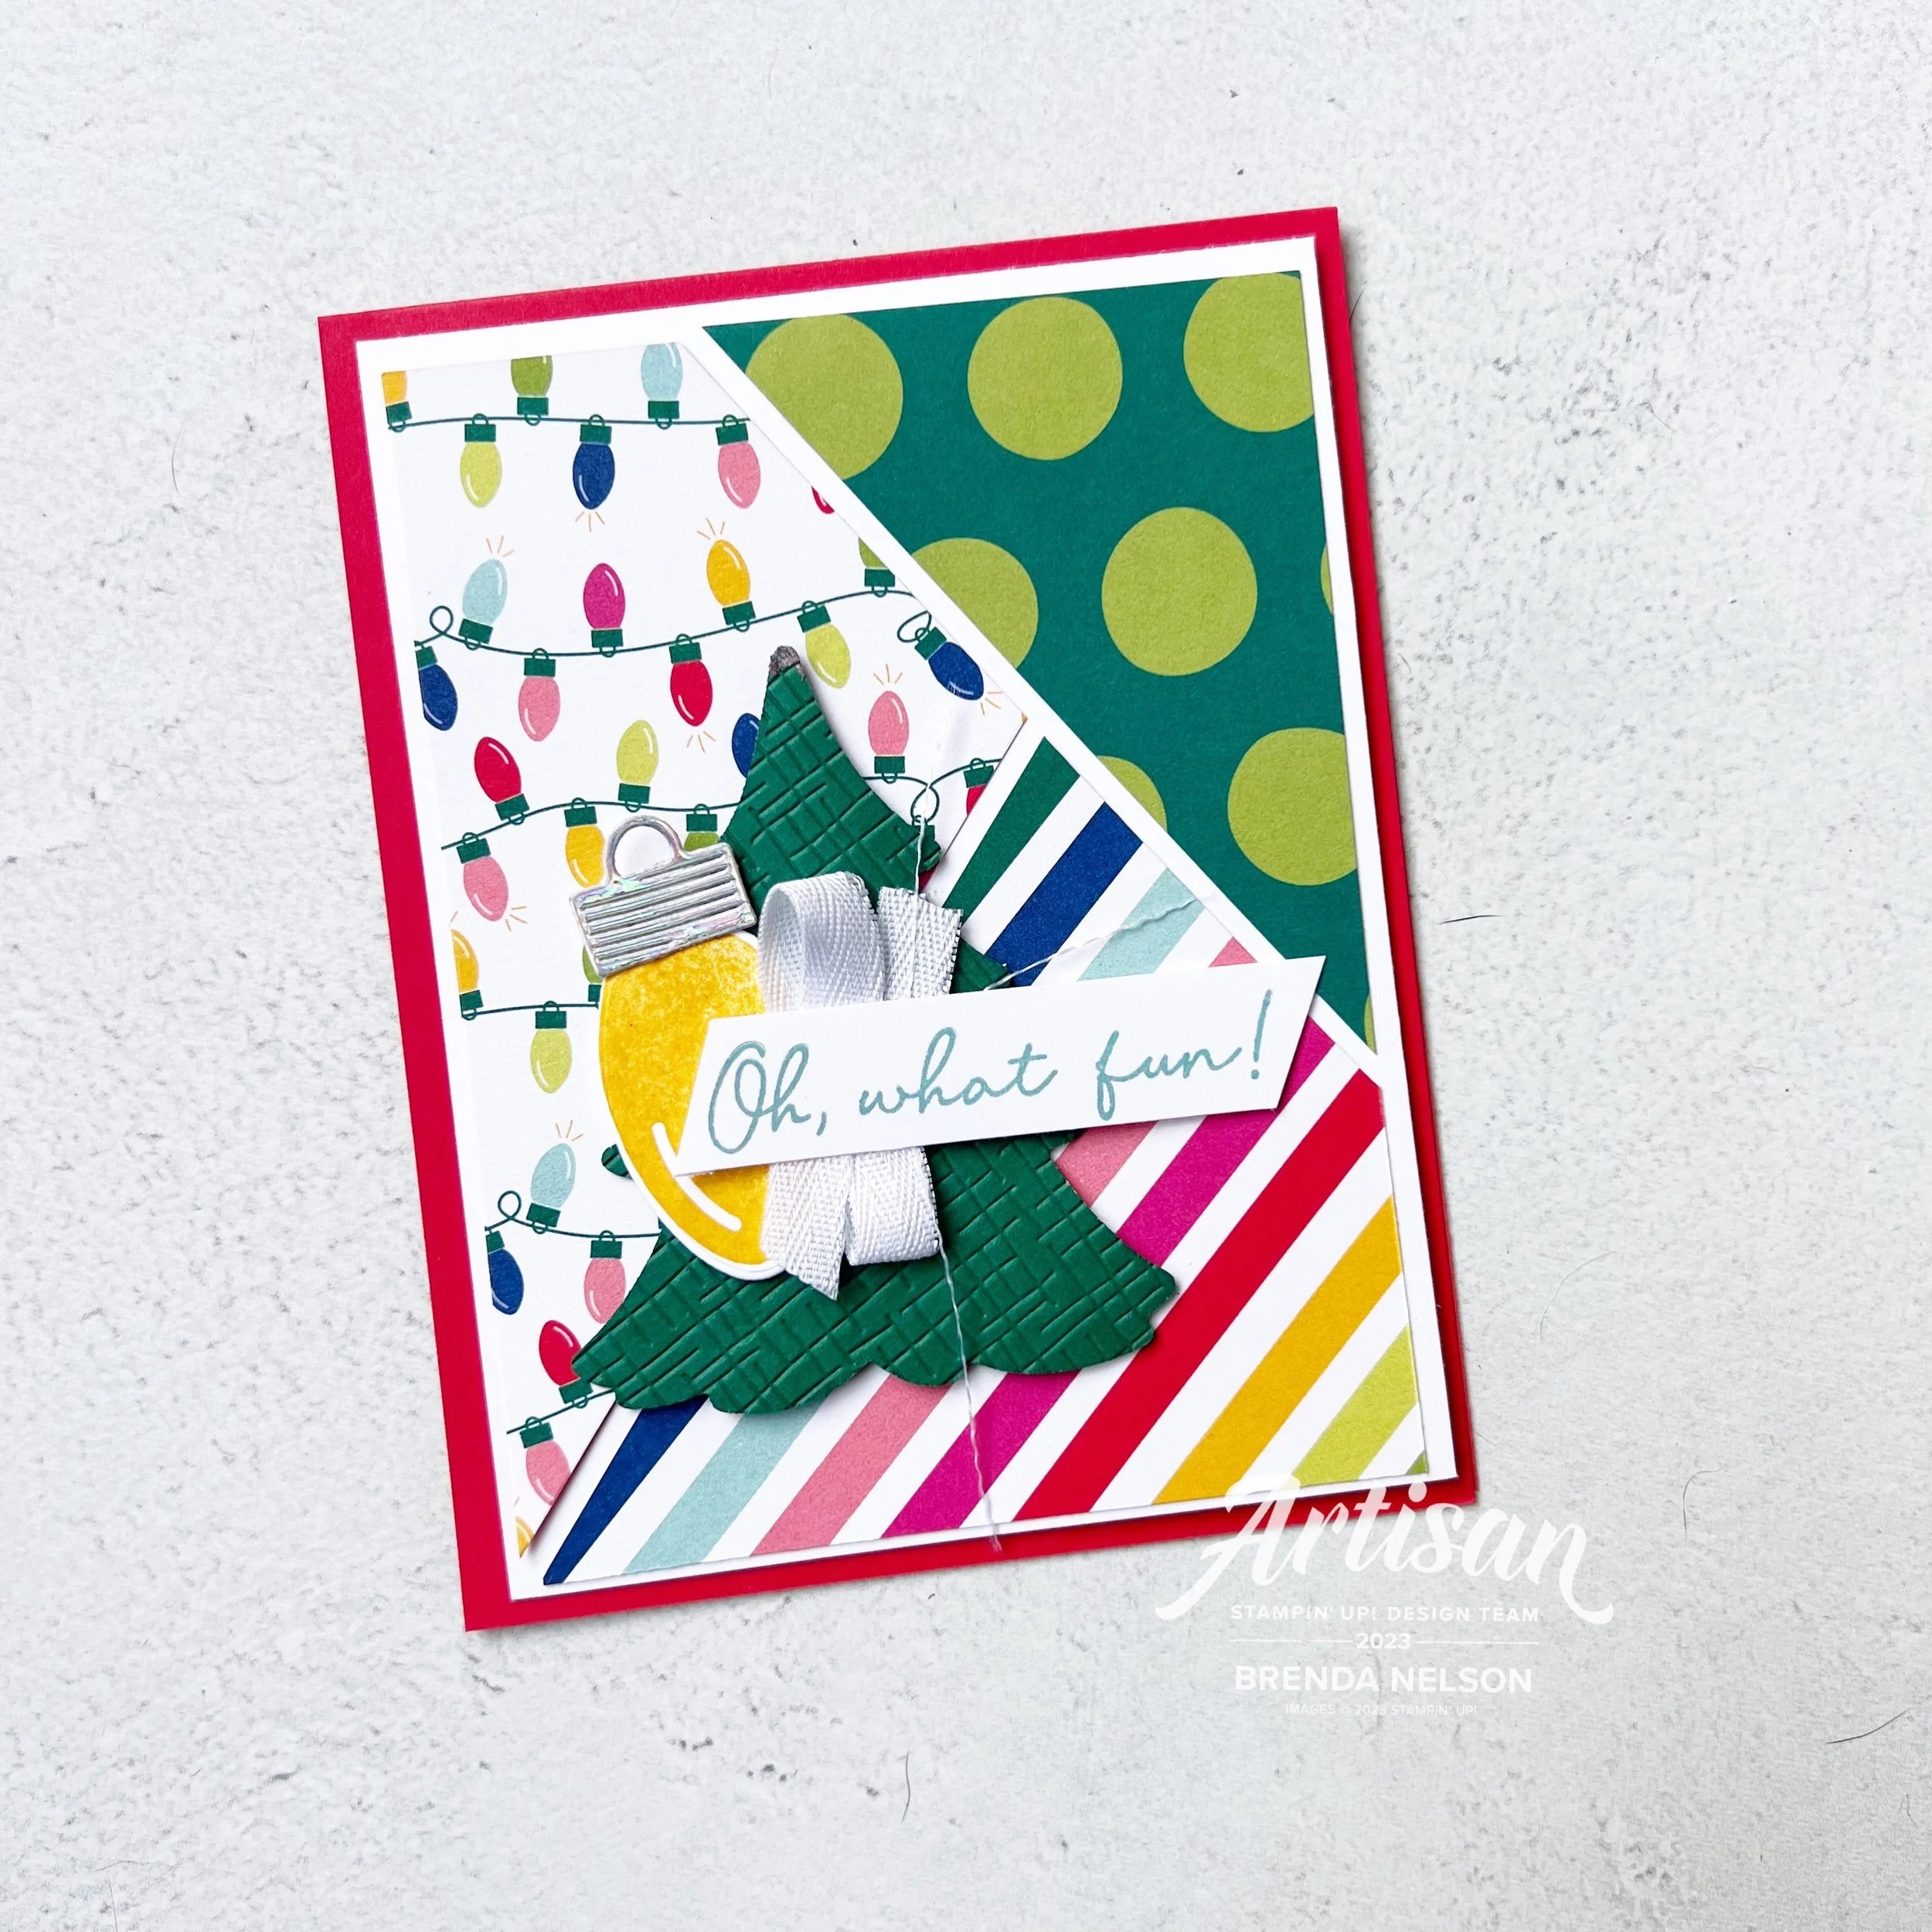
Today I have something fun and on trend to share with you—some cards made with the Stack Cut & Shuffle technique! It is so fun and such a great way to use our amazing Designer Series Paper!

To create these cards using the Stack Cut & Shuffle technique you will need 3 standard card bases. I cut my bases to be the ‘tent’ style option of 4 1/4 x 11 (score at 5 1/5). I decided to keep my card bases all uniform, although you certainly could mix up the base colors.

You also need a base layer that is 4 x 5 1/4 —for all 3 of my cards, I used Basic White.

Your DSP layers are 3 3/4 x 5—-you can choose 3 different DSP’s and mix and match for endless possibilities.

The idea is you ‘stack’ your DSP, cut once and mix up the patterns, layering them down almost like putting a puzzle together! This particular method of Stack Cut & Shuffle is great because you can just start along the 3 3/4 inch side, angle your DSP outwards towards the right and cut.

TIP: Start with the 3 3/4 side rough along the 1 inch mark and angle the bottom right corner out. This piece stays as is.

The second piece, which is a bit larger, can be cut from the bottom left corner through the middle

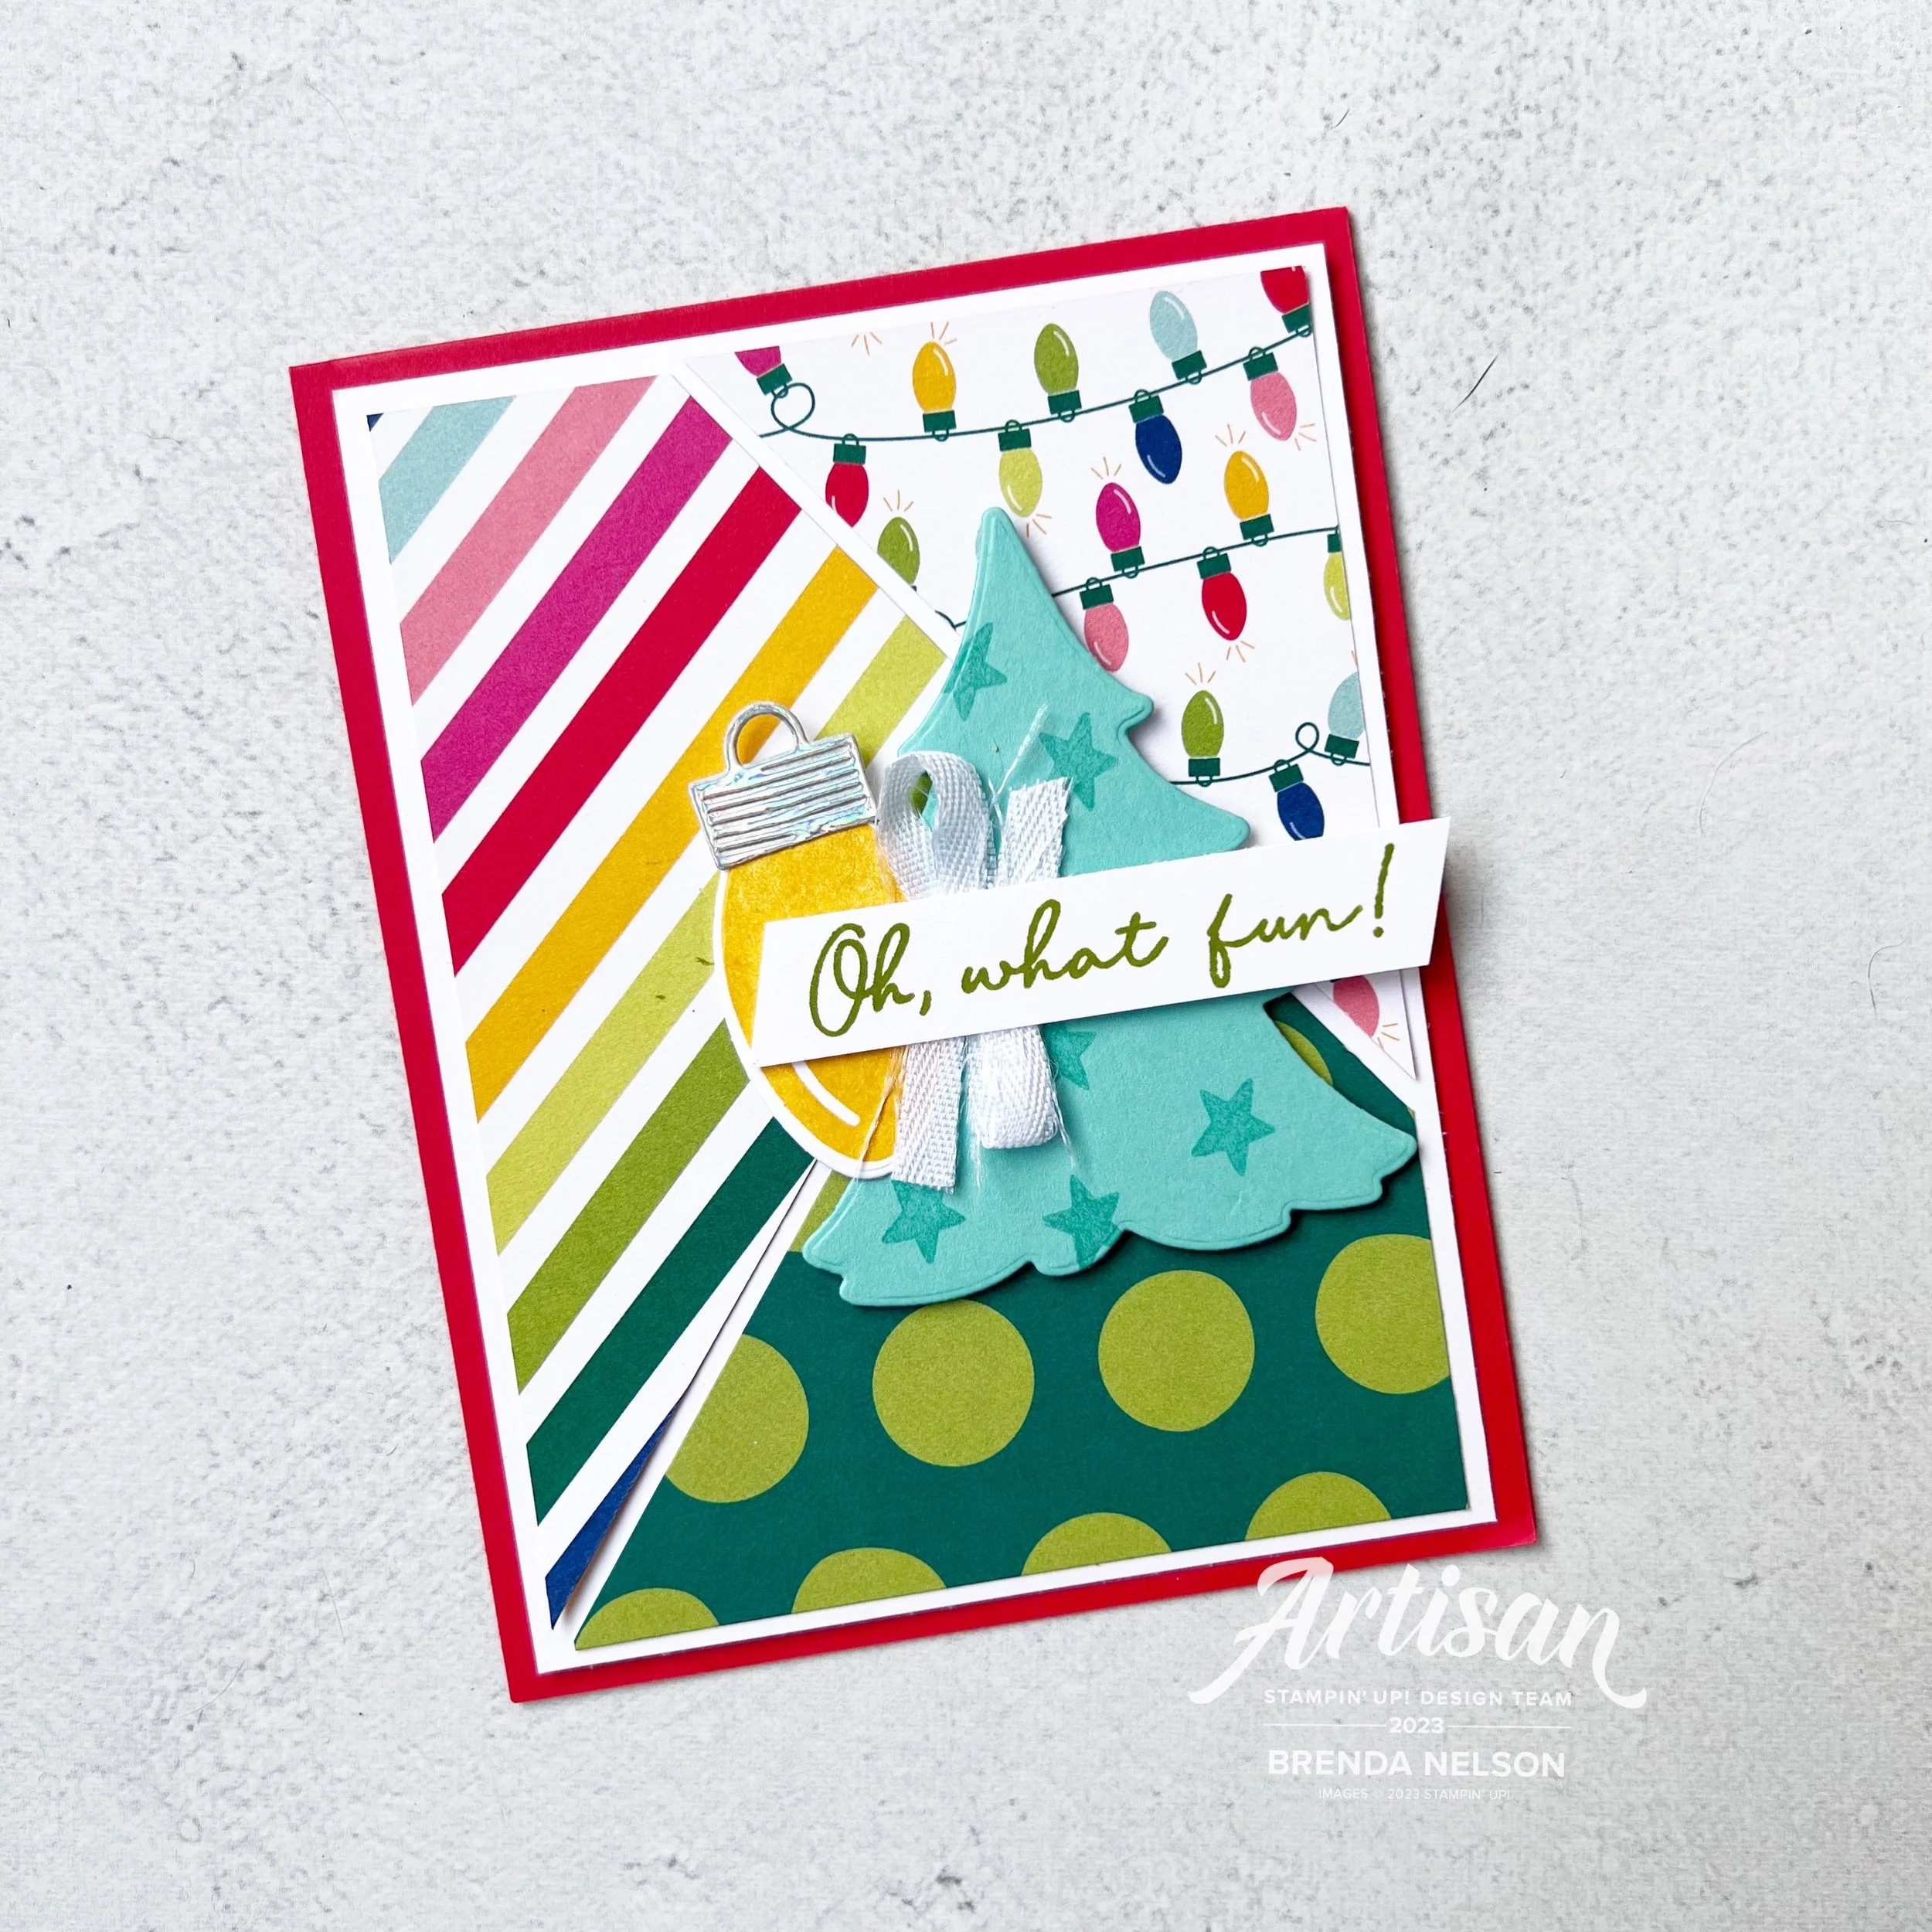
I decided to cut the large tree from the Merriest Trees dies and stamp some little stars on top for two of the three cards.

The light bulb stamp is from the Merry & Bright bundle as are the little stars and the sentiment on each of the cards, ‘Oh, What Fun!’

I think these two bundles work so well together!

The fun, bright and cherry DSP is from Merry Bold & Bright.

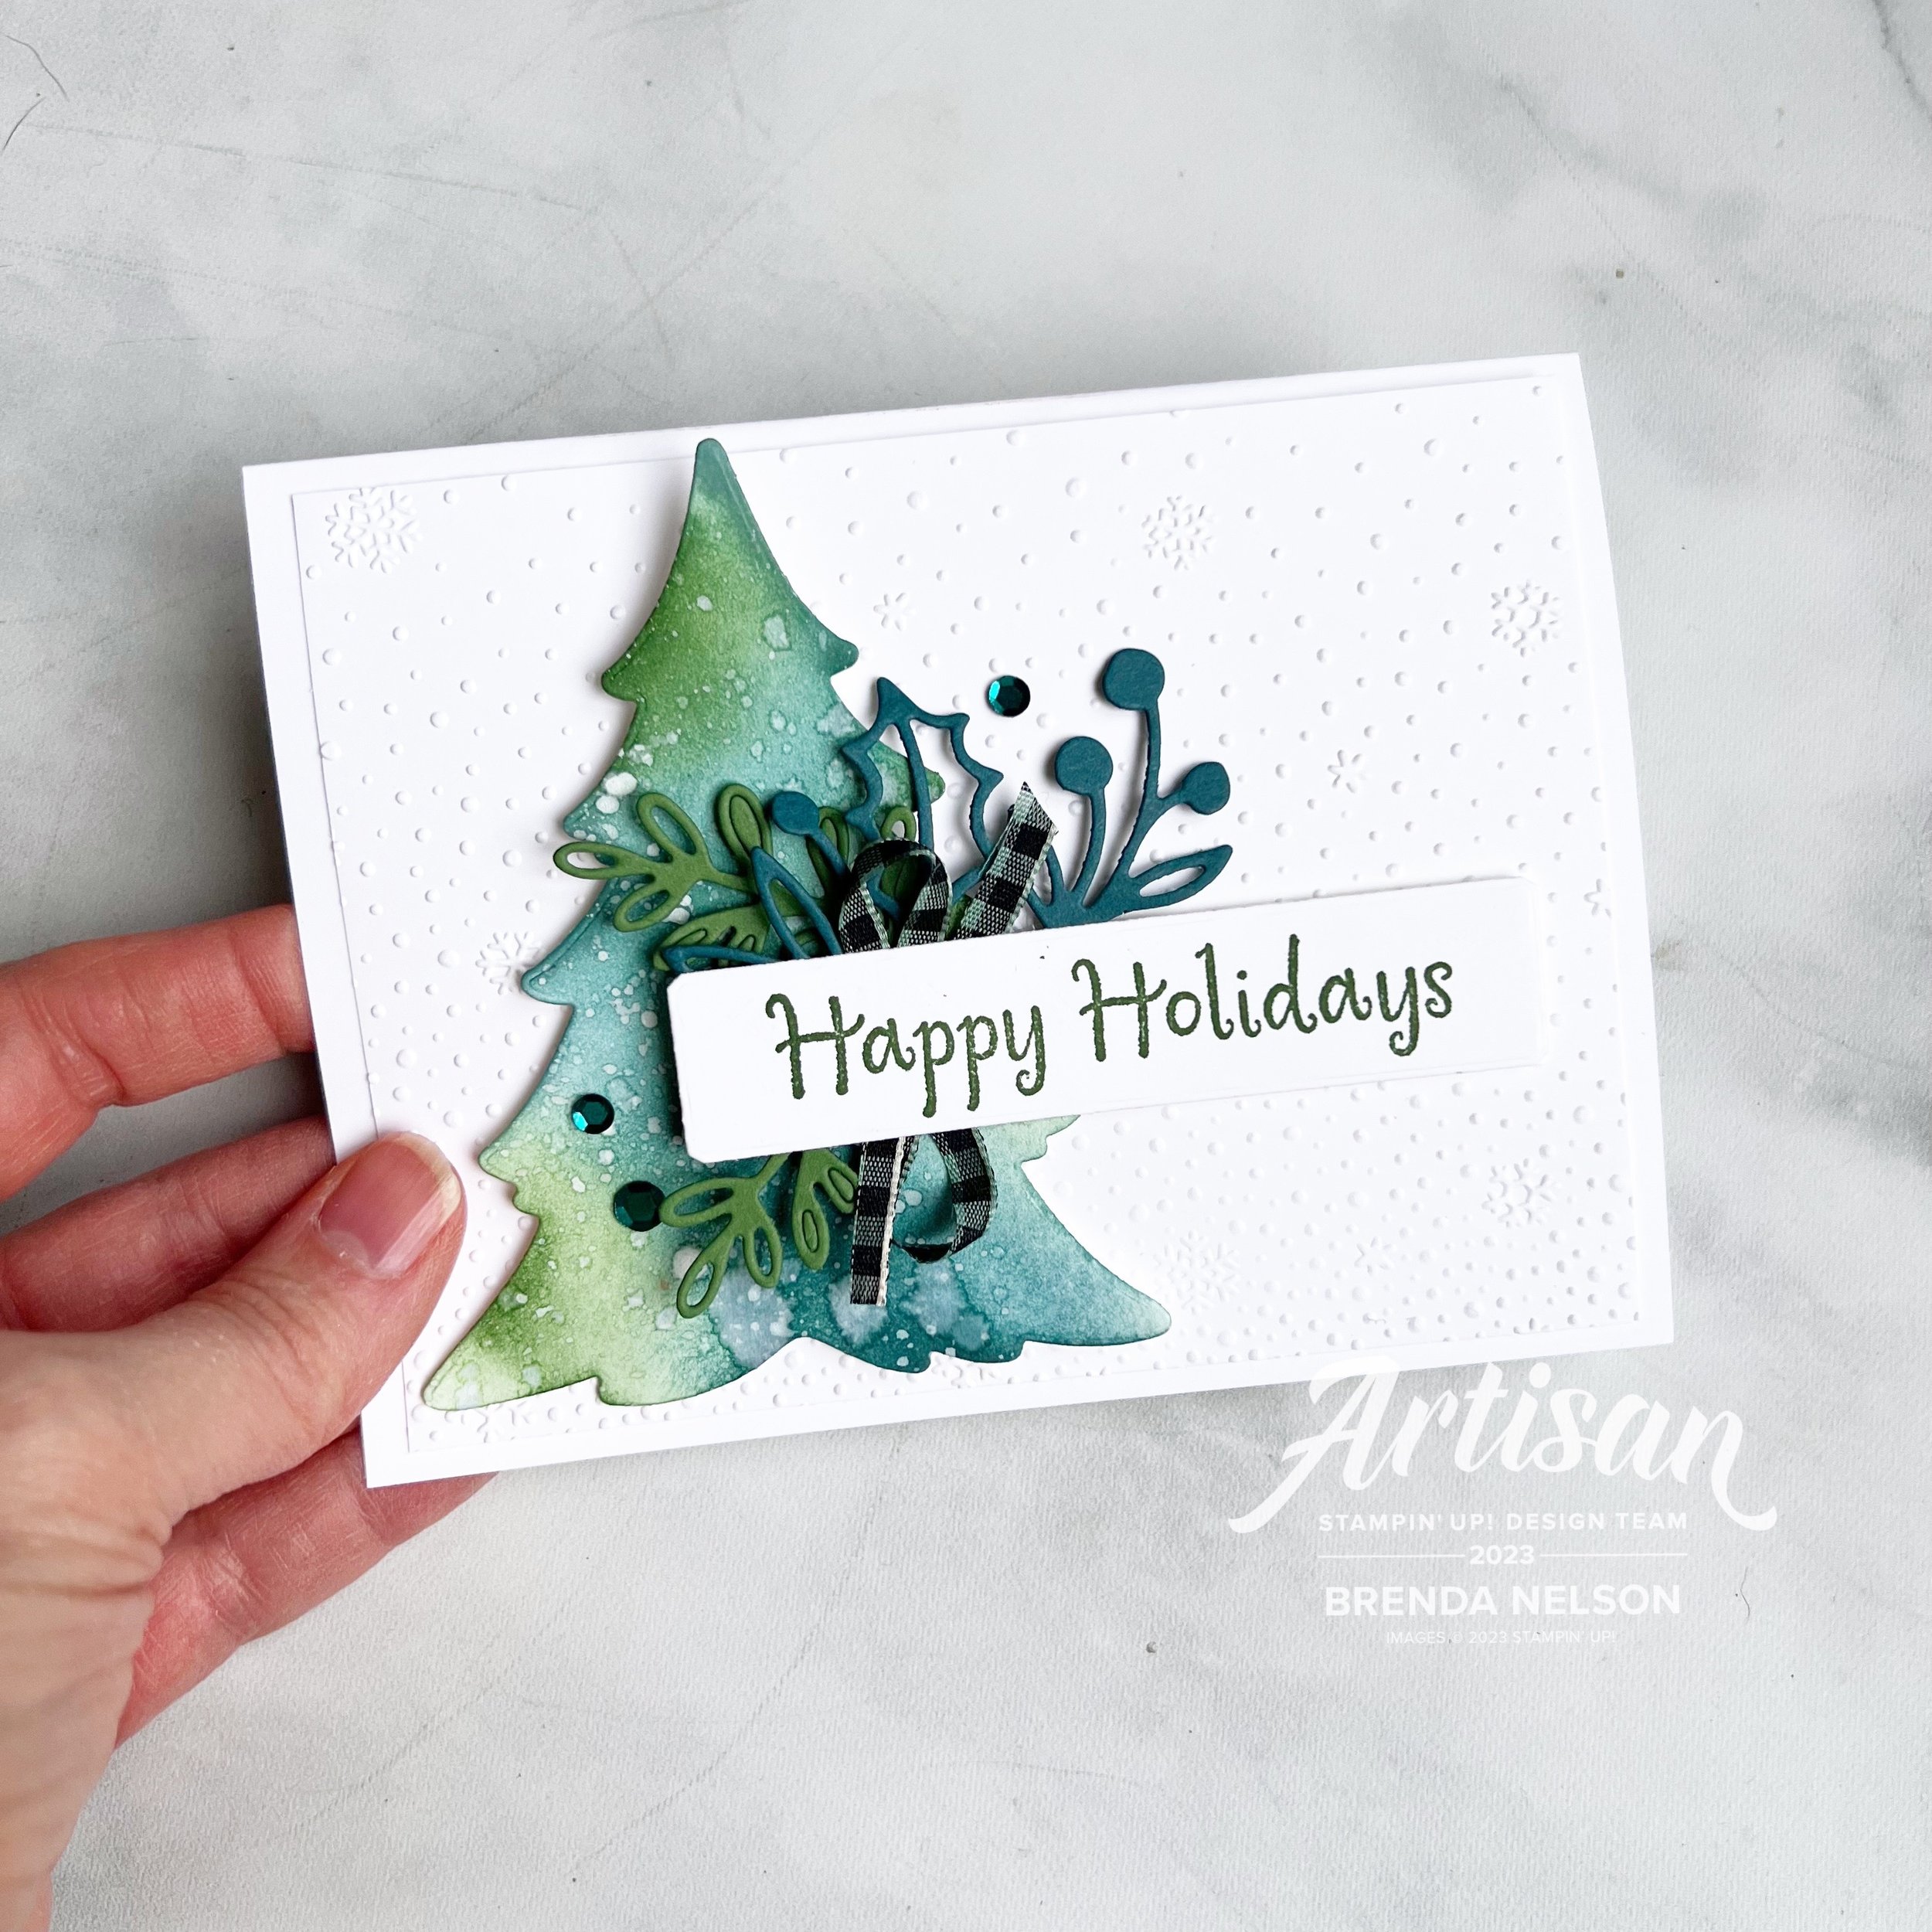
For the third card option, I cut the large tree from Shaded Spruce and ran it through one of the 3D Basics Embossing Folders for a bit of texture.

Each one of the cards uses some ribbon behind the sentiment as well for a little extra touch.

TOP TIP: The Holographic Trio paper in the Annual Catalogue is perfect for making toppers for the light bulbs!

If you haven’t given this fun technique a try, you really should! It is easier than it looks and quite a bit of fun to mix and match up the DSP pieces to create some unique cards!

I can’t wait to see what Melanie is sharing with you today! Make sure to check back tomorrow and each day until Nov 12th!

If my projects have inspired you, please consider shopping my online store!

12 Days of Christmas--Day 2!

Welcome to Day 2 of our 12 Days of Christmas Blog Hop! This is my and Melanie’s second time offering this fun blog hop and we each have a ton of fun projects line up for you—in total you will get to see 24 super inspiring holiday projects!

My second project is one inspired by two of my fellow Artisan Design Team members—Tammy Wilson for the cool tree idea and Charlet Mallet for the fun pop up portion on the inside!

The base and first layer of this card are Basic White and I ran the first layer through the new Snowflake Sky embossing folder. I love how the little snowflakes on the folder are on scale with this project!

The sentiment is from the Throughout the Year stamp set in the Holiday catalogue—its a perfect stamp set as it covers off so many wonderful occasions throughout the year in a variety of fonts.


I cut the tree from the Merriest Trees Dies and used my Blending Brush with three colors—Lost Lagoon, Pretty Peacock and Garden Green.

After blending I flicked my water painter over top—the water acts like an eraser of sorts. I then took some Whisper White re-inker, squeezing a small amount onto a block. Using another water painter (I have one designated to this craft ink) I flicked a few sprays of white over top of the tree. What I love about this fun technique, is that every tree you blend will look different!

I cut some of the sprigs from the Christmas Classics Dies—including the sentiment. I used Pretty Peacock and Garden Green card stock with a little bit of the Vanilla & Black Check ribbon behind the sentiment. Note the color of ribbon!

TOP TIP: Use your Stampin’ Blend markers to color ribbon to your liking to match your projects!

A few sequins from the Adhesive-Backed Sequins Trio from the Annual Catalogue, finished off the front of the card!

But remember I mentioned something fun for the inside? Earlier this year Charlet shared this super fun tip on how to create a little pop up in the cards! The sentiment from the Merriest Trees ‘We Wish You a Merry Christmas’ was perfect, die cut with one of the smaller trees from the dies.

Isn’t this little pop up tree so cool? Thank you for such a cool tip charlet!

To make the fun pop up, according to Charlet’s awesome instructions, is to cut a piece of card stock, that matches your card base, to 3 x 3 inches and score this in half. Fold. Line up the folded edge on your trimmer and at each 1 inch mark cut a 1 inch snip. Unfold and score from snip to snip at the 1/2 mark.

Pop the center fold out. Line up interior fold and adhere to the center of card at the fold line.

I used some Tear’n Tape on each side of the pop up to keep it in place on the top and bottom.

I stamped the sentiment in Pretty Peacock and used some Lost Lagoon ink to softly blend over top so that the tree stood out a little bit more.

I hope this card inspires you to try a fun pop up on the inside of your next card!

I can’t wait to see what Melanie has created for you! You can click on this image to go visit her blog!

If my projects inspire you and you are needing some supplies, please consider shopping my online store so I can continue to do what I love!