12 Days of Christmas--Day 11!
/Hello friends! We are down to just the last 2 days of 12 Days of Christmas! It has really flown by and I hope you are feeling festive and inspired by our projects!

For Day 10, I decided to share another scrapbooking page with you! I want all my crafty friends, whether you make cards, projects or scrapbook to find something to inspire you during this 12 Days of Christmas Blog Hop that Melanie and I are putting on for you!

This fun and colorful layout is perfect for a couple of holiday photos—I can’t wait to add some! I am going to feel so ahead post Christmas when I can just print and add some pictures!
I started with a base of Coastal Cabana and added a layer of Basic White over top with a couple strips of paper from Merry Bold & Bright. I love this color combination of Pool Party, Starry Sky, Granny Apple Green, Lemon Lime Twist and Shaded Spruce!
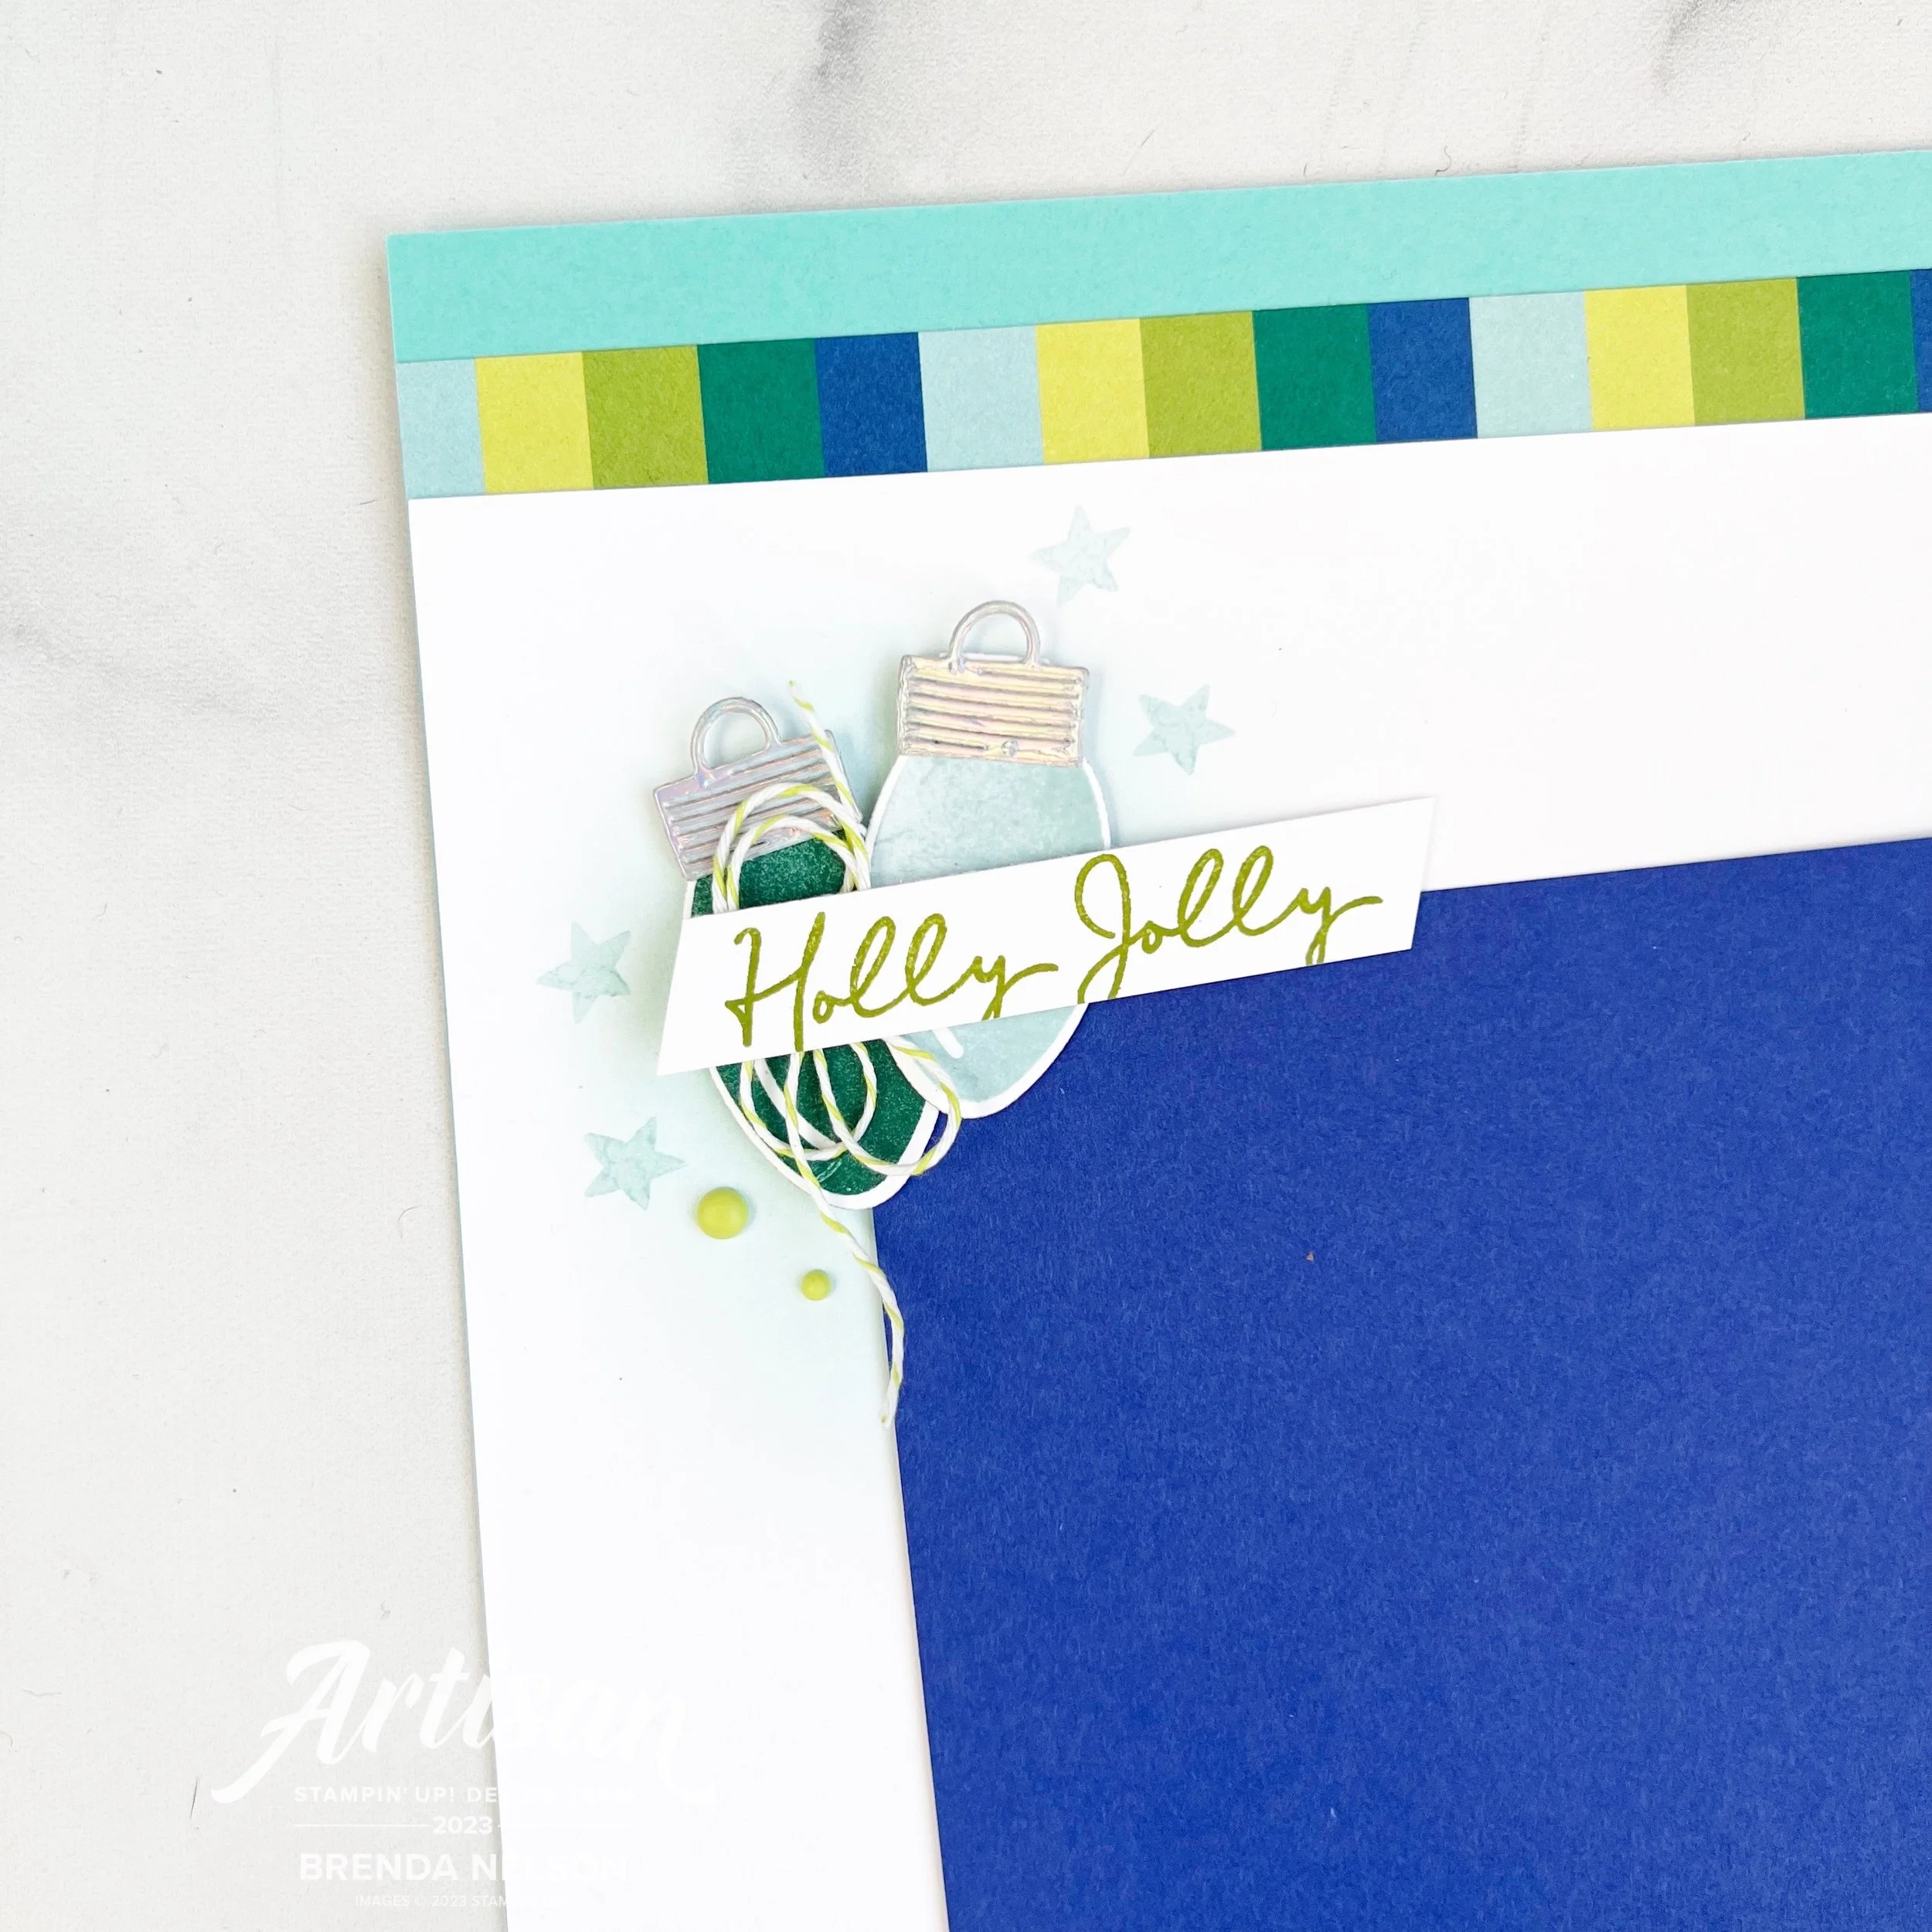
I did a little blending with Pool Party ink in the top left and bottom right corners of my Starry Sky photo mats. I then stamped some little stars from the Merry & Bright stamp set over top of the blended area. It creates such a nice background.
The Christmas bulbs are stamped in Pool Party and Shaded Spruce with the toppers cut from the Holographic Specialty Paper. This paper is absolutely perfect for these bulbs!
The sentiment is from the Merry & Bright stamp set and I added a little bit of the Parakeet Party Twine in behind the sentiment. A couple of the Ombre Matte Decorative Dots were the perfect little touch to this area.
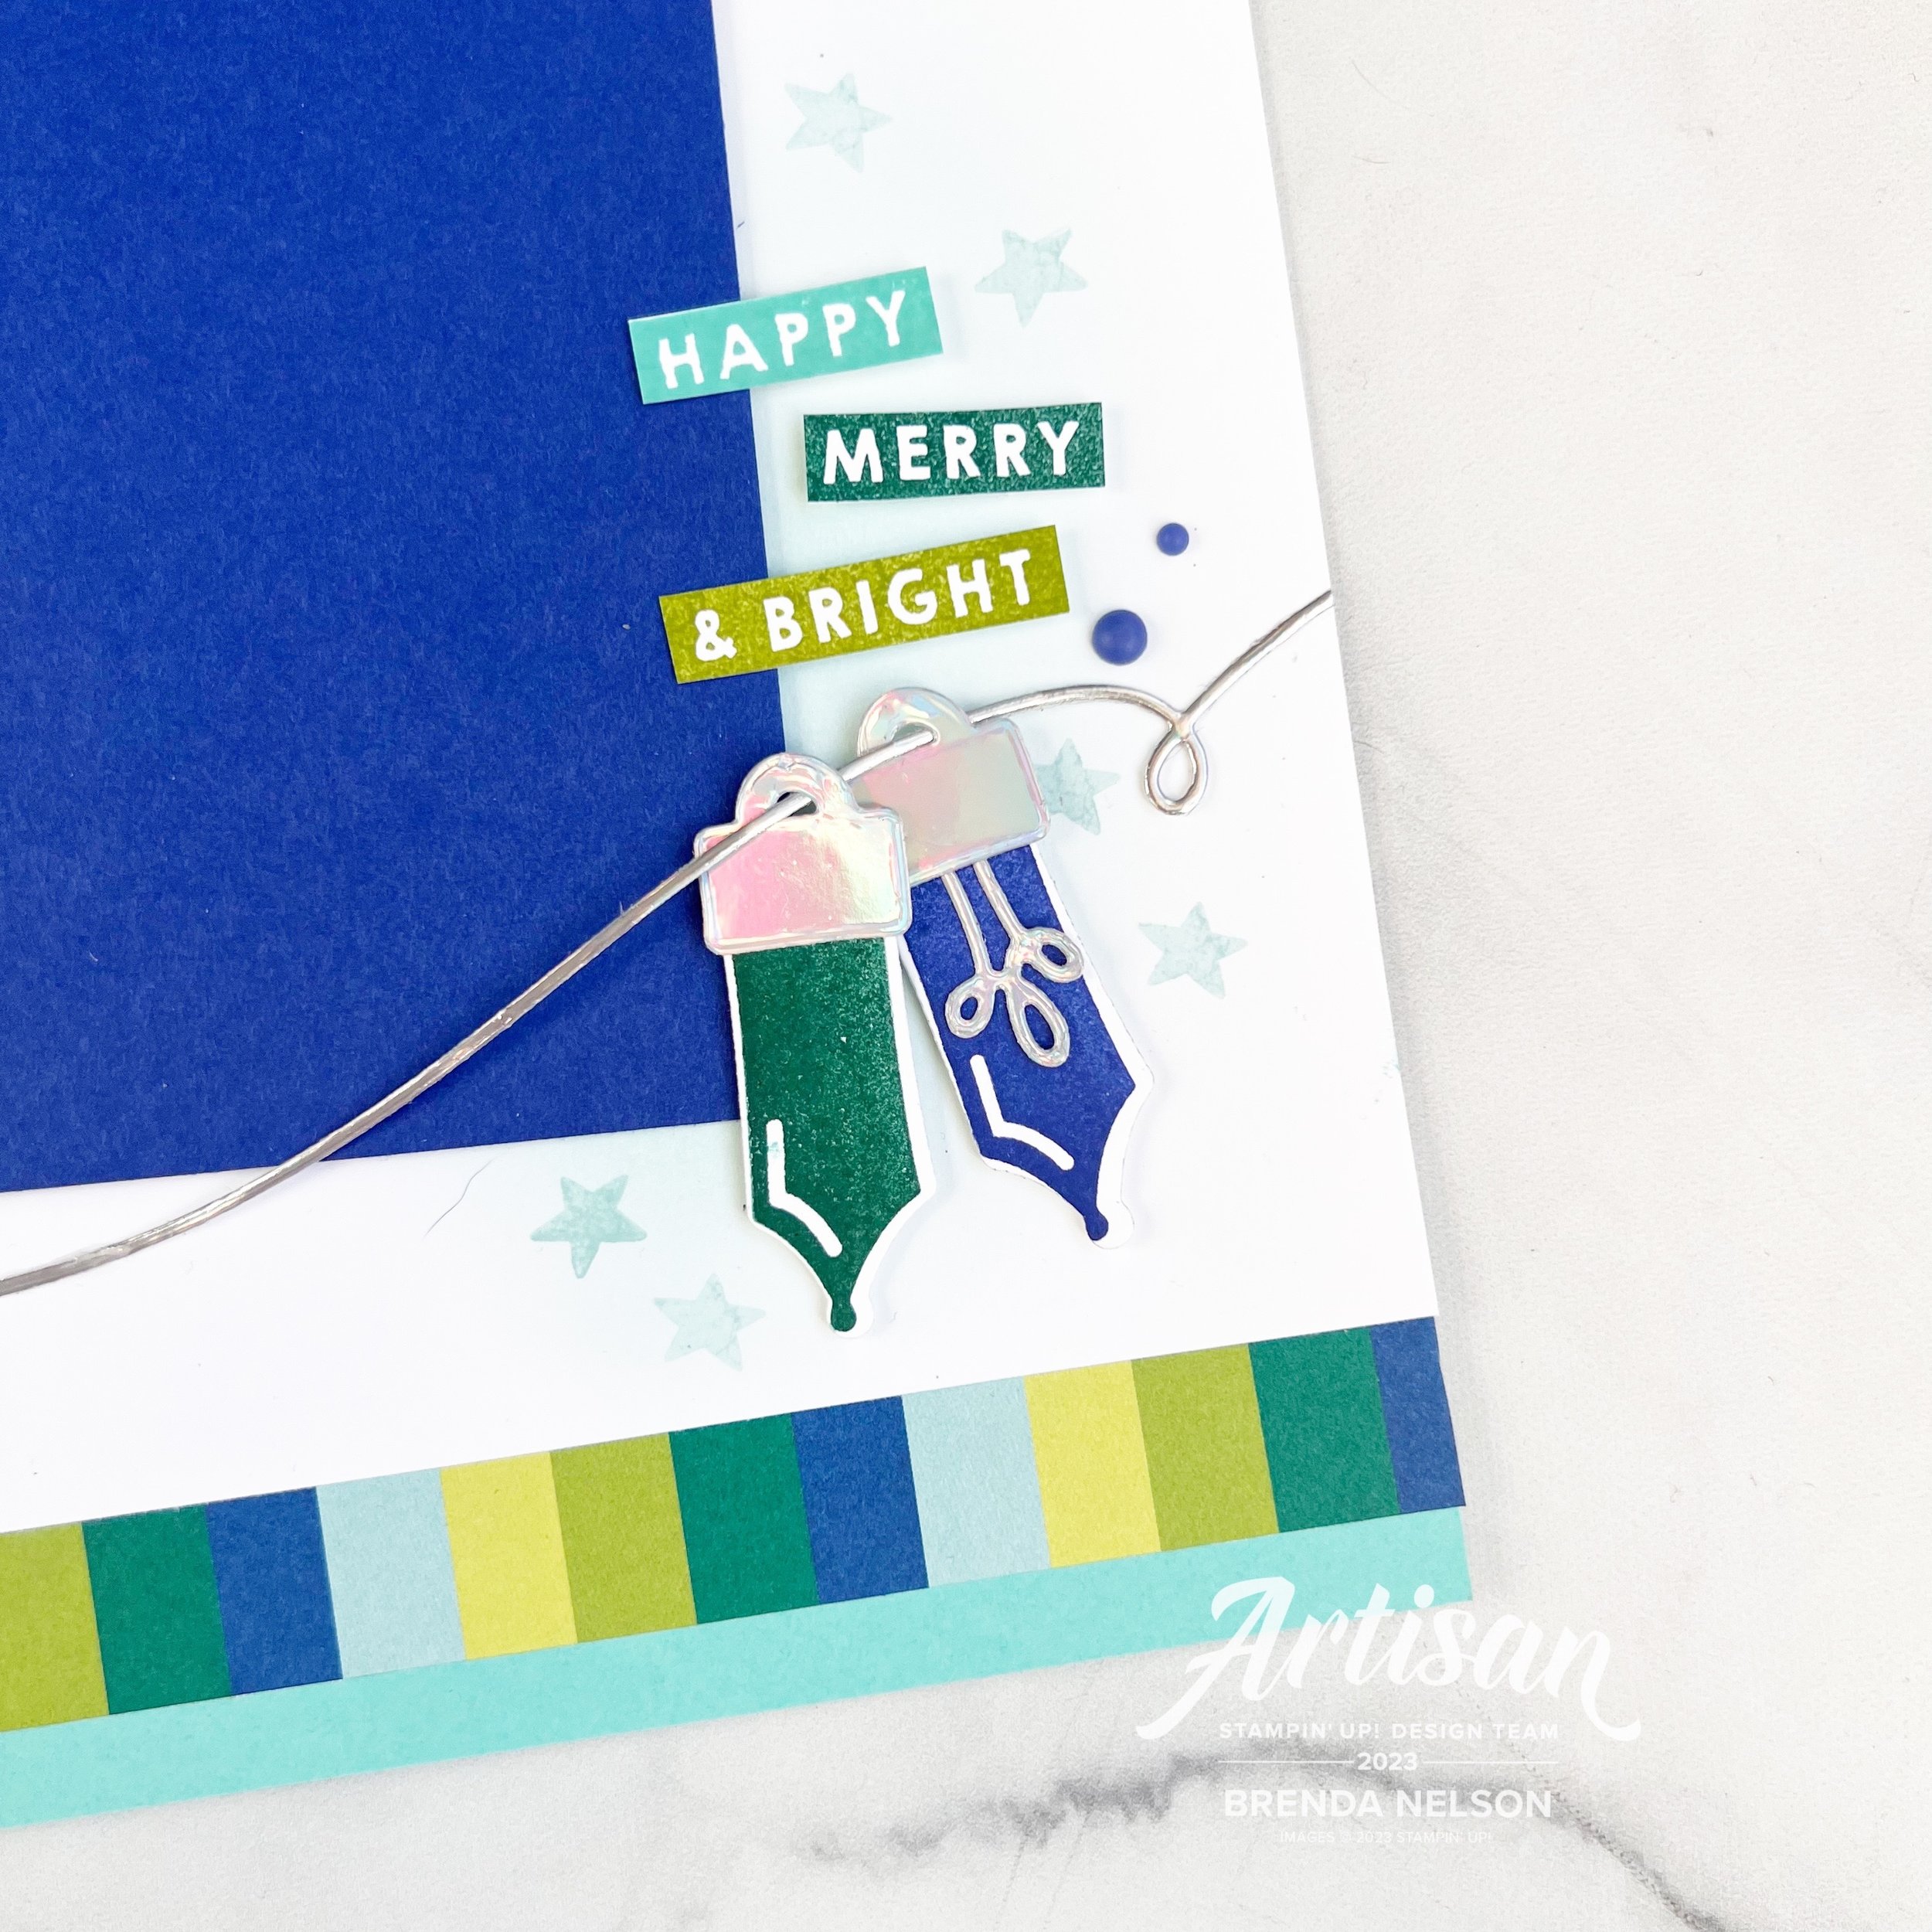
I love how this stamp set has two different bulb designs and also includes a die for the filament inside and a string! So clever. These bulbs are stamped in Shaded Spruce and Starry Sky and you might notice the tops are a bit different—I love that the die set includes two options as well!
I stamped out HAPPY MERRY AND BRIGHT in Coastal Cabana, Shaded Spruce and Granny Apple Green and then trimmed them down. I added a couple more Ombre Dots to this area as well.

I love this page and I hope it has given you some ideas on how to use the Merry & Bright bundle beyond cards! Now head on over to Melanie to see what she has to share with us today!

If this page has inspired you and you are in the need of supplies, please consider shopping my online store! Every purchase helps me continue to do what I love!
Click any image to shop my store!
Product List")
 Designer Series Paper")
 Specialty Paper")
 Cardstock")
 Cardstock")


 Herringbone Ribbon")


