12 Days of Christmas--Day 11!

Hello friends! We are down to just the last 2 days of 12 Days of Christmas! It has really flown by and I hope you are feeling festive and inspired by our projects!

For Day 10, I decided to share another scrapbooking page with you! I want all my crafty friends, whether you make cards, projects or scrapbook to find something to inspire you during this 12 Days of Christmas Blog Hop that Melanie and I are putting on for you!

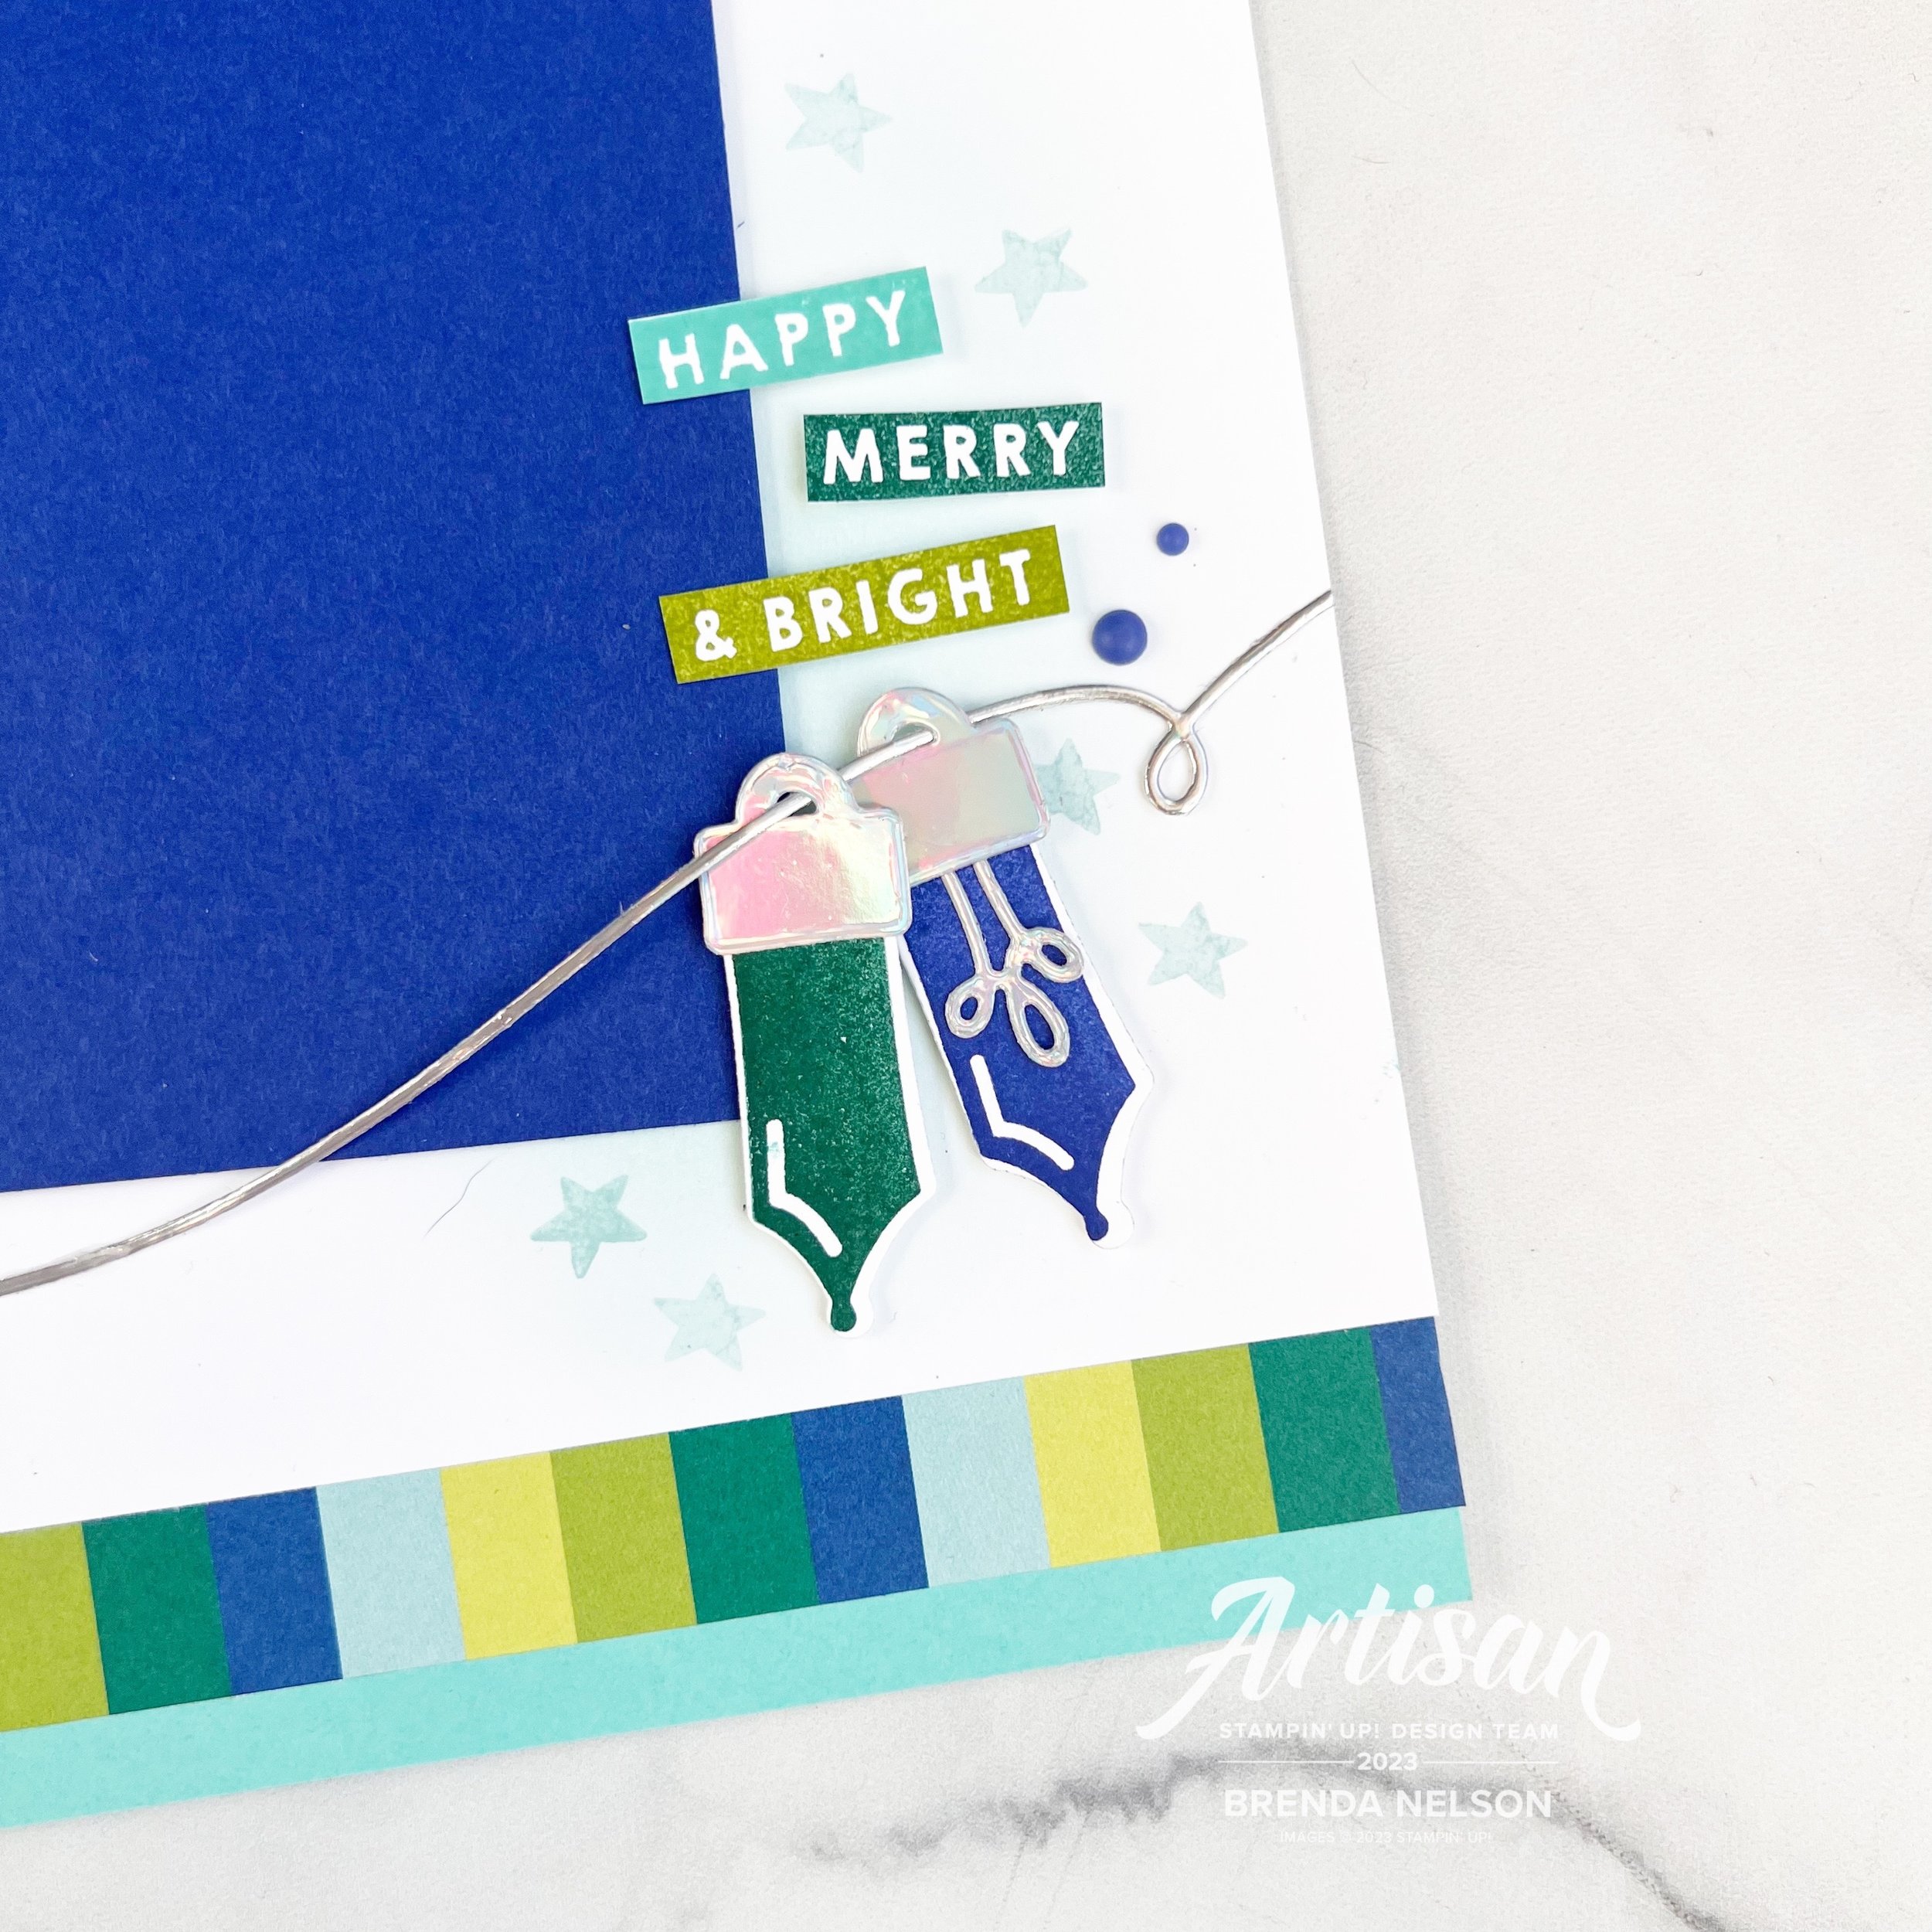
This fun and colorful layout is perfect for a couple of holiday photos—I can’t wait to add some! I am going to feel so ahead post Christmas when I can just print and add some pictures!

I started with a base of Coastal Cabana and added a layer of Basic White over top with a couple strips of paper from Merry Bold & Bright. I love this color combination of Pool Party, Starry Sky, Granny Apple Green, Lemon Lime Twist and Shaded Spruce!

I did a little blending with Pool Party ink in the top left and bottom right corners of my Starry Sky photo mats. I then stamped some little stars from the Merry & Bright stamp set over top of the blended area. It creates such a nice background.

The Christmas bulbs are stamped in Pool Party and Shaded Spruce with the toppers cut from the Holographic Specialty Paper. This paper is absolutely perfect for these bulbs!

The sentiment is from the Merry & Bright stamp set and I added a little bit of the Parakeet Party Twine in behind the sentiment. A couple of the Ombre Matte Decorative Dots were the perfect little touch to this area.

I love how this stamp set has two different bulb designs and also includes a die for the filament inside and a string! So clever. These bulbs are stamped in Shaded Spruce and Starry Sky and you might notice the tops are a bit different—I love that the die set includes two options as well!

I stamped out HAPPY MERRY AND BRIGHT in Coastal Cabana, Shaded Spruce and Granny Apple Green and then trimmed them down. I added a couple more Ombre Dots to this area as well.

I love this page and I hope it has given you some ideas on how to use the Merry & Bright bundle beyond cards! Now head on over to Melanie to see what she has to share with us today!

If this page has inspired you and you are in the need of supplies, please consider shopping my online store! Every purchase helps me continue to do what I love!

Sale a bration Kick Off 2023!

Hello friends! I hope you had an amazing holiday season and I am so excited to be back again after a little crafting hiatus. I mean, I did craft, I just didn’t share as much on social! The theme of my post today is Sale a Bration—or the happiest time of year! Who doesn’t LOVE to get FREE stuff. I mean if you are spending money anyway…might as well get some free goodies!

Isn’t this little owl the cutest? He is actual one of three owls found in the new 2023 Sale a Bration stamp set Adorable Owls. And he truly is! I wanted to create a card that depicted an owl flying high in the sky and I think this turned out pretty close to my vision!

I started with a base of Basic White card stock and I used Balmy Blue ink and a Blending Brush to add the first layer of blue. I then added some Tranquil Tide in the corners. I feel like these two colors did a great job created dimension for the sky. I then took my Water Painted and flicked some water over top. Water acts like an eraser giving the illusion of moisture in the air.


The cute stitched clouds are die cut from the Give it a Whirl Die set in the annual catalogue. I love that you get 3 sizes of clouds to help design a scene!

I added a strip of DSP from the In Color DSP stack along the bottom to help ground the sentiment. And a little Linen Thread behind the sentiment (stamped in Tahitian Tide) with a little scallop border just makes it pop.

My flying owl is colored with a mix of Stampin’ Blends from the Neutral Tones collection plus some Crumb Cake and Tahitian Tide. I really feel that this owl has a lot of dimension and I really enjoy coloring with our Blends. I couldn’t resist adding some of the new Pastel Adhesive-Backed Sequins too. They might be my favorite new embellishment!


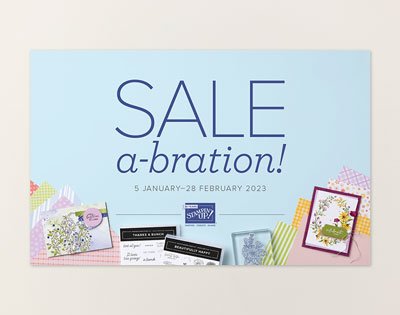
You can shop the Sale a bration catalogue, choosing a free item with your $60 CAN purchase by clicking on any image. This should direct you straight to my online store.

Look at all these fun choices you get during Sale a bration 2023! I love the Adorable Owls set, I think it has alot of potential to color with Stampin’ Blends, Watercolor Pencils, or lazy watercoloring!

12 Days of Christmas--Day 7

Whoo Hoo! Its been a full week of Christmas project shares so far! I love the variety of things that Melanie and I have been able to offer you as inspiration so far! And remember, you can save these ideas for next year or July! If you are someone that likes to get a jump on Christmas cards. I mean, Christmas in July is a THING!

My project today might actually be one of my fav holiday cards yet! It is just so fun and I love to color so it was a perfect little project. I loved it so much I ended up making a bunch as card swaps too!

I started with a base of Fresh Freesia which leant itself to my little rabbits scarf and the racoons toque. I created a stencil with a piece of Thick White and cut the largest circle from the Layering Circle Dies. I used the stencil with Pool Party ink and Blending Brush to create this little wintery window. After I blended my circle I stamped the snowflakes over top in Pool Party ink and then I used a Water Painter with water to flick a spray over top. Water acts like a remover and I thought it also looked like a bit of snow.


The droplets of water really have a cool effect when you flick them over blended ink.

Are these cute critters from All Bundled Up not the best? I just love how adorable they look and I had so much fun coloring them and then fussy cutting them out.

The sentiment “Happy Christmas” is from the Joyful Flurry stamp set. I stamped and embossed it in white and then trimmed around the sentiment. A few Iridescent Pearls were perfect to finish off this fun holiday card.

Click below to go see what Melanie has created today for our 7th day!


Around the World on Wednesday--Just Sketch It!

Hello friends! It has been so so so long since I have been able to participate in the Around the World on Wednesday Blog Hop! I am so excited that I was able to prioritize the time to create something and participate in this fabulous blog hop!

This month the theme was a sketch—our fabulous hop organizer, Angie, gave us a few to choose from. Once I selected mine, I knew right away I wanted to use it to help design a scrapbook page!

This is the sketch that I selected. I liked the idea of using strips of paper—either card stock or Designer Series Paper.

And I interpreted the 3 shapes to represent a photo mat and supportive shapes to tell the story of my scrapbook page.


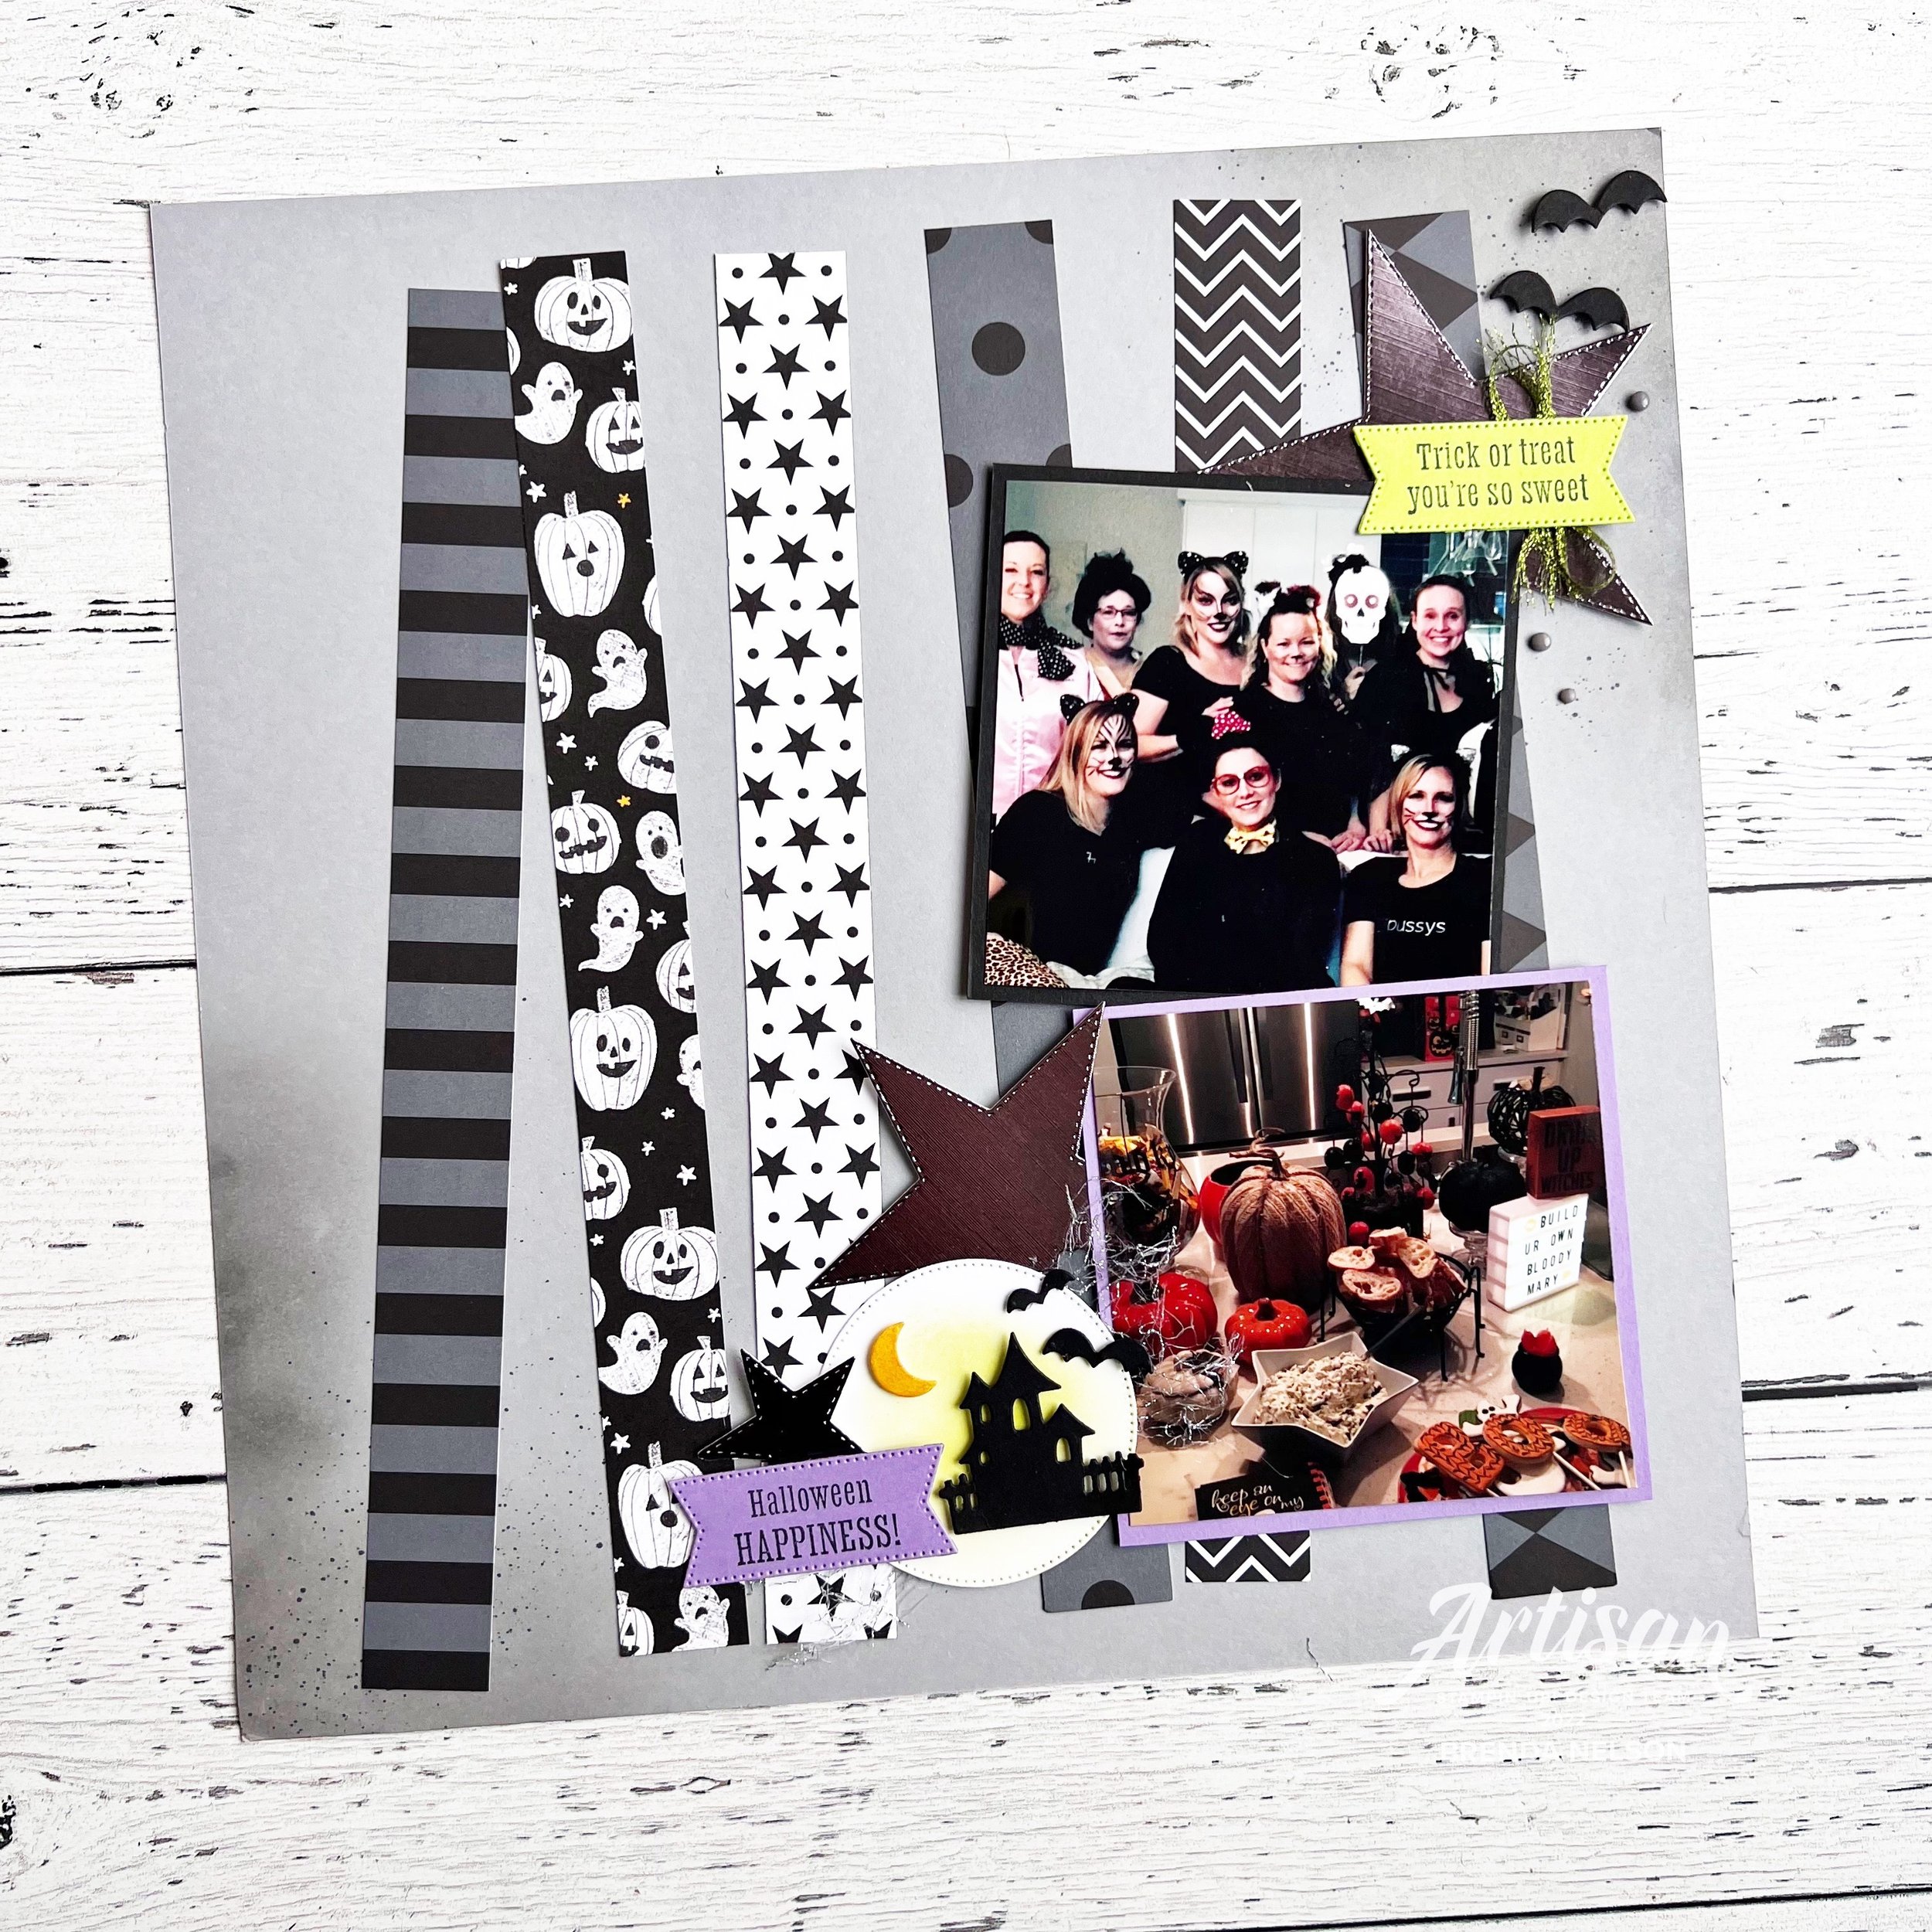
I started with a base of Smoky Slate card stock and decided to make it feel a little grungy to go with the spooky theme of Halloween. I used my Blending Brush on the edges and then flicked my Basic Black Stampin’ Blend over top.

I cut 6 strips of DSP—all except the pumpkin pattern are from the Black & White Designs collection. The pumpkins are from the Celebrate Everything hostess stack. I added the DSP strips and wonky angles as it also felt like the spirit of Halloween.

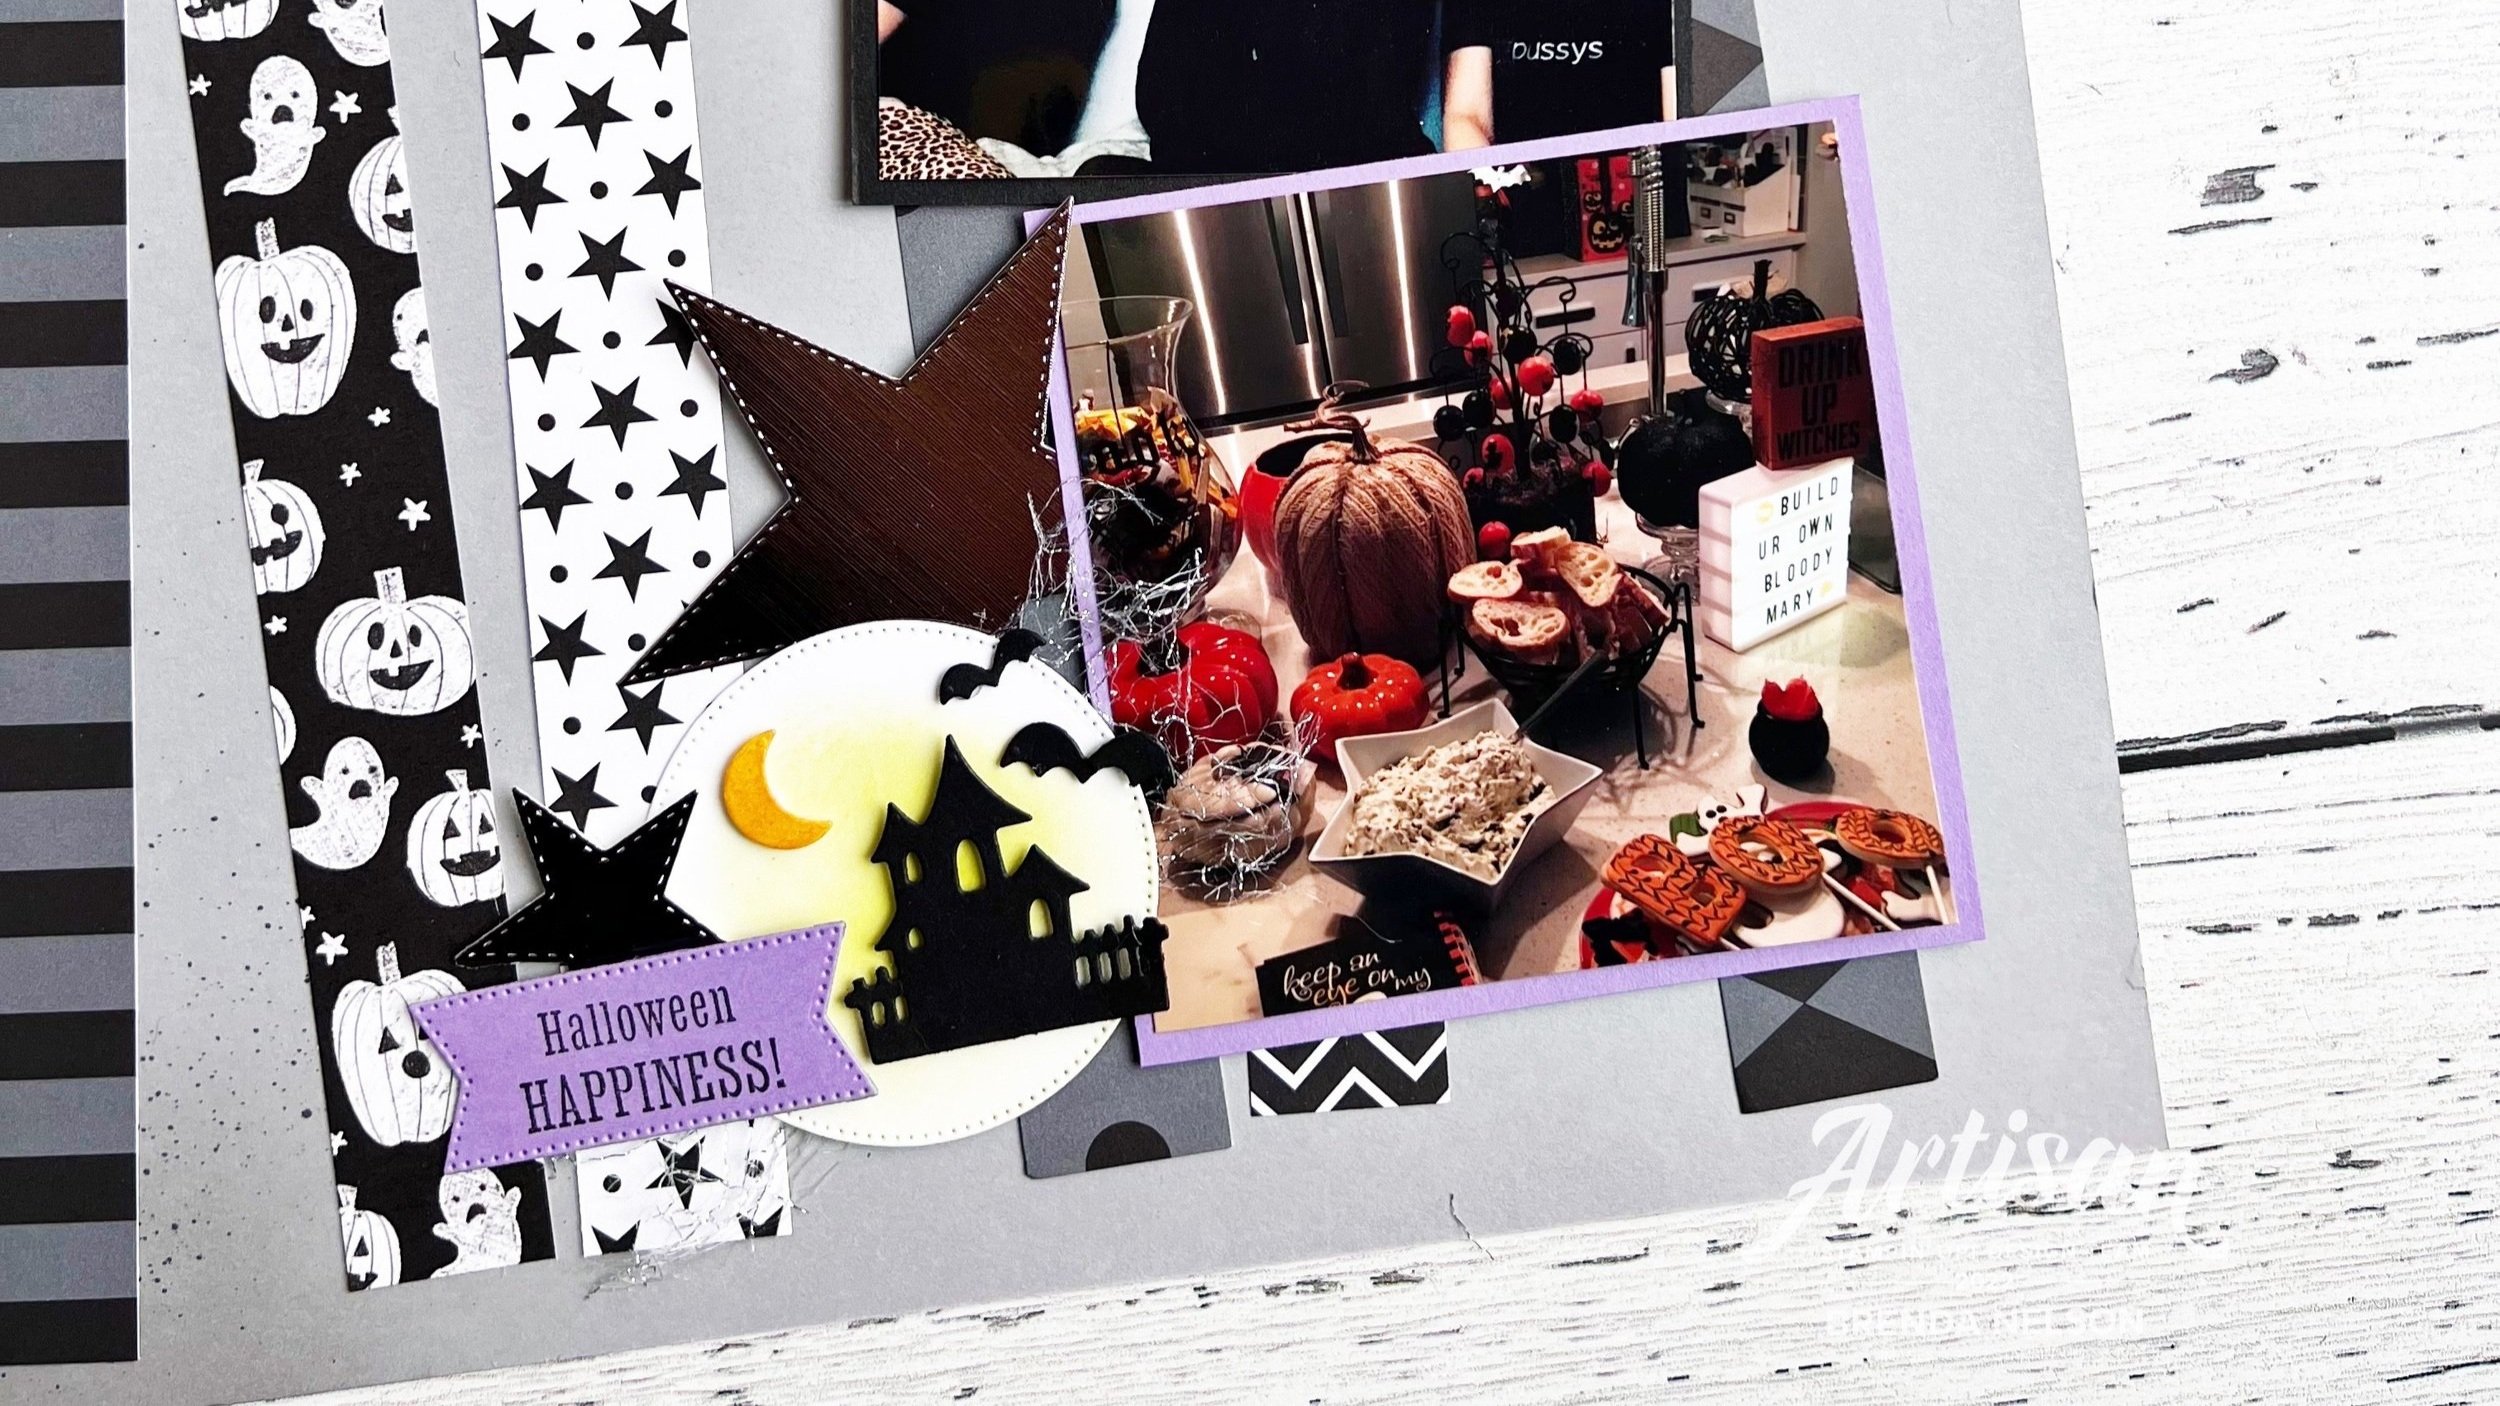
I decided to play up the stars from the DSP by added them to my design using a retired die set. Some sets though I just can’t part with as I find I do still reach for them. I cut them out using the Silver Foil Specialty Pack.

My two photo mats are cut to 4 1/4 x 4 1/4 which are perfect for adding 4x4 photos. I also wanted to get two pictures on this layout and this size works really well when you want to stack pictures. I felt that adding two pictures didn’t take away from the page design too much.

I cut a stitched circle from the Stylish Shapes Dies and then gave it a little yellow hue using my Crushed Curry ink pad and Blending Brush. The Scary Silhouette Dies were perfect for this page. I love the spooky little house, moon and bats die shapes.

Both of the sentiments on this page are from the Scary Cute stamp set and are die cut with the Stylish Shapes Dies. I added some of the Parakeet Party Ribbon and frayed the edges a bit too. A few of the Classic Matte Dots added to the design as well.

This sketch was perfect for coming up with this scrapbook page. You could switch out the elements to do a Christmas page, birthday page, a summer holiday page. There are so many options with this sketch. I hope you will give it a try!


Click the NEXT BLOG button to see what Tricia Butts from the USA has created to share with us this month. And hopefully you can go all the way around the world with us as we share creativity and inspiration from around the world!

If my project has inspired you in any way and you find yourself needing some supplies, please shop my online store by clicking any of the product images or by visiting my store!

Color Fusers January 2022

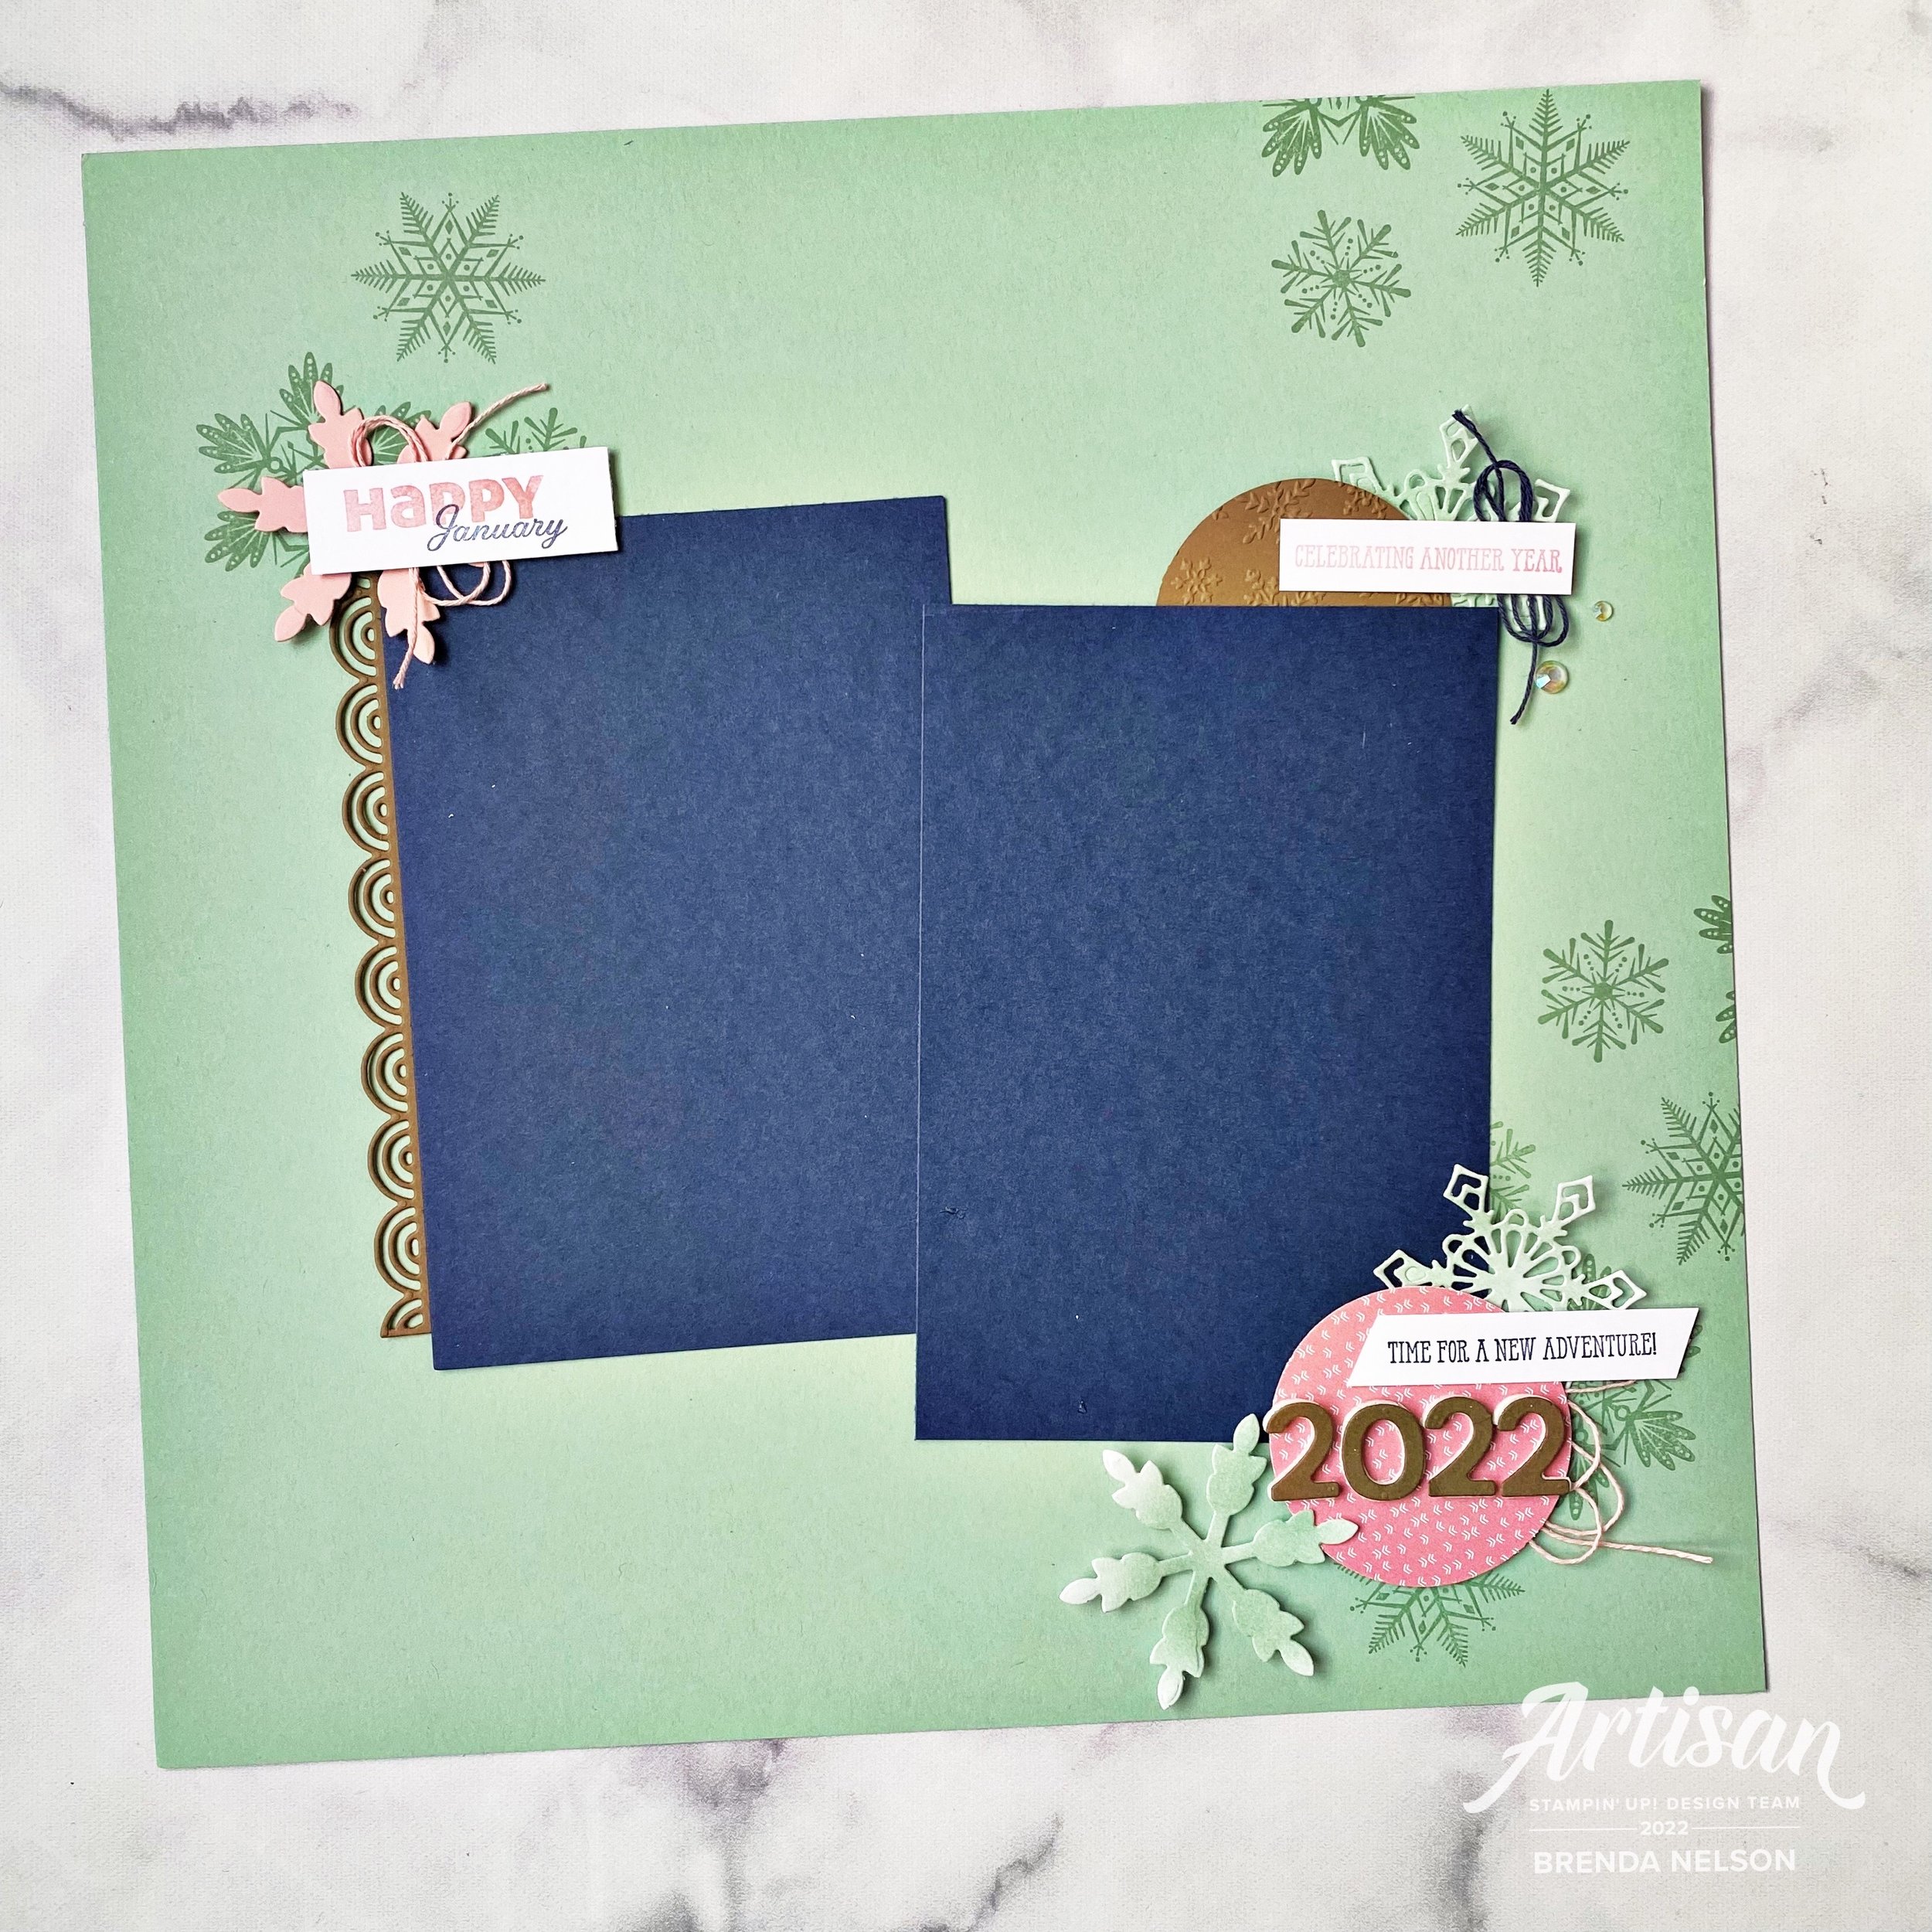
Hello friends and welcome to another year of the Color Fusers Blog Hop! I really love participating in the Hop because it forces me to look at my SU colors in a new way and experiment with new color combos! The color combos are all submitted by the Hop Team Members. To kick off the new Year, Happy 2022 everyone!, we are playing with Night of Navy, Mint Macaron, Blushing Bride and Soft Suede.

As soon as I saw these colors I knew that I wanted to make a scrapbook page —a January winter theme page. Making this in advance will also hopefully ensure that I get outside in January to do something fun, so I have a couple of cute pictures to add to my page! This might sound ridiculous, but when its -30, trust me, you don’t really want to be outside!

This layout also works perfectly to support a monthly class that I offer, Year in Memories, where we scrapbook each month of the year. At the end you have a complete album of 2022!

I started with a base of Mint Macaron because I felt that it was the color that linked the other 3 together. Soft Suede works perfectly as an accent color, along with Blushing Bride. Night of Navy gets a bit more attention as I chose it for the photo mats. I also decided on vertical pictures, because let’s face it, we take alot of selfies.

Fun Fact: I have over 4,000 selfies on my camera roll. Guess you could say I like myselfie. Hahaha!


This page is a mix of recently retired, really retired and new products! Sometimes past products are the perfect fit for our projects so I try not to stress out too much about using them, but I always make sure there is something NEW and CURRENT on my pages too. This way I can discuss all sorts of things during my classes.

The sentiment “Celebrating another year” is actually masked from a larger phrase and is from the stamp set Well Said. This set is retired but I have hung onto it because it has some more unique phrases such as “Time for a New Adventure” which is at the bottom of my page. I thought they were both rather fitting for a January, new year, page.

The Soft Suede half circle is embossed with a retired folder too. Behind the sentiment you see some twine and a snowflake, cut from the Gingerbread dies. All 3 of the Mint Macaron snowflakes were die cut from Basic White card stock and then I ran my Blending Brush across with some Mint Macaron ink. I added my favorite new embellishment, the Iridescent Rhinestone Jewels, to the side.

The top left corner of my page features the Merry Snowflakes stamp set in the background. I mounted the 3 snowflakes from the set onto a block and used it with Mint Macaron ink to stamp across the background of my page.

The Blushing Bride die cut snowflake is from the So Many Snowflakes Dies which are in the Annual Catalogue. Paired up with some new stamps, this is a fun little area of interest! The Brilliant Rainbow Dies supplied the Soft Suede scallop border along my photo mat and I isolated “Happy” from a stamp in the Slim Sayings set, which is a new JJ catalogue release. January can be found in the set Days to Remember which was one of the best new sets in the Annual Catalogue for memory keepers! It isn’t too often that date sets come around!

The bottom little section is my favorite though because I love how “Time for a New Adventure” and 2022 work together! In the spirit of a new year, I would agree! And I am choosing to enter this new year with a positive heart and mind. The date is mounted on a circle from the Sunshine & Rainbows paper which is a free Sale-a-bration choice.

Overall I really love this color combo and I think it completely suites this page design! I can’t wait to add some photos to it! Thank you for joining us on our first Hop of 2022! I hope you will leave a comment and join us for the whole year!

Next up on the Hop is the amazing Bonnie O’Neill—I can’t wait to see what she makes with this color combo! You can also hit the Previous Tab to see Tami’s creation. We are a small group this month so make sure you give us all some love.