Gumball Goodness!

Have you had a chance to play with the super fun and cute Gumball Greetings stamp set yet? I love this set as it makes the cutest kids birthday cards…or if I am being honest, what full sized human would not love to get one of these cheerful cards in the mail? I know I would!

This bundle can be found in the January to June Catalogue and it has endless possibilities! You can also add the Gumball Machine Shaker Domes and Frosted Beads Assortment to this cute product bundle. For my card below I turned my gumball machine into a traditional shaker card!

The base of the card is one of my absolute favorite colors, Coastal Cabana, and I layered on top a Flirty Flamingo striped DSP from the Hostess DSP collection, Pattern Party. I have gotten so much use out of this paper stack. It has definitely been one of my top Host picks!

I cut a piece of Basic White as the main panel and used the Gumball Machine dies to create the cut out for the shaker part. The base and top of the gumball machine is stamped on Flirty Flamingo card stock with the coordinating ink color and then die cut. I love the little details in this die set including the opening at the bottom where a gumball could roll out and the embossed details in the machines’s mechanism. I used some Silver Foil paper to cut that out. The dies even cut a little snit where you could add in your coin! So brilliant!

I also love how the die set includes a little die cut strip of hearts. You can use this as a border accent as I have here or to even die cut some bitty baby hearts to add into your shaker.

The easiest way to create a shaker card is to use our Window Sheets and the Adhesive Strips for a perfect seal around your shaker window!

I cut a piece of Basic White to lay behind the shaker window and stamped the gumballs and hearts from the stamp set in Gorgeous Grape and Pool Party. I then added a pinch of the Frosted Beads inside!

The sentiment was stamped twice, once in the base color of Gorgeous Grape and cut with our Layering Circle Dies. The second time was Coastal Cabana and I hand trimmed the word ‘sweetest’ and popped it up on a Dimensional to give the sentiment a fun touch. Adding a little coordinating Gorgeous Grape Sheer Ribbon behind also helps it pop.

And of course no card is complete with out BLING! Our Basic Rhinestones were the perfect addition here!

The Gumball Greetings includes great elements to complete the inside of your project as well. I added a few Coastal Cabana stripes to the Basic White layer. The sentiment is stamped in Gorgeous Grape and layered on a circle of Flirty Flamingo!

And just in case you missed my Artisan Design Team project from January—here it is again! I created two other cute cards with this fun bundle! You can see that the gumball machine is colored with Stampin’ Blends and uses the Gumball Machine Shaker Dome!

I hope you are inspired to give this fun bundle a creative go! I know I have enjoyed playing around with this fun bundle!

Thanks so much for checking out my blog today! I share way more creative content on my Instagram account so please go give me a follow @stampwithbrenda

Your support is so appreciated as it lets me continue to do what I love!

Holly Jolly Santa

I was recently asked to be a guest designer for a super exciting Instagram account that I follow and many of you know and love! This is actually my OUTTAKE project as when they approached me and gave me a list of stamp sets to chose from, I choose this set—or so I thought! haha! Turns out I had my stamp sets mixed up! So this project is now going to be inspiration for you!

The best part is I spent quite a bit of time thinking about this card and the design, so I cannot let it go to waste! This was actually the first time I broke the seal on the Picture This Dies even though I have had them since June! Does that ever happen to you? You buy something and then get distracted from using it?

Well I do LOVE how this project came out in the end. I tried to create 3 little panels that felt unique. The base of the card is my favorite color Coastal Cabana. The first layer is black and then a layer of Basic White was added in after another layer of Coastal Cabana was die cut with the Picture This Die.

In the first panel I stamped the little star from the Be Jolly stamp set on the Basic White layer using Smoky Slate ink. My first Santa is stamped with Momento Ink and colored with the Stampin’ Blends markers in Real Red, Ivory, Basic Black and Petal Pink. I use the Petal Pink chubby tip to add a dot too each of Santa’s cheeks for a hit of rosy. I also use the light Smoky Slate Stampin’ Blend to add detail to his beard and hat pom pom.

I love how the Picture This Dies leave a stitched detail behind. And do throw away all the little bits that get cut out, those can definitely be used on a new project!

I like to add details to my sentiments so for this project I added a little bitty scalloped detail underneath the “A Merry Hello” by using a die from the Stitched So Sweetly Dies and a bit of white twine from the Bakers Twine Essentials Pack!

You can see just a hint of the bottom panel—I ran it though the Star-Crossed Embossing Folder, focusing just on the star half of the folder. I added a ton of Coastal Cabana Playing with Patterns Resin Dots to my card to play up the fun and whimsy feel! This Santa is colored with the same Stampin’ Blends and both are hand trimmed with paper snips to tuck into the little panels.

So even though this card is my OUTTAKE I think its pretty damn cute! And I am wondering why the heck it took me so long to use the Picture This Die set! You will definitely be seeing it in the future! I hope everyone has a merry day and if you are inspired to create your own project, please consider shopping my store if you live in Canada!


Comments are always welcome and appreciated!

Create with Connie and Mary--Love is in the Air!

Can you believe it is the end of January already? Happy that this month is done as it hopefully it means we are another month closer to ‘normal’ life! Where I live, things are still pretty strict and we are in the middle of a cold snap, so its a bit of a rough patch. Luckily I have my stamping hobby to keep me occupied!

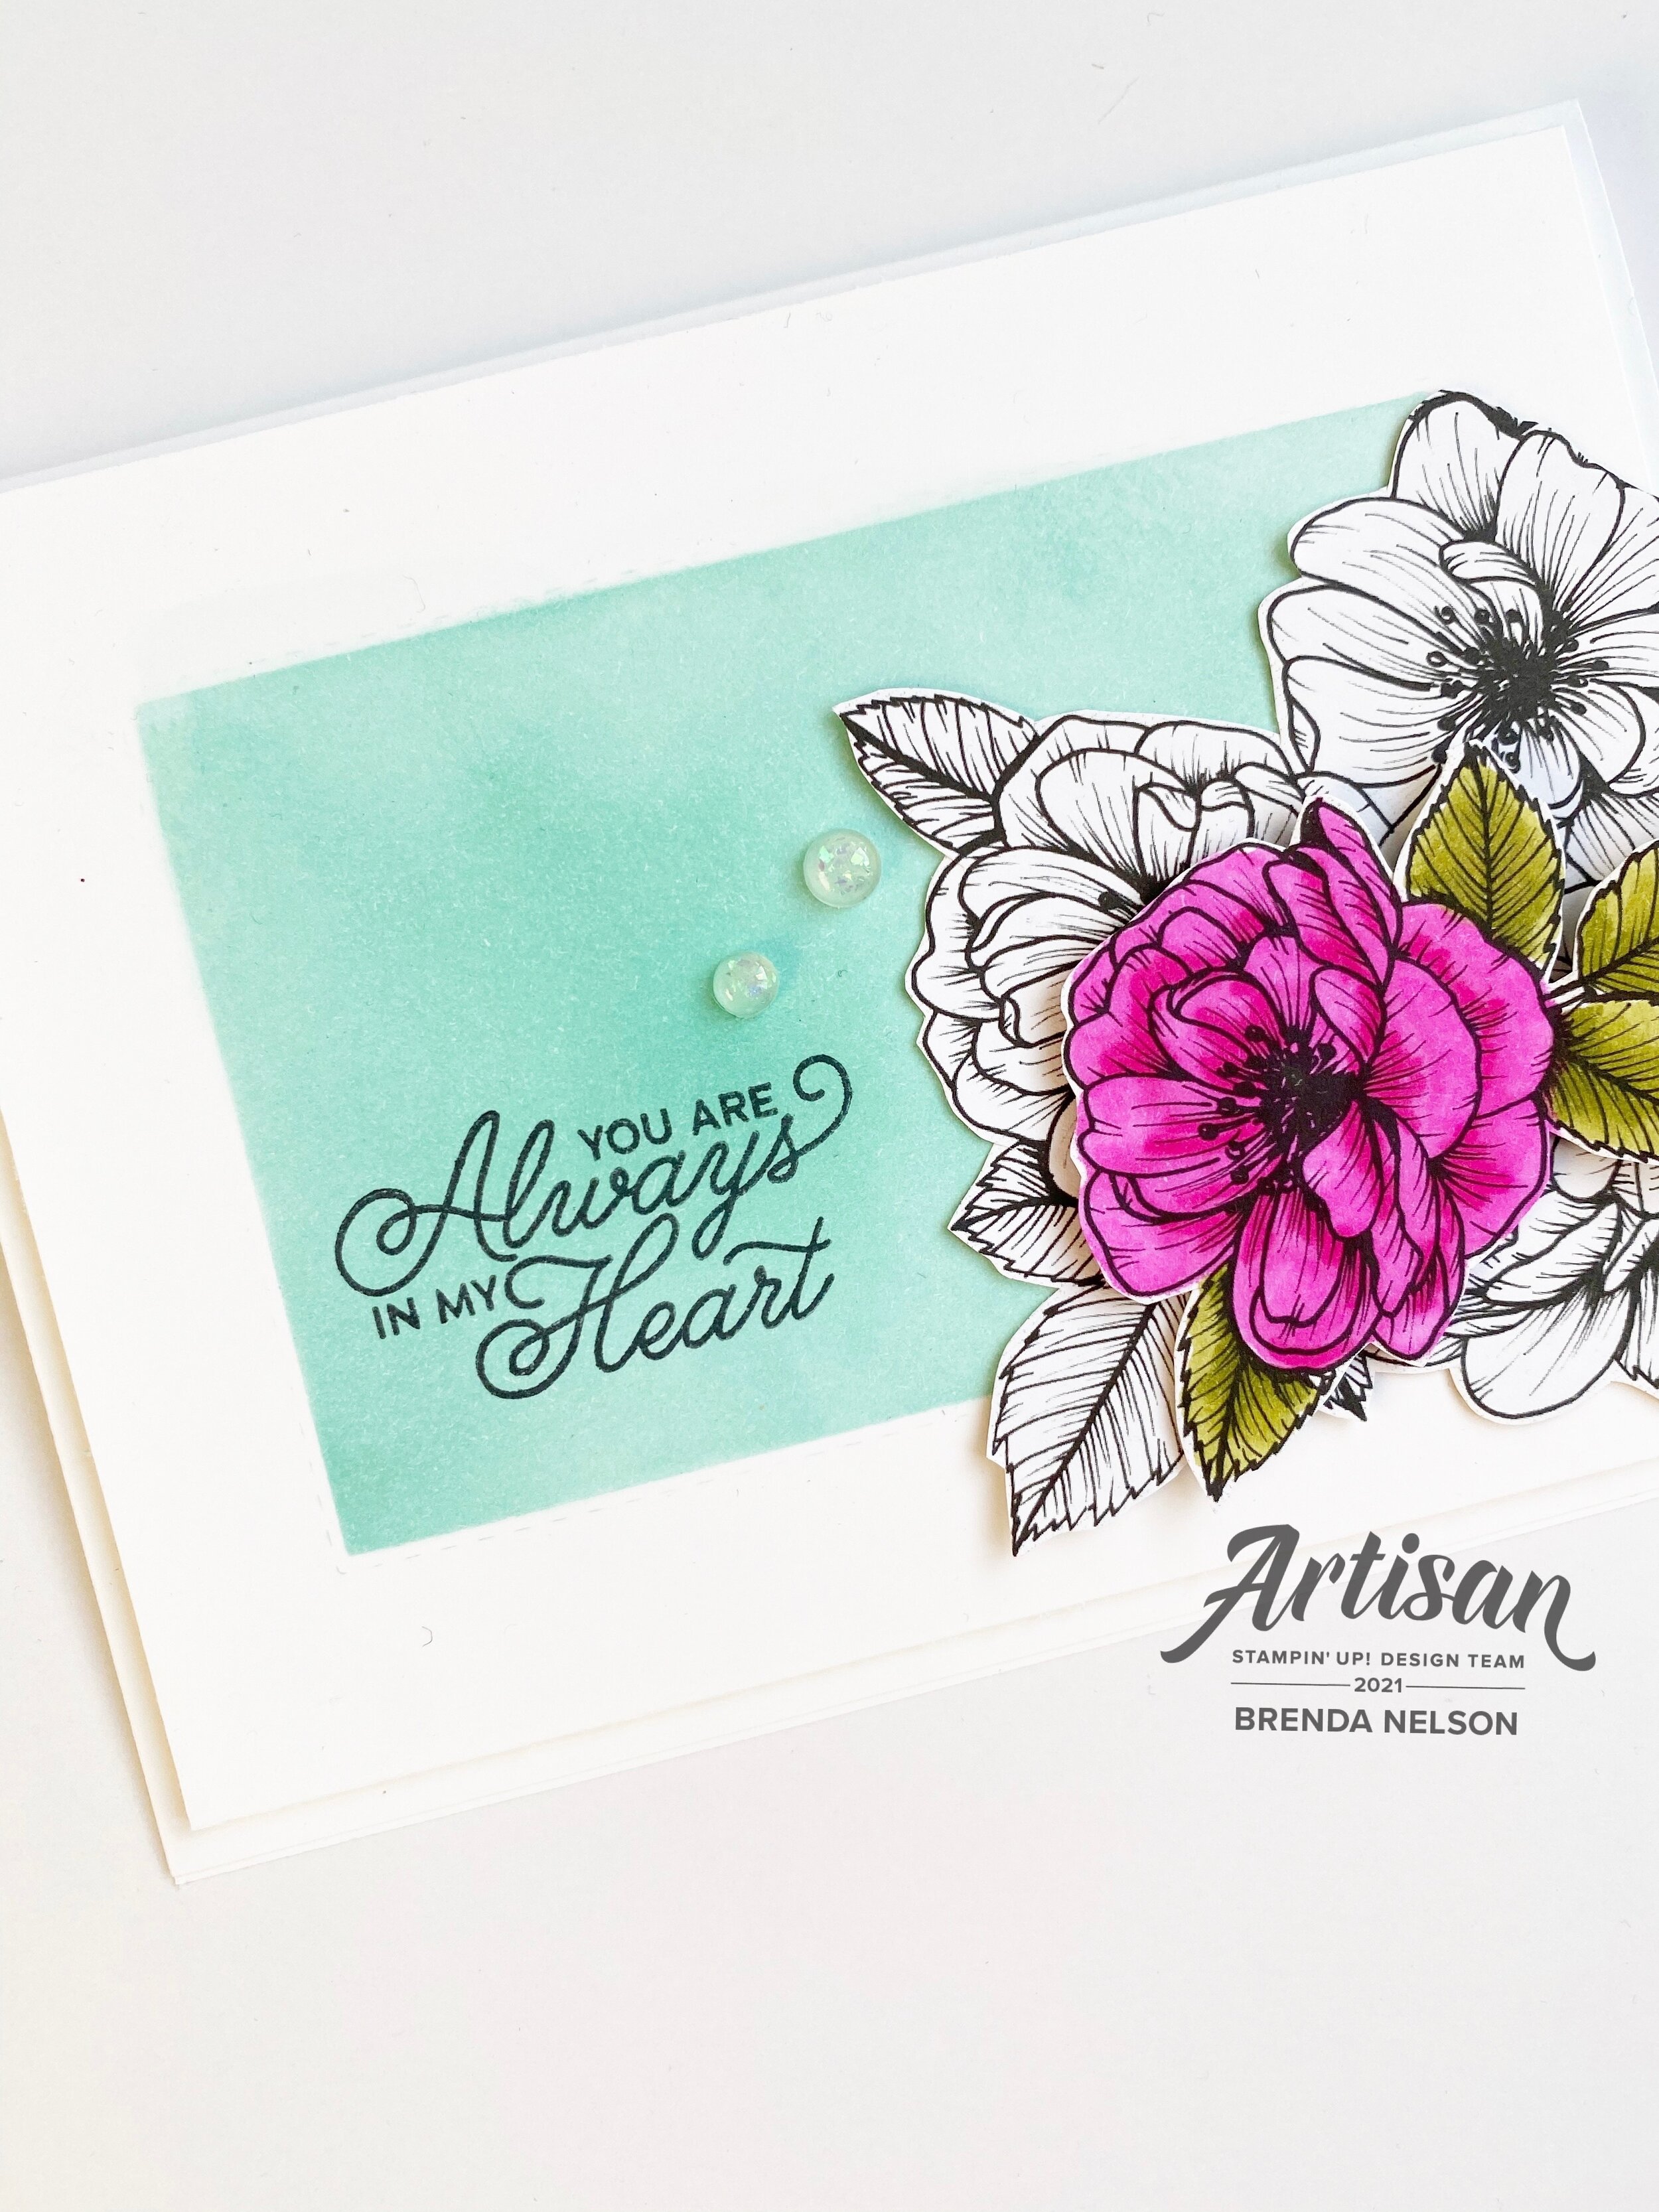
This week our theme is Love is in the Air so I wanted to make a card that has a ‘love’ theme but feels airy and light. I hope you enjoy what I designed!

Design Team.jpg
final (1) 4.jpg
 

For my project this week I decided to experiment again with the new Blending Brushes. Playing around is honestly the best way to learn about a new product. The Blending Brushes are actually so user friendly, I am seriously impressed!

The only stamp on this card is from the Always in my Heart stamp set found in the January to June catalogue.

final (1) 5.jpg

The feature of this card is the box I created with my Blending Brush and stencil I made using two Stitched Rectangular dies to create the box/frame. I used Coastal Cabana for that ‘airy’ bright feel I was wanting. I used the Blending Brush to create the Coastal Cabana box. The sentiment is then stamped on top with Momento Ink.

final 10.jpg

The flowers on this card are from the True Love Designer Series paper. I cut them by hand and then isolated a second flower on top after coloring it with the Magenta Madness and Old Olive Stampin’ Blends.

I added in a few Opal Rounds as a finishing touch. I love how they are almost translucent but have a bit of flecking to them for interest.

I really really love how this card turned out and think its an awesome way to showcase off the Blending Brushes!

Can’t wait to see what Melissa has shared (you can go BACK) or what Connie has desgined (NEXT). Enjoy the upcoming month!

Create with Connie and Mary--strip it down!

This was actually a really good challenge for me this week as I am not someone who typically does simple stamping or one layer cards! SO I had to get creative to see what I could come up with!

Design Team.jpg

I almost always have a card base with a least one layer of card stock on top. Sometimes there is another layer of Designer Series Paper on top too! So I knew that the first thing to go with my ‘strip it down’ challenge was to stamp direct to my Basic White card base.

final (1) 4.jpg

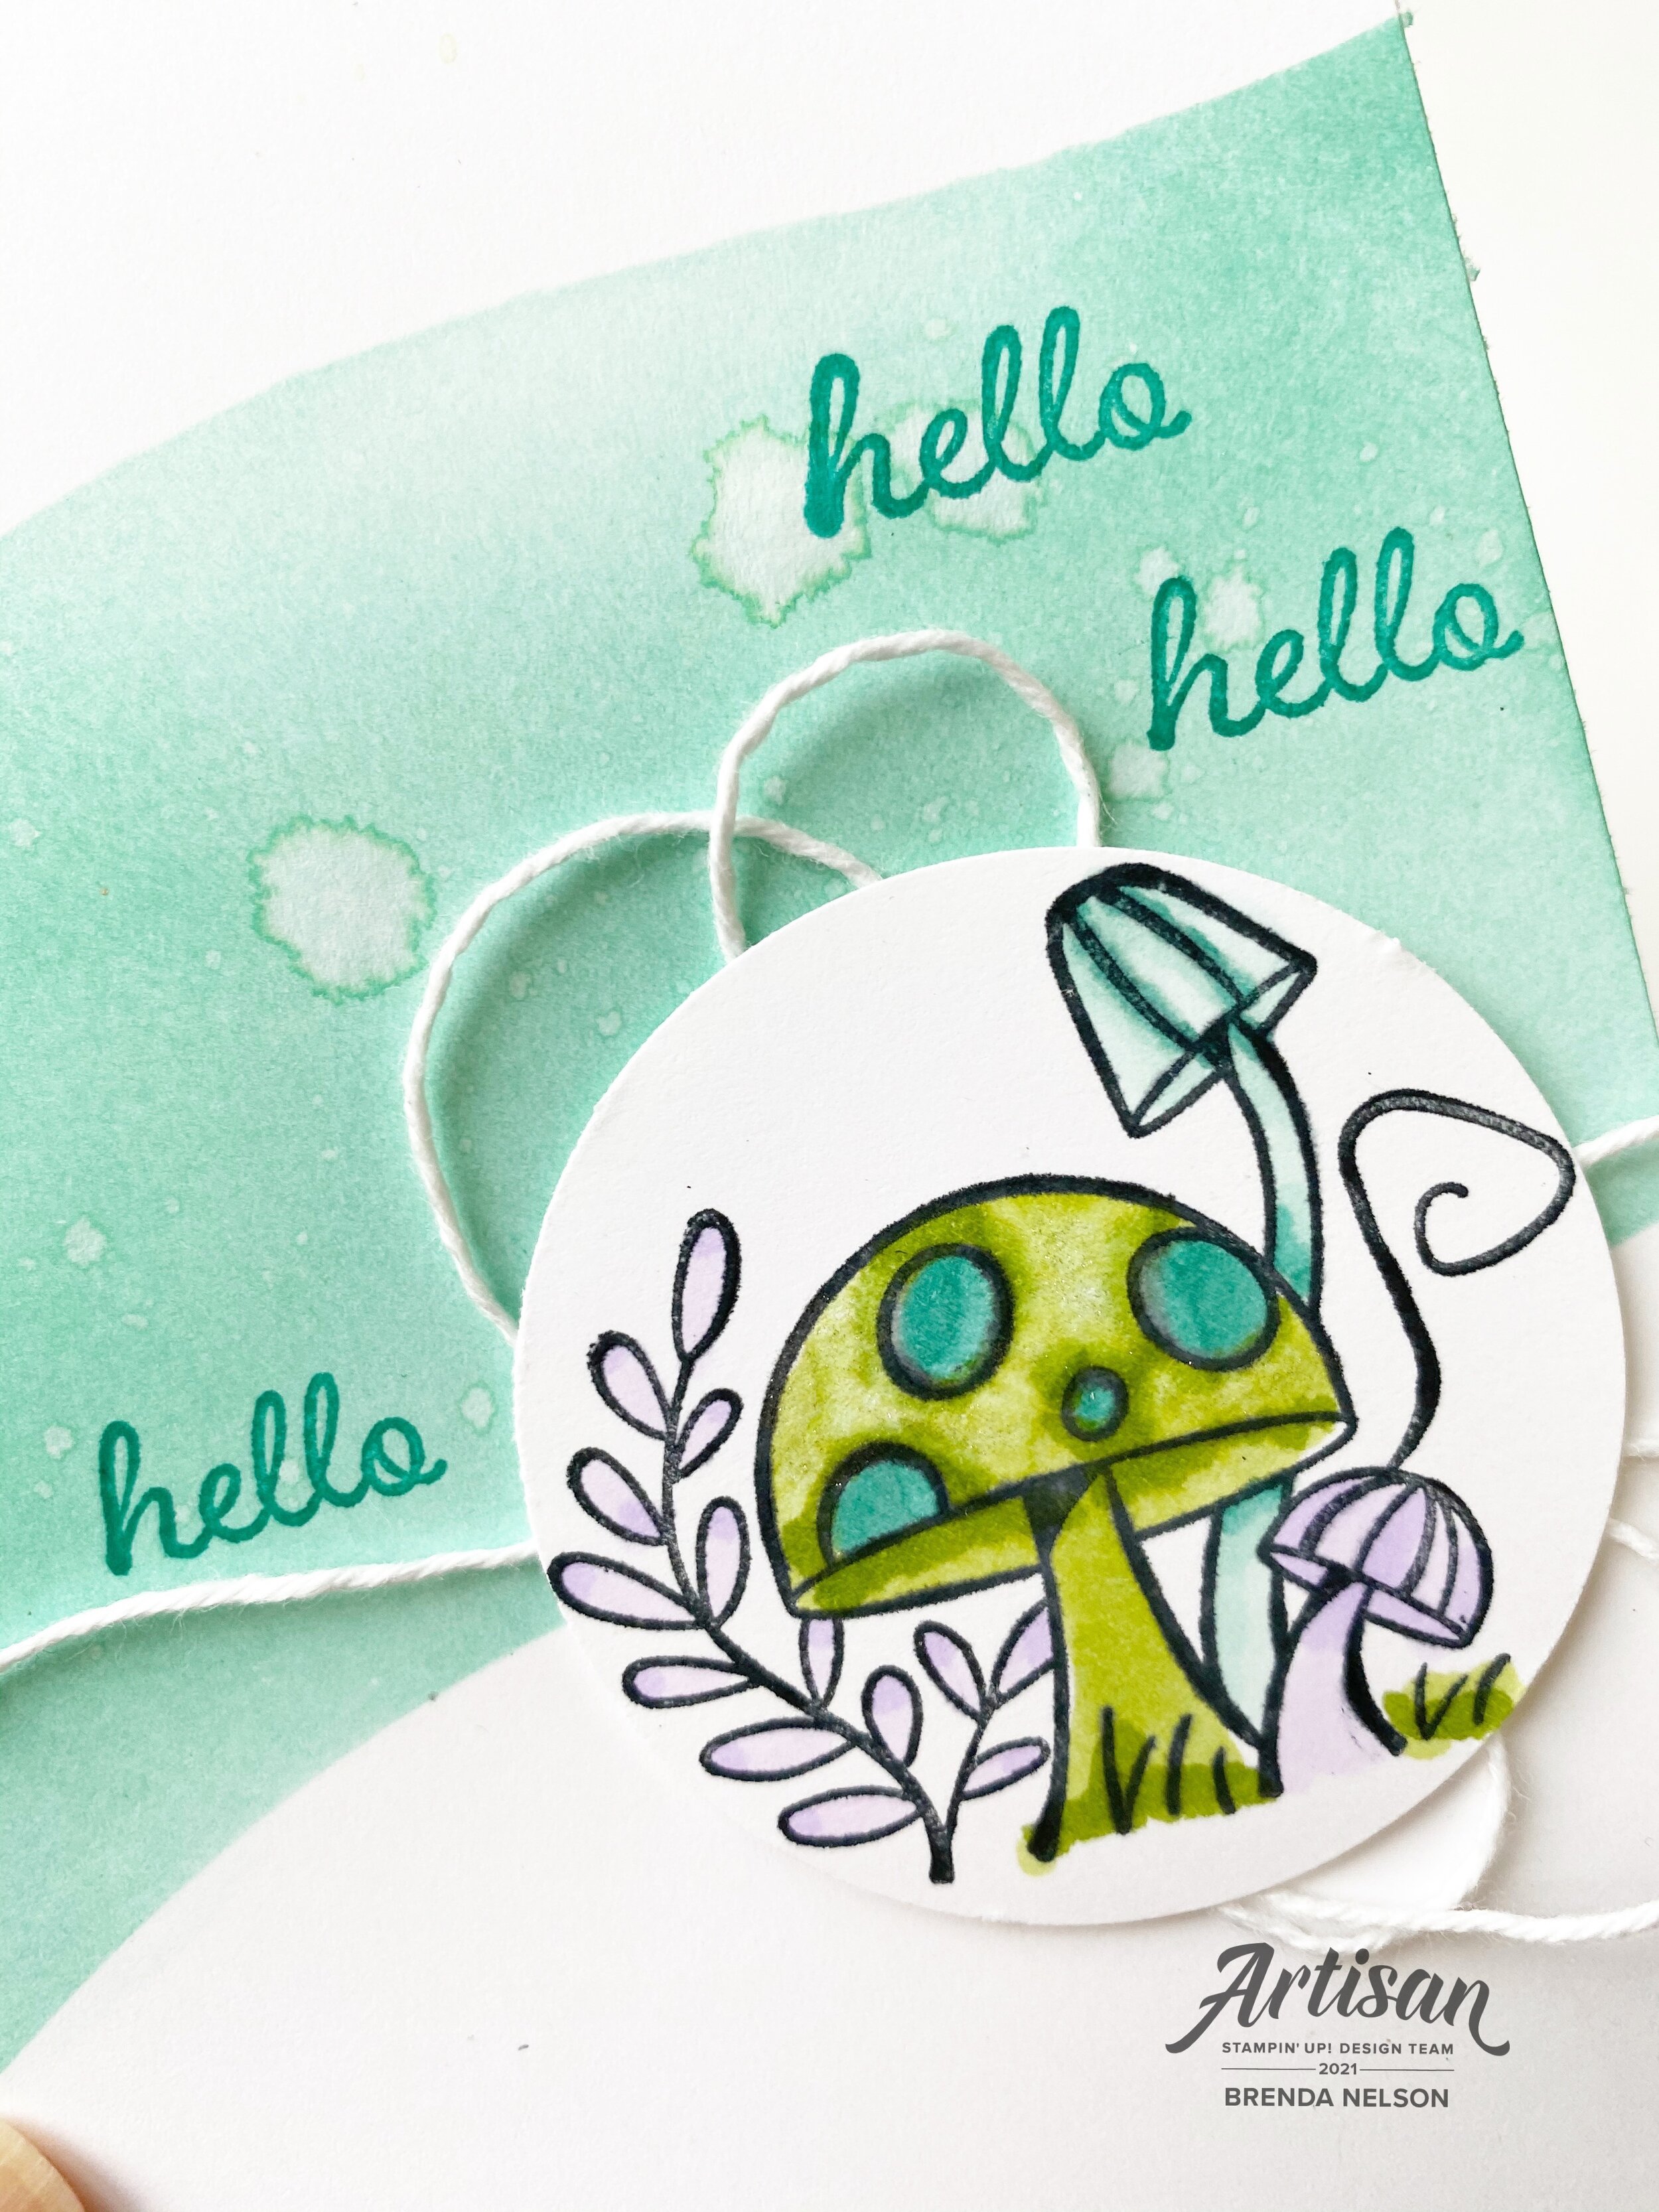
I decided to create a fun background using our new Blending Brushes and the Curvy Dies (available in the JJ Catty). I used Coastal Cabana Ink to blend the background and then tapped some water on top with my large Water Painter brush. I was just playing around and am happy with how it turned out. The water acts as an ‘eraser’ and makes the ink disappear. You can see it happen before your eyes!

This is the template I used to create my blended area

This is the template I used to create my blended area

Once I had my fun area blended, straight to the card base, I reached for the Snail Mail stamp set. I just love the little mushroom image! I used my Stampin’ Blends in Granny Apple Green, Pool Party, Bermuda Bay and Purple Posey.

Adding in a bit of white twine added a little something, but I still feel like for my stampin’ style this card is pretty stripped down!


I stamped the sentiment, Hello, straight onto the area I blended and I resisted every temptation to add some bling or anything else to this card.

And you know what? I actually love this clean and simple finished card!

I can’t wait to see what the other gals create this week! You can go BACK to see Melissa or NEXT to see Connie!

Please feel free to leave a comment!

final 7.jpg