Dad--You're the Best Card

I don’t know about you but making masculine cards always feels a bit more tricky. I really do love how this one turned out especially as the Tailored Made Tags Dies did all the work to make it awesome!

final (1) 35.jpg

I started with a base of Soft Suede and layered a large piece of the True Love DSP on top as my first layer. I always love a good black & white DSP and I will be sad when this one retires at the end of June. I then die cut 3 different sizes of tags from the Tailor Made Tags Dies in Misty Moonlight, Soft Suede and Smokey Slate.

The Playful Alphabet dies are a craft room must have in my opinion as they are the perfect size for card making and memory keeping. I added them to this project with the Foam Adhesive Sheets behind to give them a little pop off the base.

I added in You’re the Best on a piece of Basic Grey card stock for all the man colors on one project!

final 64.jpg

I decided to also do the inside of this card as well so I added another piece of DSP from the True Love paper this time in a stripe. I cut another tag in Misty Moonlight and stamped the sentiment from the Handsomely Suited stamp set. This is also where the “You’re the Best” on the card front came from.

Behind the sentiment I added a little bit of Misty Moonlight ribbon. Voila! A pretty eye catching yet simple Father’s Day card!

Create with Connie and Mary-Favorite NEW In Color!

I don’t even KNOW if its possible to pick just one color…so I am going to go with the first color I chose to create a scrapbook layout! Obviously that color was really speaking to me and I have to say I LOVE how it turned out. I hope it inspires you too!

21DesignTeamBadge.png

I am also curious to see if the Design team has similar favorites or if we have quite the spread! Its always so fun to see each week how we incorporate the challenge!

final (4) 15.jpg

The base of my page is the new Evening Evergreen and I just love it! It is such a nice rich green that looks fantastic with these lighter colors. I added interest and texture to my page by just punching a bunch of 1 inch circles and adhering them flat to the layout. This is a great way to add a design element without any background stamping.

I used the flowers from the True Love Designer Series Paper and colored them in with a variety of Stampin’ Blends.

final (1) 19.jpg

Evening Evergreen is such a nice base to showcase some brighter colors and make them really pop on your page. Here is stamped the sentiment with Fresh Freesia ink on the coordinating card stock. The sentiment is from the Color & Contour stamp set. Flowers in Calypso Coral, Polished Pink and Fresh Freesia look so awesome on this rich dark background. The leaves are colored with the new Soft Succulent Stampin’ Blend.

final (2) 16.jpg

These flowers are colored with the Pale Papaya Stampin’ Blends. I brought in a Pale Papaya photo mat and some of the new Pale Papaya and White Ribbon too. It is such a lovely color that really fills a gap in our standard color offering.

final (6) 8.jpg

You will notice in my paper crafting that I like to create little areas of interest on my pages. Typically on photos or up in the top corners of my pages.

This view gives you a sample of each of these! I love to add sentiments or phrases onto my pages to help bring my feelings about the content to life. Stampin’ Up! has no shortage of amazing stamp sets to help us in our design.

final (4) 15.jpg

If you have not pulled out this luscious green to play with yet, I really encourage you to do so. It is quite distinct when paired up with some of our current greens and as you can see it really does make a stunning backdrop for this scrapbook layout.

I can’t wait to see what the rest of team has chose as their Favorite New In Color! You can go BACK to see what Melissa’s choice is or NEXT to see what Connie has selected! Please feel free to leave a comment. Its always nice to get feedback!

Create with Connie and Mary-Valentine's Favors!

I am super excited for Valentine’s Day this year and I plan on spoiling some of my favorite Galentine’s with a super cute project! Valentine’s favors happen to be the theme for this week’s Create with Connie and Mary challenge!

Design Team.jpg
final 15.jpg

I was super excited about the Hearts & Kisses stamp set in the January to June catty as I loved the sentiments “Happy Galentine’s Day” and “You go, Girl!. I knew right away I wanted to make a special gift with this set.

I honestly think the stand out feature of this card is the True Love Designer Series Paper—don’t these hand trimmed flowers look AMAZING when paired agains the blended Flirty Flamingo background? This paper has unlimited potential as you can feature black & white imagery on literally anything or color this paper with thet variety of color tools we have at our disposal.

For the background, sentiment tag, and heart border (cut with the Floral Heart Dies) I used Flirty Flamingo ink with our new fabulous Blending Brushes.

I tied Blushing Bride twine around the front panel with a Heart Charm attached (LOVE!) and added some Matte Black Dots. This entire product suite is phenomenal!

final+%281%29+8.jpg

My coordinating Love You Always Treat Box is my favorite of this duo. I am going to fill this box with some of my Reese’s Valentines Surprise Cookies that I shared on my blog last Valentine’s Day! You can click this link to go to my recipe or click on my Lifestyle Tab and then Favorite Recipes and you will find it there! Your welcome in advance, these cookies are AMAZING!

I wrapped the box with another pattern from the DSP and added some more of the flowers that I hand trimmed from the paper. This time I also used my Blending Brush to add a pop of color with the Flirty Flamingo ink.

I added some Blushing Bride Metallic Ribbon and some sliver metallic thread to the back of my label. The sentiment is from the Always in my Heart stamp set and the tiny heart is cut using the Kangaroo dies.

I love this project combo and cannot wait to deliver these to some of my special Galentine’s this year!

I love this project combo and cannot wait to deliver these to some of my special Galentine’s this year!

To see what Melissa has created you can click BACK and to see what Connie designed this week you can go NEXT. I hope you hop the whole way through so you don’t miss anything!

Create with Connie and Mary--Love is in the Air!

Can you believe it is the end of January already? Happy that this month is done as it hopefully it means we are another month closer to ‘normal’ life! Where I live, things are still pretty strict and we are in the middle of a cold snap, so its a bit of a rough patch. Luckily I have my stamping hobby to keep me occupied!

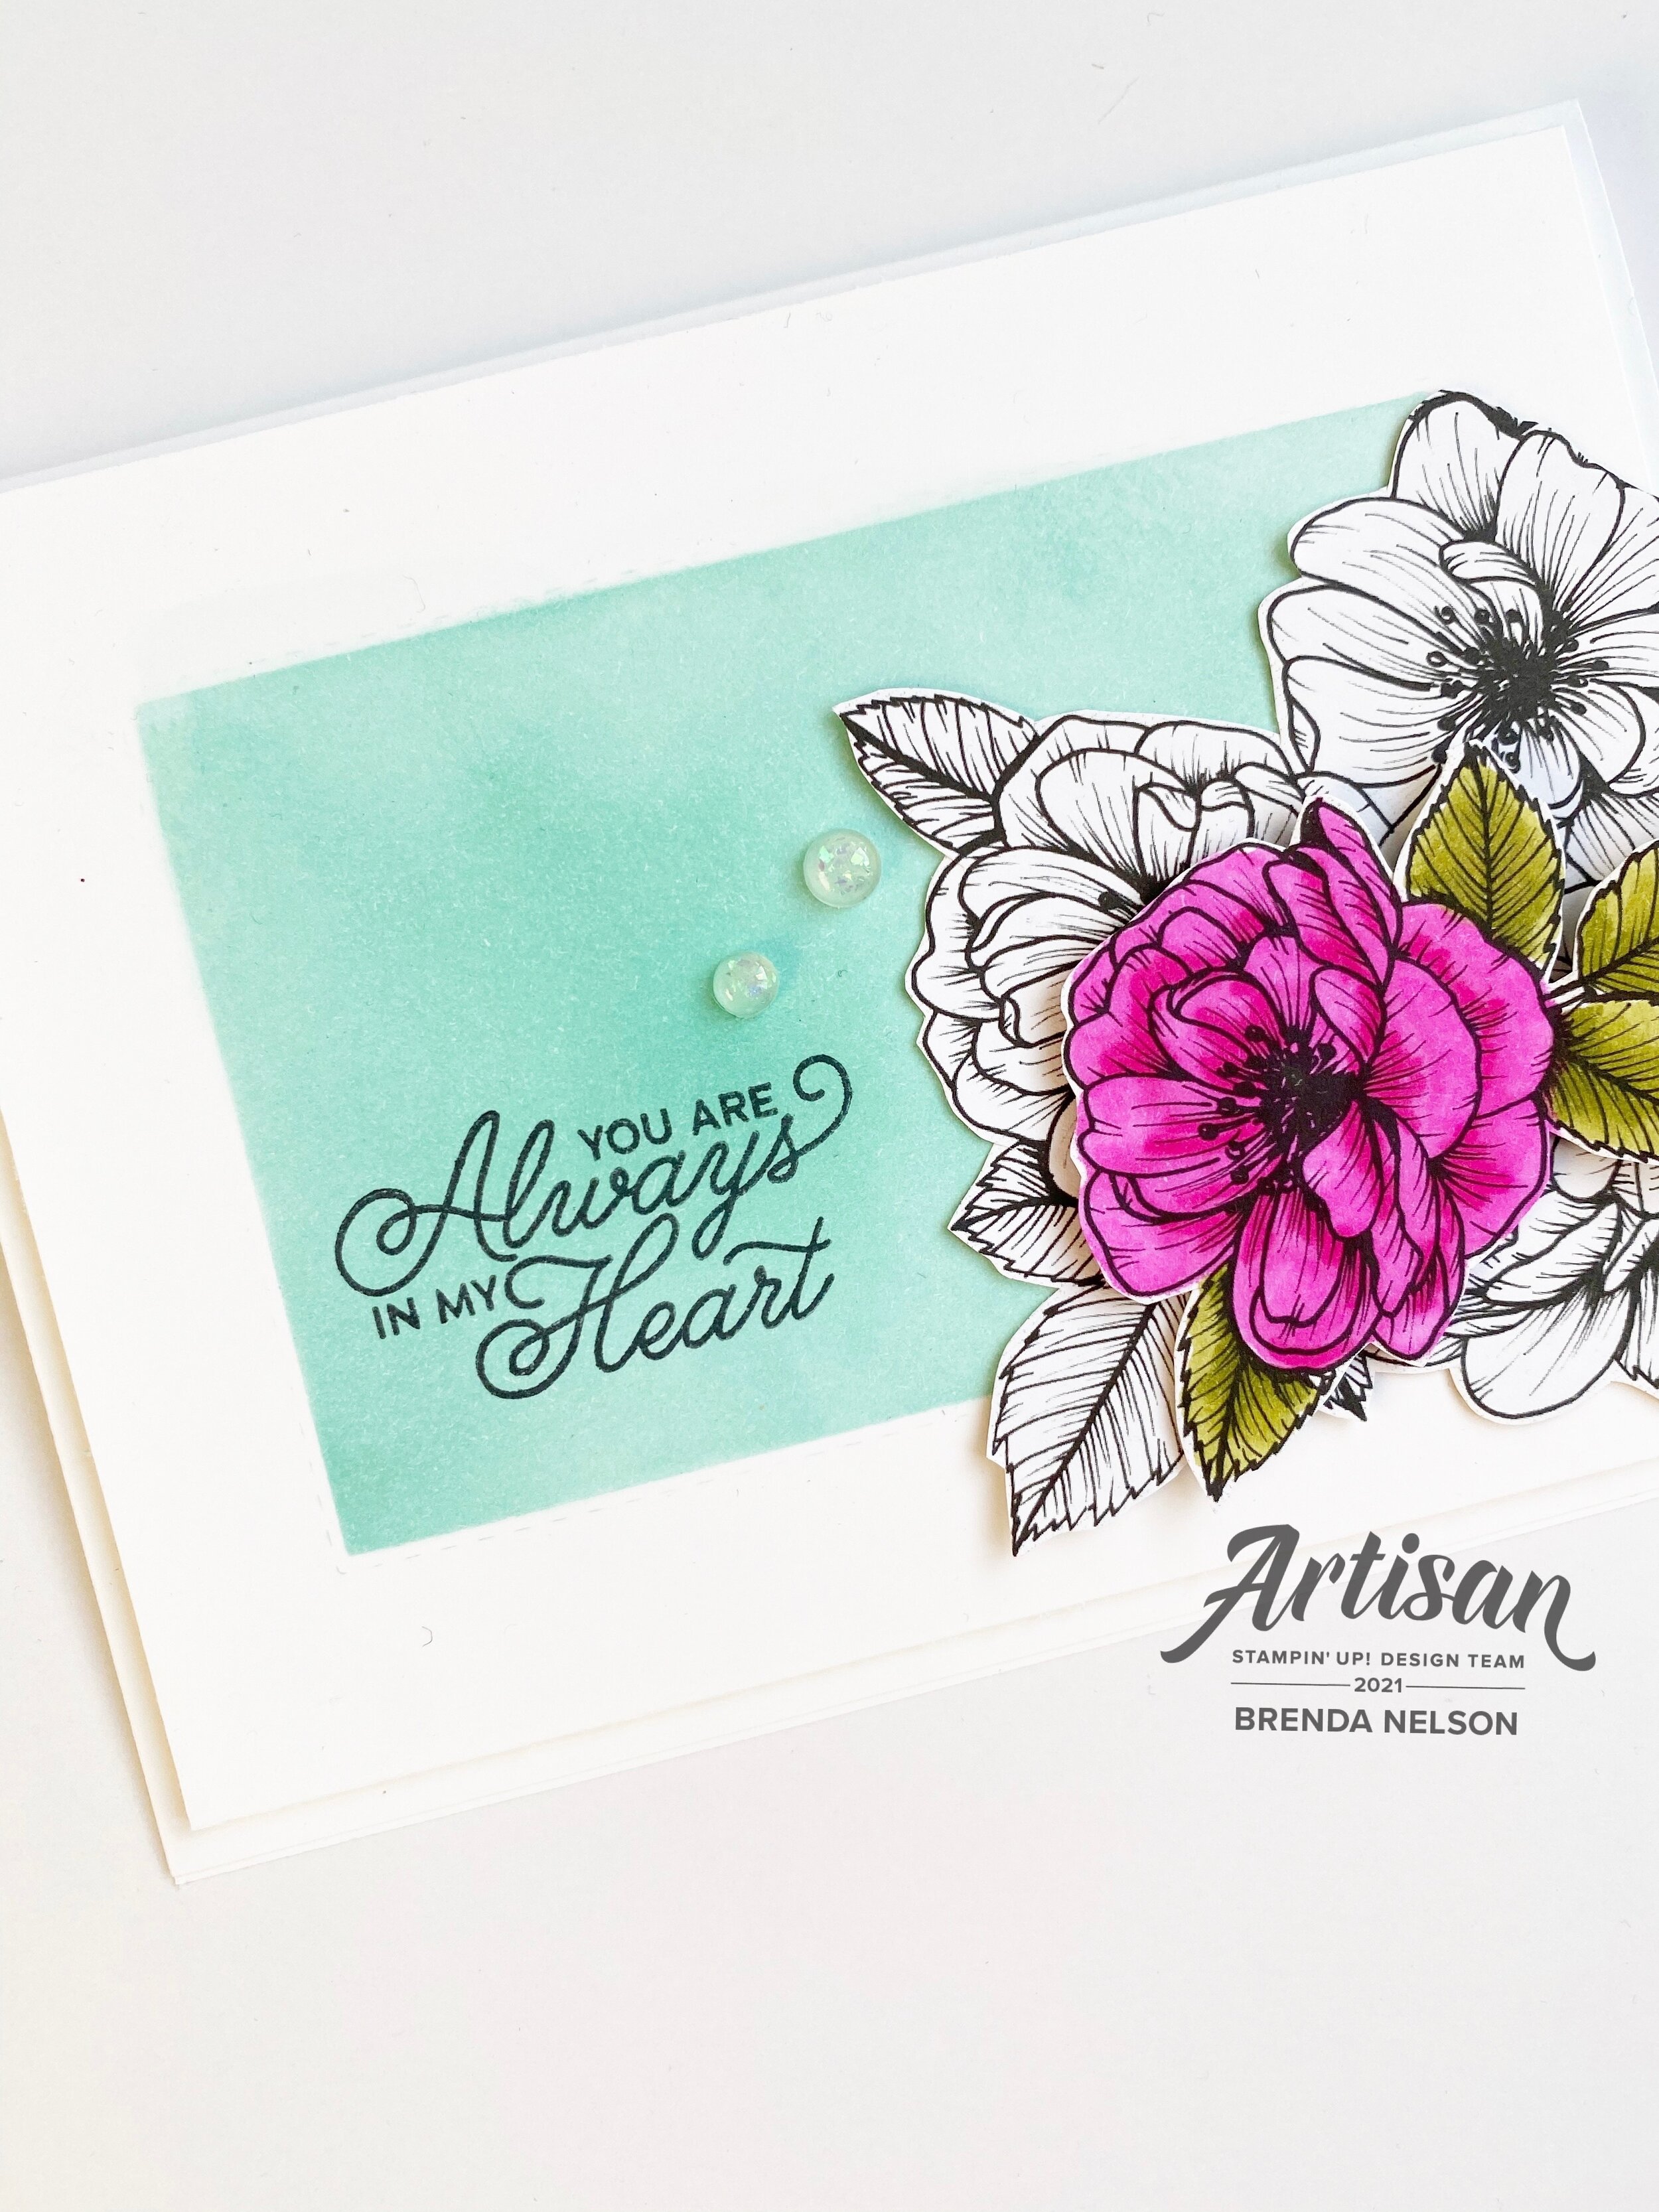
This week our theme is Love is in the Air so I wanted to make a card that has a ‘love’ theme but feels airy and light. I hope you enjoy what I designed!

Design Team.jpg
final (1) 4.jpg
 

For my project this week I decided to experiment again with the new Blending Brushes. Playing around is honestly the best way to learn about a new product. The Blending Brushes are actually so user friendly, I am seriously impressed!

The only stamp on this card is from the Always in my Heart stamp set found in the January to June catalogue.

final (1) 5.jpg

The feature of this card is the box I created with my Blending Brush and stencil I made using two Stitched Rectangular dies to create the box/frame. I used Coastal Cabana for that ‘airy’ bright feel I was wanting. I used the Blending Brush to create the Coastal Cabana box. The sentiment is then stamped on top with Momento Ink.

final 10.jpg

The flowers on this card are from the True Love Designer Series paper. I cut them by hand and then isolated a second flower on top after coloring it with the Magenta Madness and Old Olive Stampin’ Blends.

I added in a few Opal Rounds as a finishing touch. I love how they are almost translucent but have a bit of flecking to them for interest.

I really really love how this card turned out and think its an awesome way to showcase off the Blending Brushes!

Can’t wait to see what Melissa has shared (you can go BACK) or what Connie has desgined (NEXT). Enjoy the upcoming month!