31 Boo's to You

This is a little twist on Halloween because this card doesn’t actually say…Happy Halloween but its implied! Hahaha! I thought it would be fun to focus on ‘31’ as its the date of this fun holiday!

final (4) 3.jpg

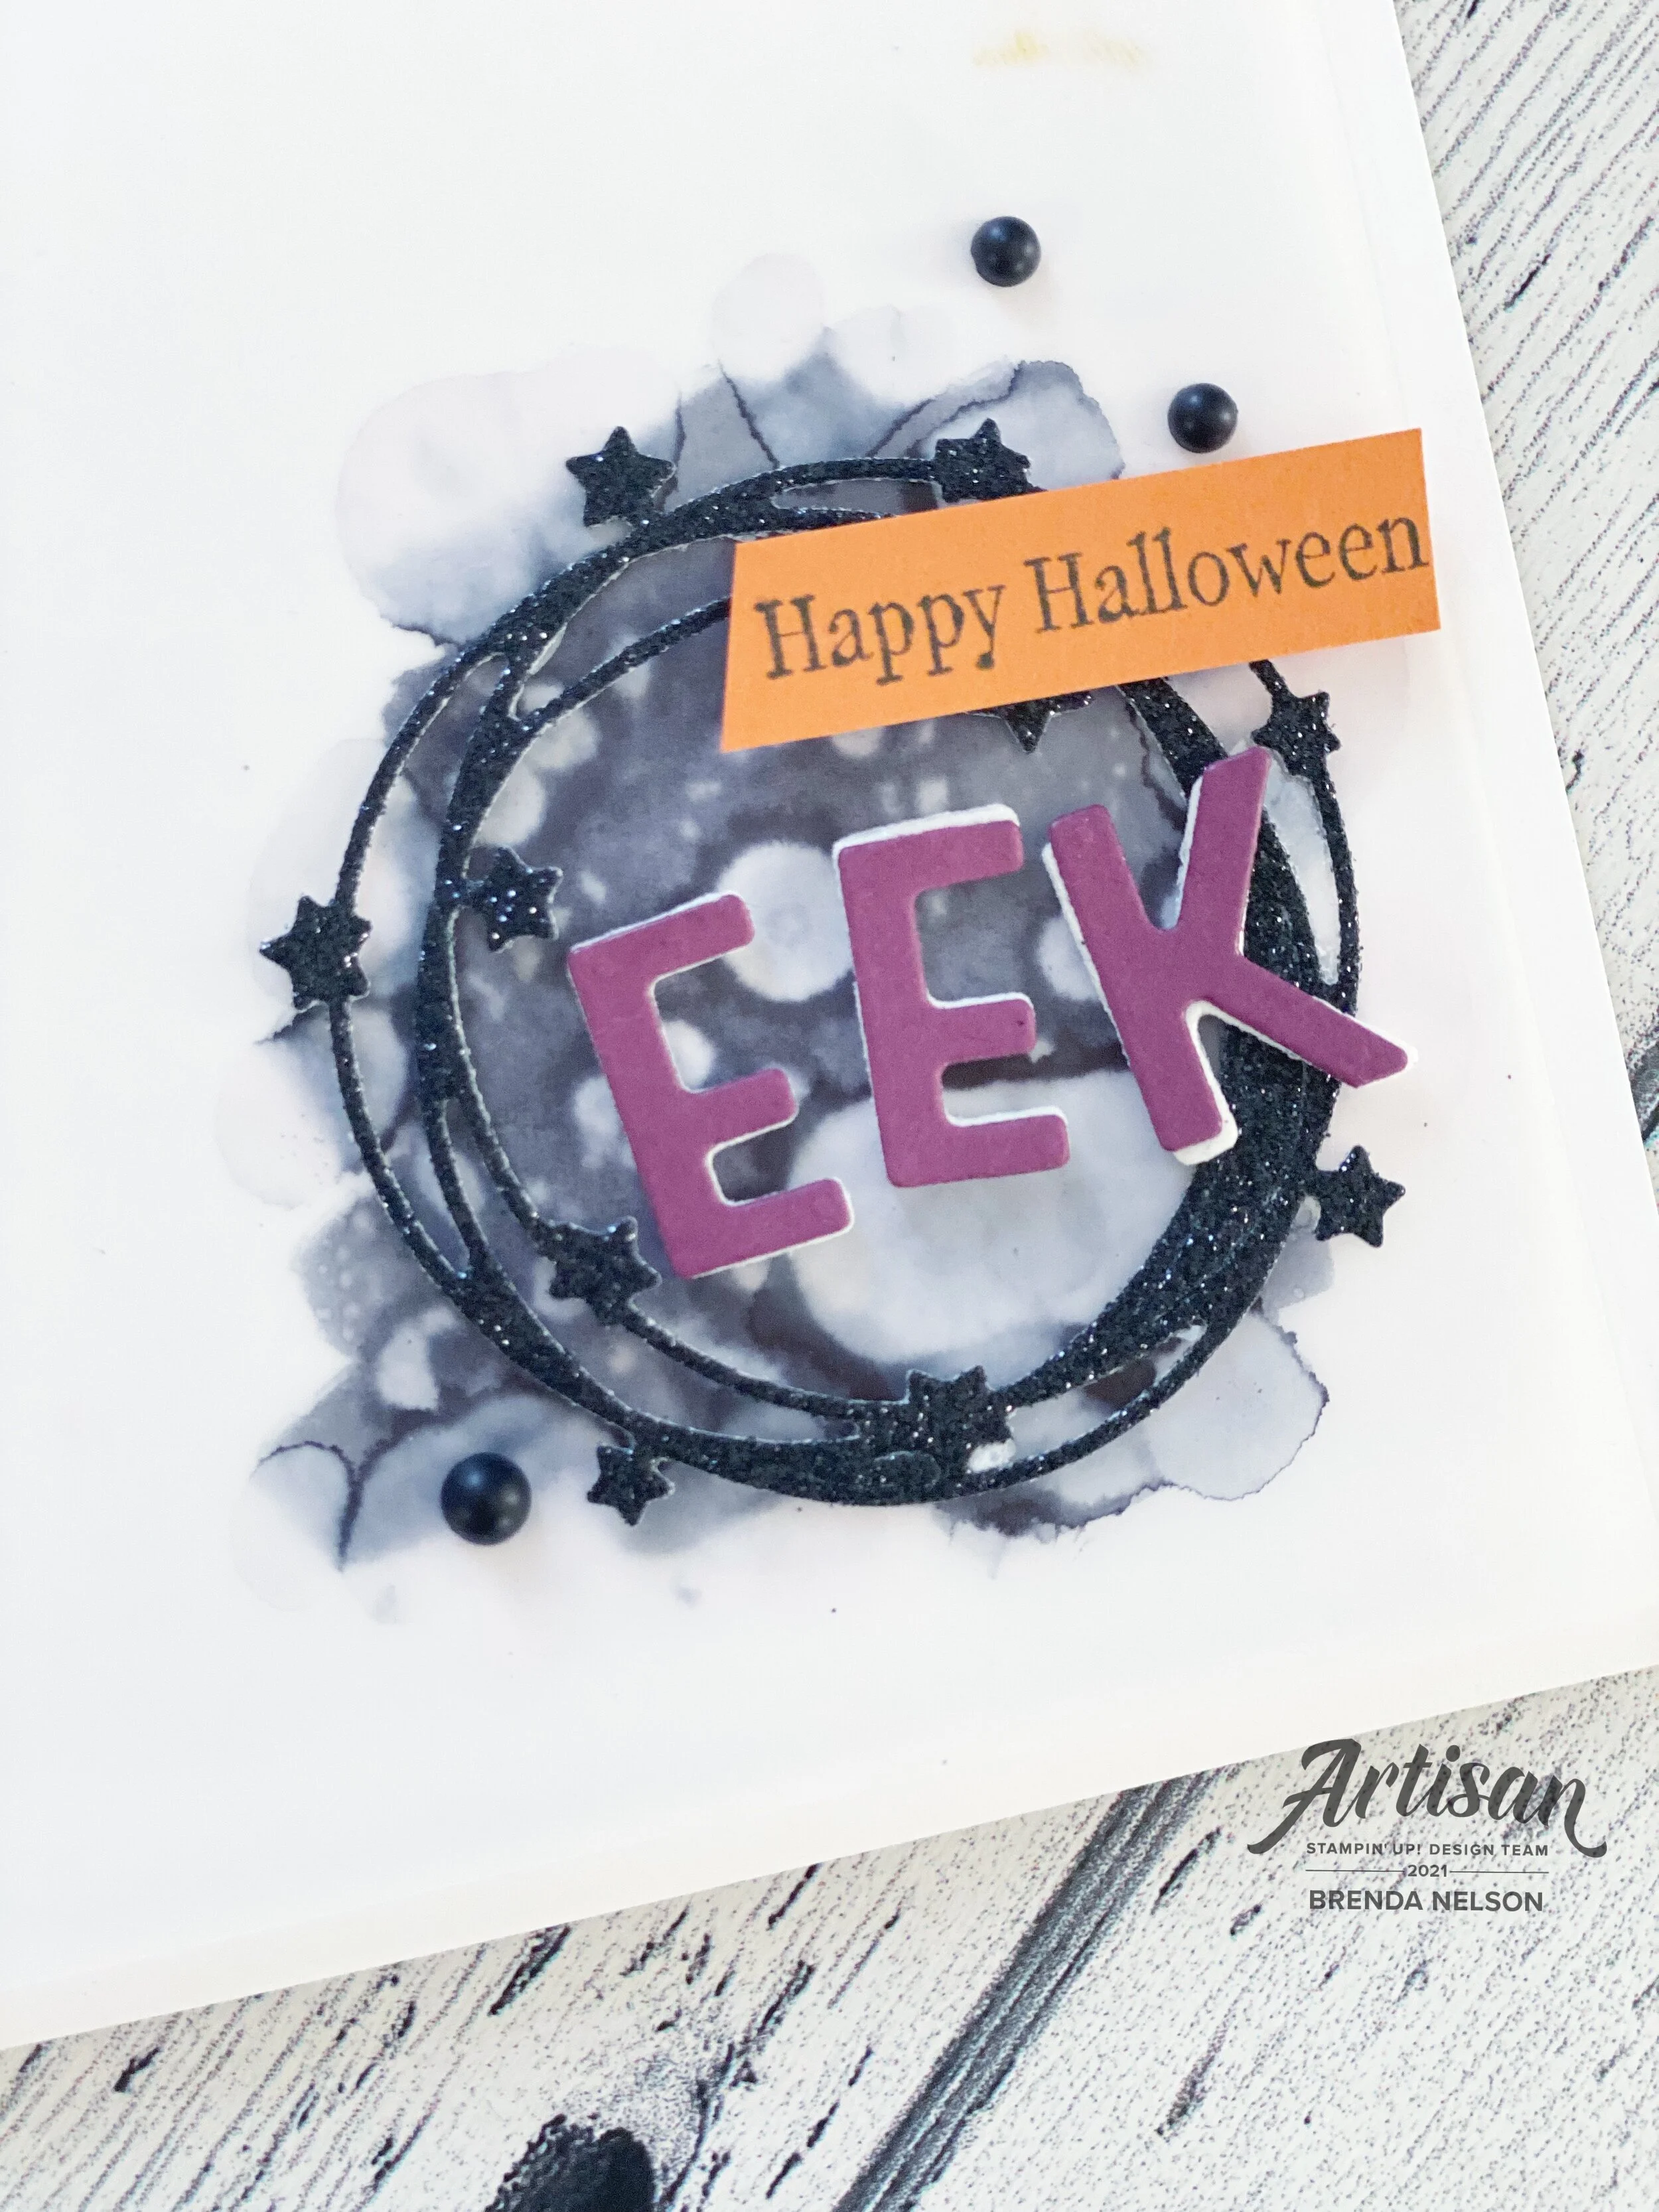
The background of this card is created using the Alcohol Blends technique again and it really pops to have the vellum on a Basic White background! I used Rich Razzleberry, Basic Black and Night of Navy Stampin’ Blends to create this custom background.

I cut the glittery wreath and the tag using the Frightful Tags Dies. Have I ever gotten my money’s worth this holiday season! I have made countless projects using this die set!

The ‘31’ is cut using the Playful Alphabet Dies—-if you haven’t looked that closely at them, they do contain numbers as well. This is a great die set to have in your collection.

final (7) 4.jpg

I added the ‘Boo’ from the stamp set Thinking Thanks & Peace which is in the Holiday Catalogue. I love how the ‘Boo’ has a little ghost floating above. It reminds me of the ghosts in Pac Man!

The twine is from the Playful Pets Trim Combo Pack which also has a thin red and white ribbon—great for that upcoming other holiday!

If anything has inspired you today or on any of your other visits to my blog, please consider supporting me if you live in Canada! I would love to keep doing what I love! Thank you!

EEK! Happy Halloween!

Following up on my post from Wednesday, here is another look at that amazing technique with our Stampin’ Blends and Isopropyl alcohol!

final (28) 2.jpg

For this card I started with a base of Basic White. I used the same technique, coloring a squiggle with my Basic Black Stampin’ Blend marker in the bottom right corner of the vellum. Remember, you need vellum for this cool technique to work.

I added a few light droplets of the Isopropyl alcohol to this area and let it work its magic!

final (1) 13.jpg

I cut a glittery star wreath using the Seasonal Swirls Dies and added to my Stampin’ Blend area with a few Glue Dots. I cut out EEK from Rich Razzleberry card stock using the Playful Alphabet Dies and the Foam Adhesive Sheets.

Happy Halloween can be found in the Frightfully Cute stamp set and is stamped with Momento Black Ink on Pumpkin Pie card stock.

A few Matte Black Dots and this fun Halloween card is complete!

I really hope you will give this technique a try! Its super fun and easy!

If you are in Canada and are inspired by any of my Halloween projects, please consider shopping with me! I would love to be able to keep doing what I love, which is stampin’ in my stretchy pants!

It's all about the Boo's...

Did you see my earlier post post about the alcohol blending technique? I shared a fun way to use three different colors to create a fun background. For this option using the Stampin’ Blends and Isopropyl Alcohol I am just using one color to help create a fun focal point.

final (9) 6.jpg

To create this look you will need a Basic Black Stampin’ Blend marker (or one singular color of your choice) plus vellum (which is the key paper for this technique).

I started by coloring a section about 2 - 2 1/2 inches wide on the bottom right corner of the vellum with my Basic Black Stampin’ Blend. I then used an old Aqua Painter with some rubbing alcohol to drop little dots on top of where I colored. It ends up creating a really cool unique.

I used the Seasonal Swirls Dies to cut out a sparkly star wreath to layer over top of my Basic Black alcohol area. I cut out “BOO” from Paper Pumpkin card stock using the Playful Alphabet Dies. The letters are cut out a second time using the Foam Adhesive Sheets. It is such an easy way to pop the whole letter up on your project. The Granny Apple Green pumpkin is also from the Seasonal Swirls Dies. I added a few extra stars to my project using the Cute Stars Adhesive Backed Sequins!

Once I had this vellum panel complete I layered it over top of some DSP from the Cute Halloween collection. I love how the vellum softens the DSP and how spooktacular the alcohol technique looks on top of the DSP too. The base of the card is Basic Black.

I hope this card also inspires you to play around with this alcohol Stampin’ Blends technique. Its so fun and you can create some really terrific backgrounds that are all unique!

final (1) 9.jpg

Happy Halloween MONTH!

Self proclaimed Halloween LOVER over here! In fact I have created so many things that I am going to share 3 projects per week with you this whole month and an extra special post on Halloween! This means you can expect 14 amazing awesome and unique Halloween projects this month—ALL featuring our Amazing Stampin’ Up! products!

final (44).jpg

I want to kick things off with this super fun BOO BOX or a Halloween Happiness Box—you decide what you want to call it! It uses one of our Mini Paper Pumpkin Boxes that I spritzed with Pumpkin Pie reinker mixed with Rubbing Alcohol. I used one of our Stampin’ Spritzers to cover the top and sides of the box. I really love how it turned out and it was SO FAST to change the outside look of this box!

I created a belly band to go around the box using a 2 x 12 strip of the gingham print from the Hostess DSP stack—Pattern Party! This is one of the best Hostess Rewards Stampin’ Up! has ever offered in my opinion! And I love the fact that a belly band can be slipped off of the box so after the recipient has gotten to all of the treats inside they can fill it up again, slide on the belly band, and give this fun BOO BOX to someone else! That is the whole purpose of what we create, to brighten as many lives as possible!

final (42).jpg

I decorated the belly band with a fun spider web cut with the Frightful Tags Dies. You will notice how many times I used these dies in creating my projects this month! I would highly recommend adding them to your next order! You can always use my Monthly Hostess Code or shop my online store if you live in Canada!

The spiderweb is also cut from the Black Glitter Paper for that extra little pop of fun. The Highland Heather label is also from the Frightful Tags dies and the mini spider webs stamped on top are from the Banner Year stamp set. You can find this amazing stamp set in the Annual Catalogue. It also has a sentiment inside saying “Happy Fall Y’all”…just saying…you need it! Behind the label is some black twine from the Baker’s Twine Essentials Pack, also in the Annual Catalogue.

I finished off my BOO BOX but cutting the letters BOO using the Playful Alphabet Dies in Pumpkin Pie cardstock. i used the Foam Adhesive Sheets to cut the letters again and add the cardstock letters to it. The Foam Adhesive Sheets are like one giant Dimensional. And to jazz up the BOO a little bit, I took my Pumpkin Pie Stampin’ Blend to the bottom half of the letters. Its such an easy way to add some interest to your letters!

Well that is my first awesome Halloween project to share with you this month! I hope you will visit me on Monday, Wednesday and Fridays as I continue to share Halloween projects, cards and scrapbook pages with you this month!

Dad--You're the Best Card

I don’t know about you but making masculine cards always feels a bit more tricky. I really do love how this one turned out especially as the Tailored Made Tags Dies did all the work to make it awesome!

final (1) 35.jpg

I started with a base of Soft Suede and layered a large piece of the True Love DSP on top as my first layer. I always love a good black & white DSP and I will be sad when this one retires at the end of June. I then die cut 3 different sizes of tags from the Tailor Made Tags Dies in Misty Moonlight, Soft Suede and Smokey Slate.

The Playful Alphabet dies are a craft room must have in my opinion as they are the perfect size for card making and memory keeping. I added them to this project with the Foam Adhesive Sheets behind to give them a little pop off the base.

I added in You’re the Best on a piece of Basic Grey card stock for all the man colors on one project!

final 64.jpg

I decided to also do the inside of this card as well so I added another piece of DSP from the True Love paper this time in a stripe. I cut another tag in Misty Moonlight and stamped the sentiment from the Handsomely Suited stamp set. This is also where the “You’re the Best” on the card front came from.

Behind the sentiment I added a little bit of Misty Moonlight ribbon. Voila! A pretty eye catching yet simple Father’s Day card!