EEK! Happy Halloween!

Following up on my post from Wednesday, here is another look at that amazing technique with our Stampin’ Blends and Isopropyl alcohol!

final (28) 2.jpg

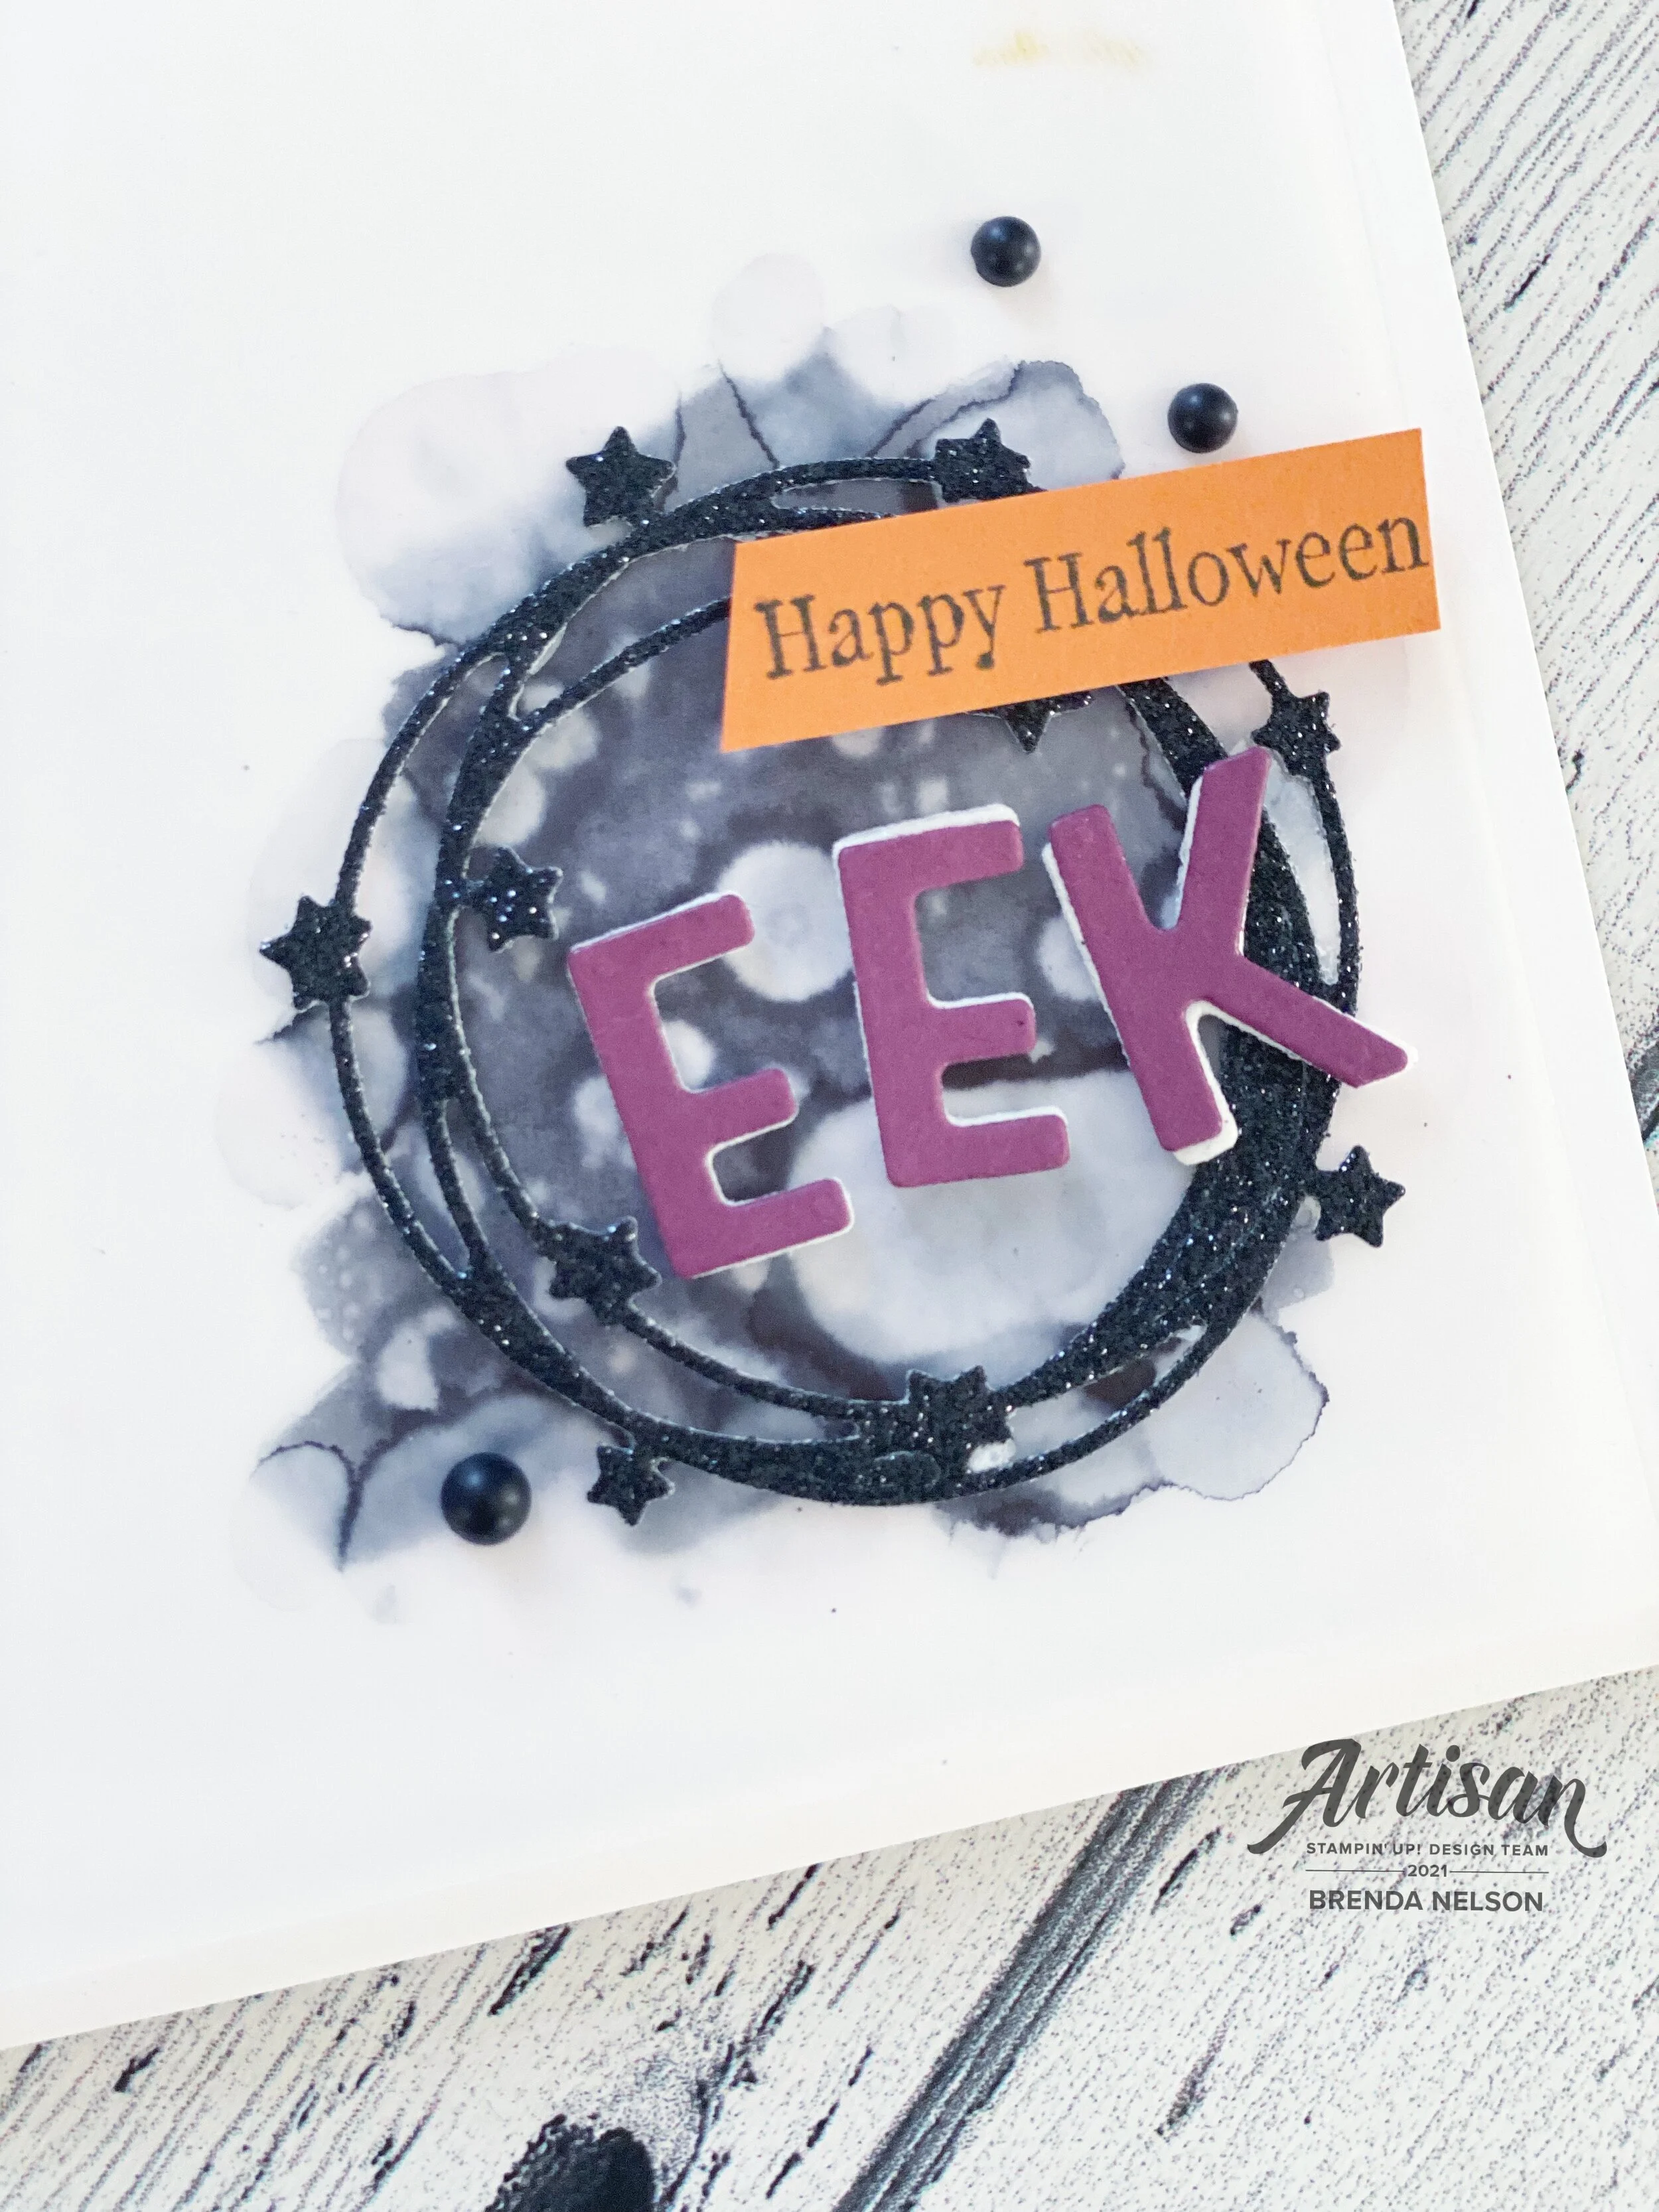
For this card I started with a base of Basic White. I used the same technique, coloring a squiggle with my Basic Black Stampin’ Blend marker in the bottom right corner of the vellum. Remember, you need vellum for this cool technique to work.

I added a few light droplets of the Isopropyl alcohol to this area and let it work its magic!

final (1) 13.jpg

I cut a glittery star wreath using the Seasonal Swirls Dies and added to my Stampin’ Blend area with a few Glue Dots. I cut out EEK from Rich Razzleberry card stock using the Playful Alphabet Dies and the Foam Adhesive Sheets.

Happy Halloween can be found in the Frightfully Cute stamp set and is stamped with Momento Black Ink on Pumpkin Pie card stock.

A few Matte Black Dots and this fun Halloween card is complete!

I really hope you will give this technique a try! Its super fun and easy!

If you are in Canada and are inspired by any of my Halloween projects, please consider shopping with me! I would love to be able to keep doing what I love, which is stampin’ in my stretchy pants!

Eyeball Jam, in a Jar of Course!

Who doesn’t love a jar of eye balls? Only in October though right? I couldn’t resist finding some fun things to put into our Jam Jars for Halloween. And it is actually surprising how much you can fit into one of these little jars!

final (21) 3.jpg

Let’s talk about the jar first! Once I had filled it with my eyeball jam, I decided to cover the lid with some DSP from the Cute Halloween 6x6 DSP stack in the polkadot pattern. This pattern allowed me to introduce a variety of colors into this project as well. I add the topper to the jar with Tombow Adhesives so it was really sealed down.

“Witch Way to the Candy” is from the Frightfully Cute stamp set. I just love a good play on words, don’t you? I stamped the sentiment in White Craft Ink and embossed it with White Embossing Powder on Basic Black cardstock.

I added some of the Black & White gingham ribbon around the lid of the jar. I colored it with the Old Olive Stampin’ Blends! So easy and fun!

I wanted my jar to be in a little holder so I created a really easy box bottom——

After making the little box for the Jam Jar to sit in, I added a second back piece to give me an area or surface to add in a sentiment. I attached this to the inside back of the box with Tear & Tape so it was really secure. I covered this panel with another print from the Cute Halloween DSP. I love all of the different fonts of the ‘boo’ printed on this DSP.

final (21) 3.jpg

I leaned into my trusty spiderweb again—seriously, I have gotten my money’s worth from the Frightful Tags Dies!! This time, I cut it from Highland Heather cardstock.

The sentiment, Happy Haunting, is stamped in Old Olive ink and is from the Banner Year stamp set. The little webs are from the same stamp set and are stamped with Smoky Slate ink with a marker spray of Calypso Coral over top! Behind the sentiment I added some Black twine from the Bakers Twine Essentials Package. Both the stamp set and twine are in our Annual Catalogue. The spooky bat is also from this stamp set and needs to be hand trimmed. A mini Black Dimensional fit perfectly behind the bat to add it to the web.

Now, this happy spider is from the Cutest Halloween stamp set and he also fits a mini Black Dimensional behind his body!

final (41).jpg

I think this project would make such a cute gift for a teacher or a coworker who loves Halloween! It can sit on their desk like a bit of a display piece until their willpower gives out and they need to eat their eyeball jam!

Tombstone Treat Boxes

Have you seen these amazing Tombstone Treat Boxes yet? They are so fantastic! They are easy to assemble as they have areas with adhesive strips already built in! So you do not need to add in any of your own adhesive! YAY! And they actually fit a decent amount of stuff inside! I decided that I could add some treats AND a little mini card!

final (1) 5.jpg

I wanted the feeling of a halloween spooky sky to anchor the little black tree so I die cut a Pumpkin Pie circle with the Layering Circles Dies. I added it to the box and then snipped off the edge. I took my Rich Razzleberry Stampin’ Write Marker and flicked it across the circle and box.

The trees are cut from Basic Black cardstock using the Frightful Tags Dies. I added one on the circle and one poking out from the top. I then tied a length of the Bumblebee Gingham Ribbon around the box.

Over top I added the sentiment, Happy Haunting, on Highland Heather cardstock, stamped with Momento Black Ink. I added a marker spray with my Highland Heather marker over top and added this circle with a Dimensional.

The happy bat is from the Banner Year stamp set and is stamped with Momento Black Ink on Bumblebee cardstock. You will need to hand trim this little bat and add it with a mini Black Dimensional to the tree.

Lastly some Cute Stars Adhesive-Backed Sequins were added to the box! Voila! A fun Tombstone Treat Box!

final (22) 3.jpg

I measured the dimensions of the inside of the Tombstone Treat Box to create the little mini card. I thought it was a neat way to add a little message on top of your treats!

final (45).jpg

The base of the mini card is Basic Black and I added a layer of Basic White over top. I used my Blending Brush with Bumblebee ink to create a little halo for my tree to rest on. The little bats are from the Little Delights stamp set and are stamped using Momento Black Ink.

The sentiment, Batty for You, is from the Frightfully Cute stamp set on Highland Heather cardstock. And this time for the inside, I stamped the happy bat on Pumpkin Pie cardstock to add to the tree!

If you are loving this Tombstone Treat box—stayed tuned! I have some other projects designed to share with you this month! However, I definitely encourage you to order them sooner than later! You don’t want to miss out on these!