Be Inspired--Triadic Color Theory!

Hi friends! Welcome to the Be Inspired Blog Hop! I love creating with this fun crew of people and I hope you will visit all of our blogs and leave us some comments!

This month the crew is creating projects featuring Triadic Color Theory! You can find this in the Annual Catalogue—its such a cool resource, especially if you are looking to mix things up in terms of color. I know I have my favorite go to colors, so it is nice to step outside the box occasionally!

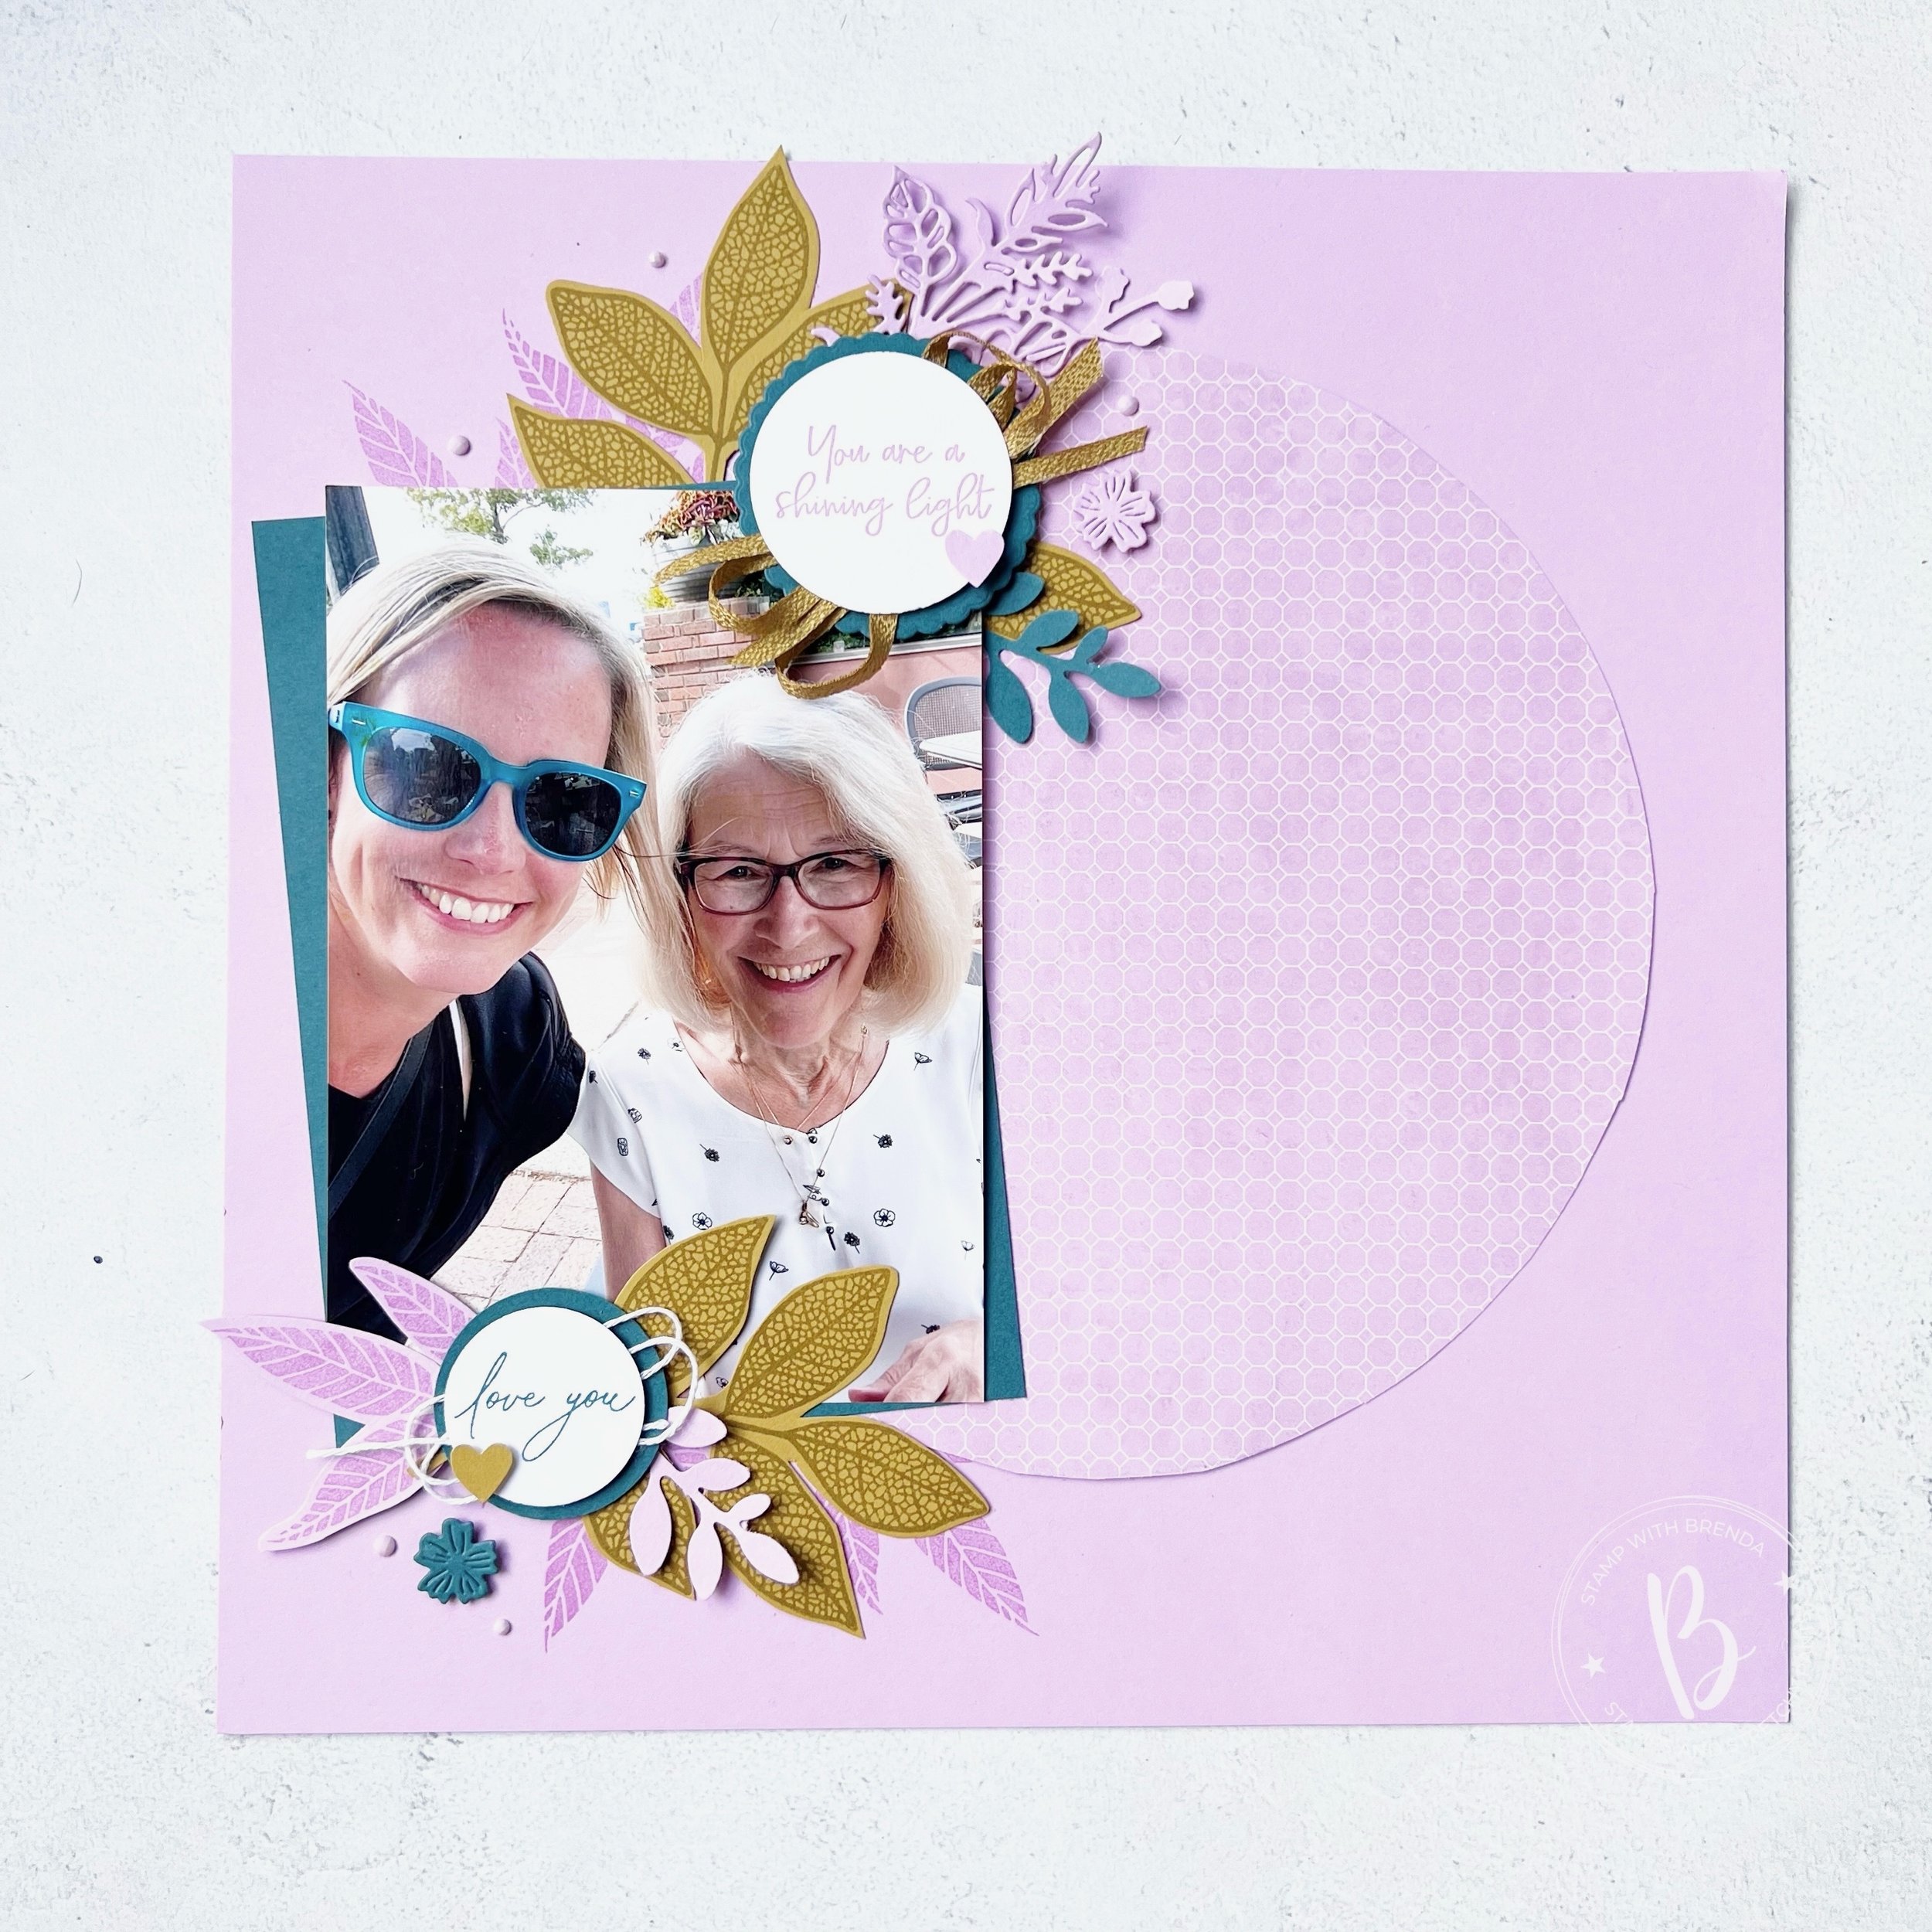
I decided to use the combination that is on the bottom of the right page— Fresh Freesia, Wild Wheat and Pretty Peacock. I can confidently say I have never crafter before with this combination, however I am IN LOVE with how my project turned out! I hope you will give this combination a try yourself after seeing how awesome it looks!

I started with a base of Fresh Freesia. I had this design in mind and I knew that in my personal stash, I have alot of 12x12 DSP to match in Fresh Freesia. This particular print is from some Sale a bration DSP. I used a 9 inch paper plate to trace the circle and just cut it with scissors! Such a fun way to use DSP, I think I might CASE myself!

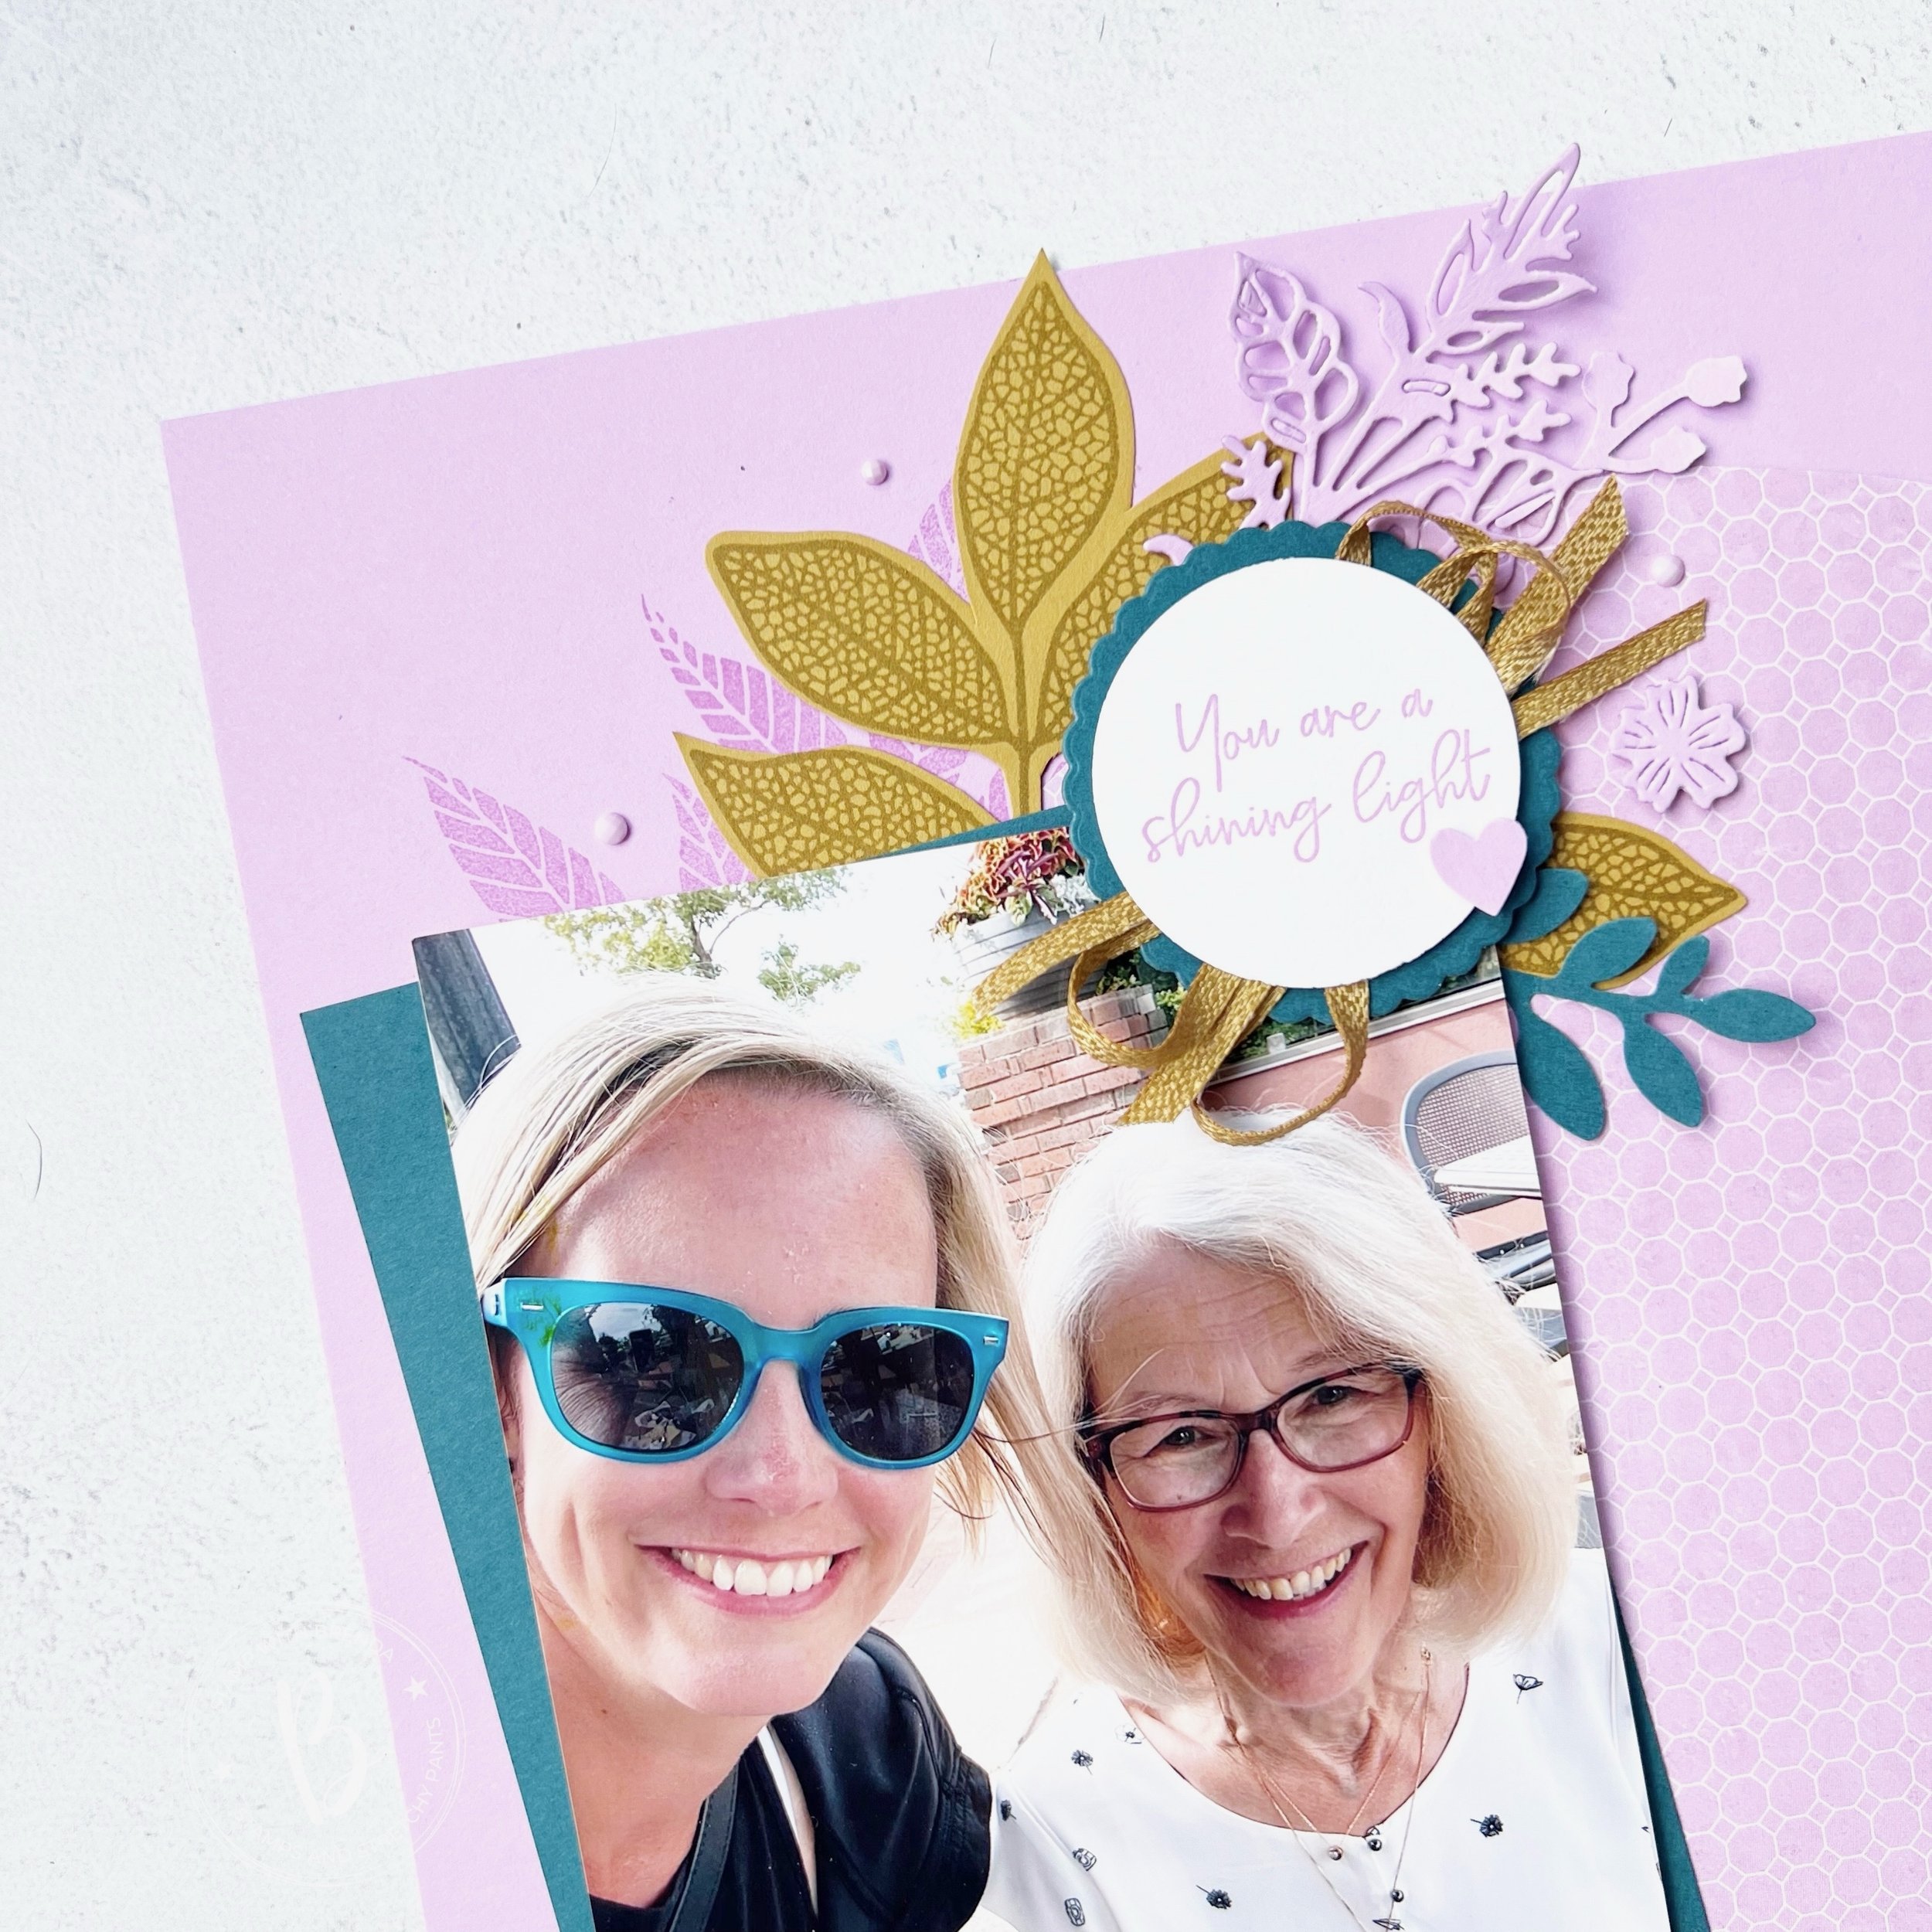
My photo mat is in Pretty Peacock to showcase this picture of myself with my mom a few summers ago.

I am a fan of coordination and it is a happy accident that my sunglasses just happened to match!

On this page, the showstopper is this new bundle that will be available to order in the Online Store in July. I am obsessed. It is a MUST HAVE. It is an amazing new hybrid bundle called Changing Leaves. And while it appears ‘fall’, it definitely does not have that vibe on this scrapbooking page!

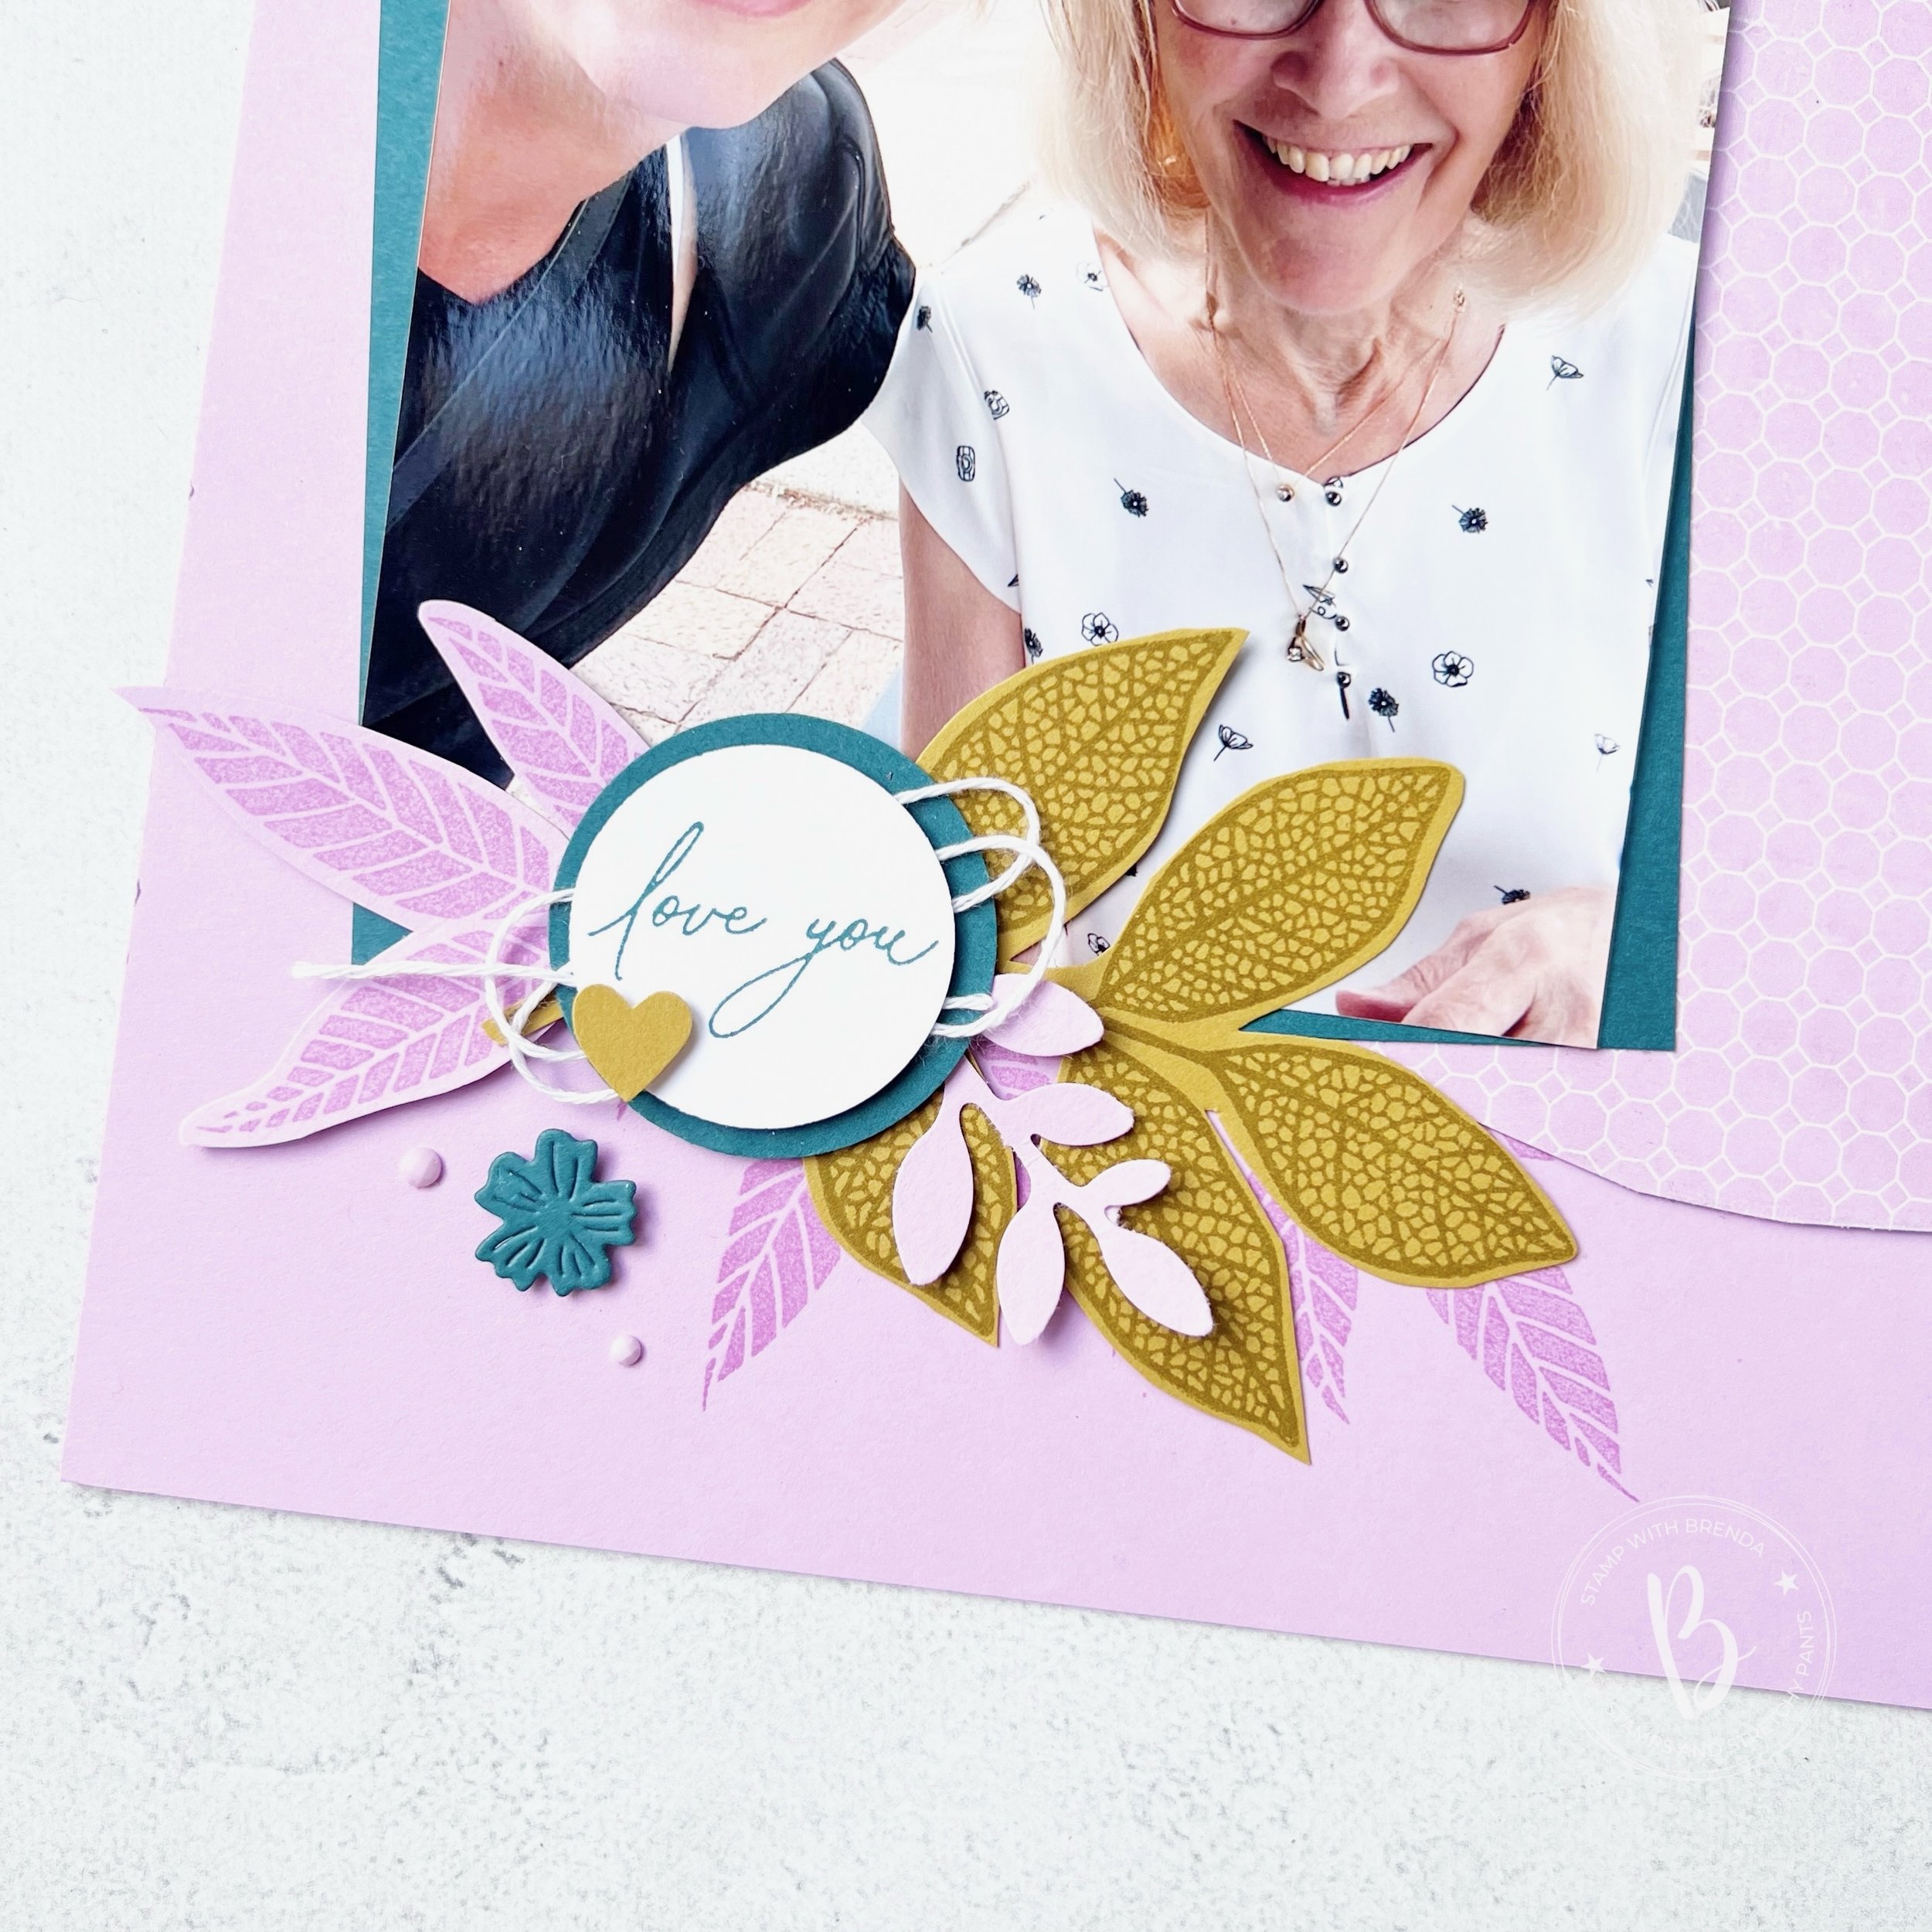
The largest of the leaves in the stamp set is stamped with Wild Wheat ink on coordinating card stock. The midsized leaf is stamped in Fresh Freesia on coordinating card stock. I added some directly to the 12 x 12 and some as elements.


The sentiment “You are a shining light” is from the You are Beautiful stamp set in our annual catalogue. I added a scalloped circle behind, die cut in Pretty Peacock card stock using the Round We Go dies.

I used a length of Wild Wheat ribbon that I cut in half to bring life to the sentiment. I also added a die cut from the Flowers of Beauty Dies and a spring from the Bough Punch.

The sentiment ‘Love You’ is from another new set, Everyday Greetings, that you will be able to order in July under the Online Exclusive section. I added a bit of white thread and a cute little heart from the Bee Builder Punch.

The little die cut flowers are from an unknown die set—haha! I didn’t put it back and its been too long to remember where it goes! I am sure I am not the only person who has some ‘homeless’ dies.

I really love this scrapbooking page and I am so glad that I was encouraged to use this fun amazing new color combo! It is definitely one that I will try again, maybe on a card design!

Next up on the hop is a fellow Canadian, my friend Carolynn! She lives a couple of hours away from me and I am pretty sure she cheers for a different hockey team! haha! Go Oilers!

Click the link below to visit her blog and see her crafty project!

If you are inspired and are looking to place an order, please consider shopping my store! Your support allows me to keep doing what I love!


So Happy...

Today I committed to making a project that was just for myself—this might sound crazy but with all of my Artisan commitments and the various classes and groups I offer, most of my creative time is designated to that. So it was refreshing to make a scrapbook page, my favorite thing, for just me and to display in my crafty space!

IMG_4767.jpg

This is a picture from a family photo shoot 2 years ago already! Sometimes, moms can relate, I just can’t wrap my head around the passage of time. The days can be long but the years go fast, is such a perfect way to describe ‘time’ and this motherhood journey!

I started with a base of Basic White because I really wanted to use the So Happy bundle. I have had it sitting on my craft table for the last month and was itching to create a stencil of sorts to create some clouds. I also wanted to use this set in a non-traditional way as at first glance it looks like a birthday set. With a little creative design I think I did create a page that has nothing to do with birthdays!

I used Pool Party and the new Blending Brush to create the clouds. You could use any of our amazing blues, but I find Pool Party and Pretty Peacock look amazing together. I will be sad to say goodbye to Pretty Peacock next month but I am also excited to see the new In Colors that will be released.

I cut a ‘stencil’ using the cloud die from the Happy Die Set and then used its edge repeatedly create a cloud like look on my page.

I cut a ‘stencil’ using the cloud die from the Happy Die Set and then used its edge repeatedly create a cloud like look on my page.

I blended the clouds about half way up my page and added two feature areas to the page. The top left little area is where I was able to introduce Calypso Coral and Petal Pink—two other colors that I find look amazing together. The half 2 inch circles are from the new and exclusive Butterfly BIjou DSP and had a similar shape to the clouds which I liked.

Using the dies I was able to cut out the little banner in the Natural Touch Specialty Paper. I sniped it apart so it looks longer than it is in reality. “Happy” is stamped in Pretty Peacock and then cut with a Stitched Rectangular die.

I love to add texture and interest to my sentiments by combining different ribbons. Here i used the Polkadot Tulle ribbon and the gold thread from the Forever Greenery Trim Combo Pack.  The Gilded Gem and itty bitty gold star (from the dies) just ad…

I love to add texture and interest to my sentiments by combining different ribbons. Here i used the Polkadot Tulle ribbon and the gold thread from the Forever Greenery Trim Combo Pack. The Gilded Gem and itty bitty gold star (from the dies) just add a fun element!

What I also love about this bundle is how the different phrases build off of the word HAPPY. I was able to cut the die down a bit from its initial form to change its appearance a bit too. I cut the ‘Happy’ out of the Natural Touch Specialty Paper as well. This helps tie the two feature areas together.

I also modified how the ‘Happy’ looked by trimming the top edge off of the die and shortening the edges.

I stamped ‘to have you in my life’ on Petal Pink Card stock and stamped the stars in the same color. I used Calypso Coral for the actual sentiment. The stars are stamped using the four colors that make up this page and also serve to create continuity across the page.

IMG_4768.jpg
 

Making this page just filled my cup today! I am so blessed that my hobby is something I love so passionately and has become a business that has allowed me to stay close to home to raise my kids.

If you are inspired by this page and want any of the project supplies I used, please feel free to shop my store or use my Hostess Code!

IMG_4770.jpg

Color Fusers-December 2020


Hello everyone! I am SO EXCITED and honoured to be a new participant in the Color Fusers Blog Hop. The talent line up in this Hop is truly like no other so when they reached out to ask me to join, I had to pinch myself!

colorfusers.jpg

If you haven’t followed along before, welcome! Each month we create projects that feature a trio of colors. There are so many fantastic colors offered by Stampin’ Up! and this is a great way to showcase them and get you stamping with different color combos!

For December we are playing with Night of Navy, Pretty Peacock and Granny Apple Green (my favorite of all our greens!).

IMG_8865.jpg
final 3 4.jpg
 

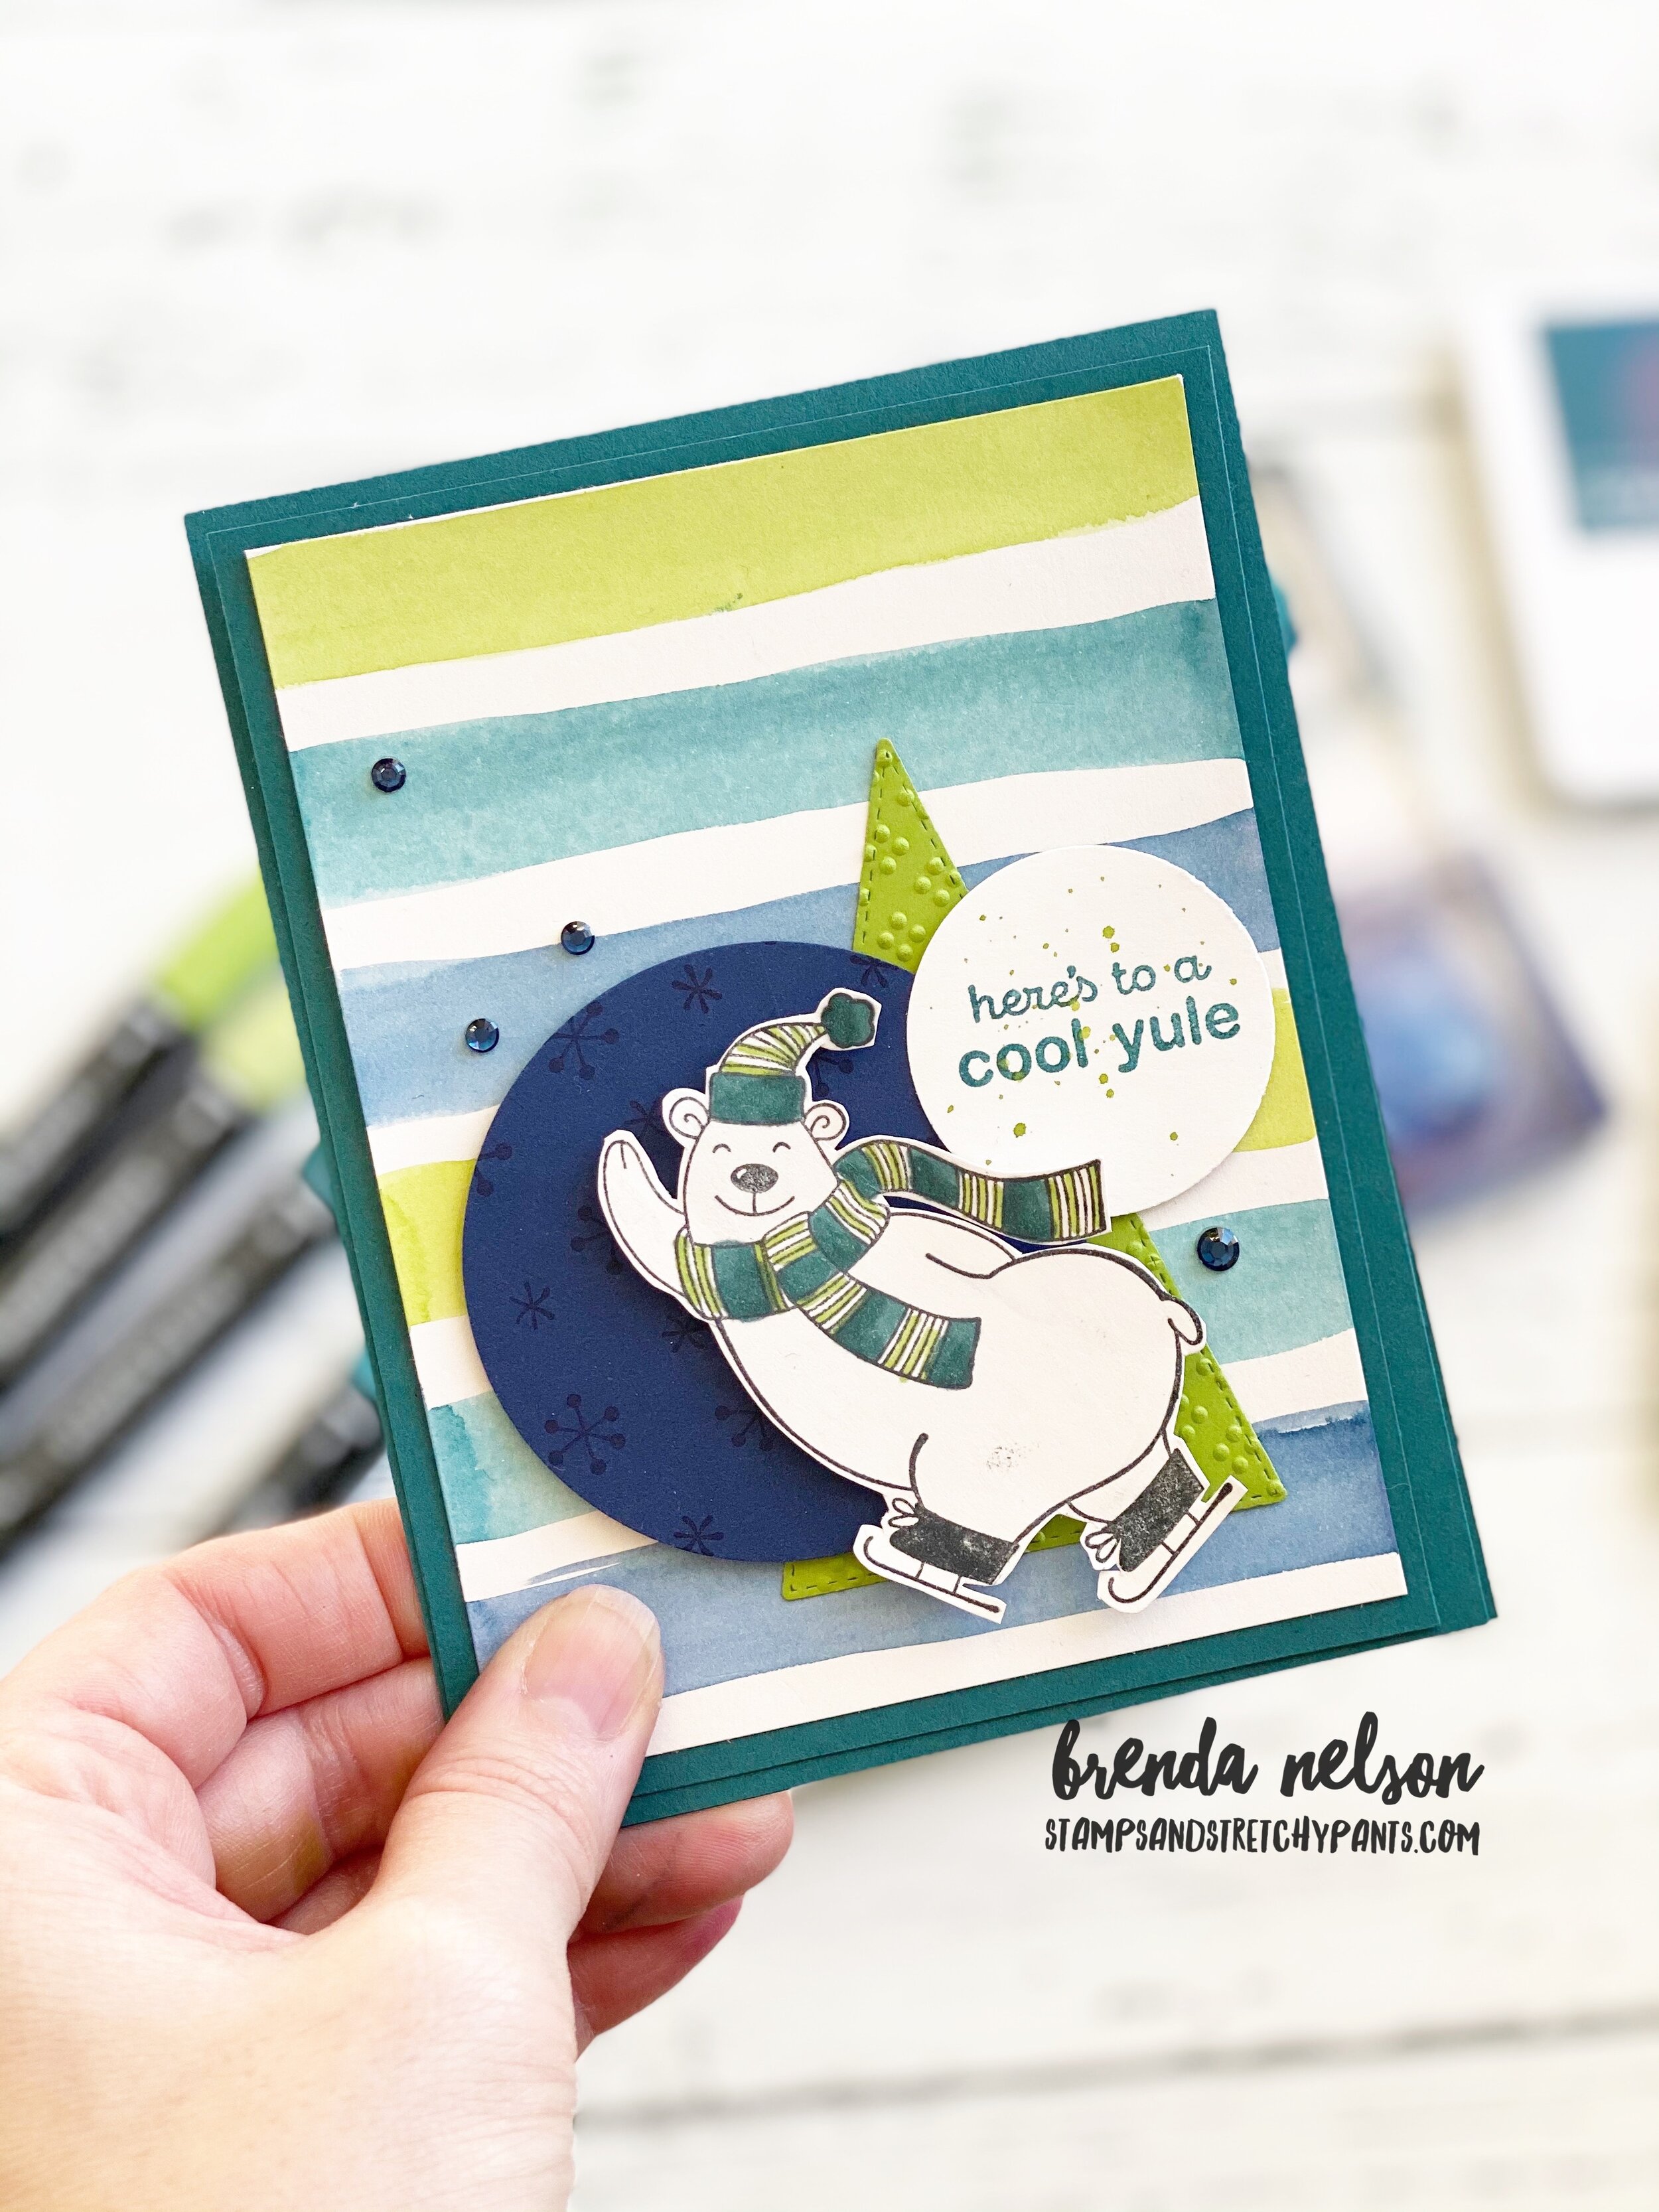
Because it December I wanted to create a fun holiday card using these colors and the cute polar bear from Warm & Toasty. He is just too much fun!

I started with Pretty Peacock as my card base and first layer. I then took a piece of Shimmery White, its a little thicker and can hold water a bit better, and using the widest brush tip from the Water Painters I made some stripes in the three colors.

Granny Apple Green, Pretty Peacock and finally Night of Navy.

final 3 3.jpg

Its actually quite easy to create custom stripes on your projects. If you don’t have the Water Painters, you can even use your Stampin’ Blends.

However in this instance I used the large Water Painter brush and added the three colors onto our acrylic blocks. I just smash the ink pad a couple of times onto the block to leave some ink behind. You then squeeze a bit of water onto the ink on the block and start creating!

final 3 4.jpg

Once my background was done I colored my polar bear’s scarf and toque with my Stampin’ Blends, which are offered in all three of these colors! You will need to hand cut this little guy as this stamp set does not have coordinating dies.

The tree is cut from Granny Apple Green cards stock with the Stitched Triangle Dies and ran through an embossing folder from the Wrapped in Texture duo.

The circle is the largest offering in the Circle Dies and I stamped little bitty snowflakes in the background with Night of Navy Ink.

The sentiment is stamped in Pretty Peacock and I flicked my Water Paper across it for a splash of green. A few of the Holiday Rhinestones were the perfect touch.

I am really happy with how this card turned out and I have already made a different one with a different color combo that I will be sharing later this month! Thank you for hoping along!


You can head backwards if you are just going in to see what Nicole has created or you can go Next to see what awesome project Melanie has designed! Please feel free to leave a comment!

final 14.jpg