Create with Connie and Mary--Christmas Favor

Hello friends! I really love the holiday season as its such a fun opportunity to share little gifts and treats with everyone. I know this season looks very different for many of us, but I was still able to make a few fun things to give away!

Design Team.png

One of my favorite things in the Handmade for You catalogue are the mini coffee cups and little carrier! I have used them for so many things. The possibilities are just endless!


I just knew I had to dress one of these carriers up using a combo of the Heartwarming Hugs Suite (one of my favorite of all time!) and the Sweetest Time Bundle. I just love a good candy cane image!

final (8).jpg

I started in covering the carrier on all four sides with a pattern from the Heartwarming Hugs Designer Series paper. I loved the stripe pattern as it allowed me to use both reds and greens in my design.

I embellished the left side with “Eat Drink and be Cozy” and layered it using the Warm Wraps Dies. I just loved all the possible combinations with this die set. I think it will be a keeper for me! The Real Red Sheer ribbon was a great addition to this layer because it is still light and airy with a wonderful texture to the ribbon.

I added in some stamped and die cut candy canes and some leaves, both stamped and some just die cut. I just love how it all came together.

final (7) 2.jpg

One of the great features of these coffee carriers is that they are sturdy enough to hold a mini bottle of champagne! Whoo Hoo! On one side of my project I have a decorated champagne bottle and on the other I have a mini coffee cup full of Baileys Irish Creme chocolate (you know, for your ‘coffee and baileys’ ).

I wrapped some of the Mossy Meadow Diagonal Stripe ribbon around the bottle neck and added “A Little Something for You” which I embossed with White Craft Ink and embossing powder on Real Red card stock. It is also cut using the Warm Wraps dies.

I wrapped some of the Mossy Meadow Diagonal Stripe ribbon around the bottle neck and added “A Little Something for You” which I embossed with White Craft Ink and embossing powder on Real Red card stock. It is also cut using the Warm Wraps dies.

final (11) 3.jpg
 

Of course I had to decorate the lid of the Coffee Cup and I made a custom coffee cozy using the Festive Felt (what a fun product offering) and the Warm Wraps dies.

On the lid I wanted to keep things traditional red and white, candy cane colors, and I added little candy cane stamps to the top. So cute!

final (11) 2.jpg

I was easily able to cut the Festive Felt with the dies and assemble everything together using a hot glue gun. I think this custom coffee cozy is the best!

I know the other gals have created some amazing projects as well! You can go BACK to see what Melissa has created or you can go NEXT to see what Connie has designed. Please feel free to leave comment! I love getting your feedback!


Create with Connie and Mary--Christmas Gift Card Holder

This week we are sharing “GIFT CARDS” which is one of my favorite holiday items to make. For several years, I have been married for 20 so I have honestly lost count of when I started this tradition, I have been doing ‘12 Days of Gift Cards’ for my husband. He was hard to buy for so this was a fun solution. And of course, each gift card has to have its own gift card holder! So needless to say, I was really excited to share this idea with you!

Design Team.png

I am really loving the Warm and Toasty stamp set in the Handmade for You catalogue and I couldn’t resist adding this happy polar bear to a project.

This is a bit of unique gift card holder because it really could double as a gift card holder AND just a regular slider card. I usually add my gift card with a Glue Dot and I like that I can also write a message.

Full disclosure though—for my hubby’s gift card holders, I write nothing as I steal them back right after he has removed his gift card :). I actually have quite the sentimental gift card holder collection. Is that weird?

giftcard.jpg
 

It is actually quite easy to create this fun gift card/slider card combo. Esentially you want to create a ‘wrap’ to go around your gift card base. The base is 4 x 5 and I cut mine from Sahara Sand card stock and layered a piece of Whisper White on top.

I created an easy pull tab with the wide green Shaded Spruce ribbon from the Wonder of the Season combo pack. I stapled it to my base and hid a snowflake cut from the Blue Glimmer Paper and the So Many Snowflakes dies.

final 4 2.jpg
giftcardholder.jpg

To create the ‘wrap’ you will need to cut a piece of card stock to 4 1/4 x 8 1/2. Score at 2 1/4 and 6 3/8. I then used a 2 1/4 circle punch to snip a half circle out of the middle panel.

You can create a front layer piece by cutting a different color of card stock, I used Just Jade, to a 4 x 4 square and then stamp as desired in coordinating ink.

I added a strip of DSP from the Feels Like Frost collection and another strip of the Blue Glimmer paper to look like ice for my cute polar bear to skate on. You will have to hand cut this cutie as there is no coordinating die.

I hope you enjoy the rest of the great gift card holder ideas on the blog hop today! You can go BACK to see what Melissa has designed or NEXT to see what Connie has created!

A Card a Day in December--Holiday Style!

Hello friends! It’s December, which means we have finally made it to the last month of 2020. We did it, we are surviving a pandemic, we are managing a thousand things at once—our families, households, jobs, our stamping and hobbies, our pets, our Netflix addiction and the list goes on and on! Which is why, I want to be fully present in this holiday season. Somehow, it means just a little bit more. Gone are many of the things we have been able to enjoy in the past. However, I am blessed to still be creating and loving what I do.

So today is Day 1 of my A Card a Day in December—Holiday Style Event. I am going to share 25 holiday cards or projects and end the month with a week of New Years Cards! So I hope you are ready for your daily dose of inspiration!

 
IMG_0080.png
 
Don’t you just love coordinating projects? I do! they are so fun to give as a little gift and I don’t think anyone will mind getting a cute little hand sanitizer project  this season!

Don’t you just love coordinating projects? I do! they are so fun to give as a little gift and I don’t think anyone will mind getting a cute little hand sanitizer project this season!

My first project I want to share is this fun holiday card and matching hand sanitizer project! I decided to use a traditional color palette of Real Red, Whisper White and Old Olive!

I used the Little Treats Bundle as the starting point of my card and hand sanitizer holder. I stamped the little candy stamps around the phrase in Real Red. I cut a strip of Real Red card stock that I embossed with the Wrapped in Texture embossing folder. I added a polka dot strip of DSP from the Trimming the Town Designer Paper on top.


The sentiment is from the Little Treats stamp set and is stamped in Old Olive ink on Pear Pizzazz card stock. I added some ribbon from the Ornate Garden Ribbon combo pack and the silver cord is from a past Paper Pumpkin kit.

I added a few embellishments from the All the Trimmings collection and a classic Jewelled Rhinestone.

This card is simple but cute and easily reproducible!

final 2.jpg
final 4.jpeg
 

This little project is one of my favorites! I was so happy when I realized that a mini hand sanitizer could fit inside!

The Little Treat Box dies are so easy to use and assemble and I love that you can get two out of one piece of 8 1/2 x 11 card stock.

The candy canes are from the Sweetest Time Bundle which has been a well used stamp set in my craft room this season!

The stitched scallop circle is included in the Little Treat Box dies too!

I hope you have enjoyed my first card in A Card a Day in December—Holiday Style!


Create with Connie and Mary--Home for the Holidays!

Hello and welcome to our weekly Saturday Blog Hop! This week we are sharing projects with the theme “Home for the Holidays” so naturally I thought of the Trimming the Town suite as it has stamp images to create a bunch of different homes!

Design Team.png

Recently my team had a virtual meeting and we made a Cube Card together! Have you tried this fun fold style yet? I actually thought it would be complicated but its actually surprisingly easy!

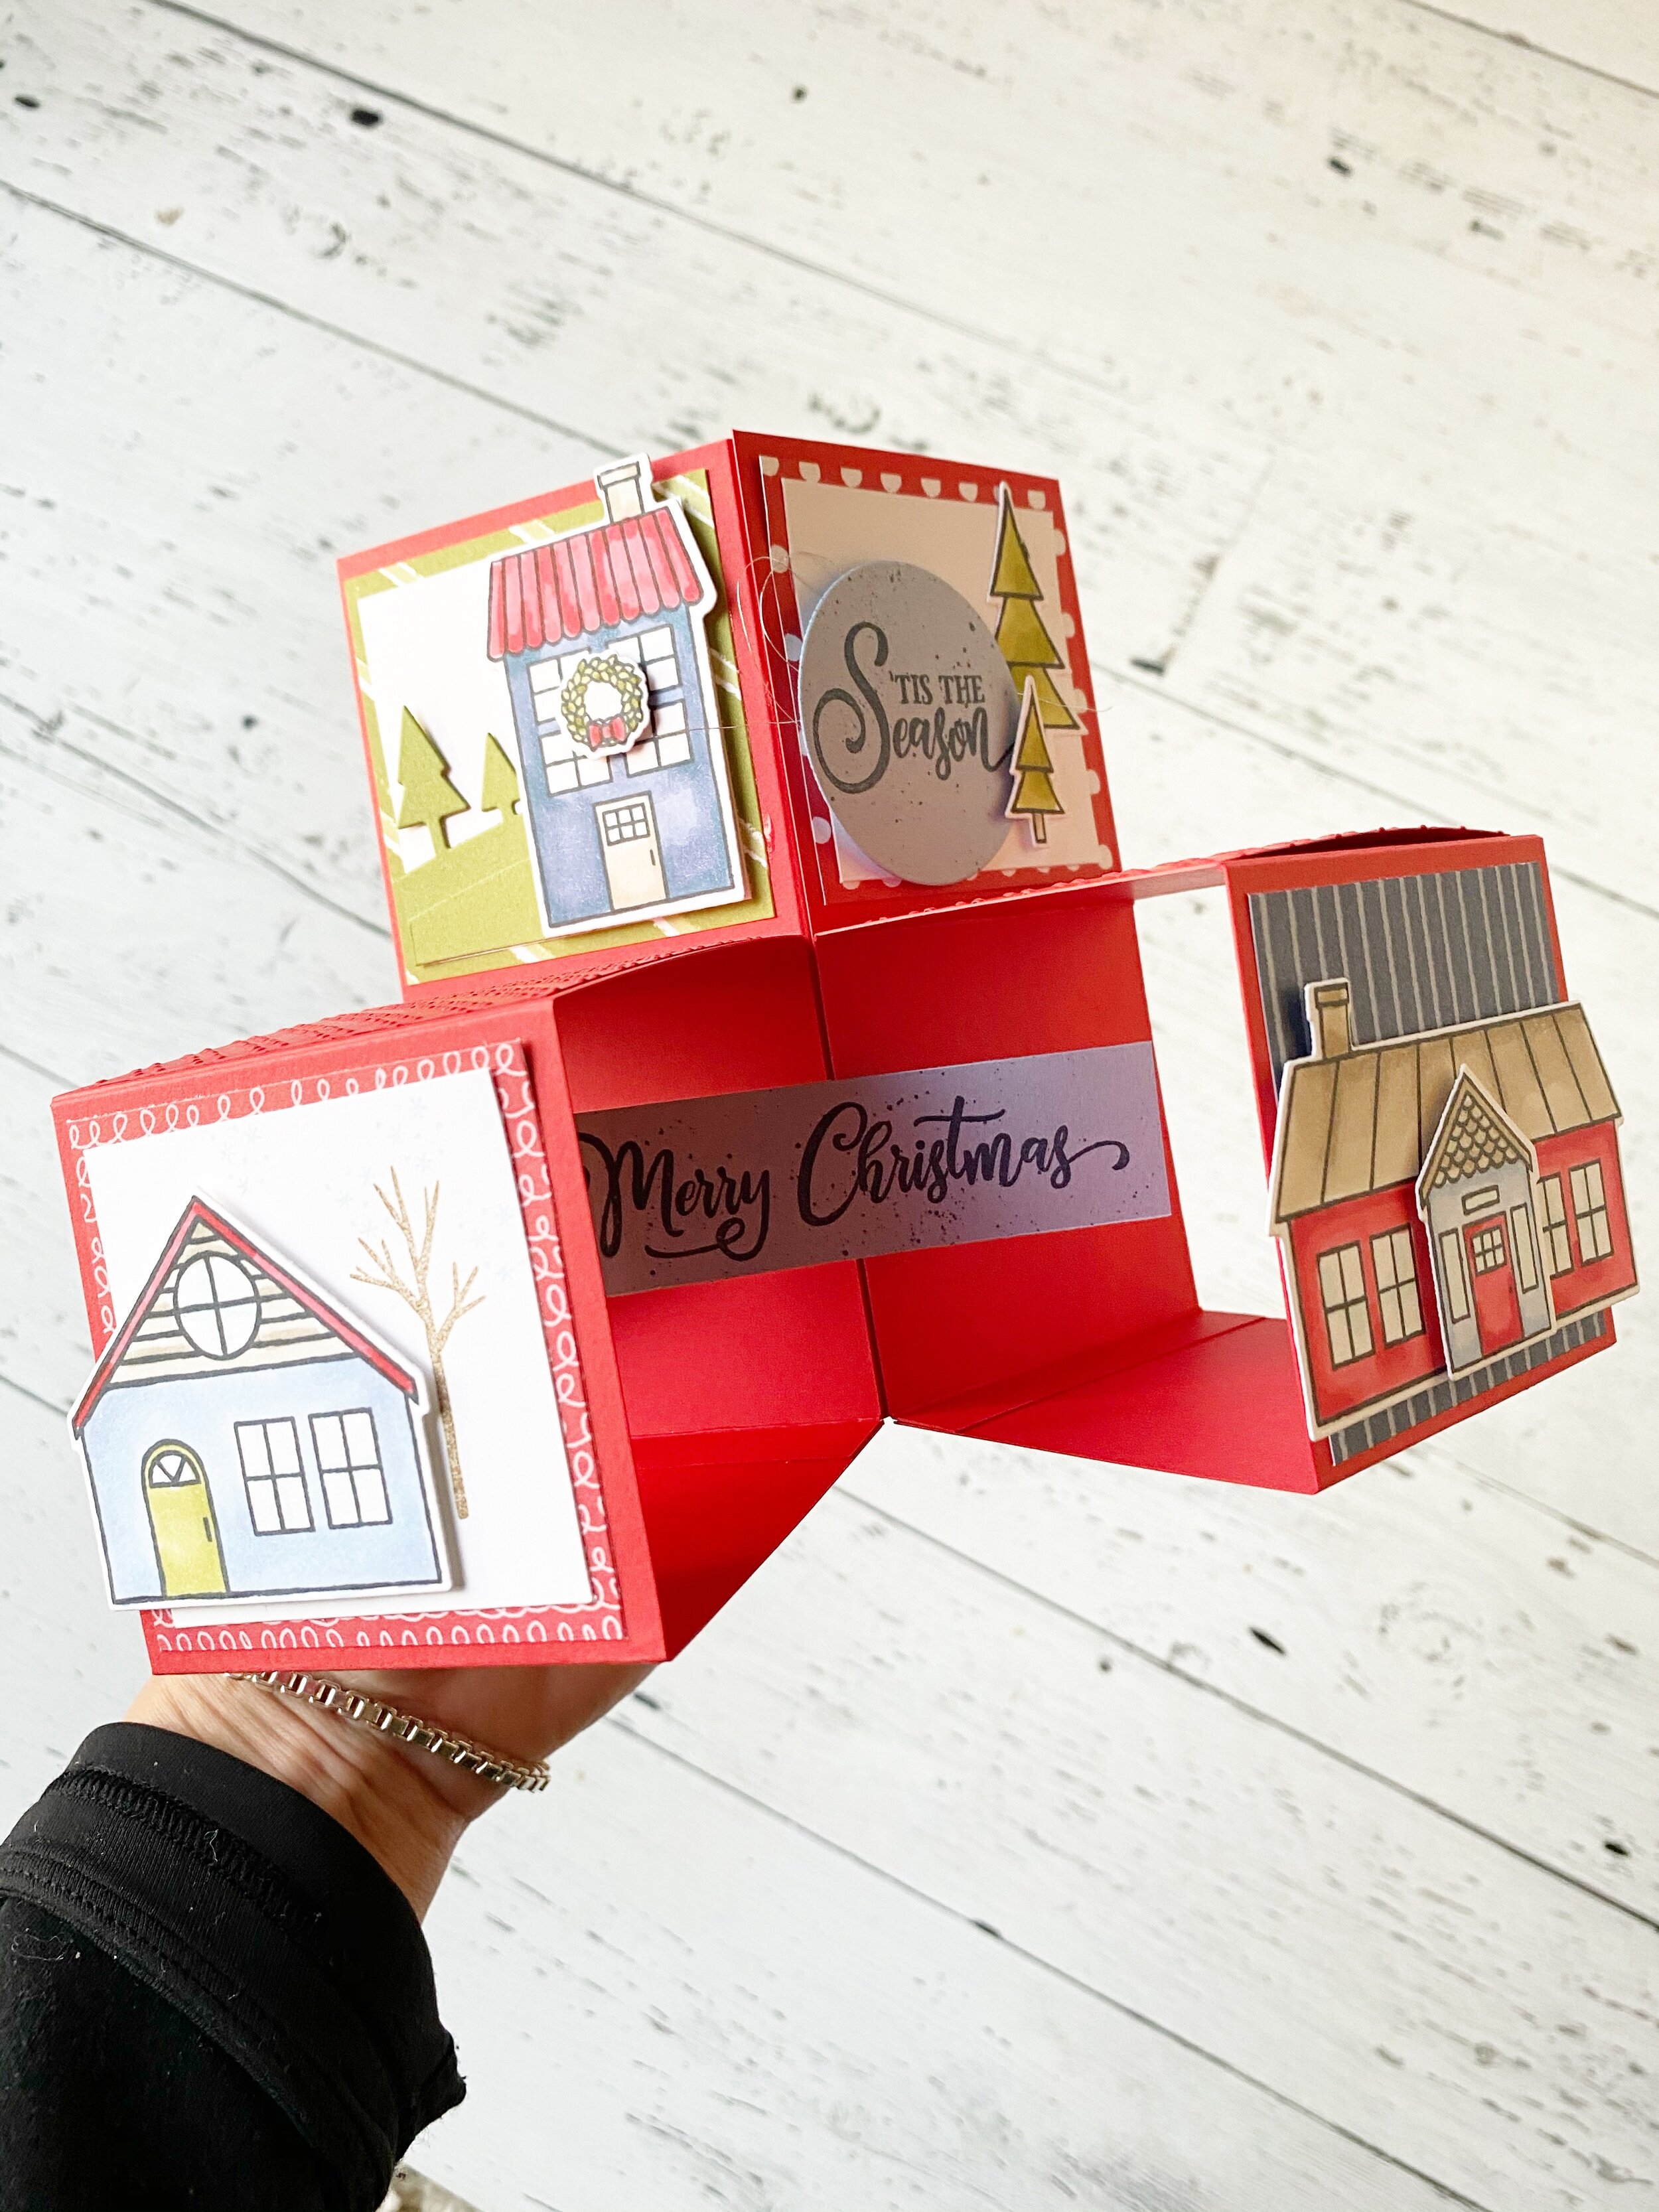
This is my ‘Home for the Holidays’ themed Cube Card! I really enjoyed designing the panels and putting this project together.

This is my ‘Home for the Holidays’ themed Cube Card! I really enjoyed designing the panels and putting this project together.


To create a cube card you will need a piece of 12x12 card stock. I used Poppy Parade as my base because its coordinated with the Trimming the Town DSP.

On your trimmer cut down one side of the 12x12 to 11 1/2 inches. On this side (11 1/2) SCORE at 2 3/4, 5 1/2, 8 1/4 and 11.

Rotate the paper so your 12x12 length is across the top and CUT at 2 3/4, 2 3/4 and 5 1/2. Thus creating 3 strips of paper—-2 will be at 2 3/4 width and one at 5 1/2 width

.

final.jpg

You will notice that you have a 1/2 inch section and this will be where you will add your adhesive to fold your paper into cubes. You will have two cubes that are 2 3/4 wide and one that is 5 1/2. The largest one is the base.

final.jpg

You will attach each of the smaller cubes to the largest cube, ONLY adding adhesive to the bottom cube. If you glue the whole thing is will not pop up into the cube card shape.


Hopefully this visual helps you as well. There are a bunch of YouTube videos you can also watch on how to create a Cube Card.

Once you have the basic design mastered, decorating and embellishing is all up to you! I decided to mix up some of the panels with DSP and card stock that I ran through the Wrapped in Texture embossing folders from the Heartwarming Hugs suite.

I added in Merry Christmas and ‘Tis the Season from the Tag Buffet stamp set.

final.jpg
fullsizeoutput_1363e.jpeg

I hope you are inspired to give this fun Cube Card design a try! My team had a lot of fun putting its together and I challenged them to share their finished design on our group page.

I can’t wait to see what the other gals create this week! You can go BACK to see what Melissa has designed and NEXT to see what Connie has created!


On Stage 2020--Team Gifts

Despite the fact that I can’t be celebrating and stamping’ in person with other demonstrators, I am still excited for our Virtual On Stage event taking place this weekend and was excited to make some fun gifts for my team that featured some brand new product being released!

If you haven’t already discovered this from previous blog posts, I LOVE these Mini Coffee Cups and Coffee Carrier.  I mean, really, you an convert them into anything theme and fill them with so many fun things!

If you haven’t already discovered this from previous blog posts, I LOVE these Mini Coffee Cups and Coffee Carrier. I mean, really, you an convert them into anything theme and fill them with so many fun things!

This new bundle is called Dandy Garden and includes a dragonfly punch, stamp set, designer paper, braided linen trim, and the cutest little ladybug trinkets!

I used the Warm Wraps dies to create a sleeve for the mini coffee cup using the new designer paper and Misty Moonlight DSP.


I filled the mini coffee cup with a Starbucks Instant Latte and added a sentiment from the stamp set to the top.

Everyone received a set of blends that coordinated with the designer series paper.

And the Rectangular Tins are the perfect size to hold some Merci Chocolates!

I stamped one of the images from the stamp set on some Bumblebee card stock and rounded the edges to match the shape of the tin. I stamped the sentiment on some of the DSP and cut with a Stitched Circle. A little metallic thread and some Misty Moonlight ribbon and they were complete!

final.jpg
final.jpg
The dragonfly punch is designed to punch out two sizes of dragonfly’s.  Isn’t this little one so cute? It is punched from Mossy Meadow card stock.

The dragonfly punch is designed to punch out two sizes of dragonfly’s. Isn’t this little one so cute? It is punched from Mossy Meadow card stock.

I really hope my team enjoys their gifts and all the fun and knowledge that comes from our On Stage events. If you are ever interested in joining my team, I would love to have you! Click on the link below to sign up directly with me!