Happy 50th Anniversary!

Did you know that can make Custom Cards? It is a service that I offer if you do need an extra special project! I have experience designing custom wedding invites, baby shower invites and even anniversary cards like this extra special one I made for my friends parents!

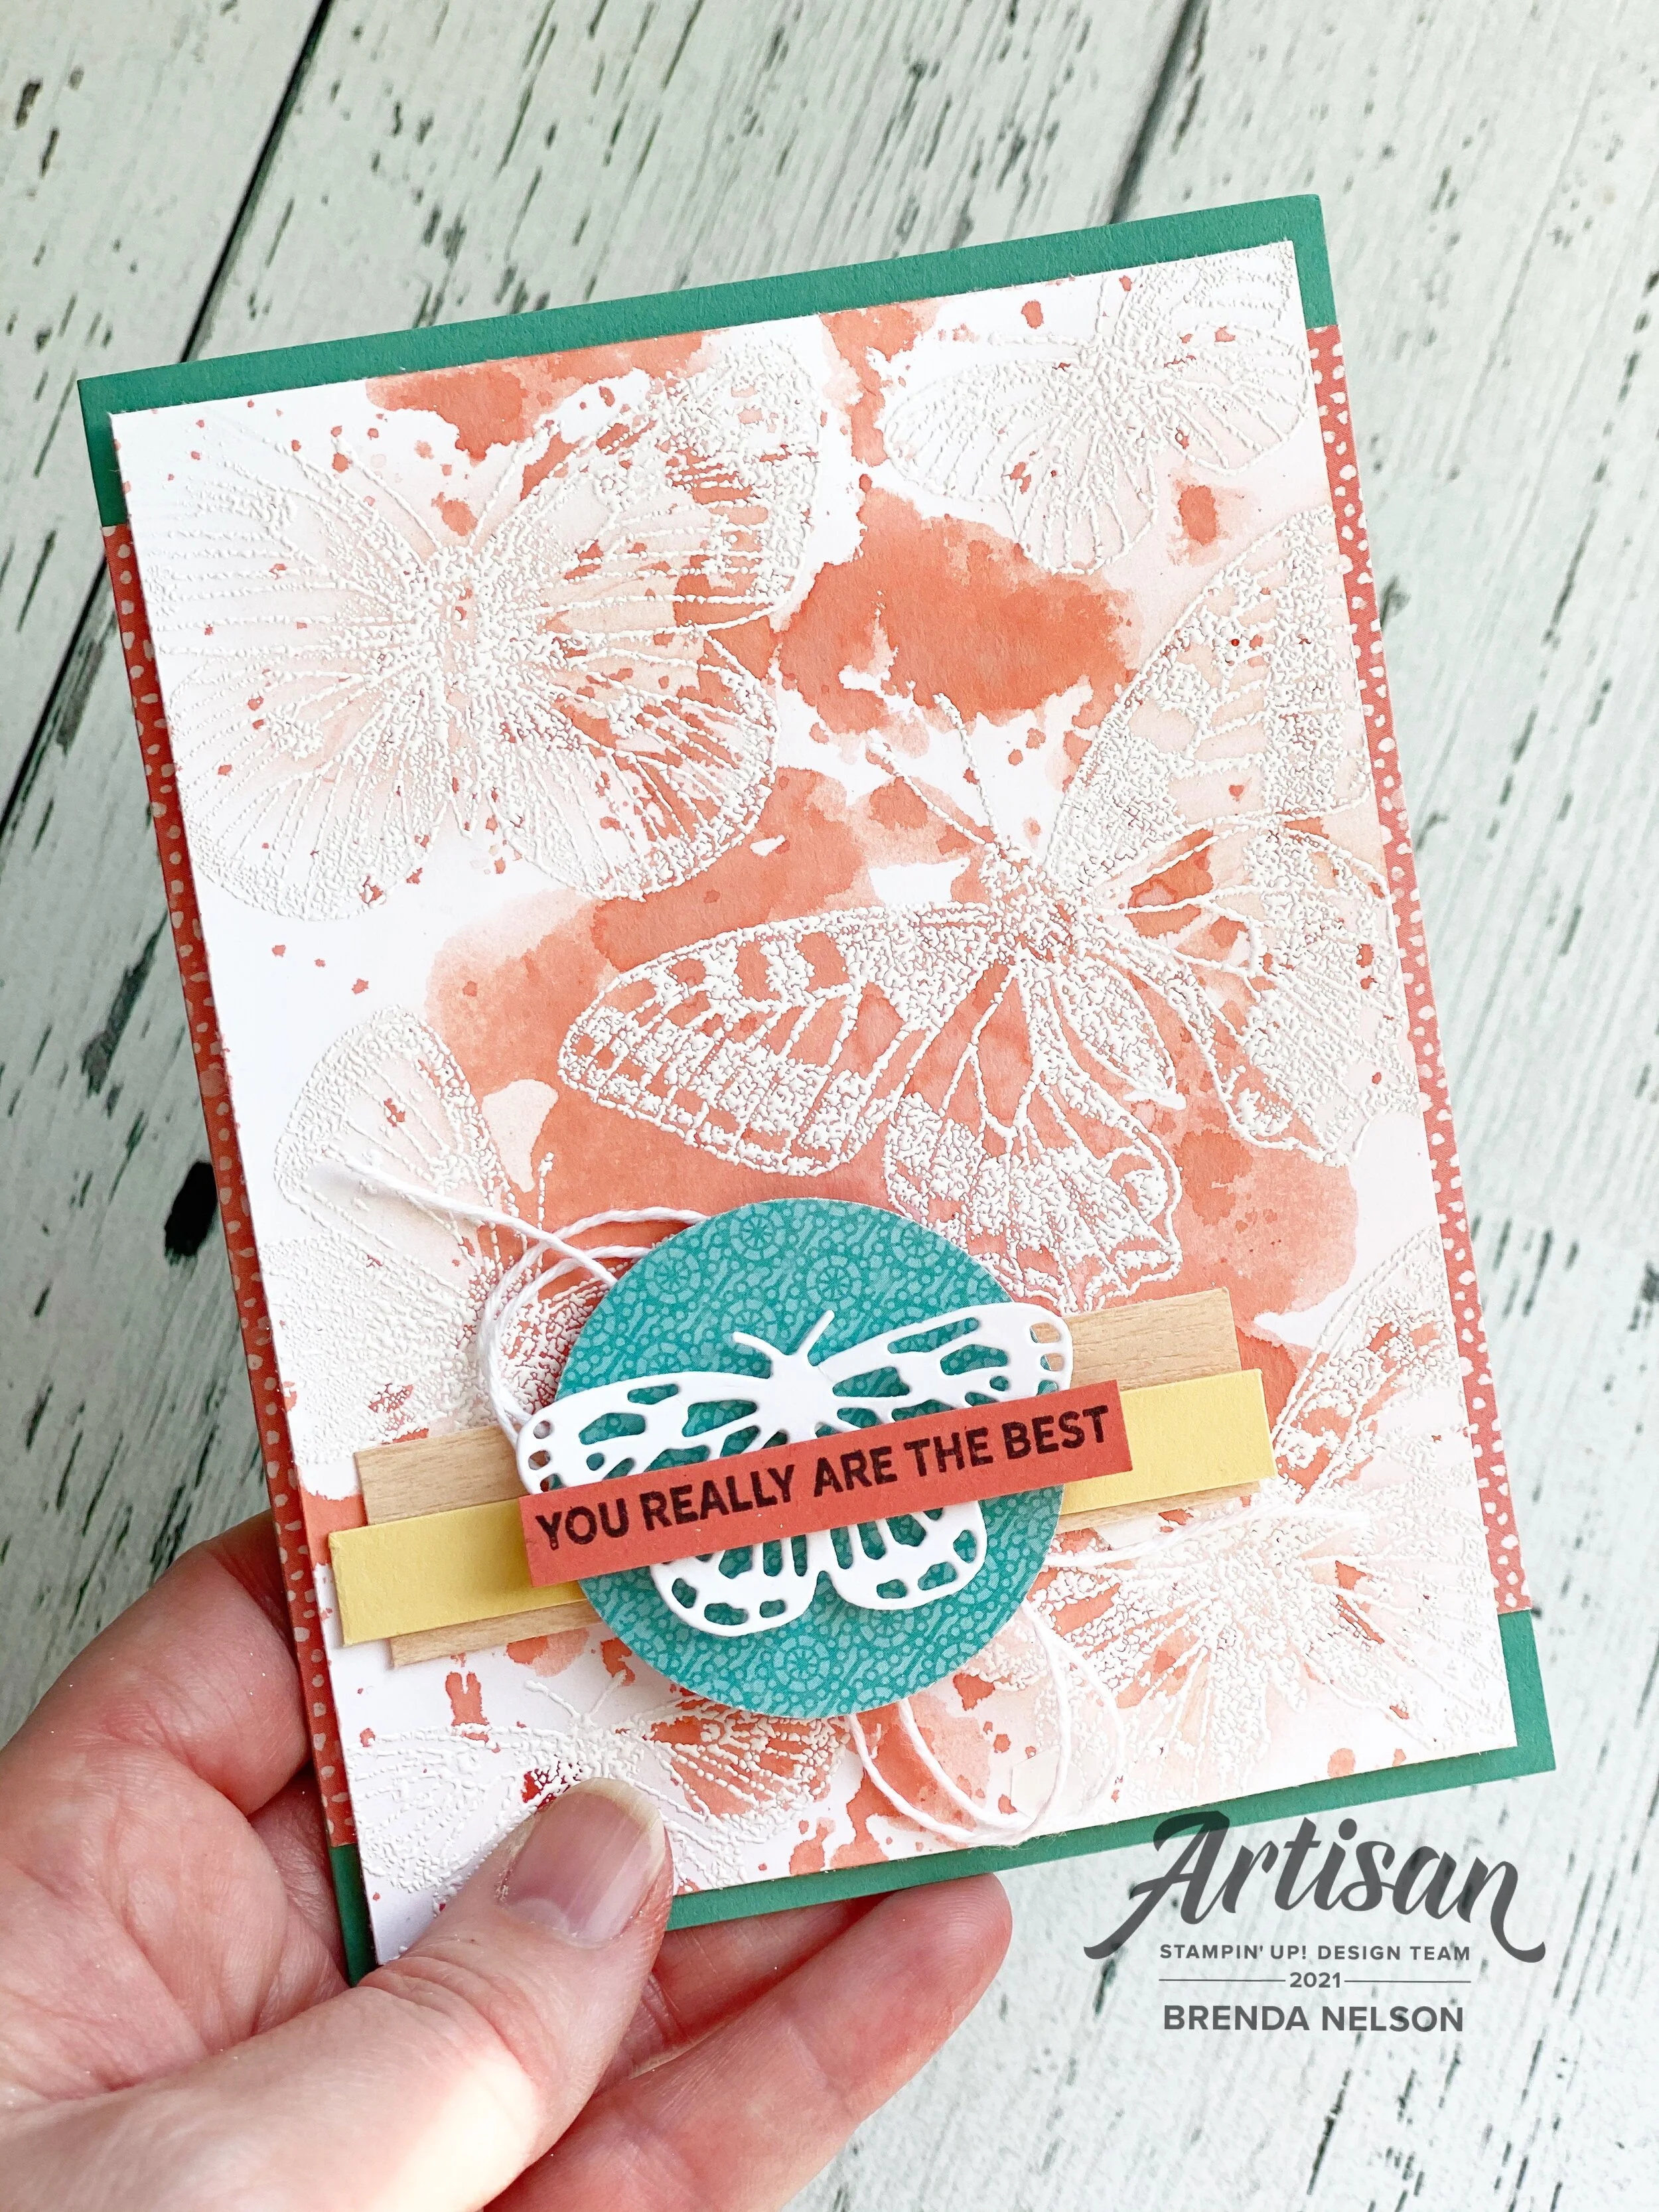
The only request my friend had was that I used some gold on this special card for her parents. I incorporated it on the 50 using Gold Foil paper and on the inside layer with the Shimmery Gold Vellum. Because the rest was left to me I decided to use brand new upcoming products with a bunch of favorites and retired products.

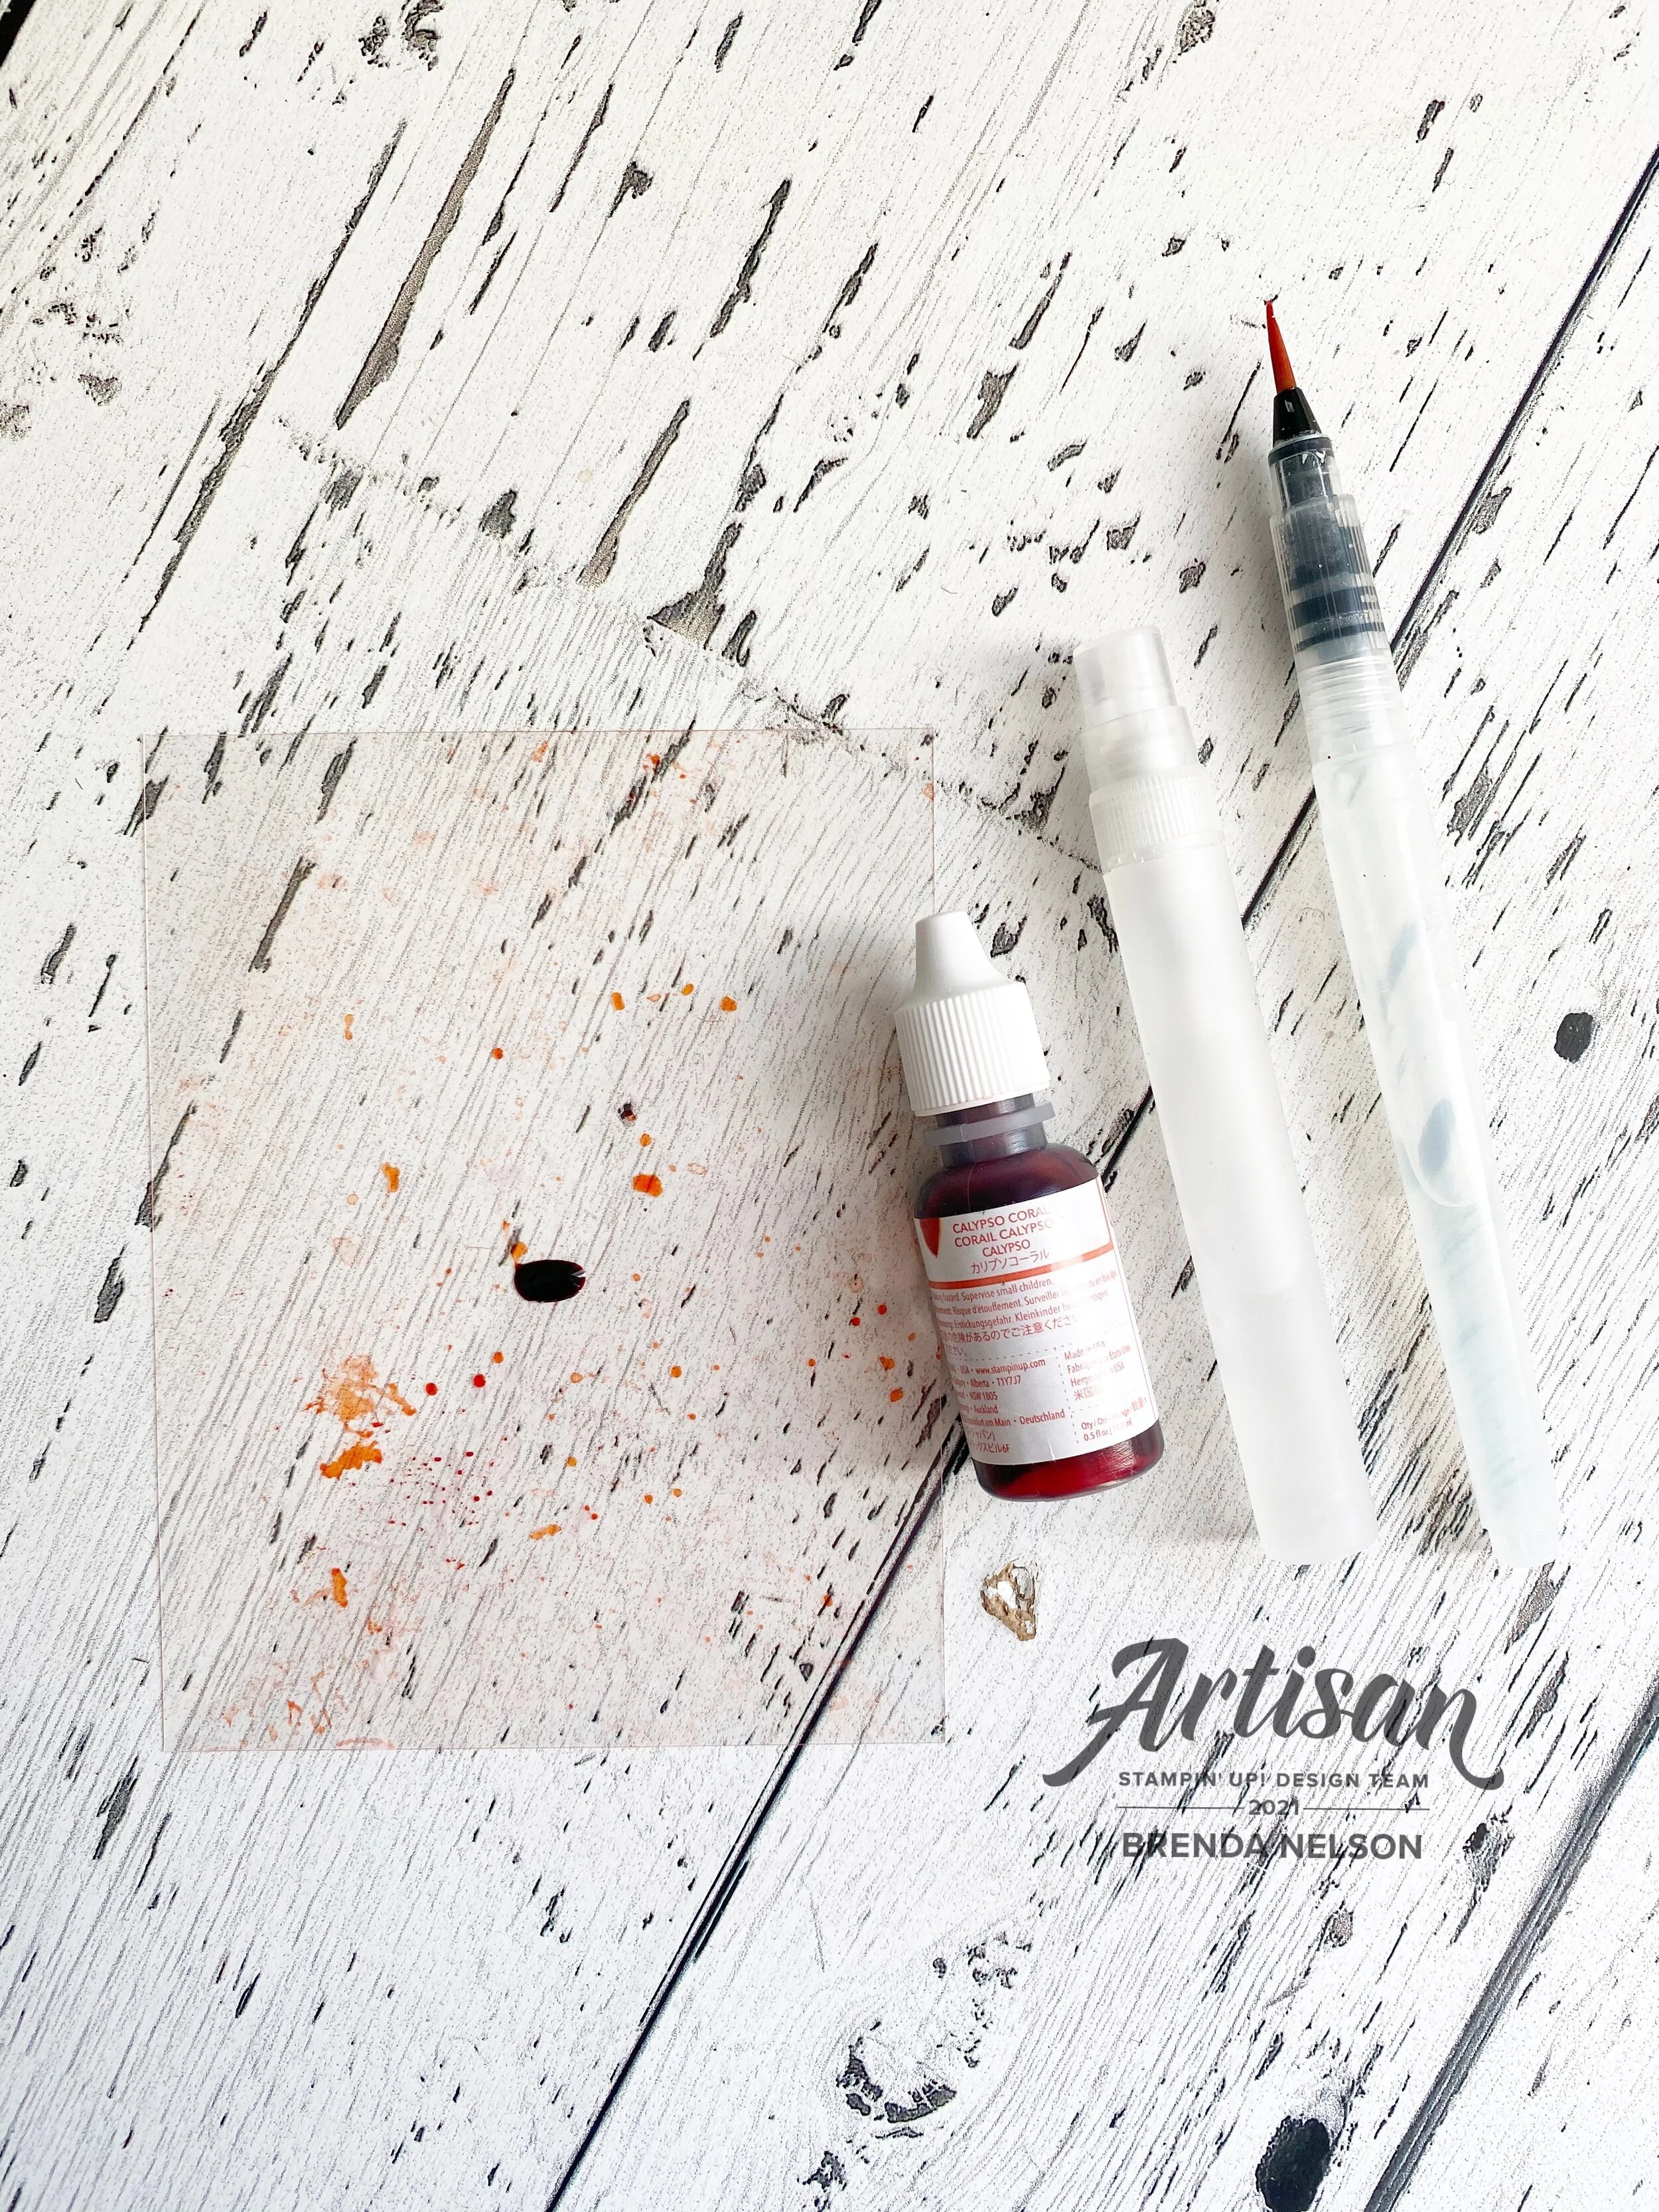
The star of this card though is the flower from the Blessings of Home stamp set. This set will be released in the upcoming January-June catalogue and I know you will love it as much as I have already! I colored this in using ink pads and a Water Painter and my lazy watercoloring technique. The stamp was stamped using Basic Grey ink in place of traditional black to give it a bit of a softer touch.

The sentiment is from a favorite retired stamp set of mine, Many Mates and is punched using the Label Me Fancy punch. I added a little bit of gold thread behind the sentiment. The card is a “fun fold” and is elegantly tied together with some of the White Crinkled Seam Binding Ribbon.

I added an extra panel of Basic White card stock to the front panel of the card. The fun flap is in Soft Seafoam card stock and the flap part was run through the Timeworn Type 3D Embossing folder to a add a subtle bit of textrure.

When you open the card you see a gorgeous panel of Shimmery Gold Vellum which I just love. You can see a tiny bit of a scalloped edge along the fun fold panel. I cut this with a die from the Peony Dies.

I stamped another floral image from the Blessings of Home stamp set and colored it with the same technique as the front. “Congratulations” is from the stamp set Inspired Thoughts in the Annual Catalogue. I added a few retired little pearls from the Share What You Love collection to complete this project.

I was told my friends parents absolutely loved their card and I was so happy to create it for them!

If you are ever in need of something extra special, please reach out to me, I would love to design and create something for you too!

Easy Watercolor with the Butterfly Brilliance Bundle

Hello friends! I am always looking for an easy way to create a fantastic background, especially if it can be watercolored! I decided to pair up this easy watercoloring technique with the new Butterfly Brilliance Bundle! It is an awesome bundle with a stamp set and coordinating dies that is an early release product from Stampin’ Up!

final (1) 22.jpg

I started with a base of Just Jade card stock and added two little strips of DSP from the Butterfly Bijou collection. This 6x6 stack of paper is only available this month! So it is a fun exclusive offering!

I order to do water coloring I would suggest using Shimmery White, which is what I used on my card, or water color paper. Shimmery White is a little more cost effective if you are planning to make a bunch of cards and it is thicker than Basic White so it allows more water to be used on the card base.

The Stamparatus will be your best friends with this large stamp! You can use the stamp on the plate either attached to the base or separate like I did here.

The Stamparatus will be your best friends with this large stamp! You can use the stamp on the plate either attached to the base or separate like I did here.

To start creating my background I began by inking of the stamp with White Craft ink and stamping it on my Shimmery White card stock. I added white embossing powder on top and heat set it.

This step helps create an ‘ink resist’ technique as the water coloring will not take where the butterflies are stamped.

This step helps create an ‘ink resist’ technique as the water coloring will not take where the butterflies are stamped.

I cut a piece of our Window Sheets to the same size of my card base. You can also use one of our cello bags too if you do not have access to a Window Sheet.

Choose an ink refill of your choice, I decided on Calypso Coral for this project. You will also need a water mister and a water painter. The water painter just helps spread the ink around on the window sheet if you need to.

final (1) 20.jpg
 

Start by adding a drop of ink onto the window sheet. You will then spritz some water on top and if you need to use the water painter to move the inky water around to cover a larger surface area on the window sheet.


Once you have your window sheet ready you are going to take our butterfly shimmery white card stock layer and flip it over so that the stamped side is going to touch the inky window sheet.

I tapped my paper around using my fingers to press the paper into the ink in different spots. I did not just lay this shimmery white piece on top.

The idea behind this method is that you only want the inky water to touch your paper in select spots.

Each background will be unique and different!

final (1) 21.jpg
I just think this looks so cool and I love how every single piece will look different! And to clean the window sheet when you are done just. grab a tissue or baby wipe! Easy peesy!

I just think this looks so cool and I love how every single piece will look different! And to clean the window sheet when you are done just. grab a tissue or baby wipe! Easy peesy!

final+36.jpg

To finish off the front of my card I added a small piece of the Natural Touch specialty paper and a small strip of So Saffron card stock over top. I punched a circle from the Butterfly Bijou DSP and I cut a white butterfly from the dies.

The sentiment is from the In Bloom stamp set and is trimmed down by hand from its original form.

I really love this technique and I hope you are willing to give it a try!

Color Fusers-December 2020


Hello everyone! I am SO EXCITED and honoured to be a new participant in the Color Fusers Blog Hop. The talent line up in this Hop is truly like no other so when they reached out to ask me to join, I had to pinch myself!

colorfusers.jpg

If you haven’t followed along before, welcome! Each month we create projects that feature a trio of colors. There are so many fantastic colors offered by Stampin’ Up! and this is a great way to showcase them and get you stamping with different color combos!

For December we are playing with Night of Navy, Pretty Peacock and Granny Apple Green (my favorite of all our greens!).

IMG_8865.jpg
final 3 4.jpg
 

Because it December I wanted to create a fun holiday card using these colors and the cute polar bear from Warm & Toasty. He is just too much fun!

I started with Pretty Peacock as my card base and first layer. I then took a piece of Shimmery White, its a little thicker and can hold water a bit better, and using the widest brush tip from the Water Painters I made some stripes in the three colors.

Granny Apple Green, Pretty Peacock and finally Night of Navy.

final 3 3.jpg

Its actually quite easy to create custom stripes on your projects. If you don’t have the Water Painters, you can even use your Stampin’ Blends.

However in this instance I used the large Water Painter brush and added the three colors onto our acrylic blocks. I just smash the ink pad a couple of times onto the block to leave some ink behind. You then squeeze a bit of water onto the ink on the block and start creating!

final 3 4.jpg

Once my background was done I colored my polar bear’s scarf and toque with my Stampin’ Blends, which are offered in all three of these colors! You will need to hand cut this little guy as this stamp set does not have coordinating dies.

The tree is cut from Granny Apple Green cards stock with the Stitched Triangle Dies and ran through an embossing folder from the Wrapped in Texture duo.

The circle is the largest offering in the Circle Dies and I stamped little bitty snowflakes in the background with Night of Navy Ink.

The sentiment is stamped in Pretty Peacock and I flicked my Water Paper across it for a splash of green. A few of the Holiday Rhinestones were the perfect touch.

I am really happy with how this card turned out and I have already made a different one with a different color combo that I will be sharing later this month! Thank you for hoping along!


You can head backwards if you are just going in to see what Nicole has created or you can go Next to see what awesome project Melanie has designed! Please feel free to leave a comment!

final 14.jpg