Color Fusers November 2021

Hello friends! Wow, did October ever go by quickly! Its now November 1st and officially Christmas season. Fall and halloween are dead, bring on the holiday! Although that is NOT what I am sharing with you today! Our color combo this month could be viewed as a tricky one as the 4 tones are all quick dark, however I had the best pictures to work with this color theme!

IMG_3964.jpg

This month our crafty group is creating projects with Merry Merlot, Misty Moonlight, Cinnamon Cider and Early Espresso. Back in July I had a Besties Photo shoot with two of my long time friends and we did a little picnic afterwards. The picnic set up totally reminded me of Misty Moonlight and a pattern from the In Good Taste Designer Series stack so I used that as my inspiration to design this page.

These are two of my besties I met while in University! We hit things off working at a restaurant together.  We have actually not all lived in the same city for over 20 years but despite the distance I know they would have my back always and no matter what #friendsforever

These are two of my besties I met while in University! We hit things off working at a restaurant together. We have actually not all lived in the same city for over 20 years but despite the distance I know they would have my back always and no matter what #friendsforever

I started with a 12x12 in Misty Moonlight and on the top half of the page I stamped the large flowers from the Blossoms in Bloom stamp set. I actually love this stamp set as I love a good image that can fill in space. I stamped it in the same ink color for a tone on tone look.

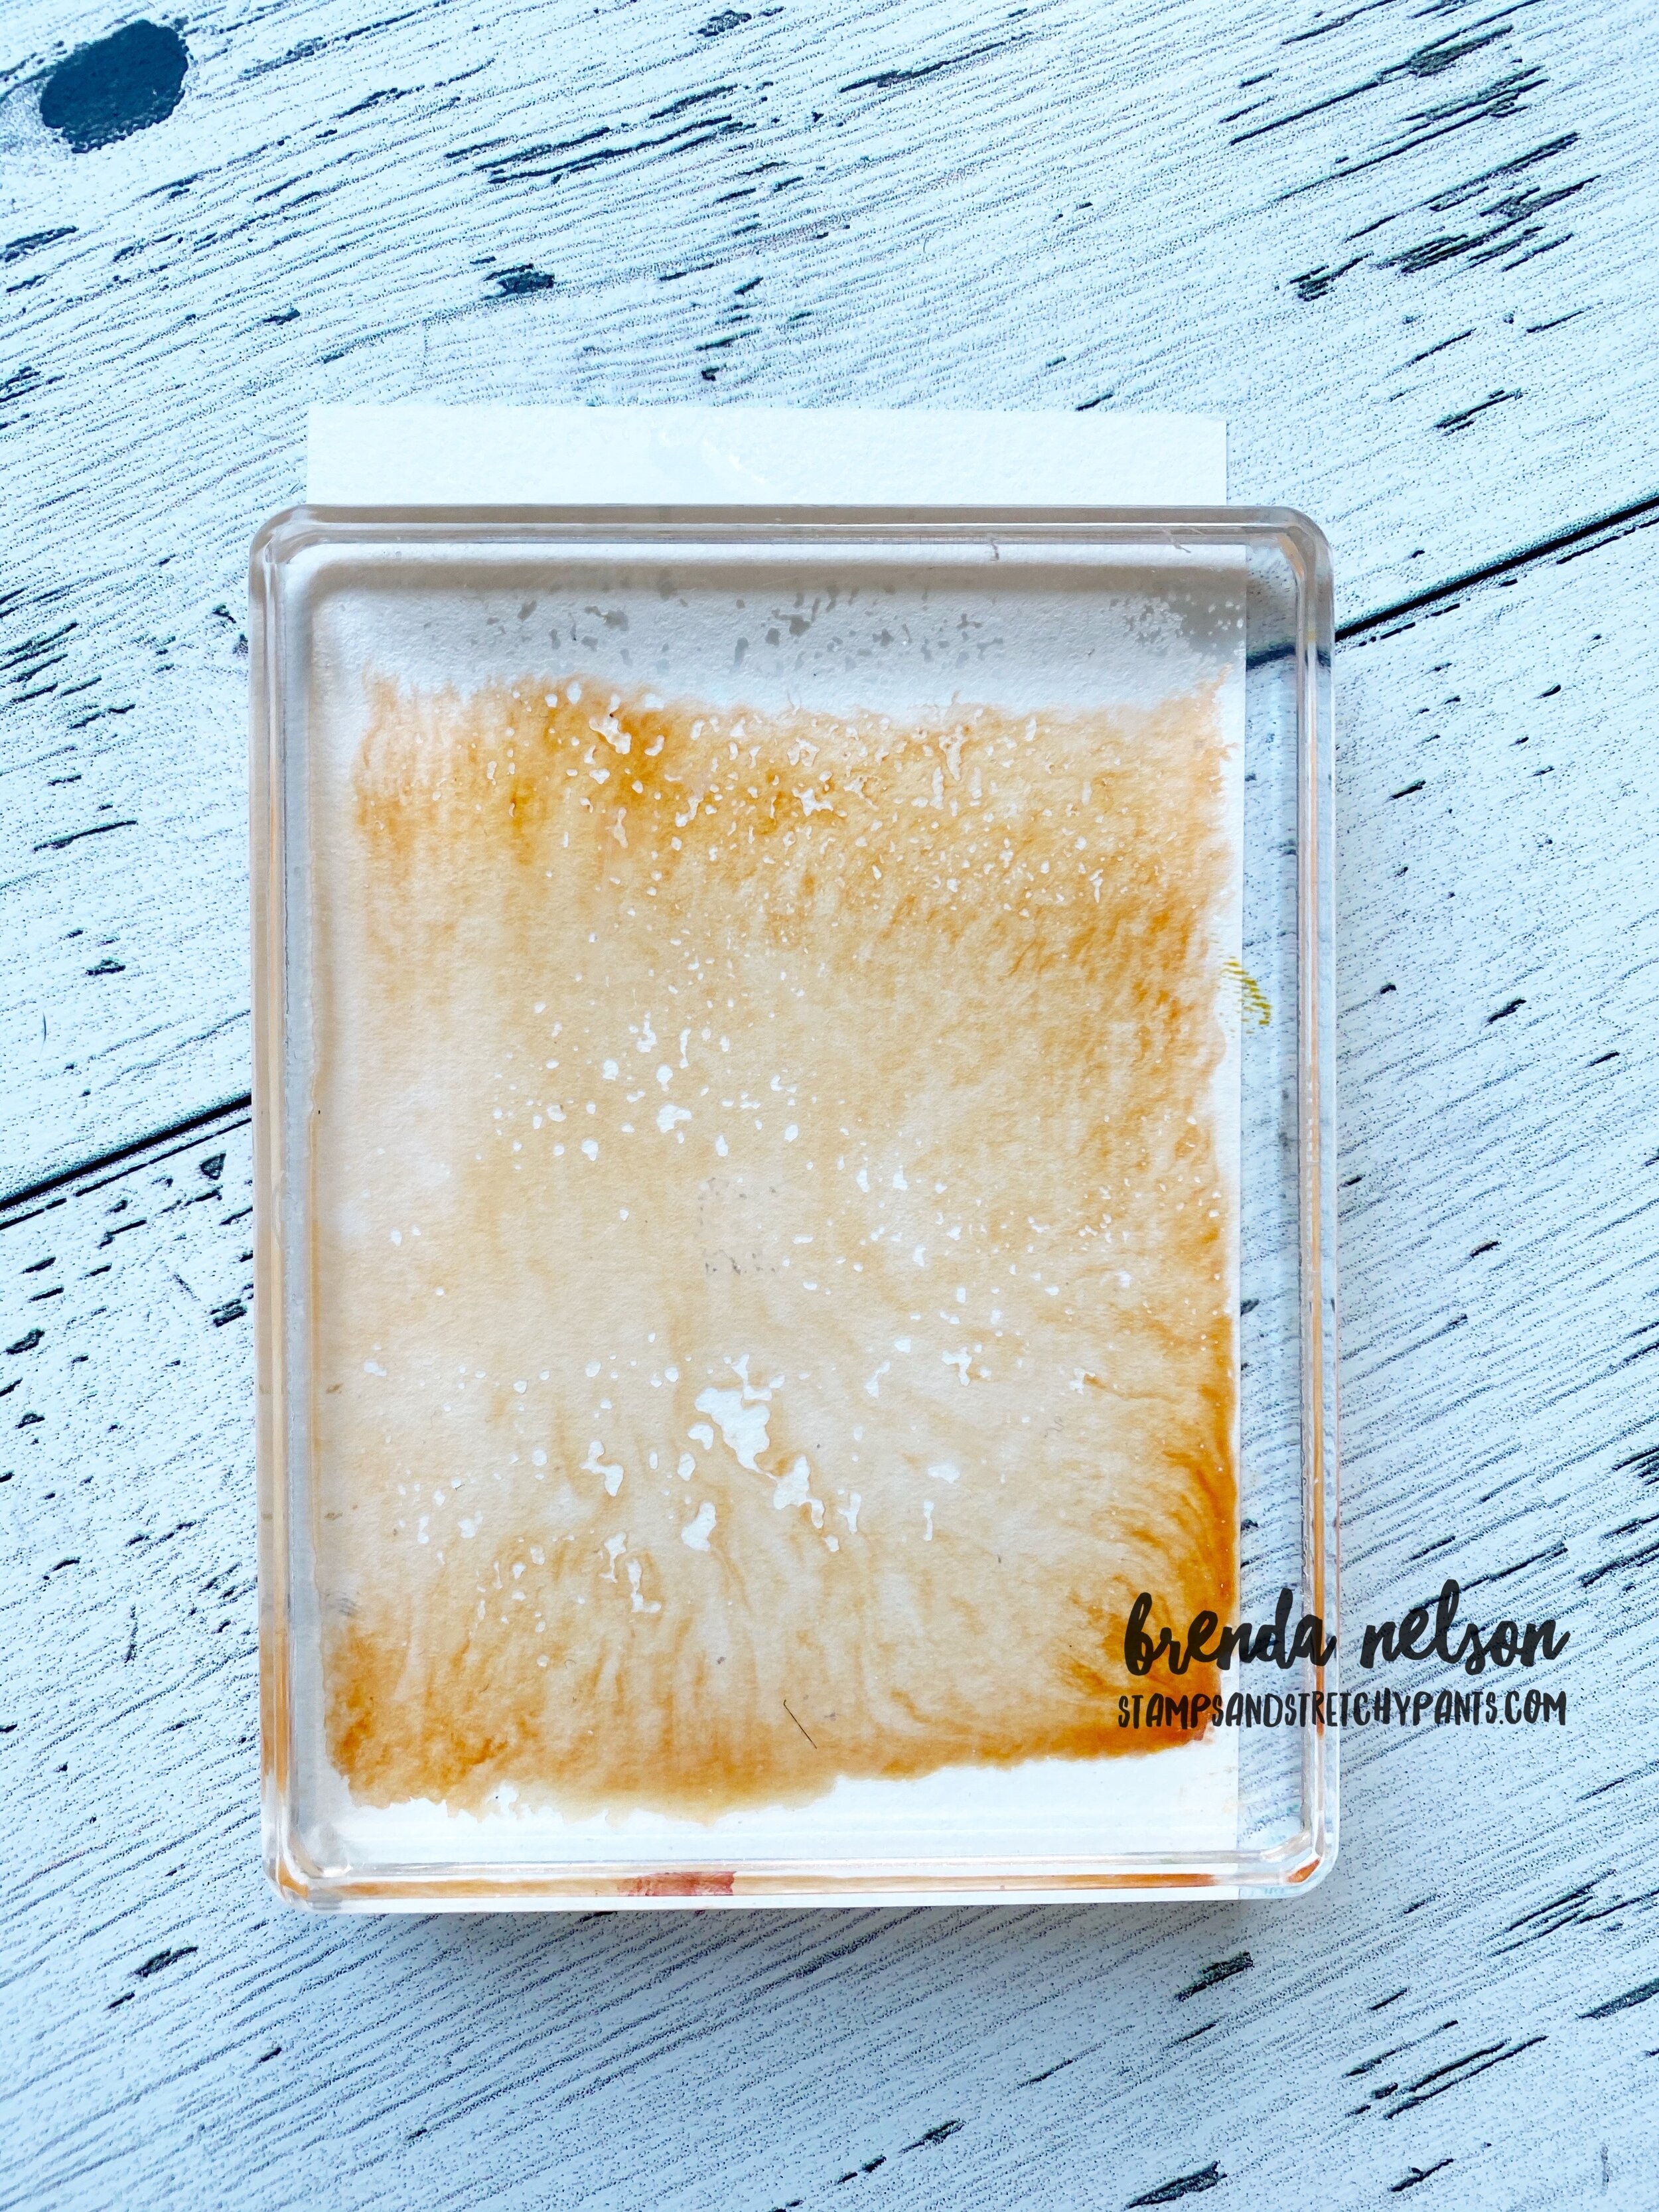
The bottom of my page features the In Good Taste DSP with a couple of strips of Cinnamon Cider DSP from the retired In Color 6x6 stacks (last years design). Adding this strip felt like a natural way to incorporate this color and create division between the two sections of my page.

Are you an F Bomb kind of mom? Hahaha, we are and my friend had these cups designed especially for us!

Are you an F Bomb kind of mom? Hahaha, we are and my friend had these cups designed especially for us!


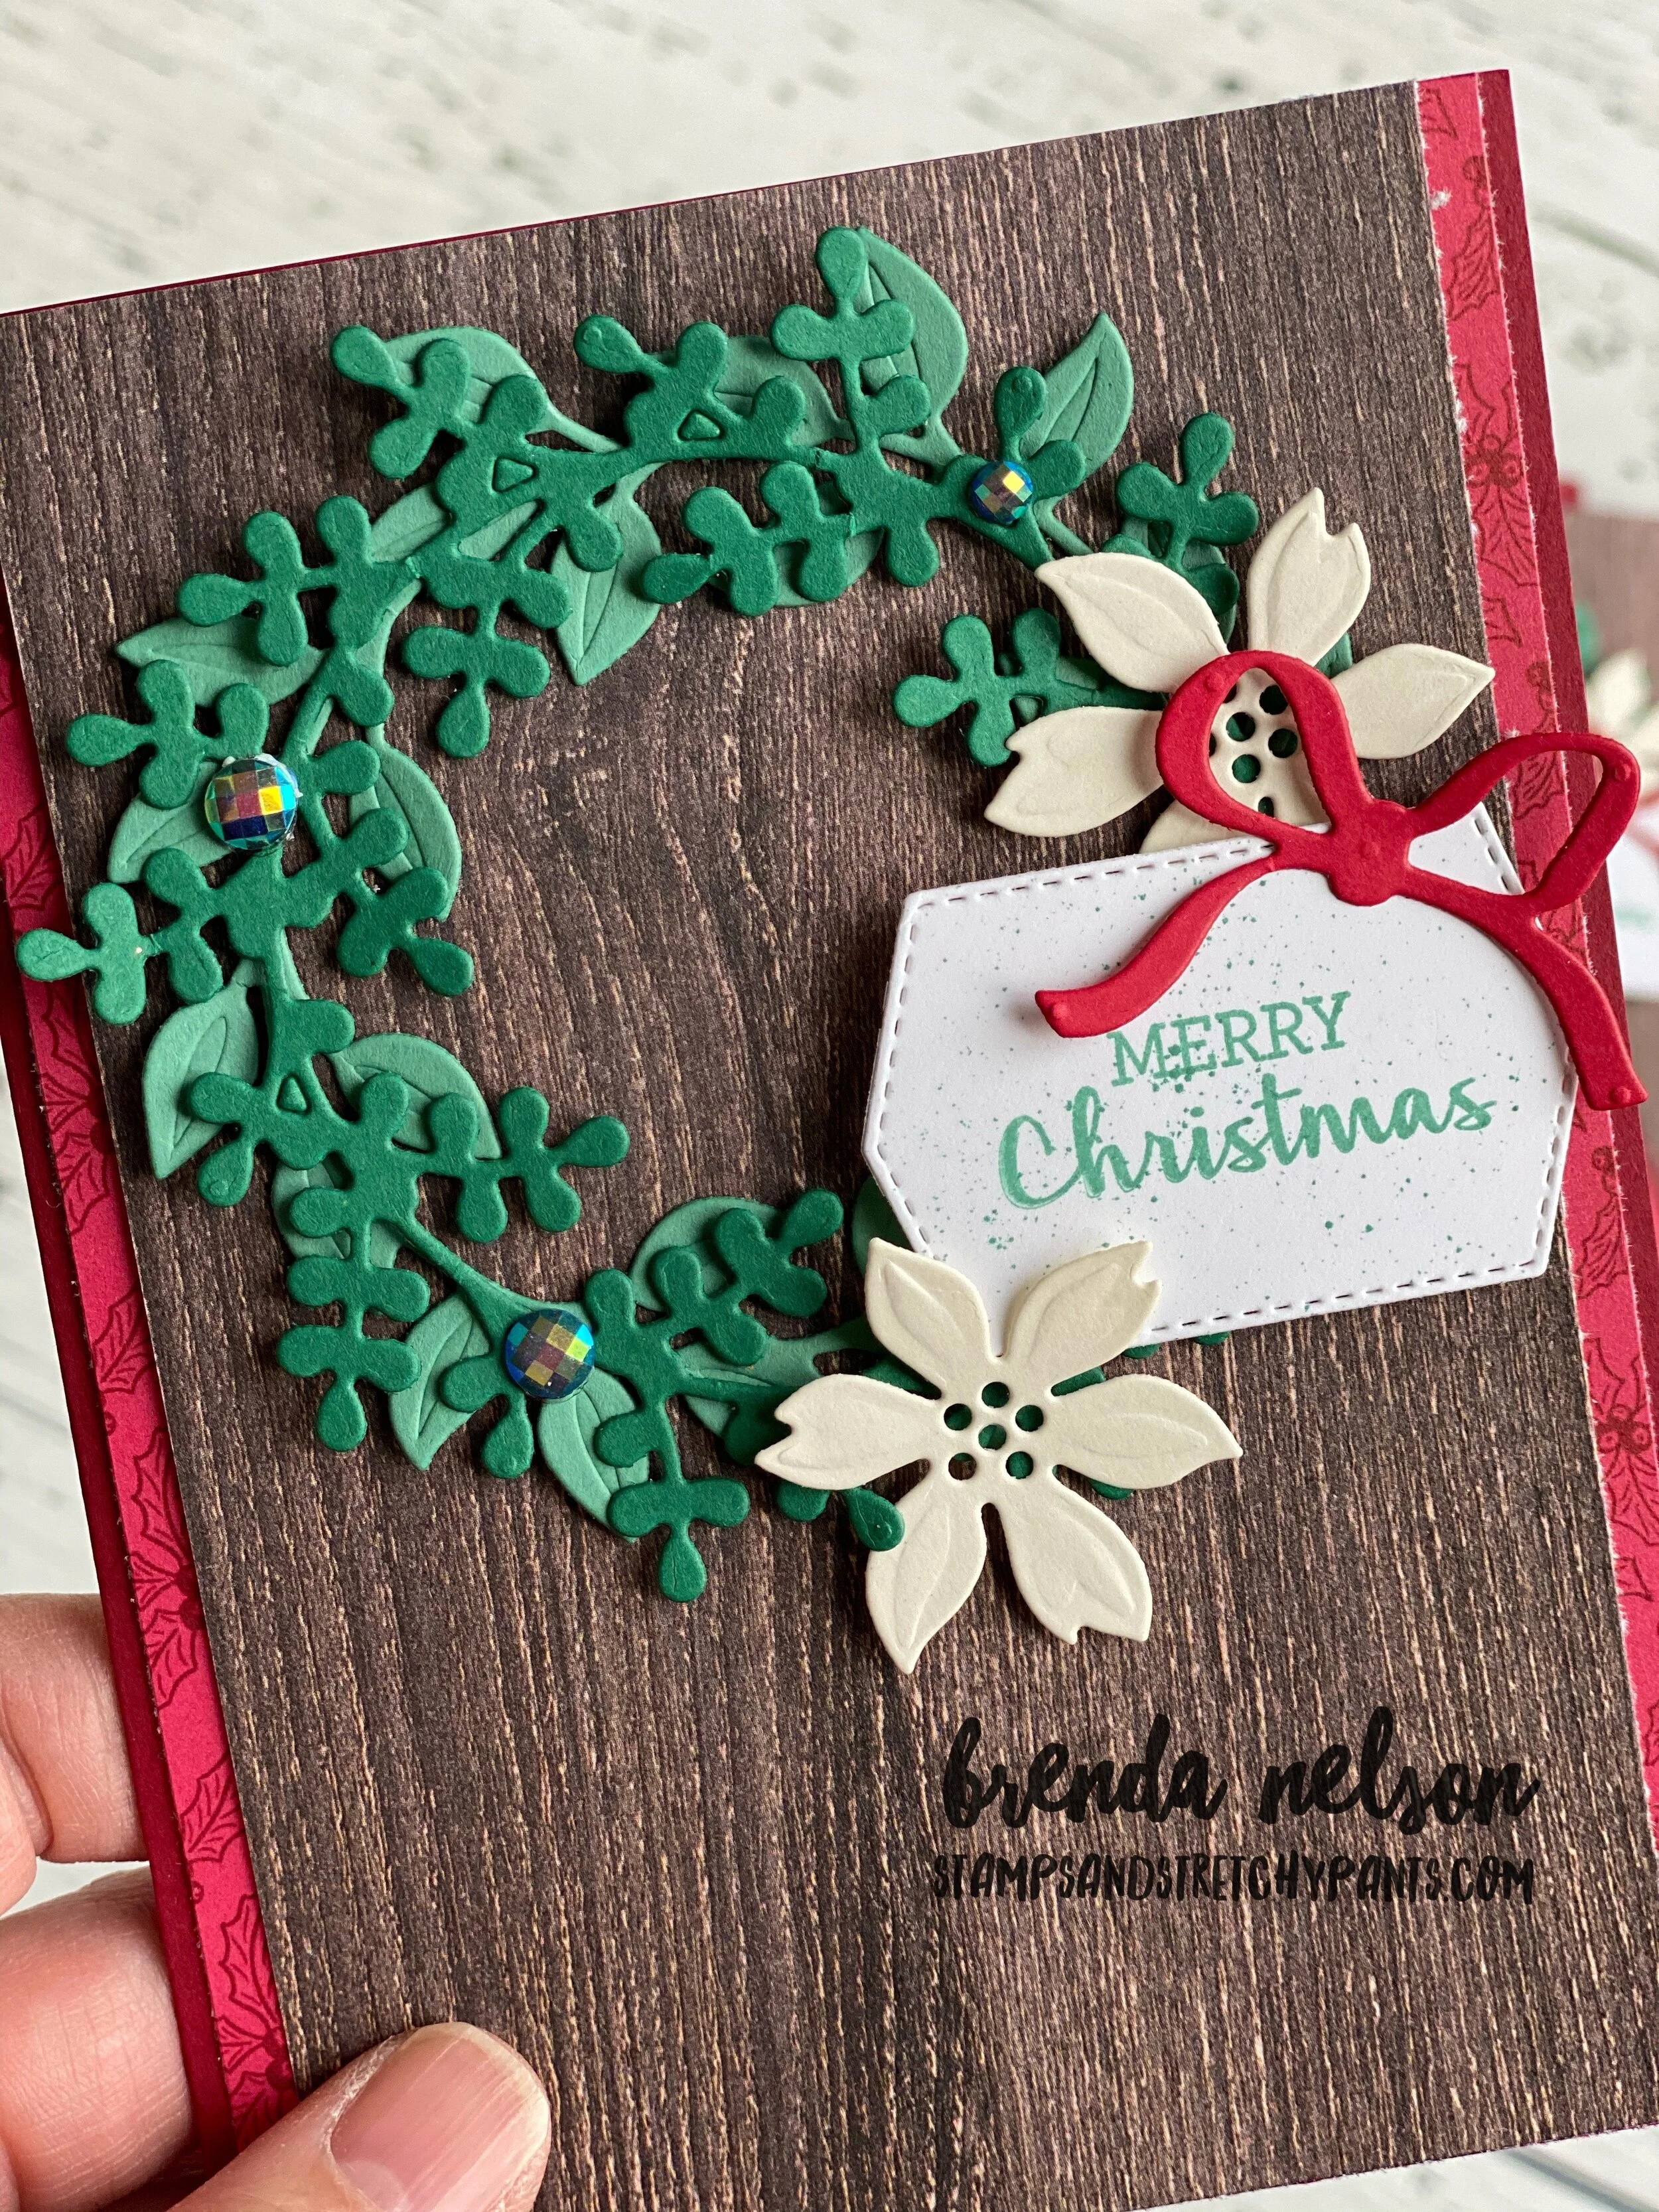
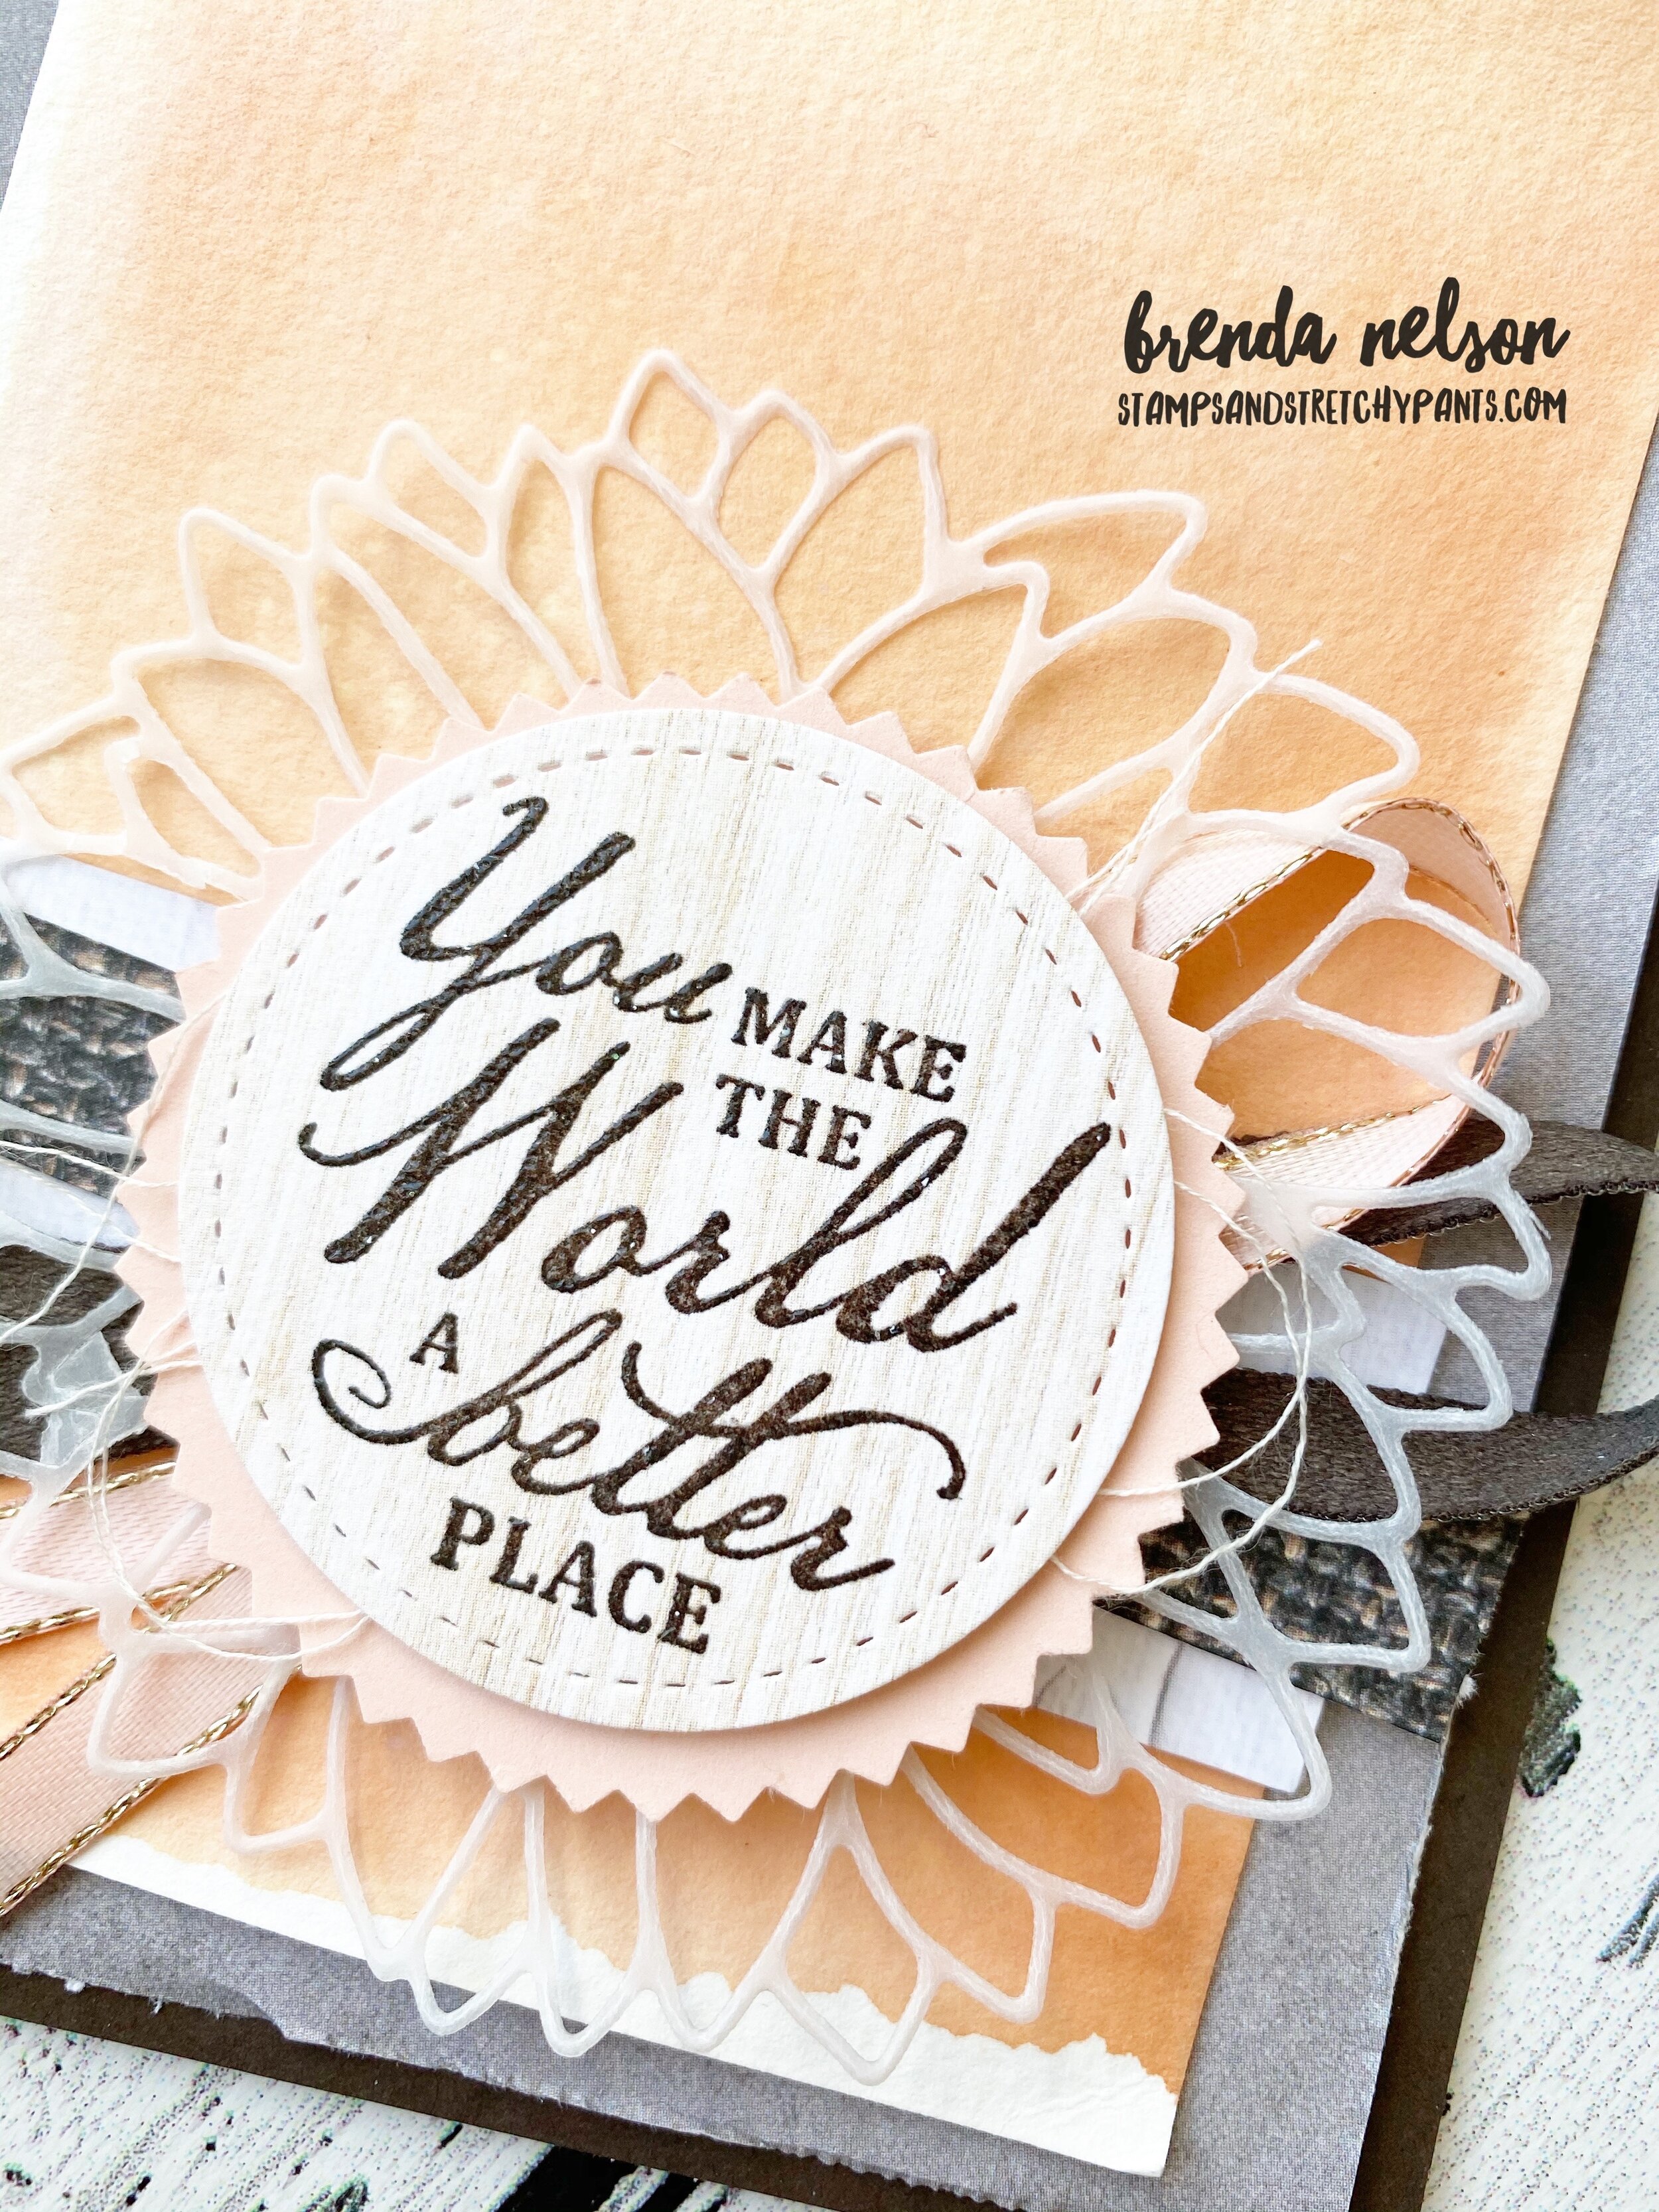
I used Early Espresso card stock as my photo mats and I ran them both through the Timber 3D Embossing Folder for a subtle effect.

It was easy to add in Merry Merlot by die cutting some flowers from the Pierced Blooms Dies. This is one of my favorite die sets in the Annual Catalogue!

I added some retired In Color Enamel Dots and the sentiment is from the Blossoms in Bloom stamp set.

final (4).jpg

You can find the sentiment “Friends Forever” in the Lighthearted Lines stamp set. NOTE: Friends Forever is part of a phrase and l used my Paper Snips to do some Stampin’ surgery on this rubber stamp as I really wanted to use this part of the phrase all on its own.

The label is also a die from the Pierced Blooms Dies and I added a bit of retired Cinnamon Cider ribbon behind and some gold thread.

final (1) 3.jpg

I am so pleased with how this page turned out using this color combination! I cannot wait to see what the other girls create this month! Please visit everyone’s blogs and share some love and comments! And if you don’t follow me on Instagram you can find me @stampwithbrenda

You can go backwards to see what Melissa has created and forwards to see what Melanie has designed! I know they will both wow you with their creativity!

Have an awesome November and see you next month! If you live in Canada and are looking for some creative inspiration I would love you to stamp with me! Please reach out at any time!

Merry Christmas Wreath

Okay, so I will admit that I am late to the game here with the Arrange a Wreath Bundle…and I LOVE it! I recently took advantage of a 50% off item to get this bundle and its so fabulous! I decided to pair up the wreath with the In Good Taste Designer Series Paper to mimic a rustic front door.

final.jpg

I loved this card so much I decided to make a bunch for a card swap I have on the horizon. I started by choosing Just Jade and Shaded Spruce to be my wreath colors and added in some Very Vanilla poinsettia’s , both cut from the Wreath Builder dies.

Merry Christmas is stamped in Just Jade ink with a bit of ink flicking done in the same color. I added some Blue Adhesive Backed Gems to the wreath as well. Don’t let the description fool you, these gems have a magical quality of reflecting the surface they are on, so you can see on the wreath how they pick up the green tones! Sometimes, the only way to figure these things out is by playing around.

final.jpg

You may notice I added another little strip of DSP to the side of the woodgrain DSP. It from the Tis’ the Season 6x6 stack and it combines Real Red and Cherry Cobbler together. The base of my card is Cherry Cobbler which helped that little strip just pop off the page.


I absolutely love how this finished card turned out. It is traditional holiday colors and Christmas feel to me and I hope you will give this bundle a try!

If you are in Canada, you can shop my online store by following the link below or using my host code on the side of my blog. I would love to send you a thank you card so make sure you don’t click NO CONTACT when you are ordering (unless you want to be anonymous).

Have a fabulous day!

final.jpg

Bountiful Blessings--Create with Connie and Mary!

Welcome to another Saturday edition of Create with Connie and Mary! This week our theme is Bountiful Blessings so I reached for a ‘tried and true’ stamp set from my collection, Country Home. Sometimes it is easy to get caught up in the ‘new’ stamp sets we have because they are fresh and feel exciting, but we still have fabulous returning favorites in our annual catalogue!


You can make these sets feel ‘fresh and new’ by pairing them up with new colors, embellishments and designer series papers like I have done here.

And sharing items from both of our catalogue publications is key to making sure people know about all of the fabulous products we offer!

fullsizeoutput_12d57.jpeg
final.jpg

I love to color and this set totally fills that need! I used a color palette of Cinnamon Cider, Mint Macaron, Pumpkin Pie, Mango Melody and Old Olive to color and develop this card.

The Mint Macaron layer has the tile image from the stamp set stamped in the coordinating ink color so you just get a glimpse. The main layer of the card is from the In Good Taste DSP collection. LOVE IT!

I wanted to fill out the milk jug a bit with extra foliage so I reached for the Forever Flourishing Dies (pg 110) to add in the little sprigs, they are the perfect itty bitty size to keep in scale with the stamped image!

I wanted to fill out the milk jug a bit with extra foliage so I reached for the Forever Flourishing Dies (pg 110) to add in the little sprigs, they are the perfect itty bitty size to keep in scale with the stamped image!


I wanted to add some gold accents to this card, as gold feels like a fall color to me. I used the Gilded Gems and some Gold Foil paper that I cut with a border die from the Autumn Essentials Die set. I really love die sets that have border options as I find I use them a lot to help highlight a sentiment or photo. And borders with a unique shape can be a great way to add in a subtle pop of color too!

A little Linen Thread bow finishes off the milk jug perfectly!

I really love the color palette of this card so you might see it in an upcoming scrapbook page too!

final.jpg

I hope everyone is soaking up the last few days of September! It went by so fast and now we are into a new month with my favorite holiday! Unless my own birthday can count as a holiday! hahaha!

Make sure you either hop forward to Connie’s blog (NEXT) or backwards to Melissa’s blog (BACK) to see what amazing creations they are sharing with us this week! And if this is your first time joining us, feel free to go back through my blog and see what we have been creating!

Create with Connie and Mary--Its a Masculine...

The theme for the first Saturday is June is Masculine! I really wanted to create a scrapbook page as I was really focused on cards for May. I shared a different card each month for the month of May. So if you are new here today, feel free to spend some time going through my posts and hopefully feel inspired!

This masculine page features my youngest son and husband and is a mix of NEW and current products. I pulled out my Geared Up Garage bundle and paired it with our new blue—Misty Moonlight! The oil splats are stamped in Versamark and embossed in clear embossing powder. Its a great solve for not having my new Misty Moonlight ink pad yet. I added in a Night of Navy photo mat to compliment the blue background and used the Denim Ribbon to add another blue tone and texture. My favourite part of the layout is probably the amazing DSP background. This is from the In Good Taste DSP stack and it looks like thick white paint on a canvas with a blue tint. I added in a 1 1/4 strip of In Color DSP in the woodgrain pattern on the left side. I LOVE this pattern option in the 6x6 stacks.

final.jpg
Image 2020-04-27 at 6.31 PM (1).jpg
 

To add a bit of extra texture or grunge to the gears I swiped my Basic Grey ink pad over top of Smoky Slate card stock. I then cut the large gear die out of this piece.

final.jpg
It you want to order any of these amazing projects, please use my monthly hostess code and shop my store!

It you want to order any of these amazing projects, please use my monthly hostess code and shop my store!

The large gears are cut out with the ink pad swipe method and the small gears have the Basic Grey marker flicked over top.

The large gears are cut out with the ink pad swipe method and the small gears have the Basic Grey marker flicked over top.

Create with Connie and Mary--Favorite NEW product!

This week we are sharing our favourite new PRODUCT from the demonstrator pre-order. I have to say that it is hands down the In Good Taste Designer Series Paper. This paper is unique as its photographic paper, meaning the 12 x 12 pages are actual photographs of different woods, tiles, textiles and fabrics that have such a real deep feel to them. I have been wanting 12x12 wood grain paper for YEARS! I had to resist making a scrapbook page for the hop as I am committed to making 31 different cards this month for my person “A Card a Day in May” challenge. This is my 30th card of the MONTH!

The sentiment is from the Beautiful World stamp set that will be available on June 3rd

The sentiment is from the Beautiful World stamp set that will be available on June 3rd

Image 2020-04-27 at 6.31 PM (1).jpg

The card base is Early Espresso and then I chose a piece of DSP from the collection that looked like concrete to add in a grey tone. I knew I wanted to share an easy water color background technique and a couple more strips of the DSP to show you how easy it is to mix and match these great patterns. The sentiment is stamped on one of the light tone wood grain options in Early Espresso and then I added clear embossing powder on top so it would have a bit of shine. The new Faux Suede Trim is also at the top of my favourites list (I actually have a list on my blog, Brenda’s Top 10 that you can see all the things I am loving in this new catalogue). Follow the link here to see my list:

And of course I think its obvious from some of my other posts this month that I love the Sunflowers Dies so I found a way to add that onto this card too by pairing it with some vellum.

Here is a really easy way to color your water color paper. Cut a piece of watercolor (or shimmery white) paper to fit your card. Choose an acrylic block that is slightly bigger in size. I used Block E. You will need an ink pad and a water spritzer. Spritz the water color paper. Press the ink pad onto the block to ink it up. Lightly sprite the block and press it onto the watercolor paper. The trick is to let it SIT and absorb the ink. I usually let it sit there for a couple of minutes. When you remove it you get an awesome easy water color background!

Look how great this light pink watercolor background looks!

Look how great this light pink watercolor background looks!

I can’t wait to see what the other girls are loving this week! Hop back to see Melissa’s favourite new product and forward to see Connie’s!