Create with Connie and Mary--Fall Essentials!

Welcome friends! It is officially FALL and the most gorgeous season of all. While I LOVE summer, the sunshine and heat, bbq’s and all the fun stuff, I do truly love the beauty of fall. The changing colors of the leaves, the crispy touch to the air, pumpkins and sweater weather! And I find fall one of the greatest themes to design and stamp with. There are so many techniques to creating leaves and so many fantastic products to create amazing projects like this fall sampler!

Our blog hop theme this week is Fall Essentials—so creating a sampler was a great way to include many of my favourite fall things on one project!


Have you ever tried to create a sampler? There are so many possibilities! However, the easiest way to begin is to just use 3x3 squares and decorate them as you desire. It is like creating mini card fronts.

fullsizeoutput_12d57.jpeg
final.jpg

I started with a 12x12 base of Early Espresso and layered a piece of Whisper White over top. I used DSP from the Poinsettia …..and In Good Taste and then squares in many of our neutrals—Crumb Cake, Sahara Sand, Soft Suede, Early Espresso and some regals—Pumpkin Pie and Cajun Craze.

I leaned into two of my favourite fall stamp sets Love of Leaves and Gather Together. I stole the world ‘Autumn’ from the Autumn Greetings stamp set along with the cute little leaf clusters under the word FALL.

final.jpg
 

Here is a fun tip to try with the leaf dies from the Gathered Leaves dies. This dies cut and emboss at the same time so if you take the die and press it into your ink pad before placing it on your paper and running it through the Stamp Cut and Emboss Machine it will also transfer the ink onto the paper giving you leaf a really cool two tone effect!

I love how Stampin’ Up! has so many embellishments to choose from to help bring our projects to life. The Gold Hoops Embellishments are perfect to add a little flair. I loved adding a little gold bow onto the leaf above using the thread from the Forever Greenery Trim Combo Pack.

The Elegant Faceted Gems are the perfect touch to the square below with the pumpkins.

final.jpg

I really encourage you to give creating a Sampler a try. Its a wonderful way to showcase a lot of products and I love having one for every season to display in my craft room. They also make amazing gifts for those who love a handmade project.

I know the other girls have some amazing things to share with you! I can’t wait to see what their ‘autumn essentials’ are! You can visit Mellisa by going BACK and check out Connie by going NEXT.

Have a wonderful Saturday!
Create with Connie and Mary--Welcome Fall!

I believe the first official day of fall is September 21st, so we are almost there officially! Unofficially, I think as soon as September ONE hits we are bringing out blanket scarves, drinking our Pumpkin Spice Lattes and crafting with all things fall colors and pumpkins! At least that is what I am doing as there has been a definite chill in the air, especially on those early morning school drop offs!

That is why this weeks theme is Welcome Fall! I hope you don’t mind but I am on a scrapbooking ROLL so be prepared to see another page layout this week from me!

fullsizeoutput_12d57.jpeg
 
final.jpg
 

Out of all the seasons, crafting and home decorating for Fall and Halloween, are my absolute favourites! I especially love making layouts because there are just so many awesome ways to stamp and cut out leaves. This page looks so crisp with the white background and the medley of leaves, pumpkins. leaves and wheat sheaves.

For the color palette I cut or stamped leaves out in Crushed Curry, Soft Suede, Crumb Cake, Old Olive with Mossy Meadow edges, Cajun Craze with Merry Merlot edges, Crushed Curry with Merry Merlot edges, Terracotta Tile and of course, Pumpkin Pie.

We have so many fantastic options for fall creating! I used the Love of Leaves Bundle, Gather Together Bundle and the Autumn Essentials dies from the Handmade for You catalogue. I did sneak in one retired leaf too as I just can’t part with it…can you see it?

Notice that big leaf on the left? I cut it from the Festive Felt and then spritzed it with a mix of Crushed Curry and rubbing alcohol. I quick blast with my heat tool and it was dry.

Notice that big leaf on the left? I cut it from the Festive Felt and then spritzed it with a mix of Crushed Curry and rubbing alcohol. I quick blast with my heat tool and it was dry.

I wanted to create sort of a fun boarder running underneath my pictures with all my favourite fall images, leaves, pumpkins and wheat sheaves. When I was mixing two colors together, like on the green leaves, I stamped in Old Olive first and then used a finger dauber in Mossy Meadow around the edges. I used the same technique with the Cajun Craze, Crushed Curry and Merry Merlot leaves. And I want to give a shout out to Merry Merlot, its definitely getting a good work out in my craft room as it is perfect leaf tone!

I added in a little splatter with Crushed Curry ink and my Water Painter across the background of both pages. I love the feel it gave, softening up the crisp white a bit.

I added in a little splatter with Crushed Curry ink and my Water Painter across the background of both pages. I love the feel it gave, softening up the crisp white a bit.

This page had so many highlights with the leaves and pumpkins that I found it didn’t need much in the way of embellishments. I bit of Bumblebee Gingham ribbon and some Gilded Gems were all I added to this page.

I like to create little focal points on my pages, I often say “Its all in the details”, which is reflected here with the ‘friendship’ and ‘So glad to have you in my life’ areas. I used the same maple leaf on each, with a gem, and twine to create continuity between the pages.

I hope you have enjoyed my fall pages! I will probably have more to share with you over the coming weeks so make sure you check back! And if you are in Canada and need to shop for any supplies you can follow the link on the side bar to my store!

If you are starting here on our blog hop you can go BACK to see what Melissa has designed for us this week and NEXT to see what Connie has created for us! Thank you for hopping by!

Create with Connie & Mary--Thinking of Fall!

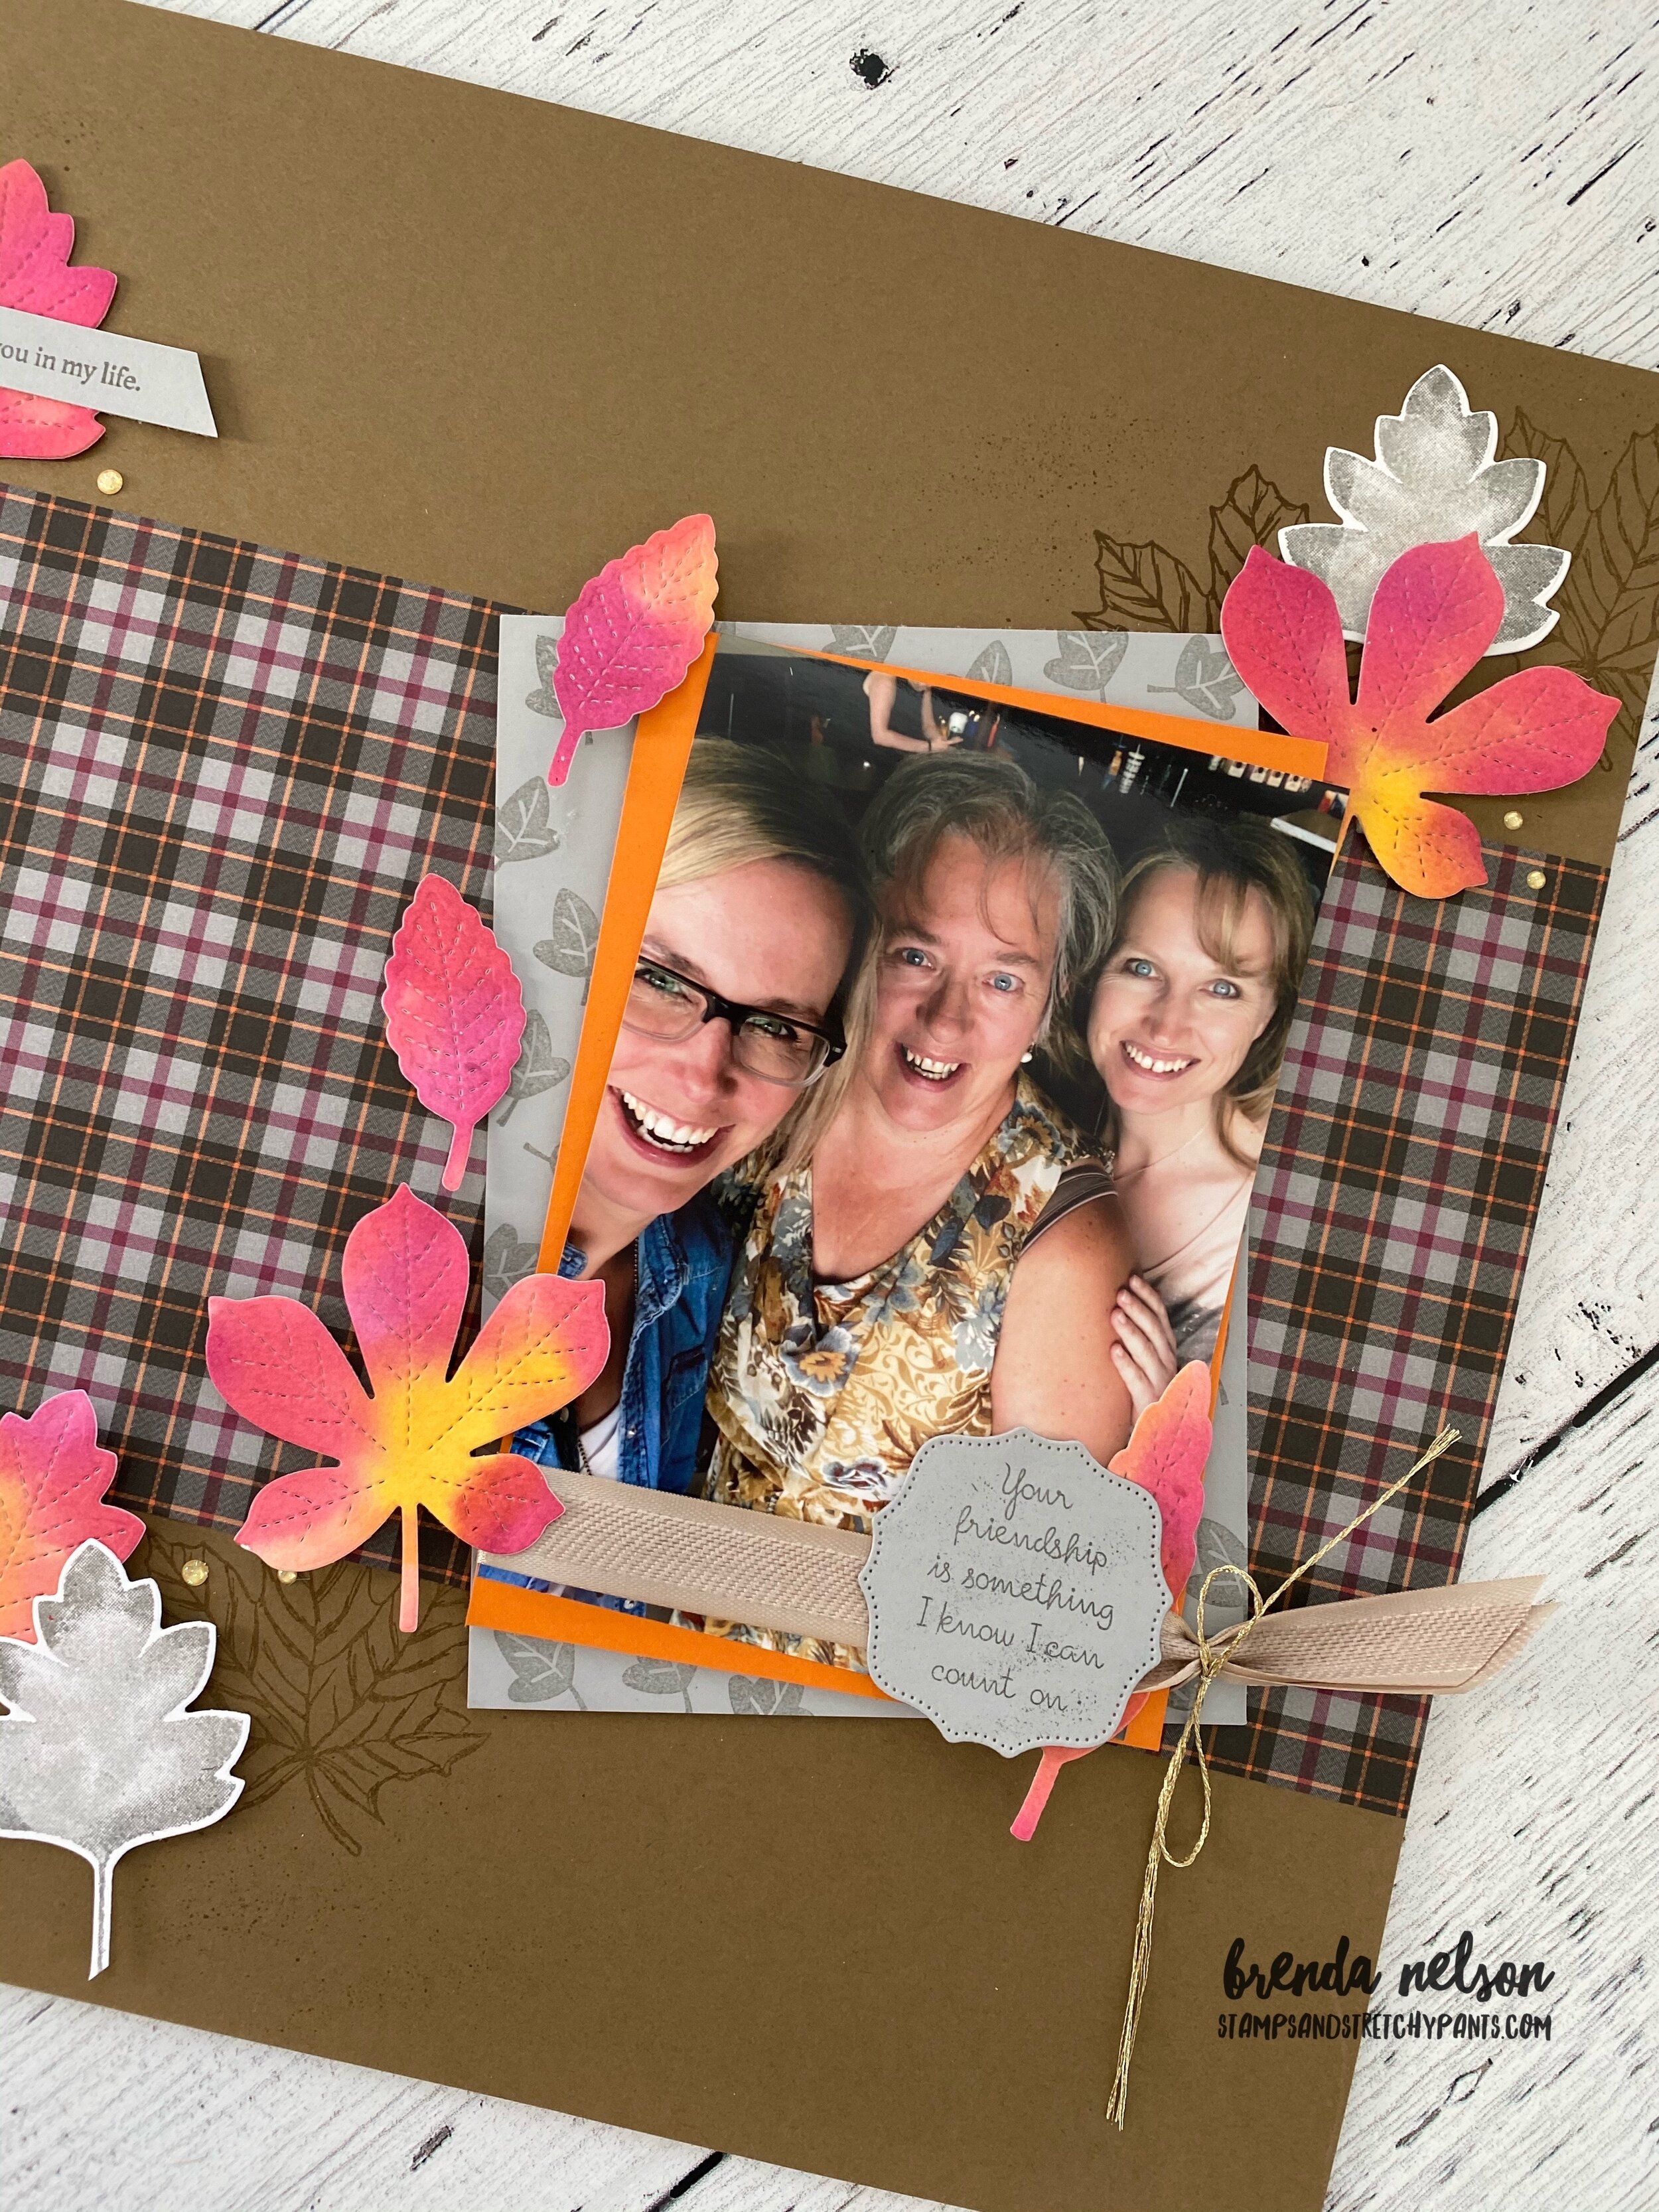
I will admit, as much as I don’t want it to be so, there is a little fall chill in the evening air! I am so blessed to live in a part of the world where we experience 4 distinct seasons. I love summer so much, but the beauty of fall is just spectacular here in Alberta. I love when all the leaves start to change and that is what influenced the design of my scrapbook page for this weeks theme—Thinking of Fall!

fullsizeoutput_12d57.jpeg
I love this photo of my two friends Donna and Karina.  For the past several years we have worked together to offer 3 large group events each year called Creative Day Getaway, to local demonstrators and stampers.  We are hosting our 20th event this S…

I love this photo of my two friends Donna and Karina. For the past several years we have worked together to offer 3 large group events each year called Creative Day Getaway, to local demonstrators and stampers. We are hosting our 20th event this September so I thought featuring them on this page was perfect!

fullsizeoutput_12dbb.jpeg

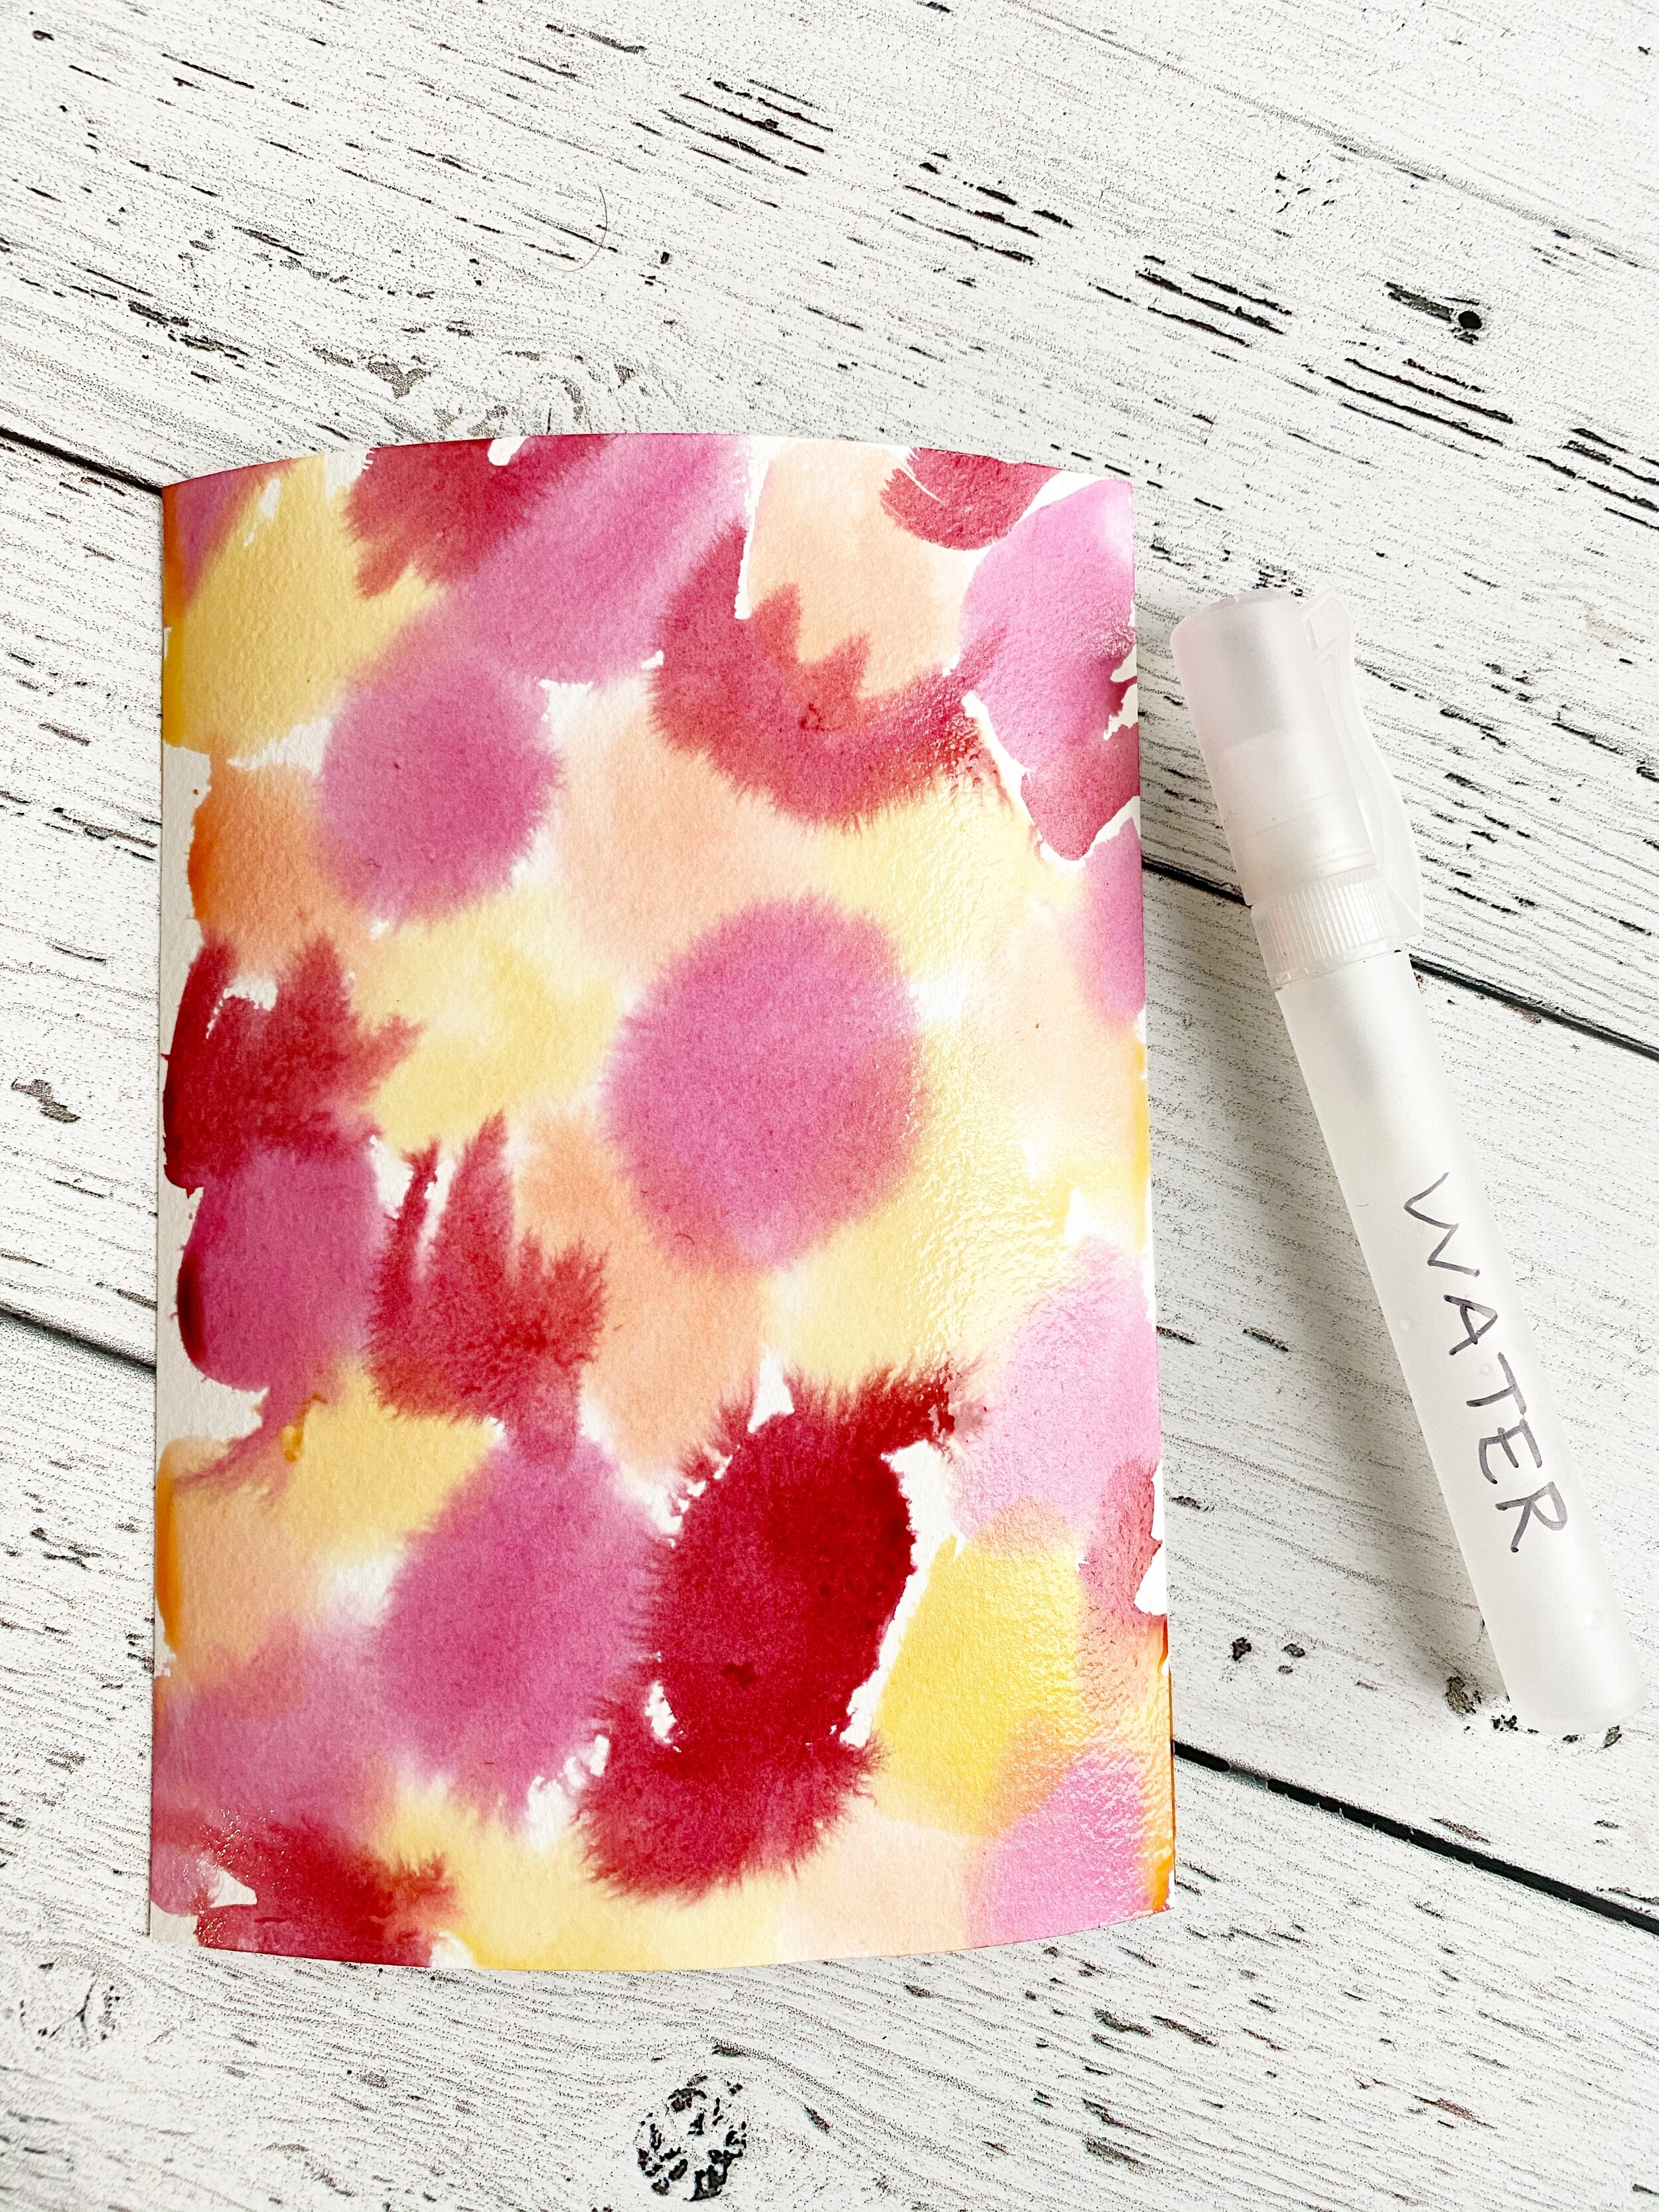
I used a really fun and easy watercoloring technique to create these leaves! Something similar was shared on the Stampin’ Up! Instagram page recently as well. I love how our Stampin’ community shares and inspires each other!

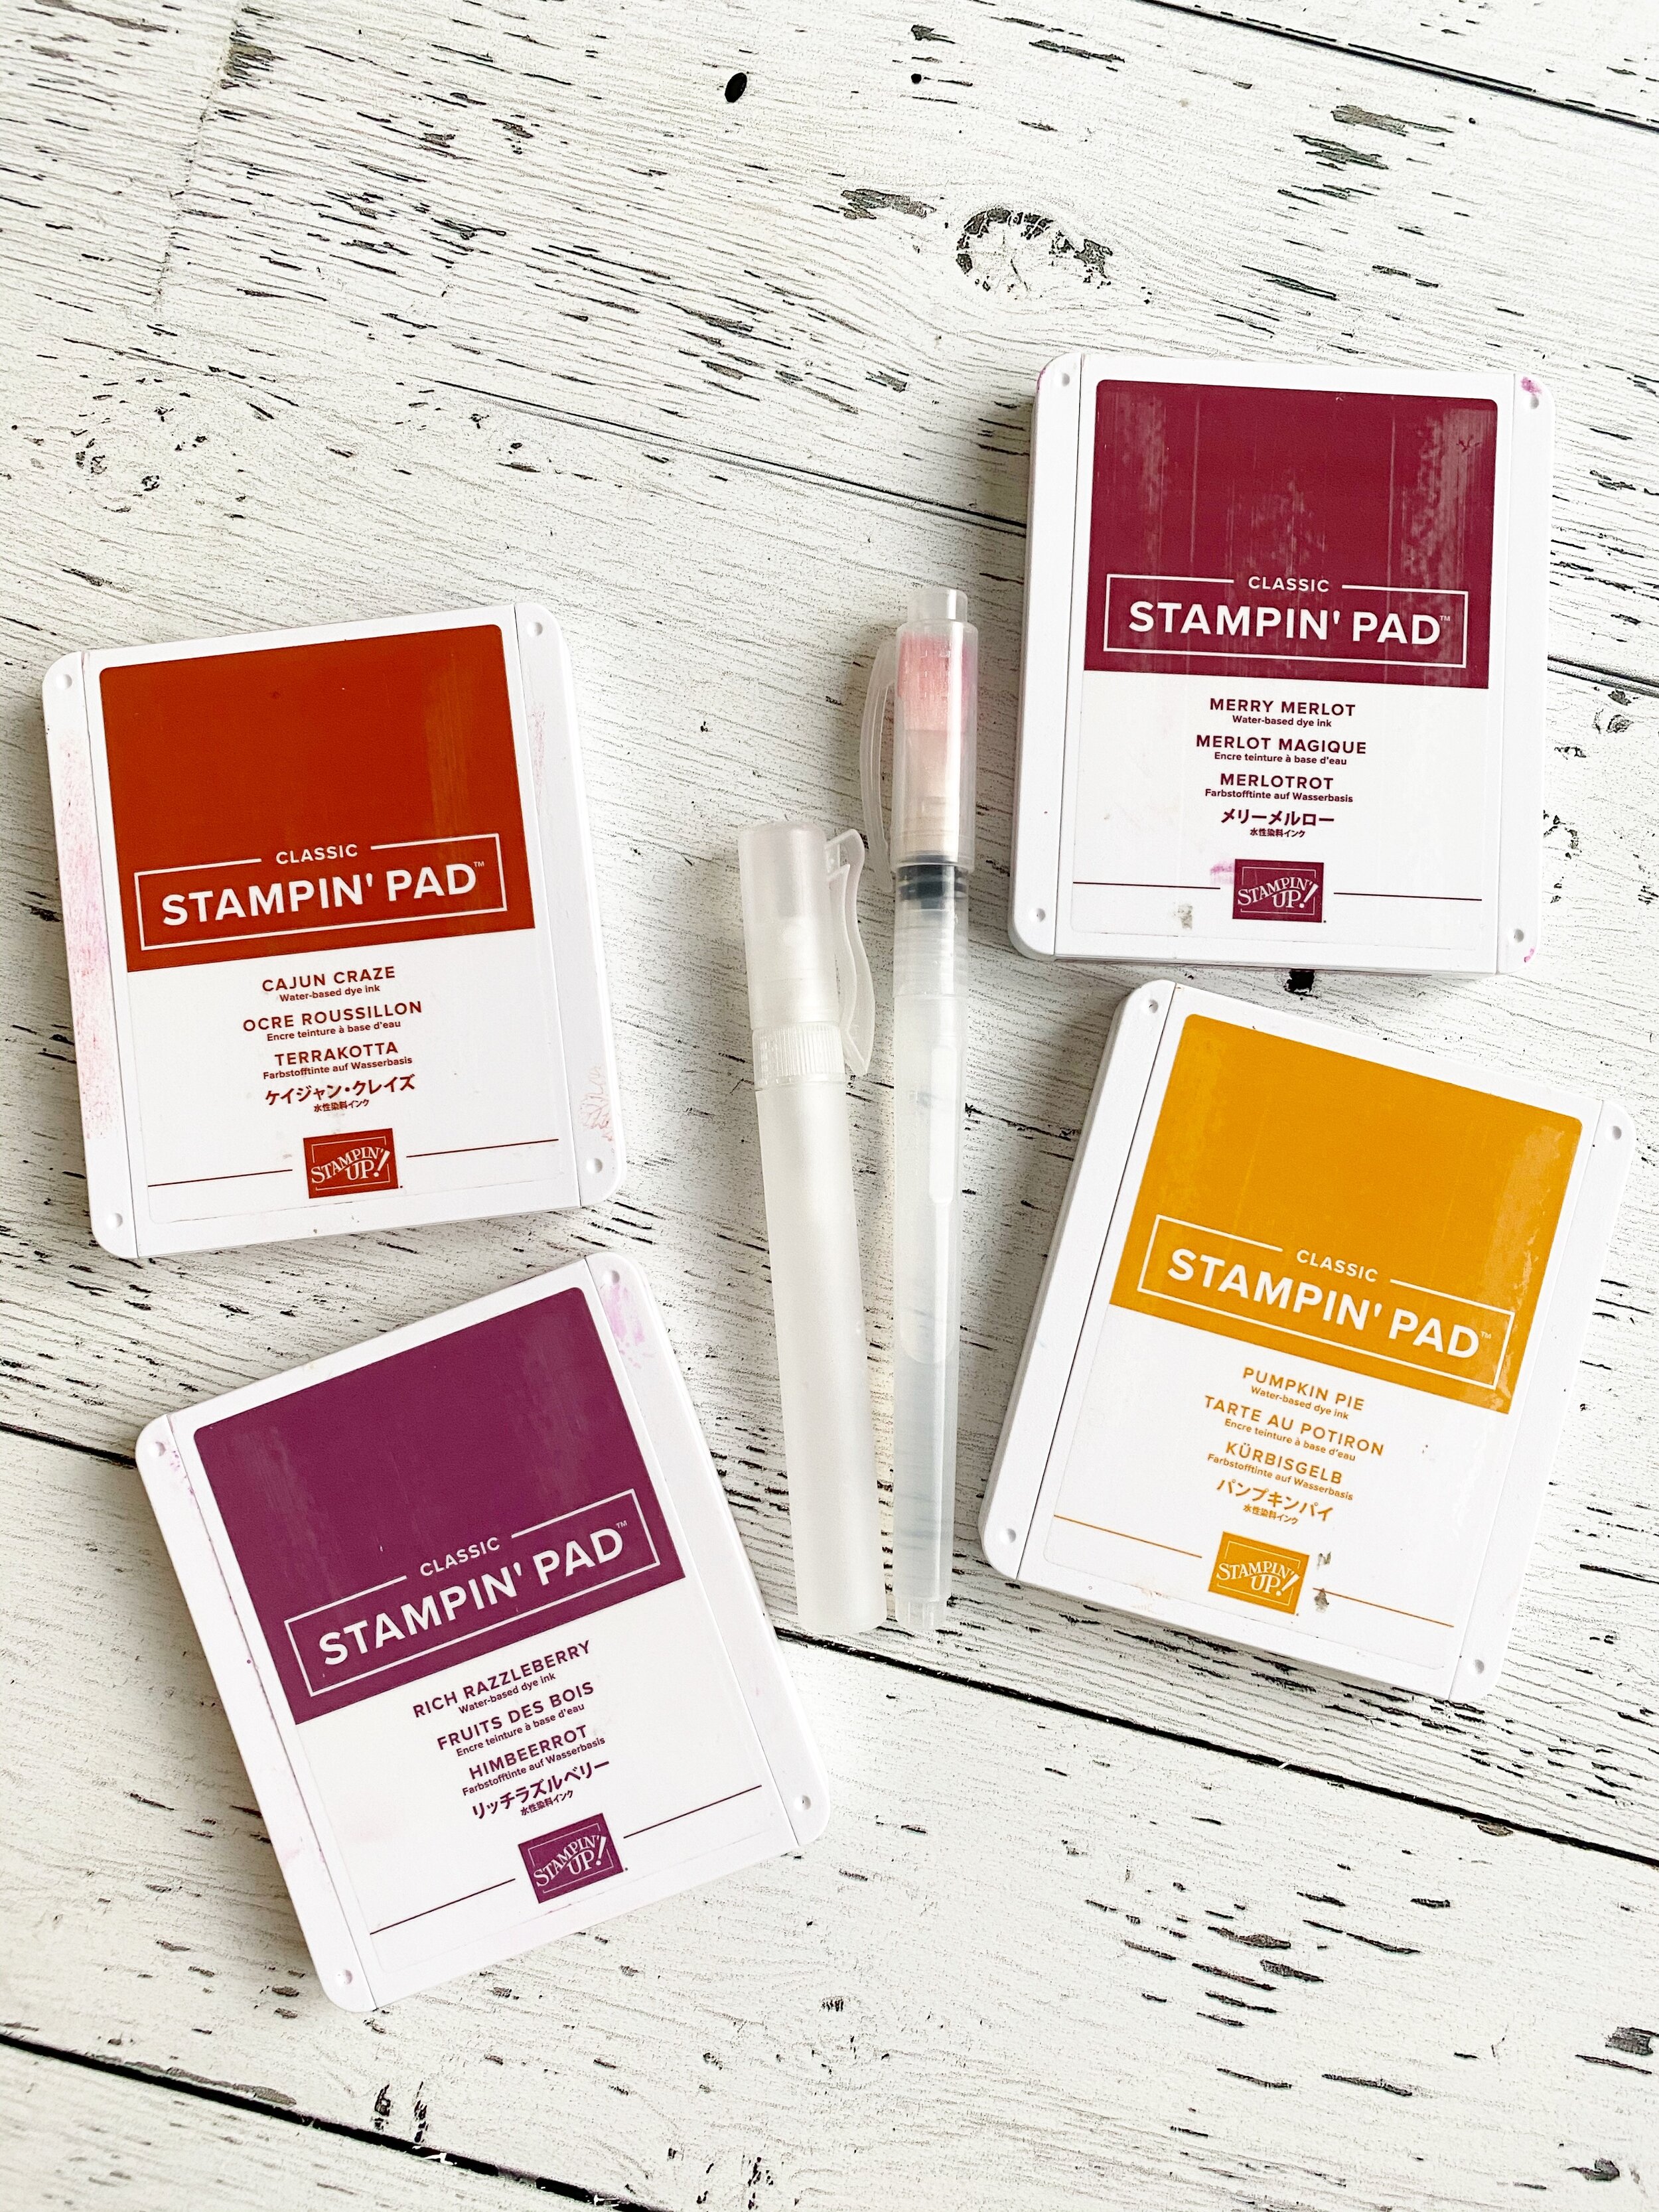
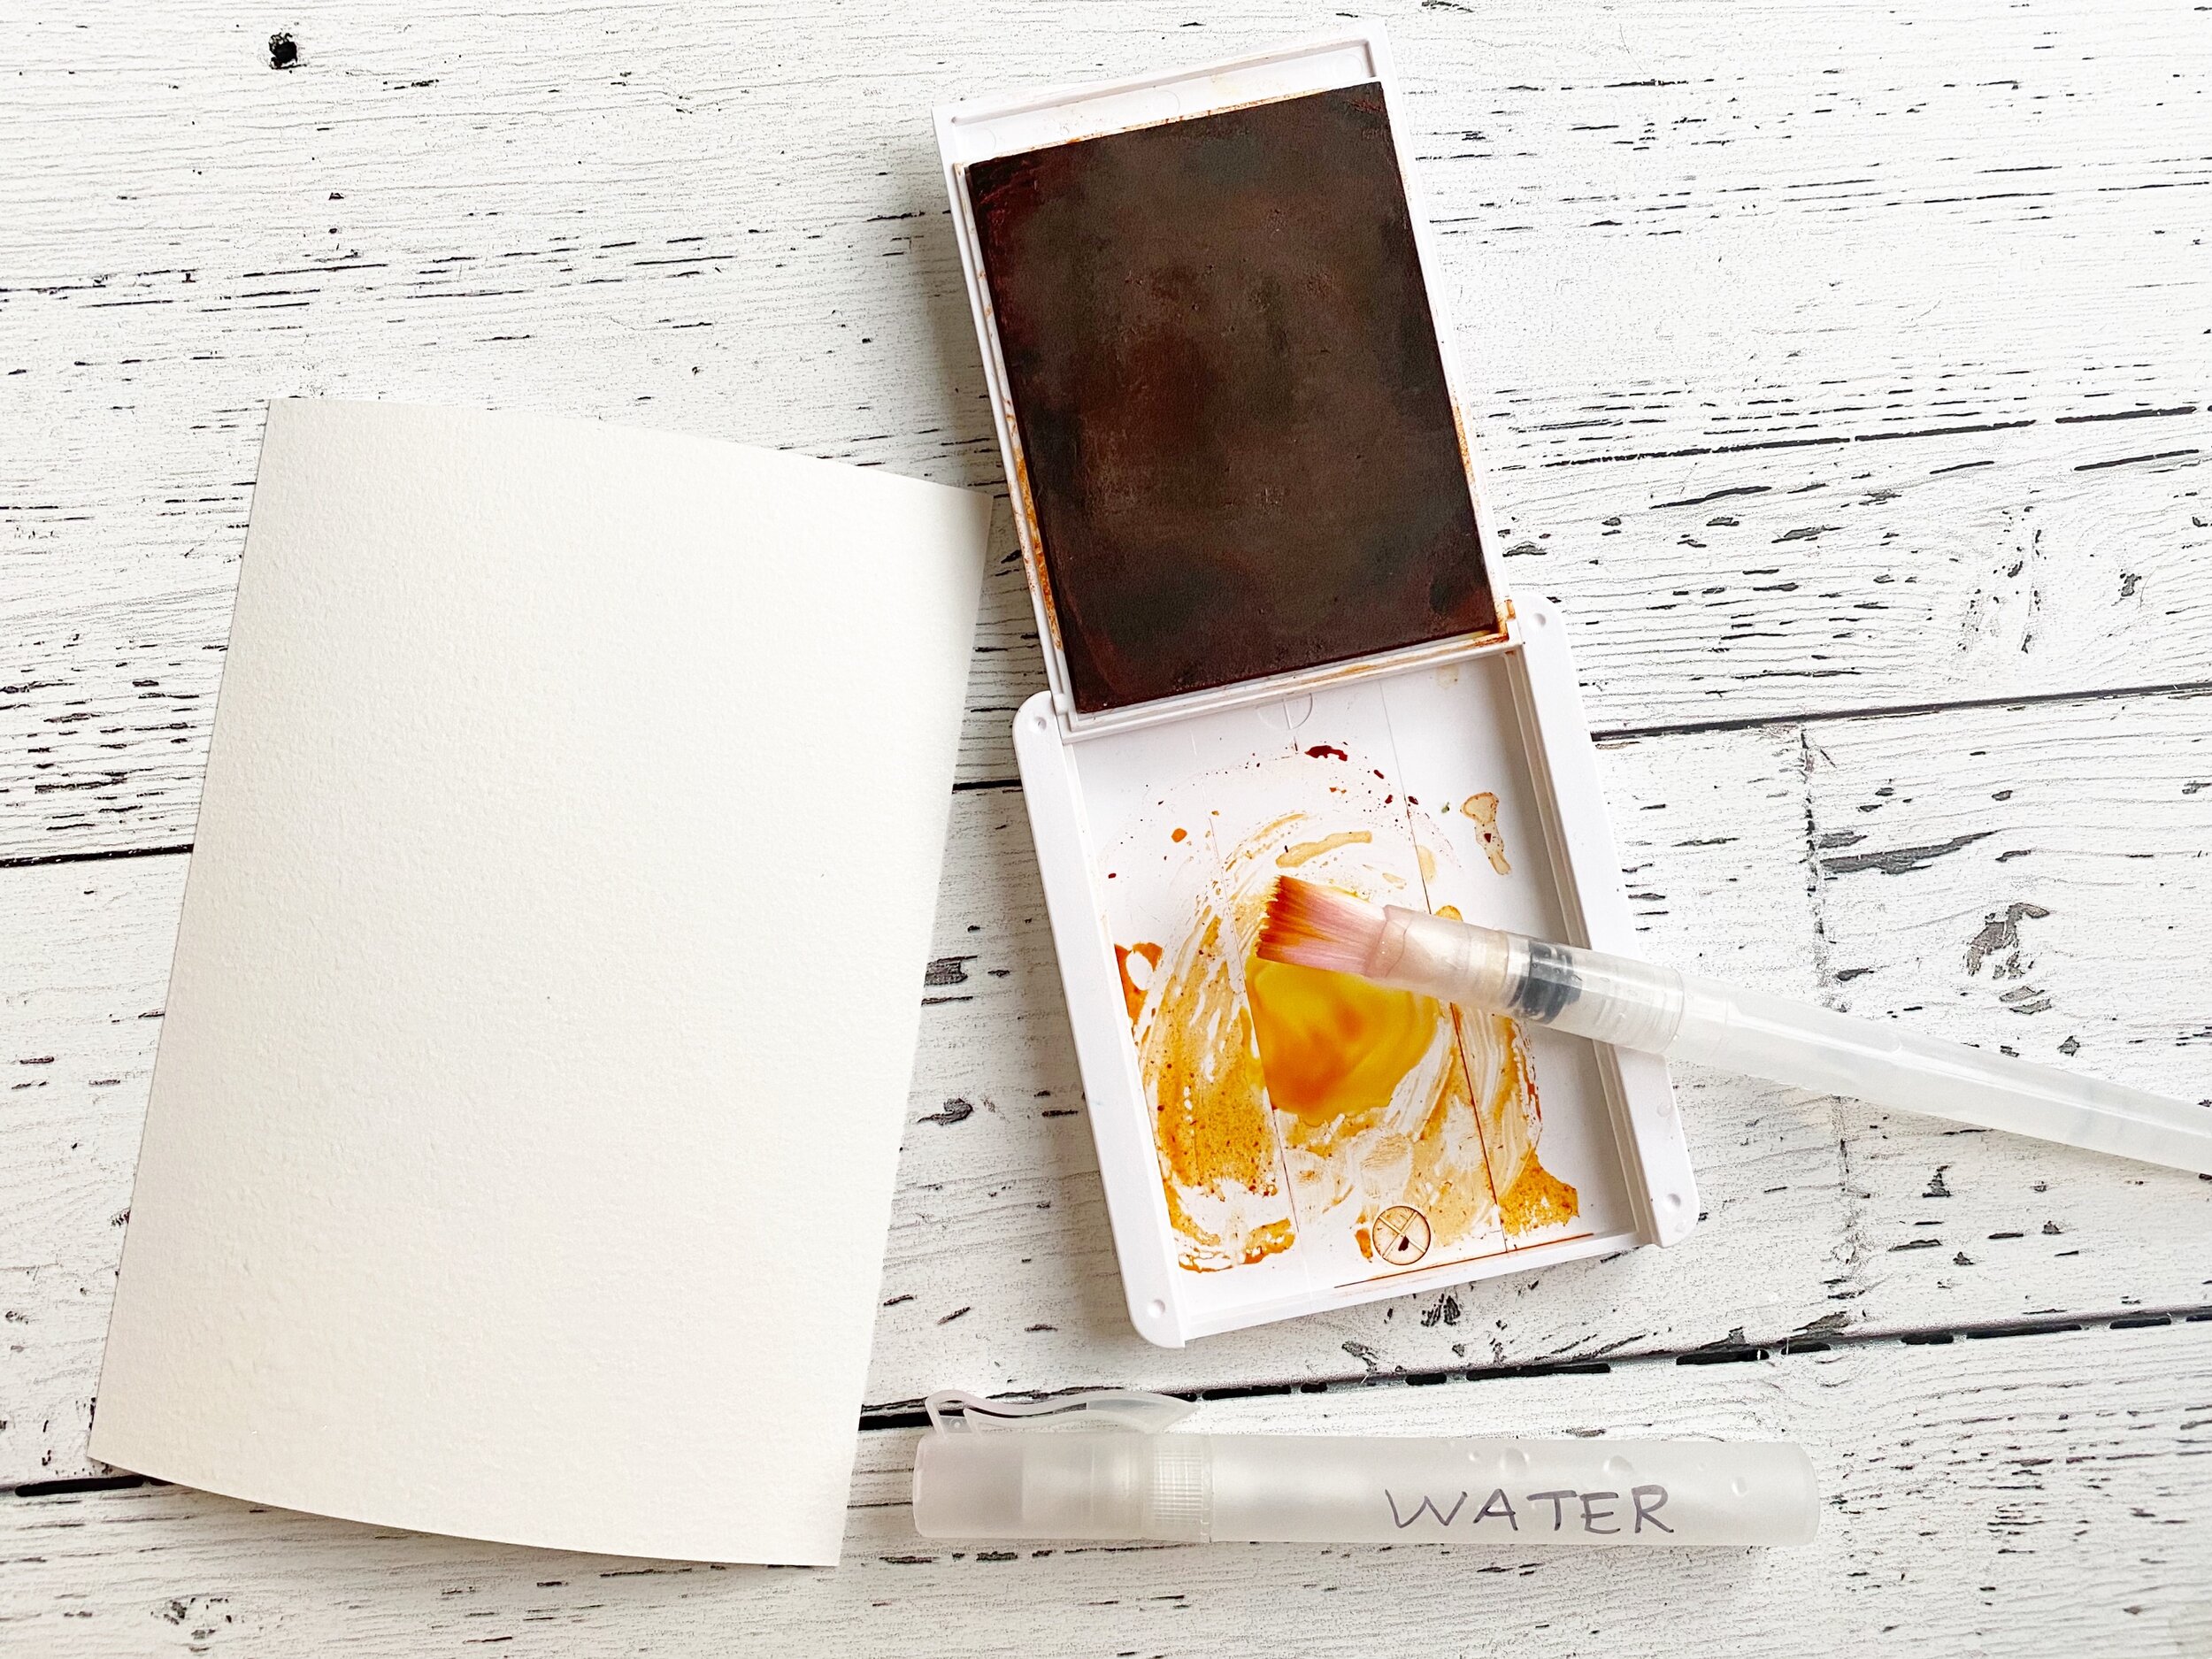
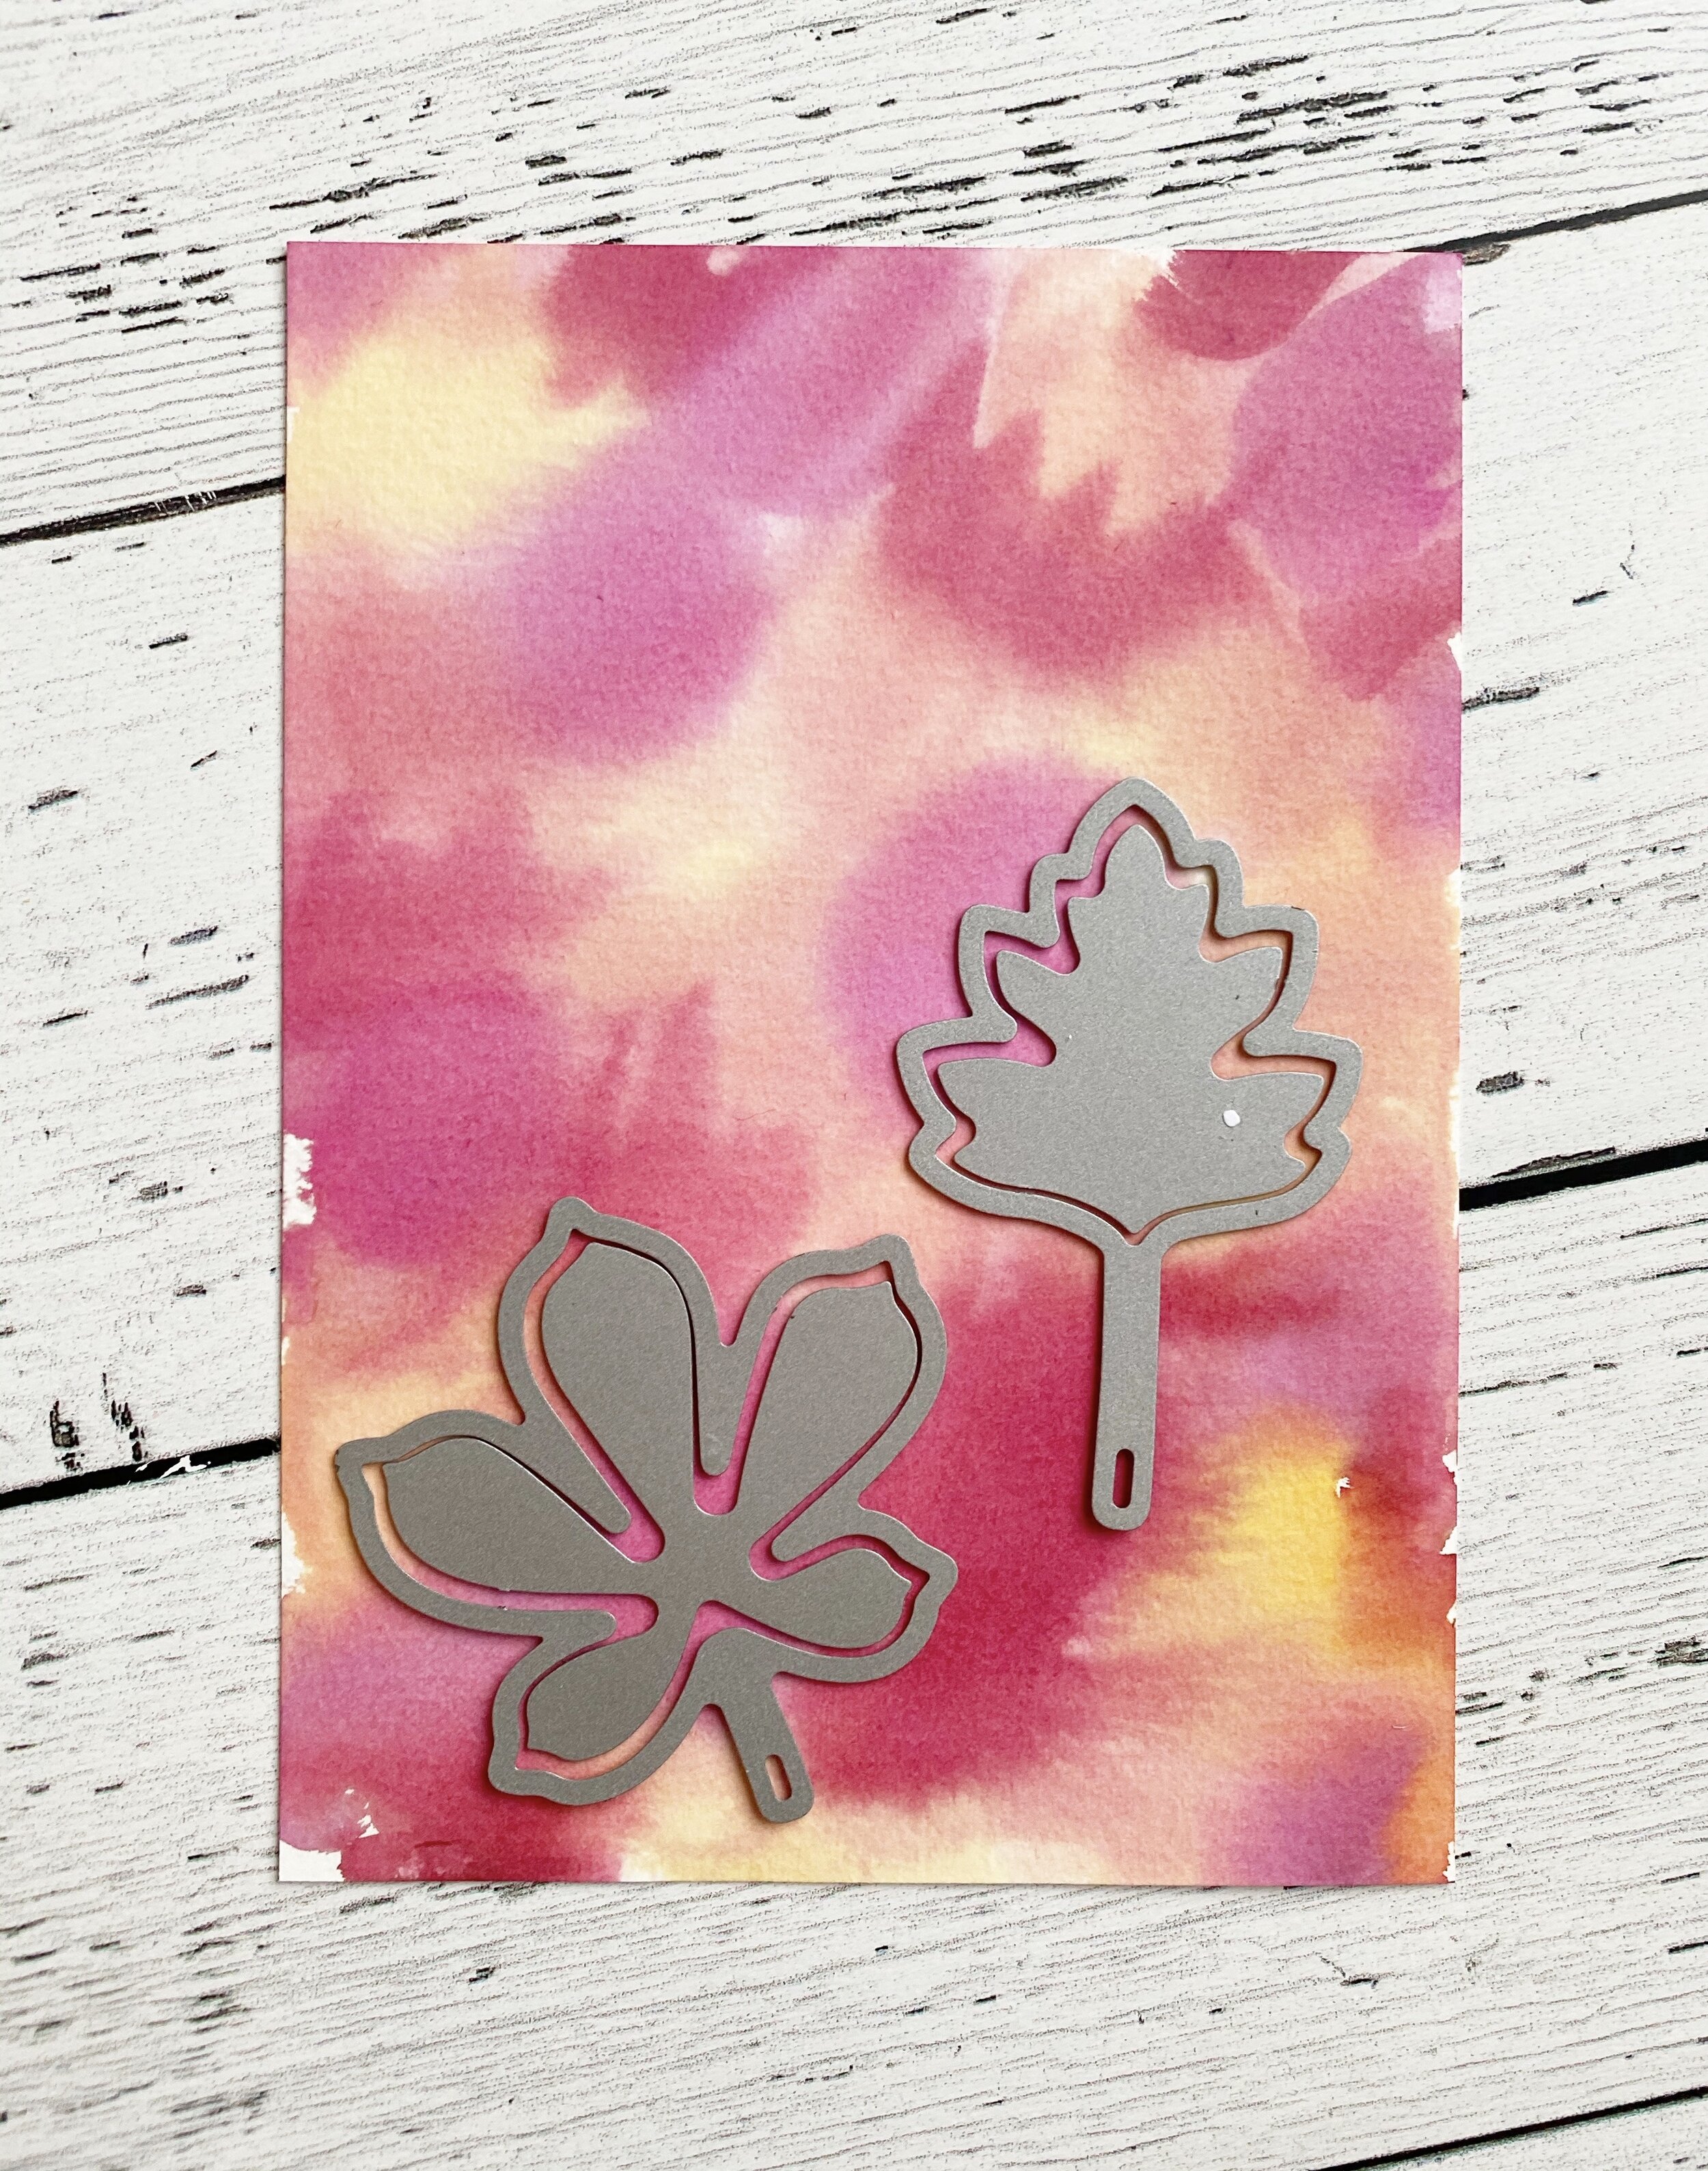
I chose the colors Cajun Craze, Rich Razzleberry, Merry Merlot and Pumpkin Pie. You will need a piece of water color paper, the large Water Painter Brush (I used the same one moving from light ink to dark ink), a Stampin’ Spritzer and the Stitched Leaves Dies.

Start by spritzing the water color paper with water and starts adding in your color. It may look a little weird but after you spritzer it one more time at the end and either let dry or use your heat tool it blends all the colors together. Cut out your desired leaf shapes for your project.

fullsizeoutput_12dc2.jpeg

I also wanted to play off of the grey tone in the Plaid Tidings DSP with the photo mat and some grey leaves. The photo mat has little leaves stamped on it in Smoky Slate ink to coordinate with the paper. The stamp set I used is Banner Year, don’t overlook it at the back of the Handmade for You catalogue! pg 65! It has tons of potential!

I used the old school Rock’n Roll technique on my grey leaves. Stamp them in Smoky Slate and then ‘roll’ the edges in Basic Grey Ink.

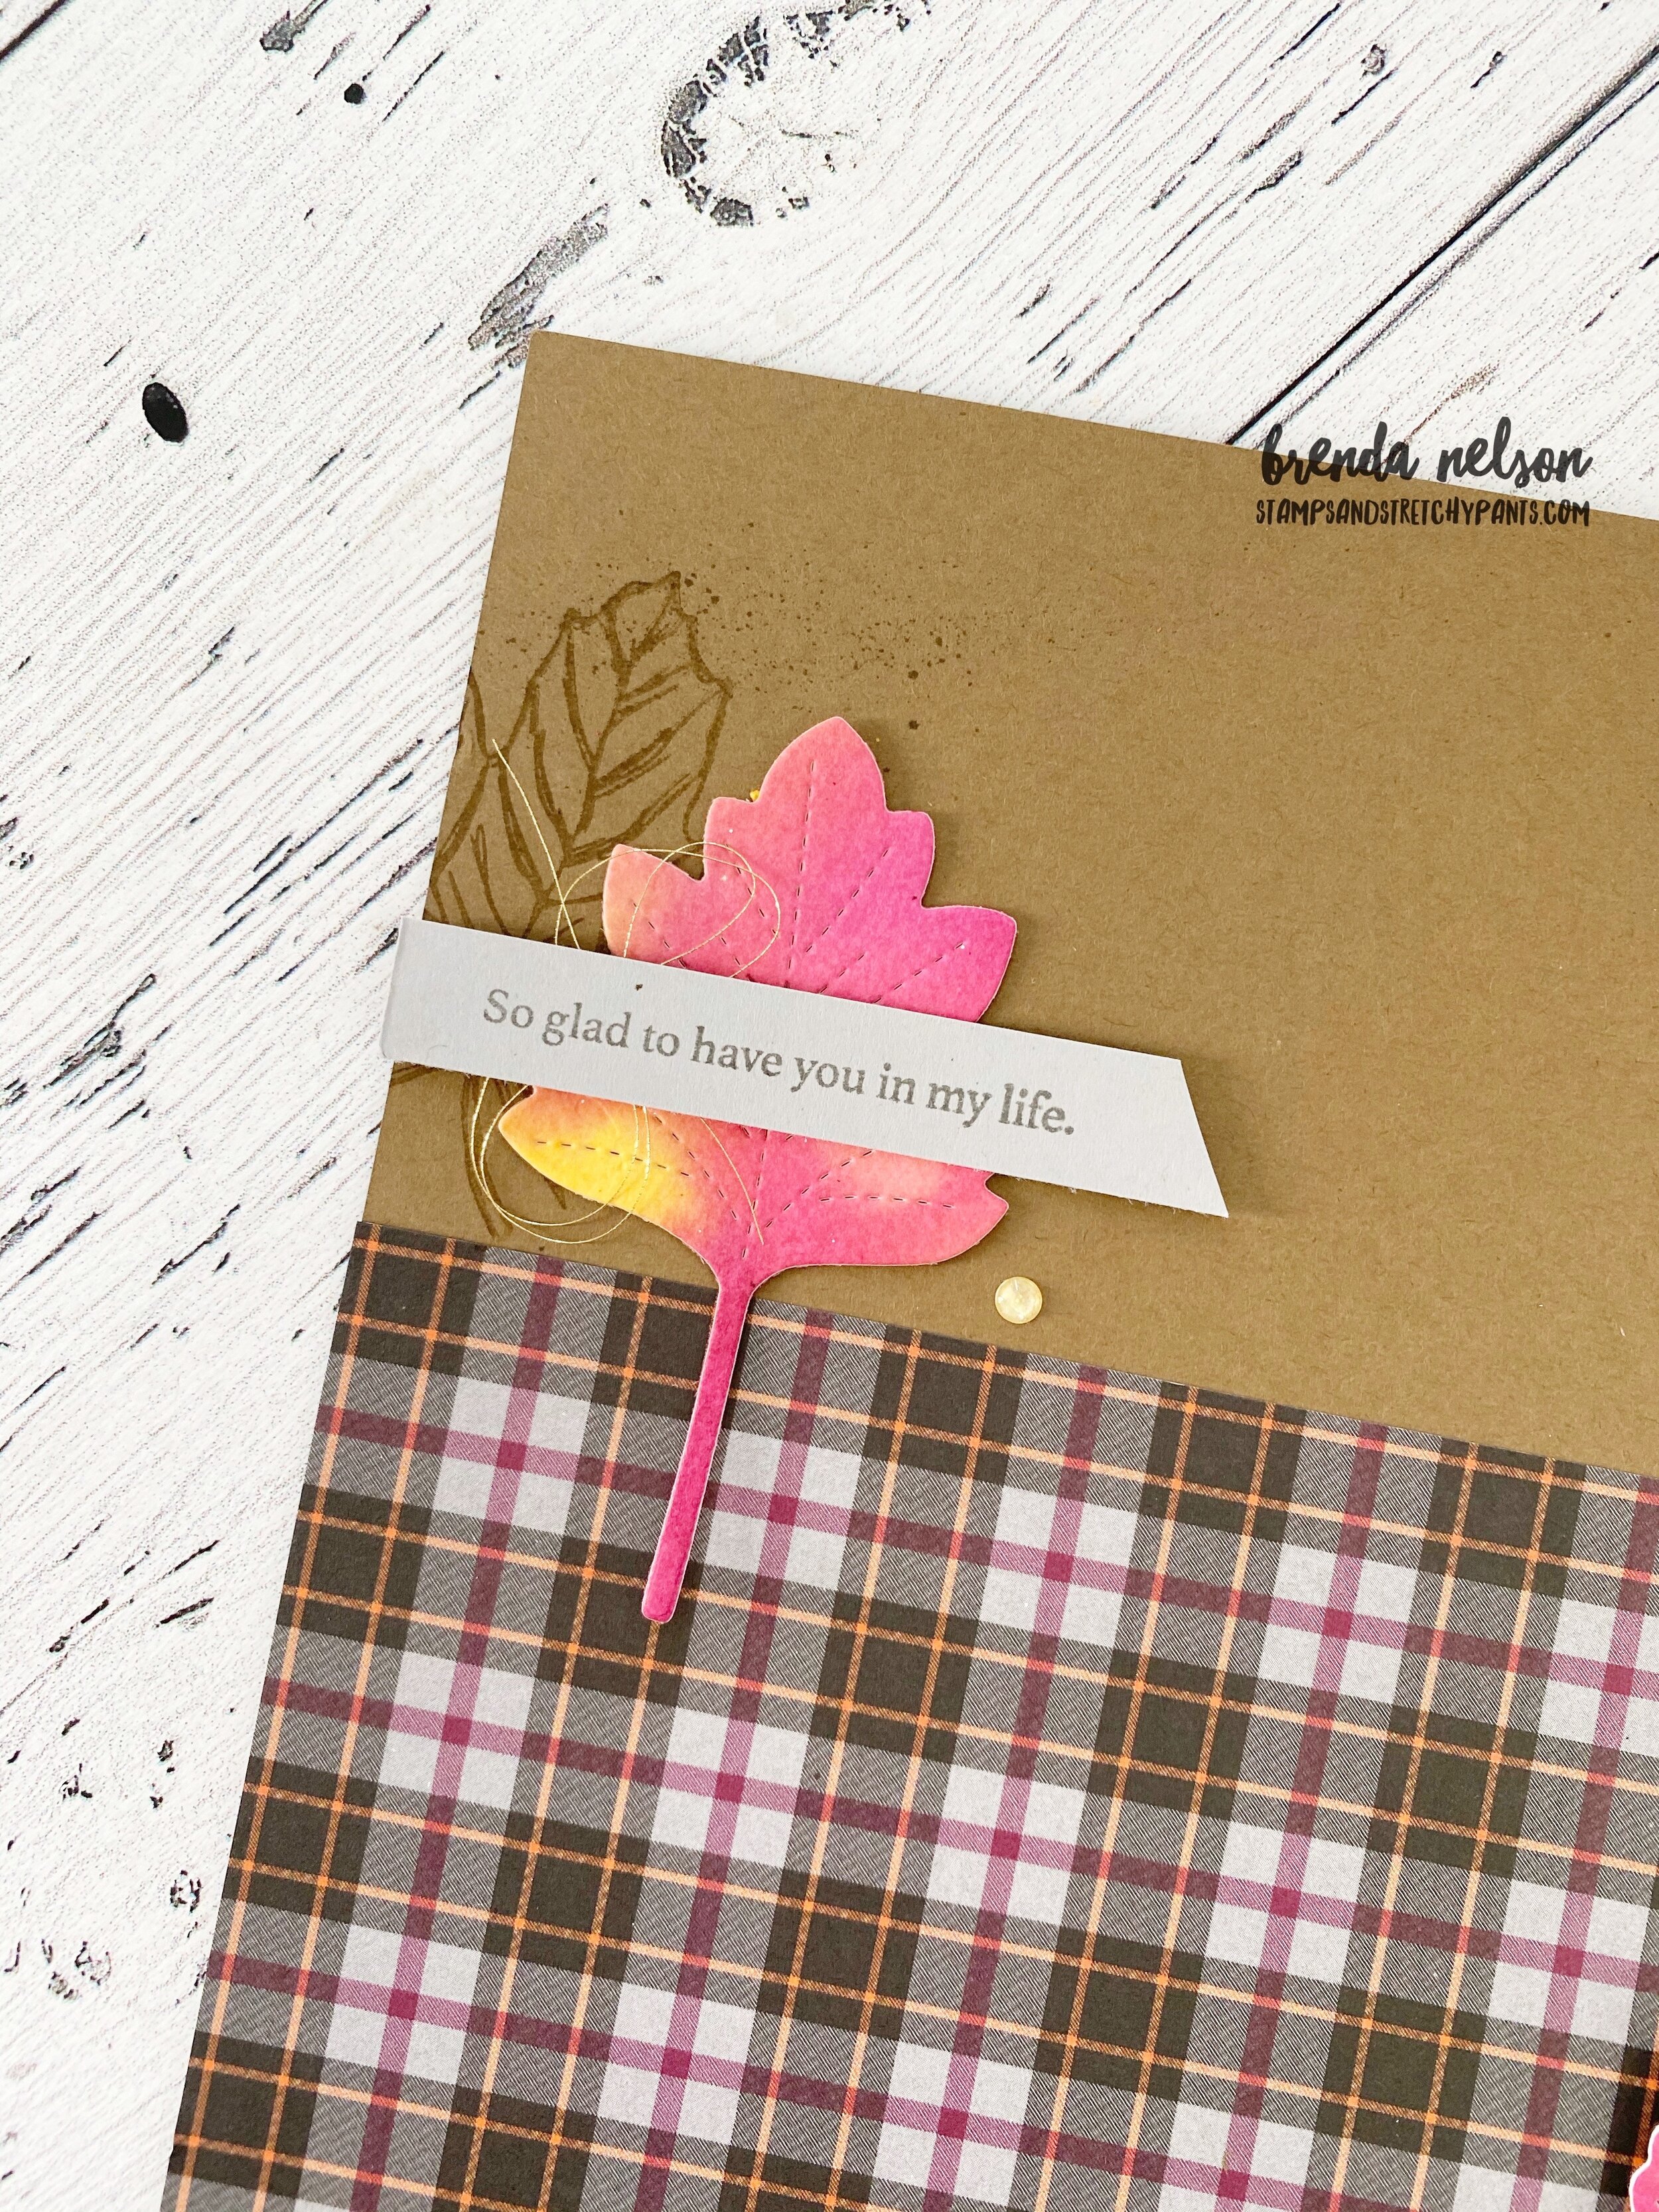
I also pulled in the large maple leaf image from the Gather Together stamp set for some background stamping. And I love the stitched look of the leaves so I decided to use the Hippo & Friends dies to cut out the sentiment with a stitched detail.


When I am creating scrapbook pages I find the magic is all in the details. Adding in different threads, textures, embellishments, layering stamps and colors. This little corner is a perfect example!

If you are in Canada and want to recreate this page you can order all the supplies from my online store! Just click below to head right there!


fullsizeoutput_12dbe.jpeg

Thanks for hopping along with us this week as we are wrapping up August and heading into September. You can go back to see what Melissa has made if you are just joining in here or continuing hopping forward to see what Connie has designed! See you next week!

Around the World on Wednesday--We Are Shaking Things Up!

Happy Wednesday! Thank you for travelling around the world on this virtual blog hop! I love how we have so many people participating from the many corners of the crafting world! So thank you for hopping along with us! I live in Edmonton, Alberta, Canada!

This month, our theme was SHAKE THINGS UP—-I took this literally, haha! To create a shaker card! Its actually been a while since I have played with this fun card style.

91442295_10216484369808661_2887014979863576576_n.jpg

I actually wanted to create a ‘simple’ shaker card and the easiest way to do this is to use our clear envelopes. You can find these in the catty with our medium envelopes on page 153. I use them for card pieces (my stampers have lovingly referred to these bags as their Brenda Bag!), as a glossy surface for water colouring techniques and to create shaker cards!

final 74.JPG

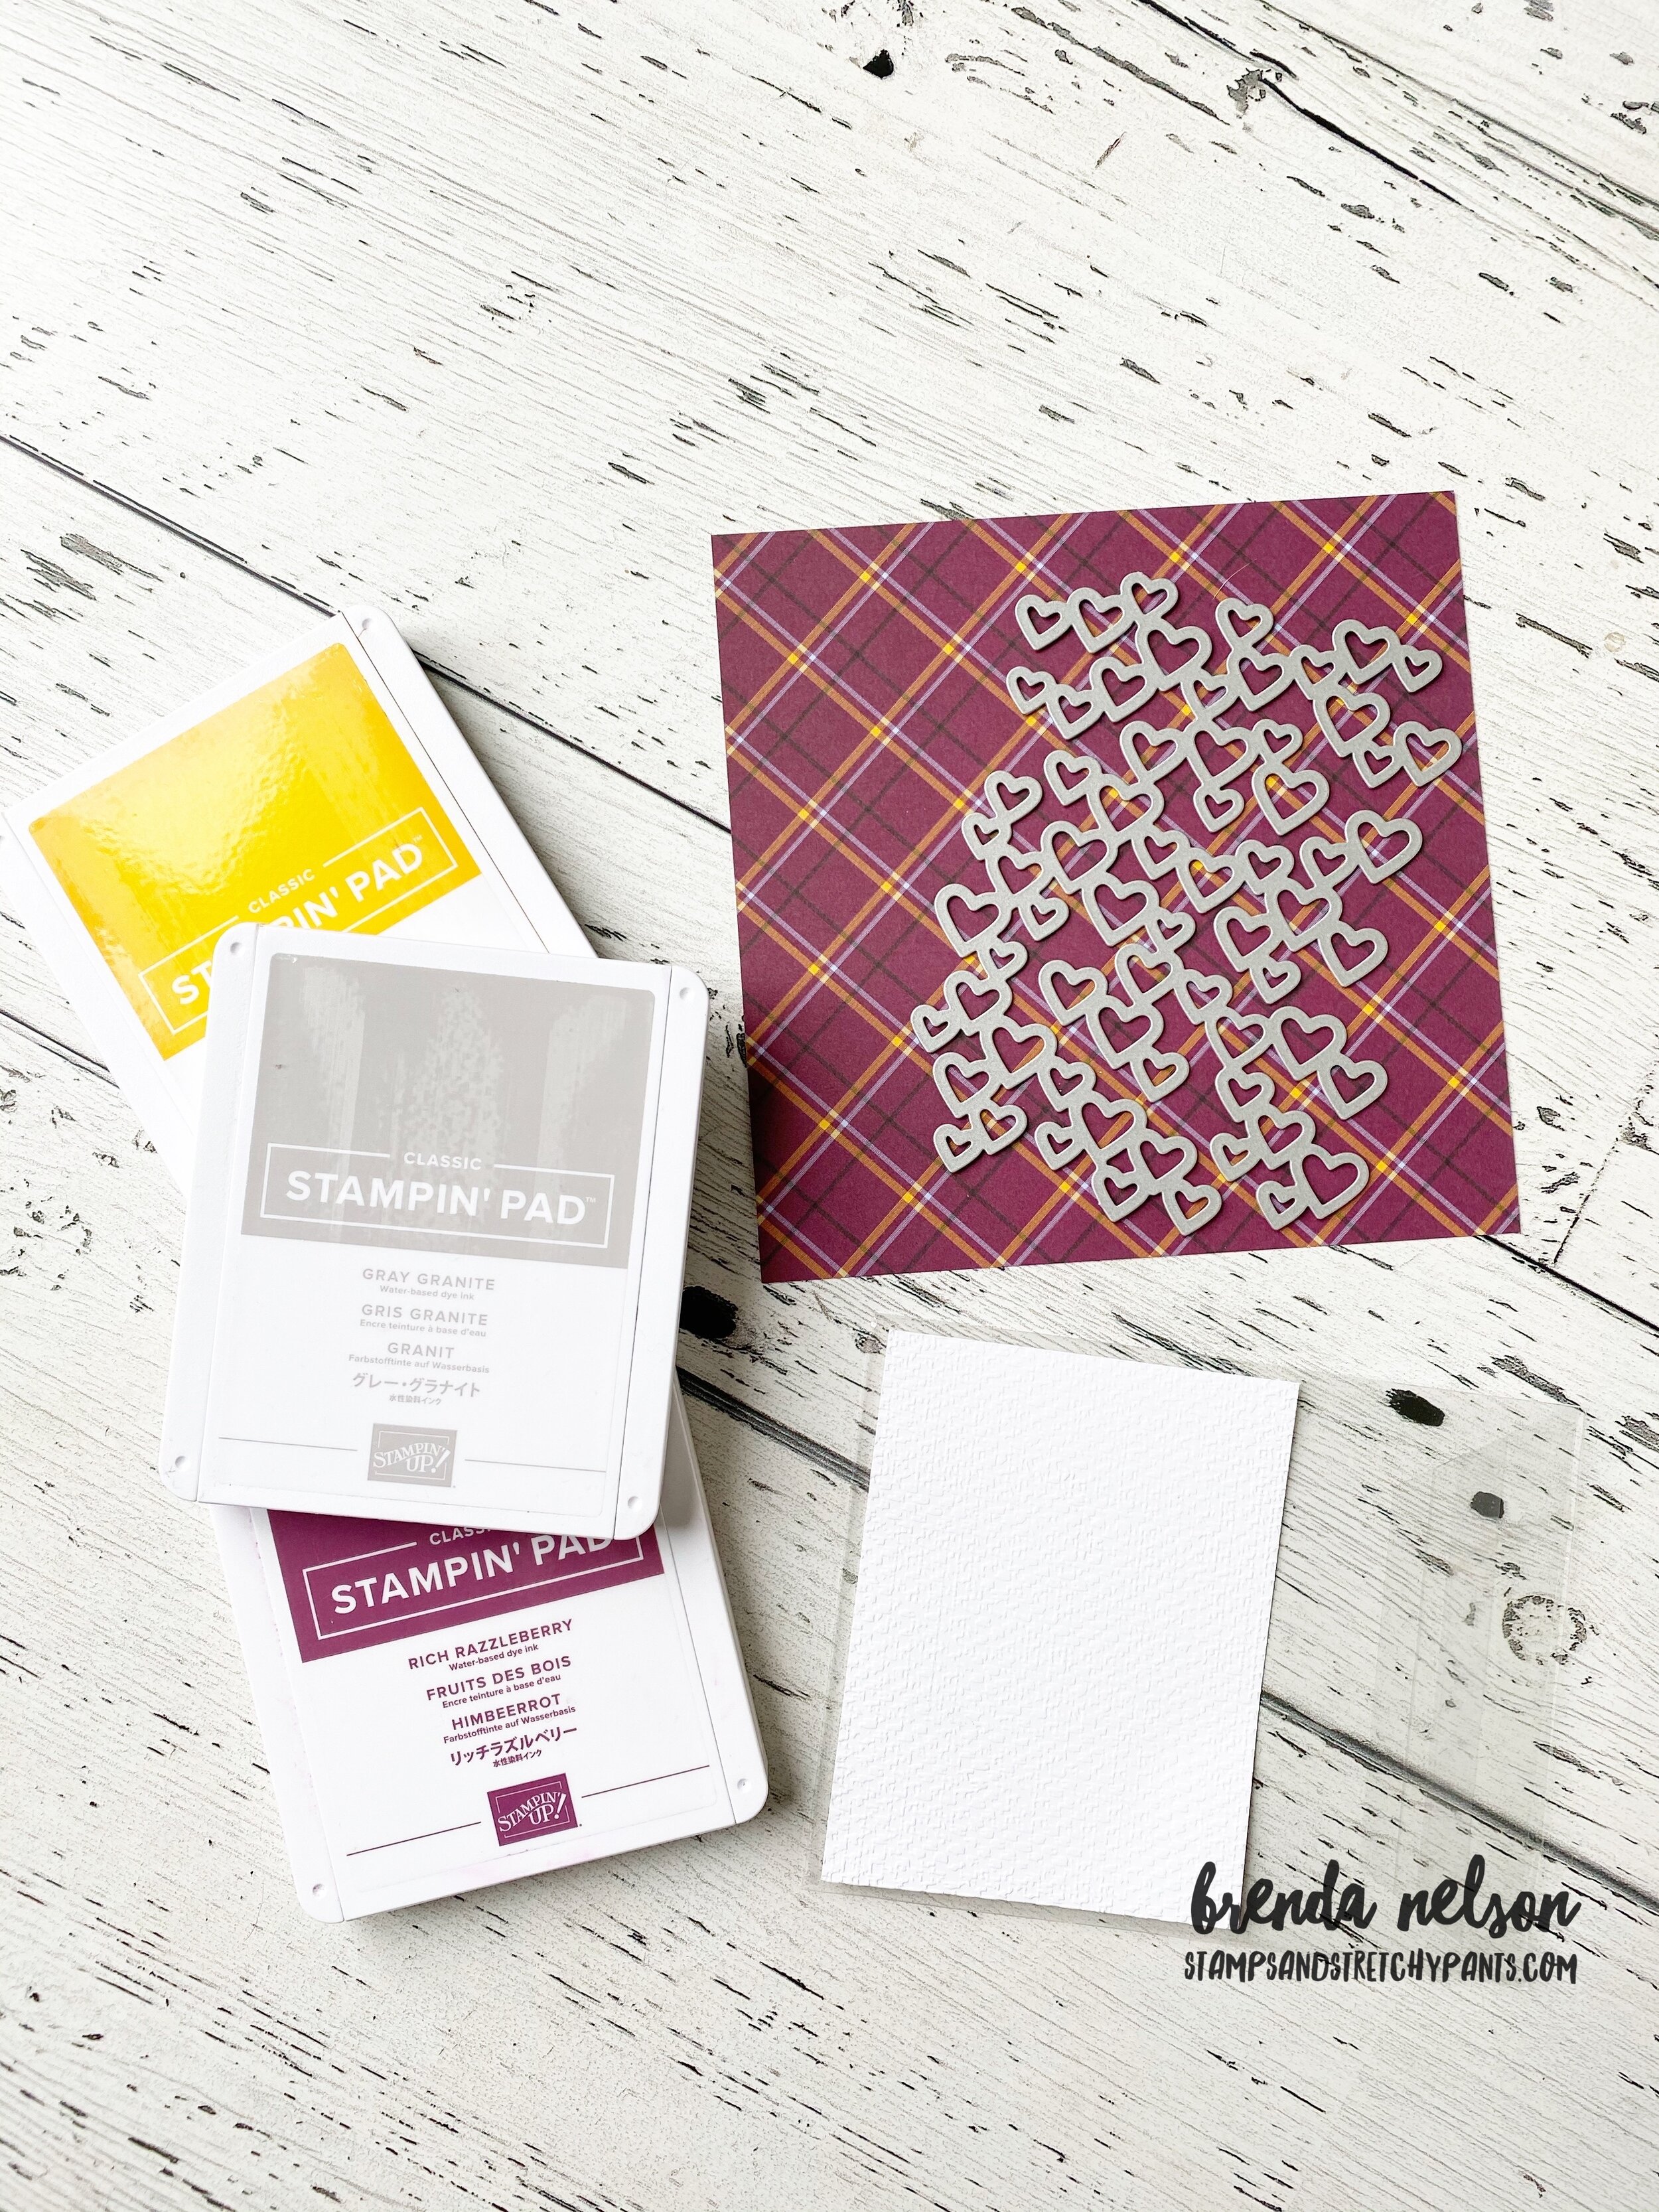
I took one of these clear envelopes and stuffed it with a piece of Whisper White card stock that was run through the NEW Stampin’ Cut & Emboss Machine with the Tasteful Textile 3D embossing folder. Ok, let’s stop right there! The NEW machine is a dream, its like butter! Even my stampers commented how smoothly things run through and how easy it is to use with all of the plaforms being labelled! So well done, SU, well done!

Now I knew I needed some filler for my shaker card and I ended up using the Detailed Hearts Die on some Gold Foil paper. I was thinking convenience people, haha! I knew this die would cut out a ton of hearts and would leave me with a fun piece I could use on a future project! I dropped all of my hearts into the clear envelope, folded it in half and sealed it shut. Seriously, this could NOT be easier and is such a fun way to create a shaker card, especially for new stampers!

I really wanted to play with some new stamps so I decided to embellish the front of my card with the Love of Leaves Bundle and the Plaid Tidings DSP. The little ‘hello’ is stamped and embossed in gold and is then cut out using the itty bitty tag that is a part of the Gift Bow Builder punch. Its literally too cute for words!

I love all of the texture you get with the Love of Leaves stamp set.  The dies are fabulous as you can use them to add a stitched detail to your leaves if you choose or just to cut out the image! You can use my Hostess Code if you want to add them t…

I love all of the texture you get with the Love of Leaves stamp set. The dies are fabulous as you can use them to add a stitched detail to your leaves if you choose or just to cut out the image! You can use my Hostess Code if you want to add them to an order!

Next up on your virtual world tour is to visit Tricia Butts from the United States. I can’ wait to see what she has created for us, I know you will be inspired! Just click on the Next Blog and it will take you there! Have a wonderful day!