Happy Birthday Summer!

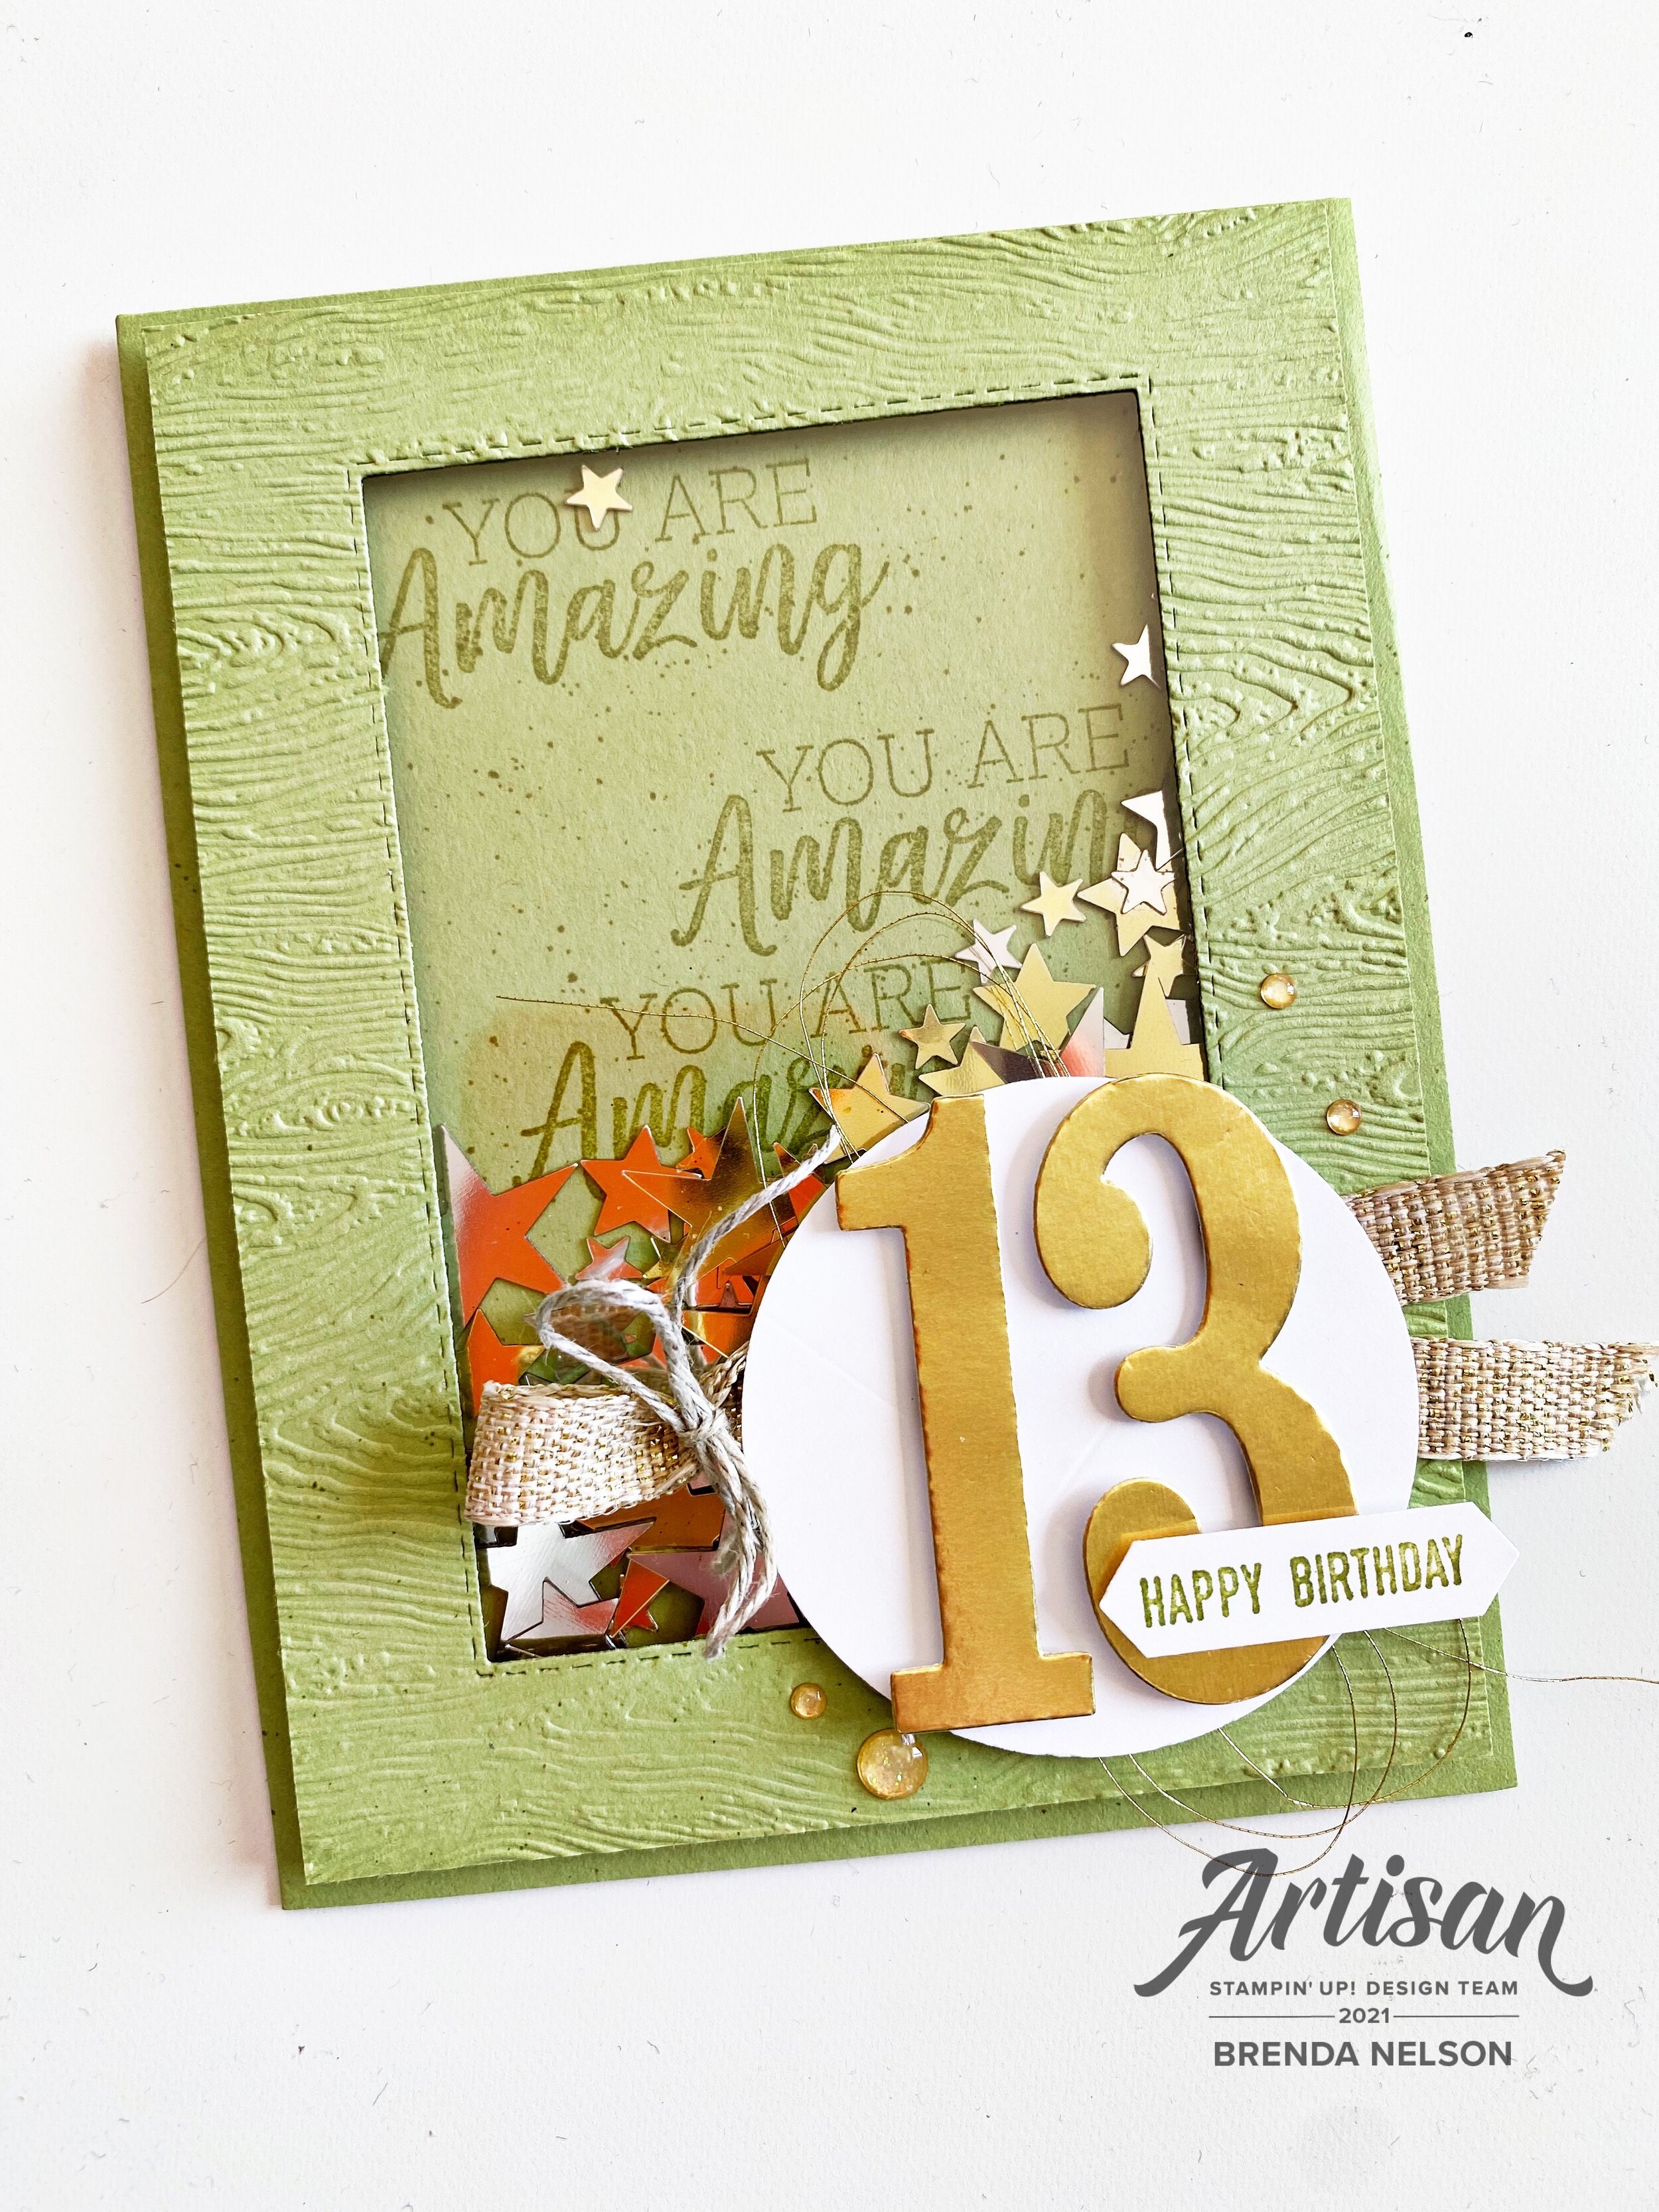
Yesterday we celebrated a milestone birthday at our house! My daughter Summer turned 13, which means I am the mom to two teenagers now! Honestly, how did that happen so fast?

So obviously I needed to make her a special card for her birthday. Pear Pizzazz was the perfect color to coordinate with her Baby Yoda birthday cake we had made and all of my birthday celebration decor was gold so that is where my color palette came from.

final (1) 2.jpg

I wanted to make a shaker card for Summer as something extra fun. The inside ‘shaker’ stars actually came from my wedding, which was 21 years ago! I recently came across some wedding decor I had stored in a box and I had a whole container of these stars which we had used to sprinkle on our head table. I am really glad that I saved them for so long! hahaha! They finally came in handy!

final (5) 2.jpg

As you can see, I used the Stitched Rectangles to cut the ‘window’ for my shaker card and layered a Window Sheet behind. I used the Foam Adhesive Strips to elevate the front panel.

On the base of the card I stamped “You Are Amazing” using the retired stamp set of the same name. The sentiment “Happy Birthday” is from Itty BItty Greetings and I used a retired punch that I modified to create just the perfect size for my greeting. I love punches that can work beyond what you initially see or think.


I ran the first window layer through the Timber 3D embossing folder before I put the shaker aspect together. I love this folder and find it so versatile.

My 13 is cut from the another retired die set that I will keep forever and ever! Sometimes you need to hang onto the dies that don’t come around very often, you never know when they might come in handy!

Behind the 13 I layered a Basic White circle and some Gold Fine Art Ribbon with some Linen Thread and Gold Metallic Thread. I finished off the front with some Gold Shimmer Gems.

final (9) 5.jpg

I was really happy with how this card turned out especially because I felt under pressure to make Summer a really special card to celebrate this milestone birthday!
Color Fusers-January 2021

Hello friends! Welcome to our first blog hop of 2021! I can’t wait to share in creativity with the Color Fusers Team this year! I hope you leave every hop being inspired to create a project with our featured color combo and to start experimenting with different color combos yourself!

colorfusers.jpg

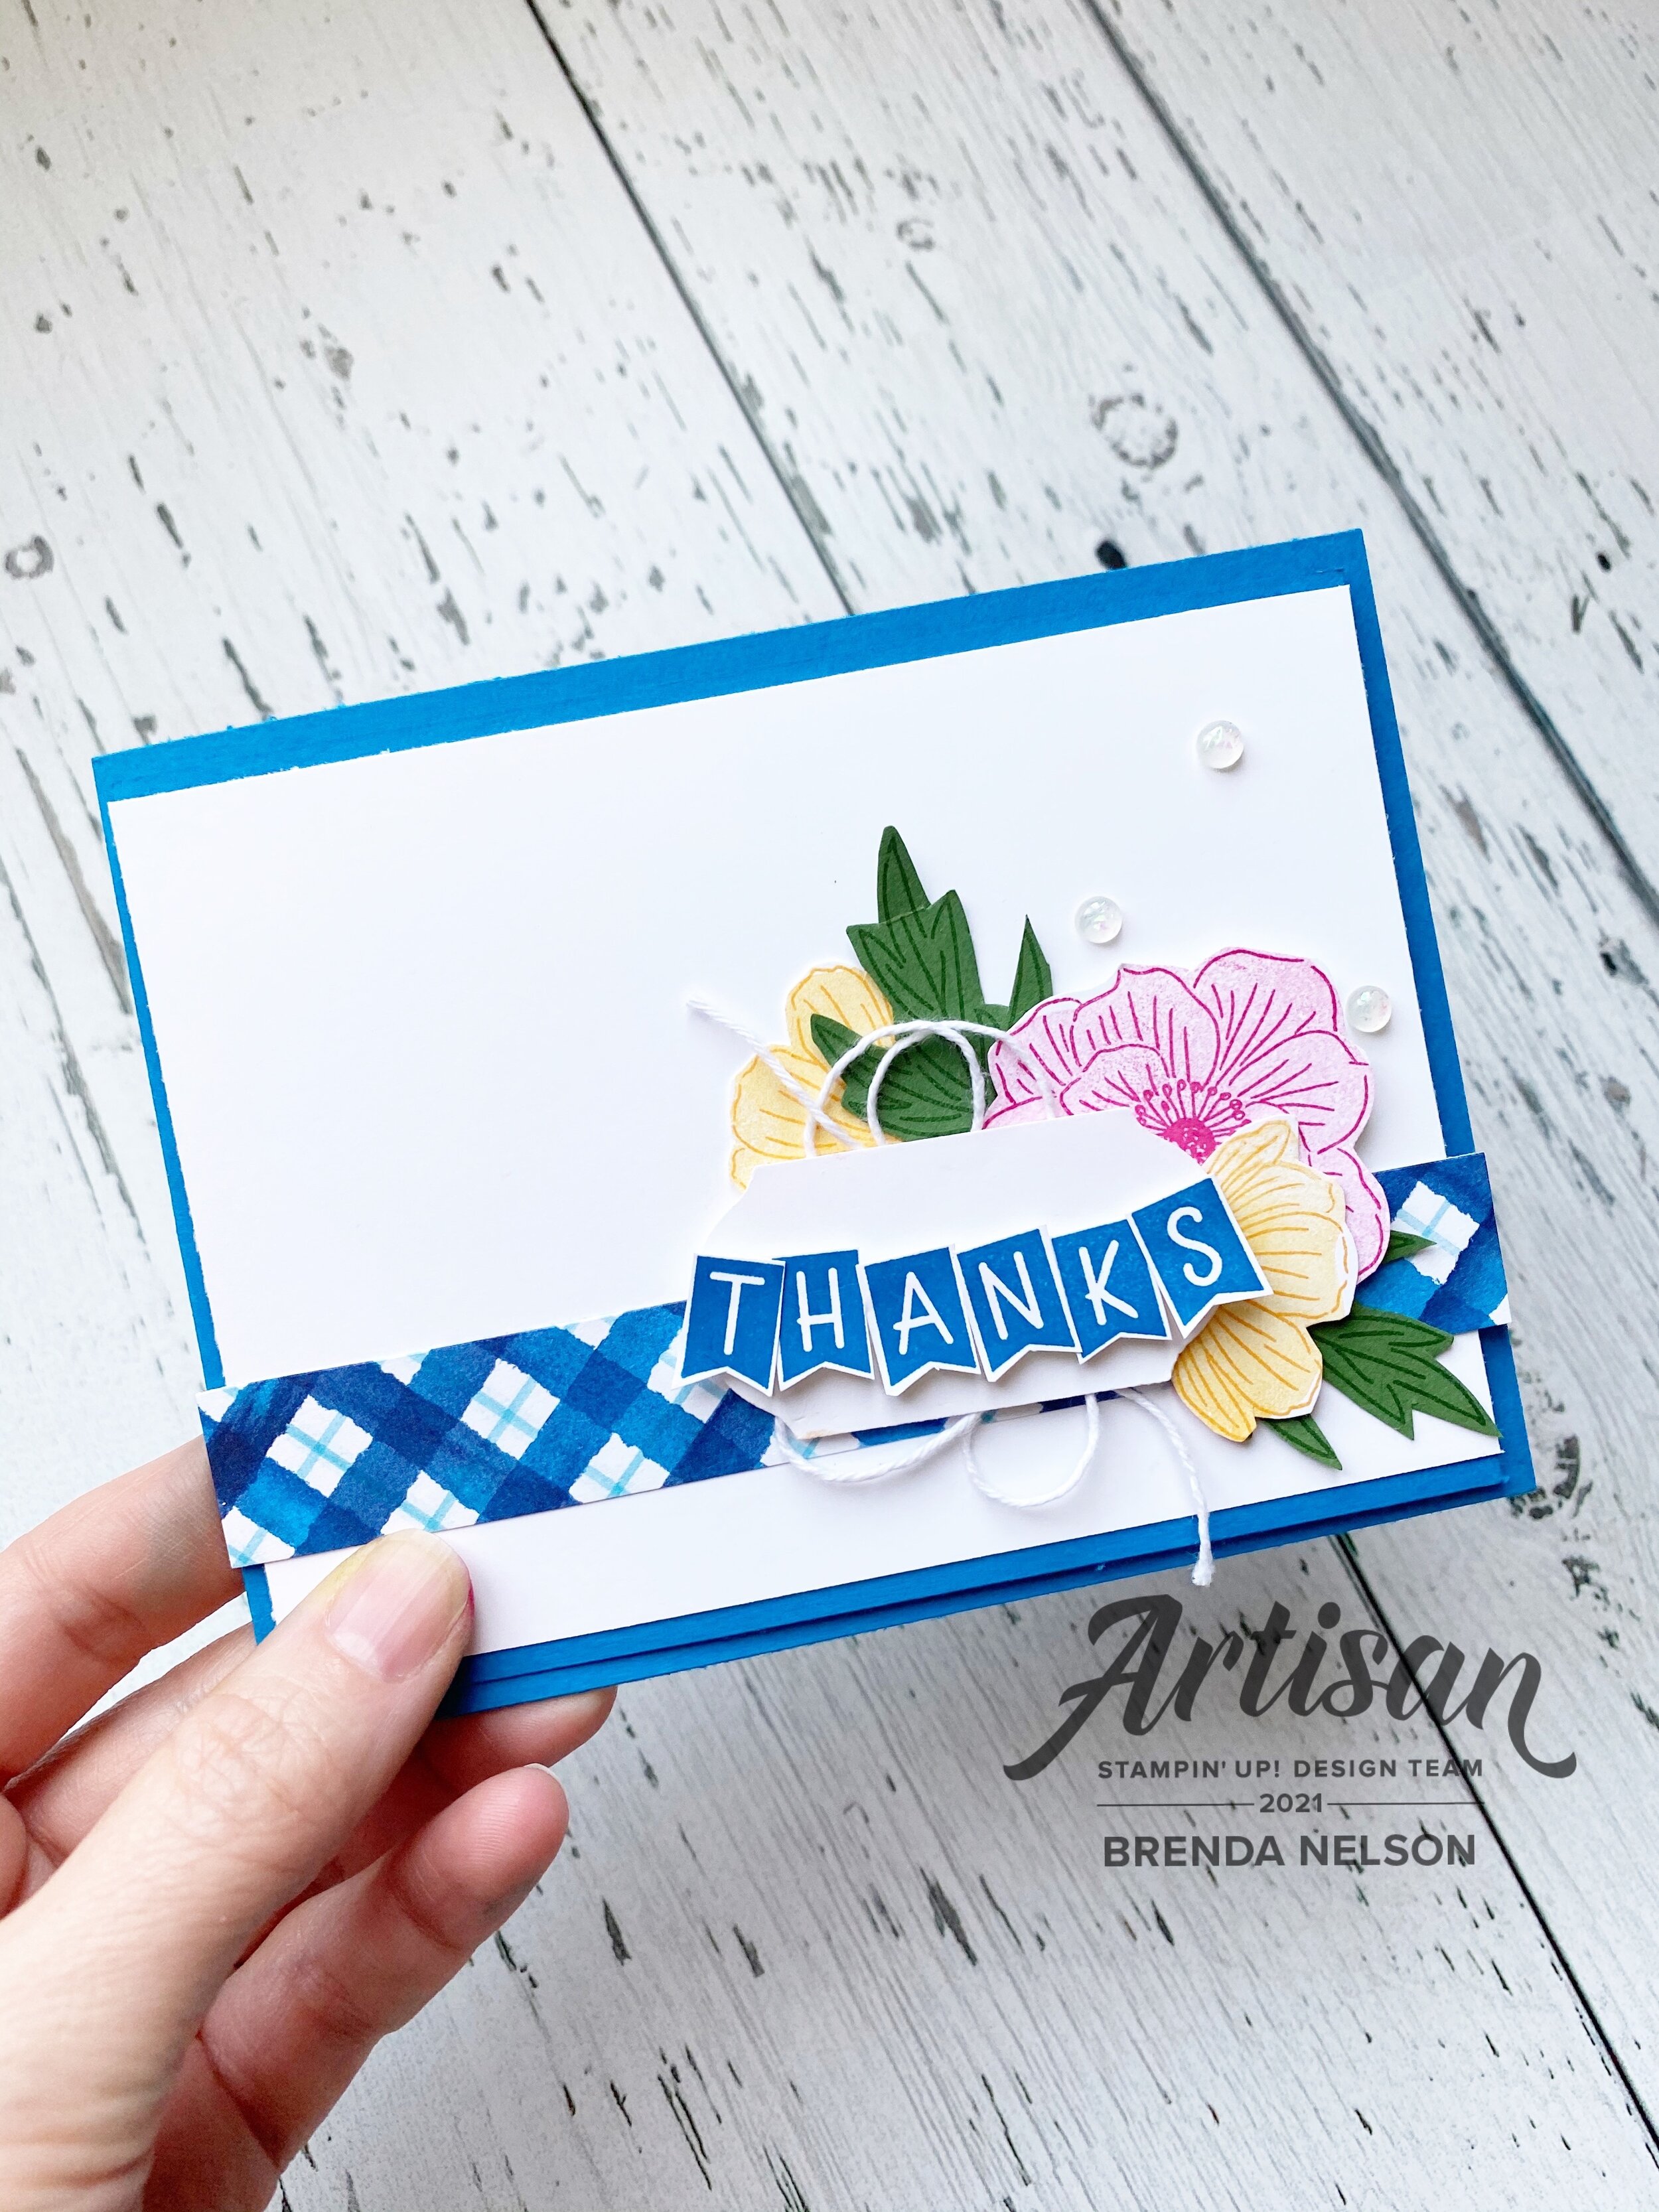
This month we have a color challenge that features FOUR Stampin’ Up! colors. Now I won’t lie, I did find this combo a little intimidating but I am actually really happy with what I was able to create! The featured colors for this month are Pacific Point, Melon Mambo, Garden Green and Mango Melody!

I knew that the only way I could make sense of this combo was to create something with a floral vibe and with our new January to June catalogue there are so many floral stamp and bundle options.

colorfuserjan.jpg

I wanted to use a set that might not be at the top of your list but may actually surprise you with its potential! I used the Back to Back Blooms stamp set which is a ‘Reversibles’ stamp set. This means you stamp the line image using one side of the photopolymer stamp and then clean and flip it (reverse it) to use the other solid side as a filler. Its actually quite genius!


I actually really love how crisp and clean this card feels even though it has four colors in the design.

I started with a base of Pacific Point and created an second layer in the same color that is 4 x 5 1/2. I then layered Whisper White over top.

The strip of designer paper is actually from the Sale-a-bration paper, Berry Delightful.

I stamped the Melon Mambo and Mango Melody flowers on Whisper White and hand trimmed them.

final (59).jpg

The leaves are stamped in Garden Green ink on the same paper. But my favorite part of this card is the “Thanks” banner! Its so adorable and so fun! The Back to Blooms stamp set actually doesn’t have any sentiments so I had to bring in another set. One of my new favorites is the You Are Amazing stamp set. This set is the partner set needed to complete the You Are Amazing card kit. However, it has so much potential! You will see it a lot in my upcoming designs.

final (64).jpg

I trimmed the ‘Thanks’ from its original form and used MIni Dimensionals to pop it up on the Label Punch. I added some White Bakers Twine to the back—-I am so happy it is available again in a combo pack with Blushing Bride! Yay! I added a few Opal Rounds (LOVE) to fill in a bit of the white space and add some subtle glitz!

final (61).jpg

I am really so happy with how this card turned out and I decided I needed to add a little something to the inside too! I did some simple and easy masking with the large flower and added another sentiment to the inside. I kept the flowers to their line image only for that fresh crisp feel. I think anyone would be so happy to get this cute card in the mail!

final (58).jpg

I cannot wait to see what Nicolle has created to share with us this month. If you want to go backwards, you can and you will be visiting Melanie. I hope you are able to hop all the way around and please feel free to leave a comment :). Happy New Year!


A Card a Day in December--Day #30

The end of 2020 is so near we can almost start celebrating! So of course I had to design a page layout to capture our celebrations tomorrow as we say Hello to 2021! I think this page is simple and sophisticated and won’t take you long to assemble. You can substitute any stamps that you have too as you will see that I combined retired, current and BRAND NEW stamps all on this layout with a mixture of fonts and design styles.

final (57).jpg

I designed this page on Very Vanilla 12x12 because I new that I wanted to use gold accents and Very Vanilla has a warmer tone to it. I used a photo mat of Basic Black to accommodate a future 5 x 7 photo. I can anticipate my family taking a selfie so this photo orientation supports that better.

The sentiment ‘Cheers…’ is from a retired set called Cheers to That. It is a set that I will keep in my collection as I do find that sets to do with New Years do not come around very often. It is stamped in Versamark with gold embossing powder on Very Vanilla. Behind the sentiment I added some retired black twine and some new gold hued ribbon called Fine Art Ribbon. And of course I had to add the Matte Black Dots from the Love You Always suite—love! A few glittery stars and this little section is perfect.

final (56).jpg

I wanted to use a Gold Hoop as well on my page to highlight the word Hooray. I used my Stampin’ Write Basic Black marker to highlight the word Hooray from the rest of the stamp as it is a part of a phrase. This stamp is from the You Are Amazing stamp set which is the stamp set designed to complete the You Are Amazing Project Kit.

final 2.jpg

I added a gold leaf behind the hoop which is cut from Gold Foil paper and the Forever Flourishing Dies. 2021 is cut from black glitter paper using the Playful Alphabet dies and Foam Adhesive Sheets. I really like this little vignette!

Let’s Celebrate is from the Bloom & Grow stamp set in the annual catalogue. It is also modified from its original form and is embossed with gold embossing powder and cut using the largest circle from the Circle Dies. I added a little gold metallic thread behind and a couple die cut starts from the Stitched Stars dies. Gilded Gems were the perfect accent here!

I hope you and your family have a wonderful New Years however you are celebrating and can capture a memory together!