12 Days of Christmas--Day 12!

Ho Ho Holy smokes! How did our 12 Days of Christmas end so fast? I can’t believe we are at the end, but we are! And I truly hope you have enjoyed all of the projects that Melanie @melsinkyfingers and I have been sharing with you. If you missed any, please make sure you go back and take a peek!

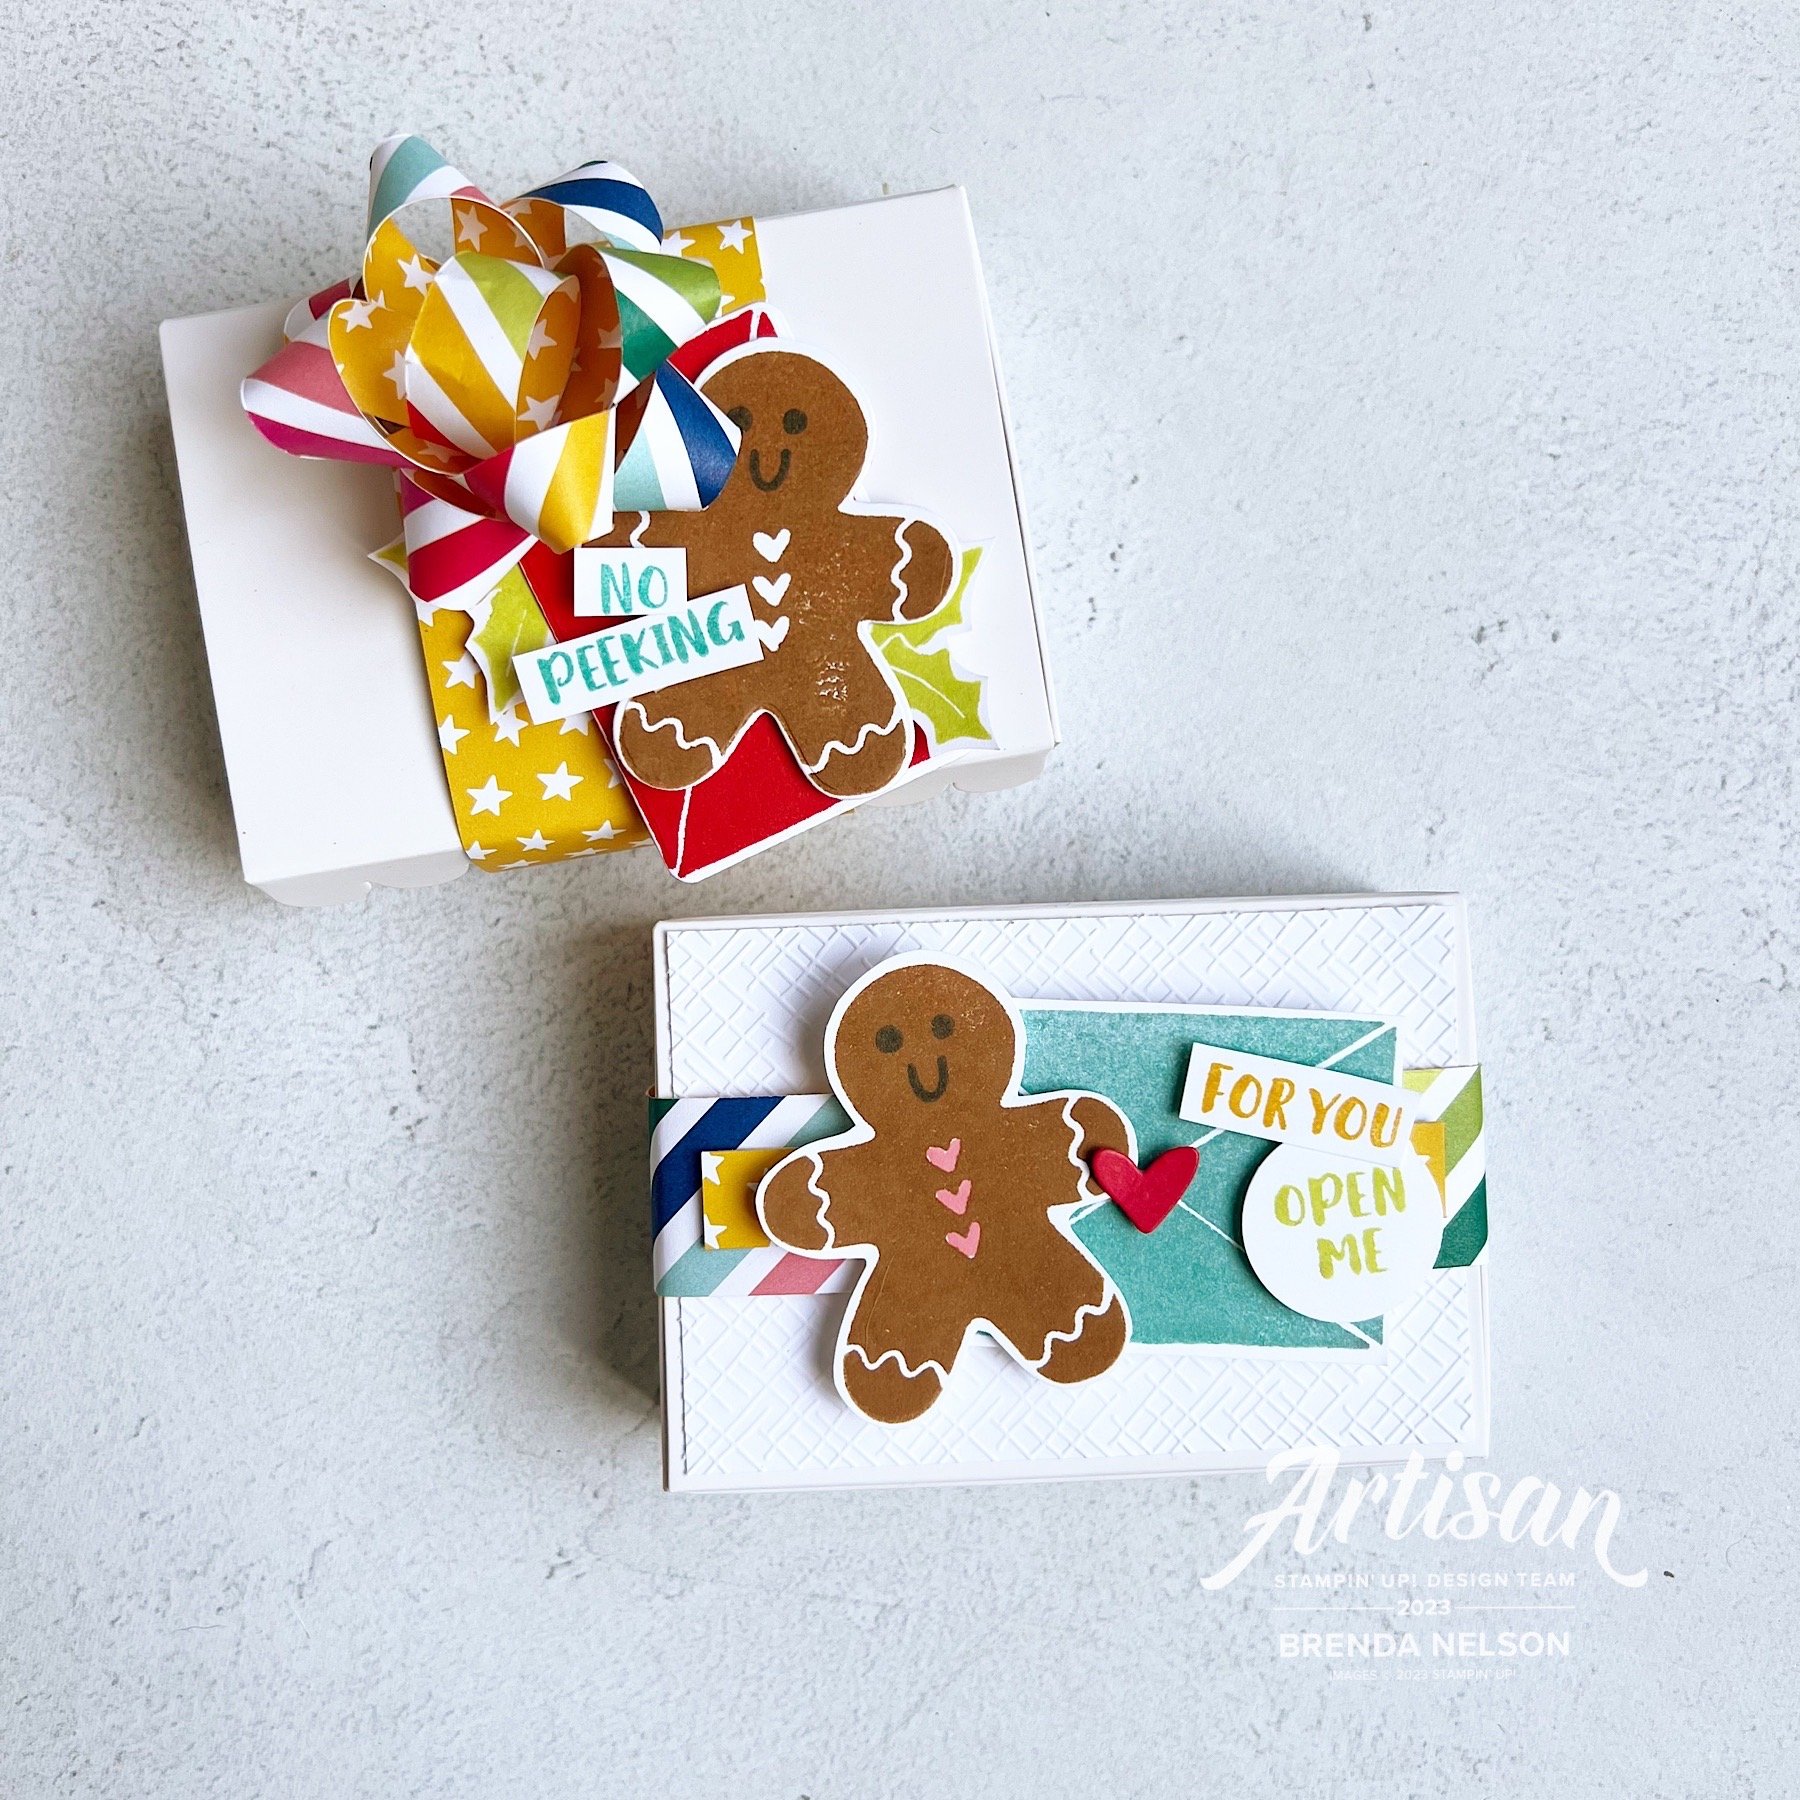
The last project I want to share with you today is an easy card box, that you can store you holiday cards in or fill with cards to give as a gift to a co-worker, friend, family member, teacher or more! Who would not love the gift of cards?

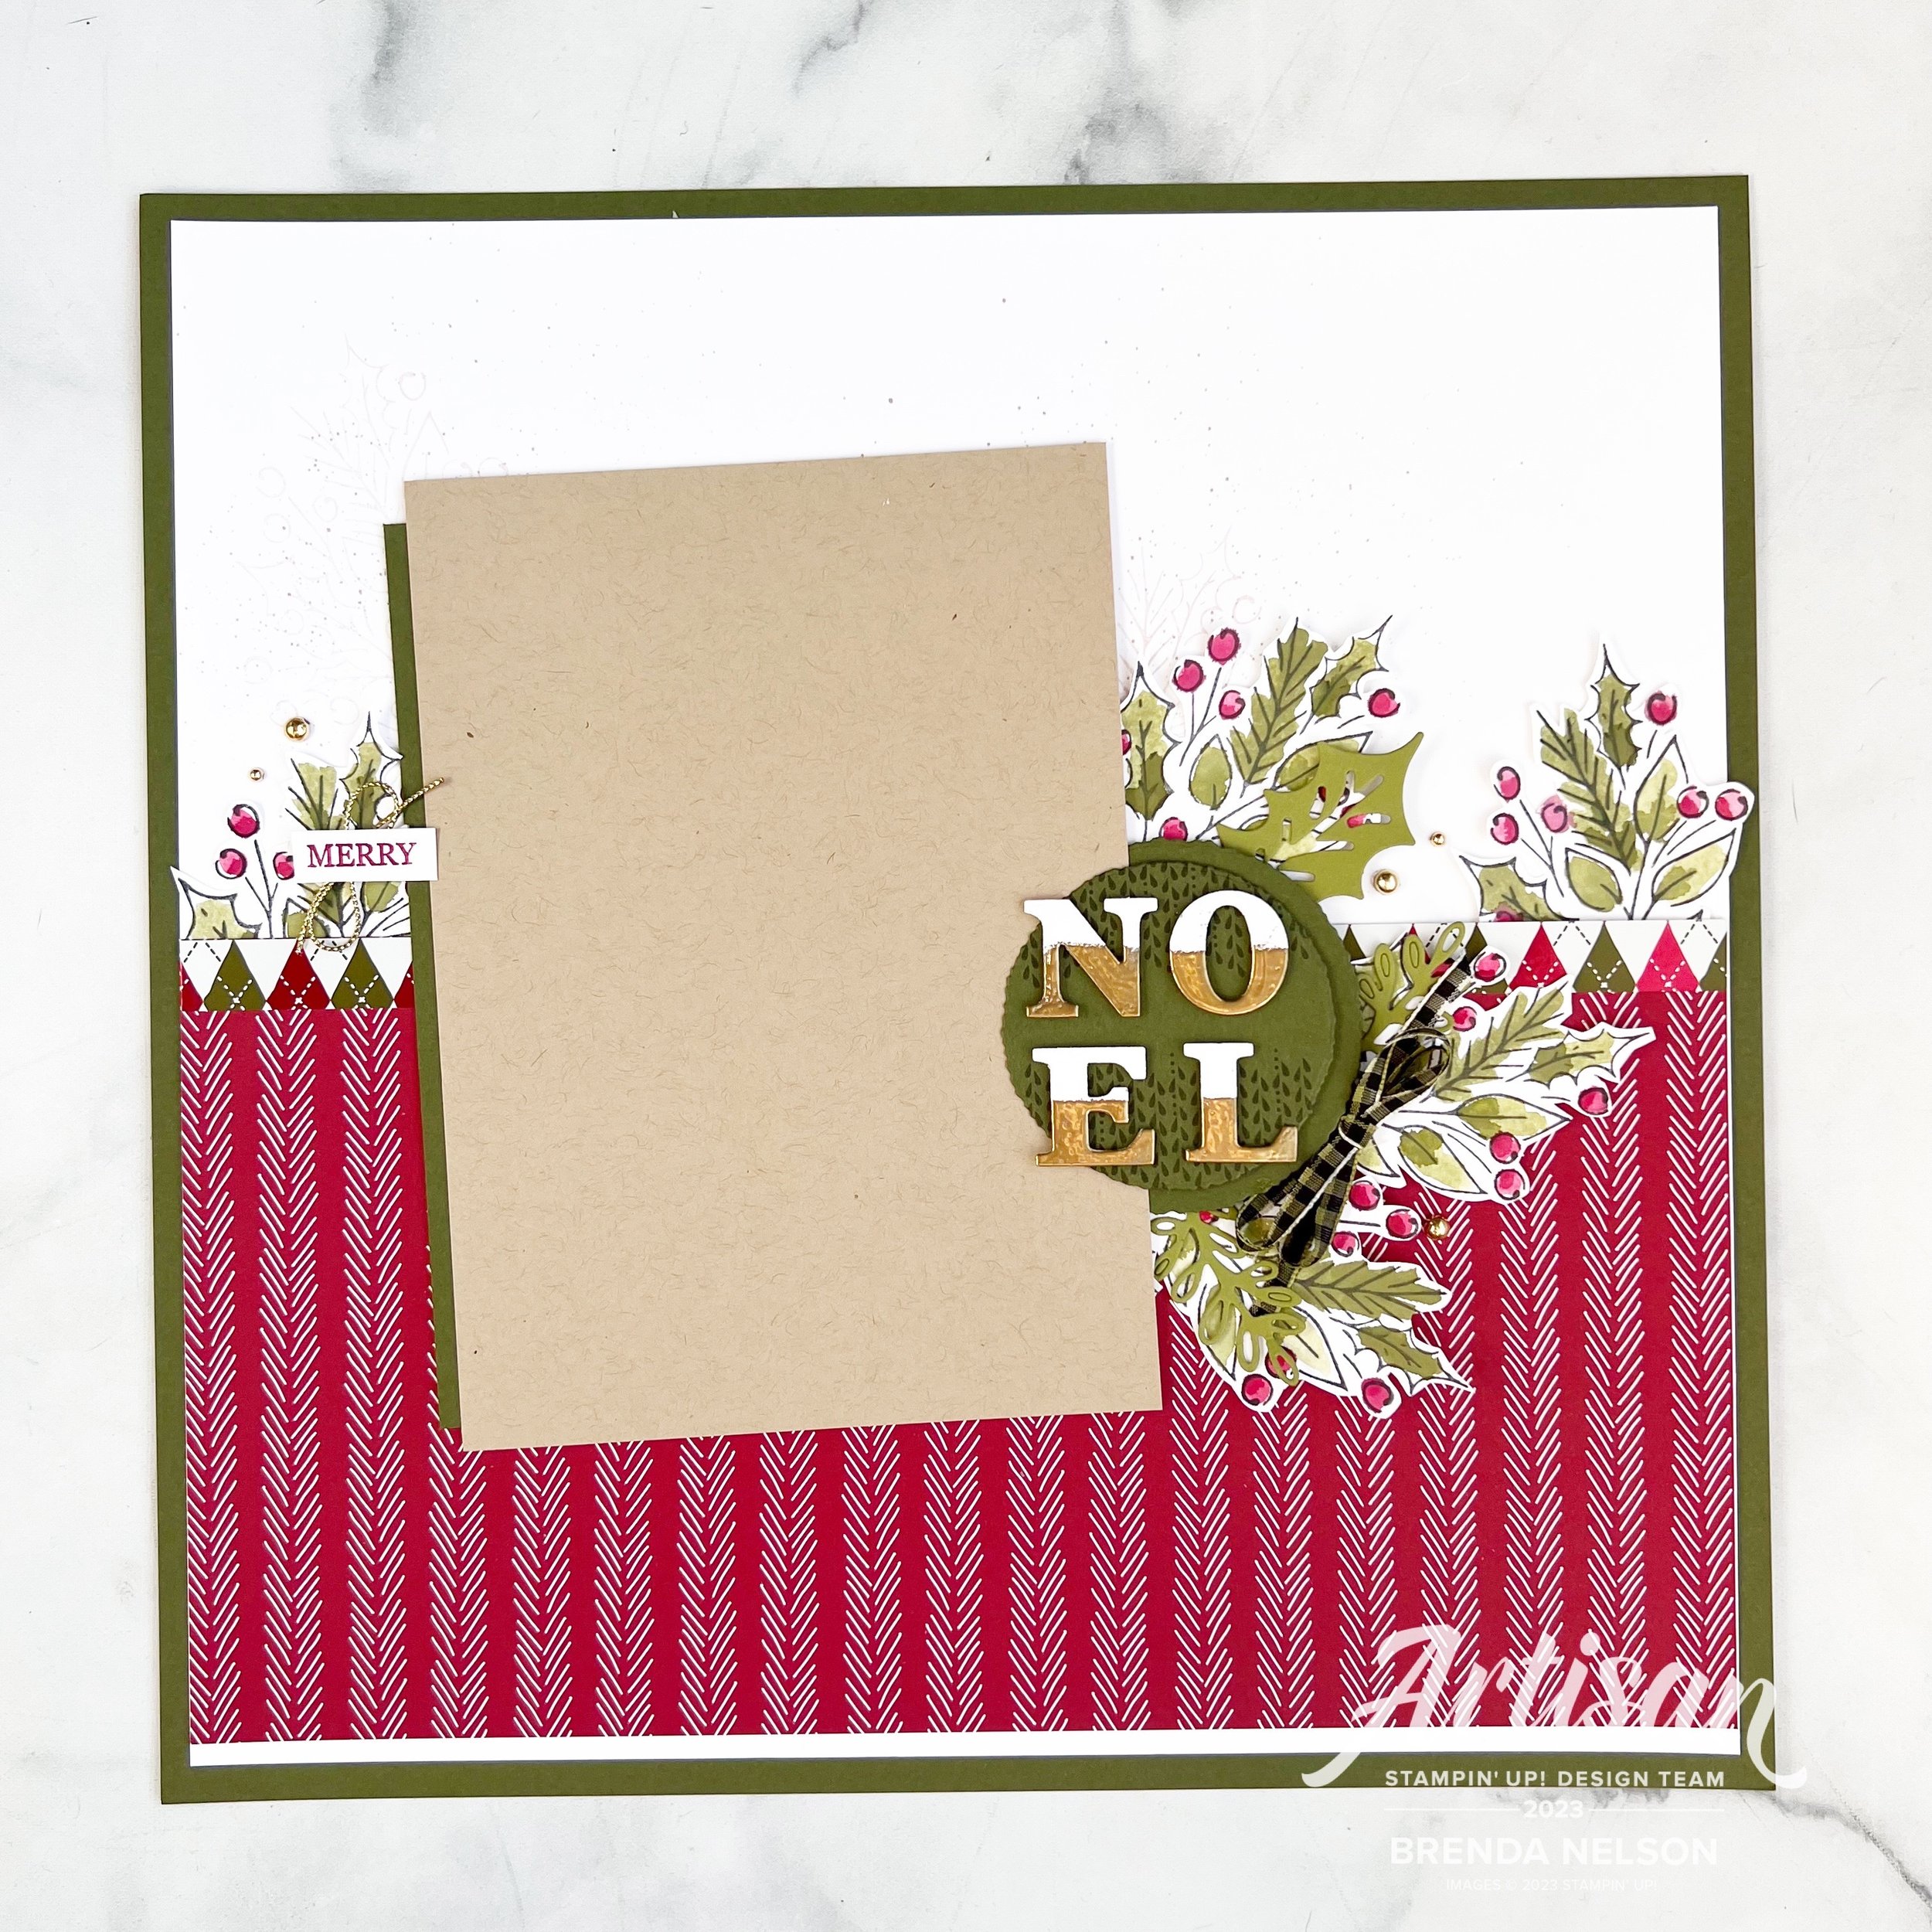
This box is made from one sheet of 8 1/2 x 11 card stock and is decorated with the Christmas Classics Bundle—the whole Joy of Noel Suite is probably my favorite in the catalogue. I do have to say that I love traditional Christmas colors the most. They just make crafting and designing so easy!

I cut an extra panel of Real Red card stock for the front of the box and ran it through the Distressed Tile 3D Embossing Folder. This folder is simply amazing, it literally works with ANY type of design!

I wrapped a 2 x 12 piece of the Joy of Christmas Designer Series Paper around the box—now its not big enough, so you will need another 2x2 piece to fill in the gap. I specifically chose this pattern because its ‘busy’ so adding in an extra piece was hardly noticed. I tied a piece of the Black & Very Vanilla Check Ribbon around the box and made a gorgeous Tammy Bow to go on the front.

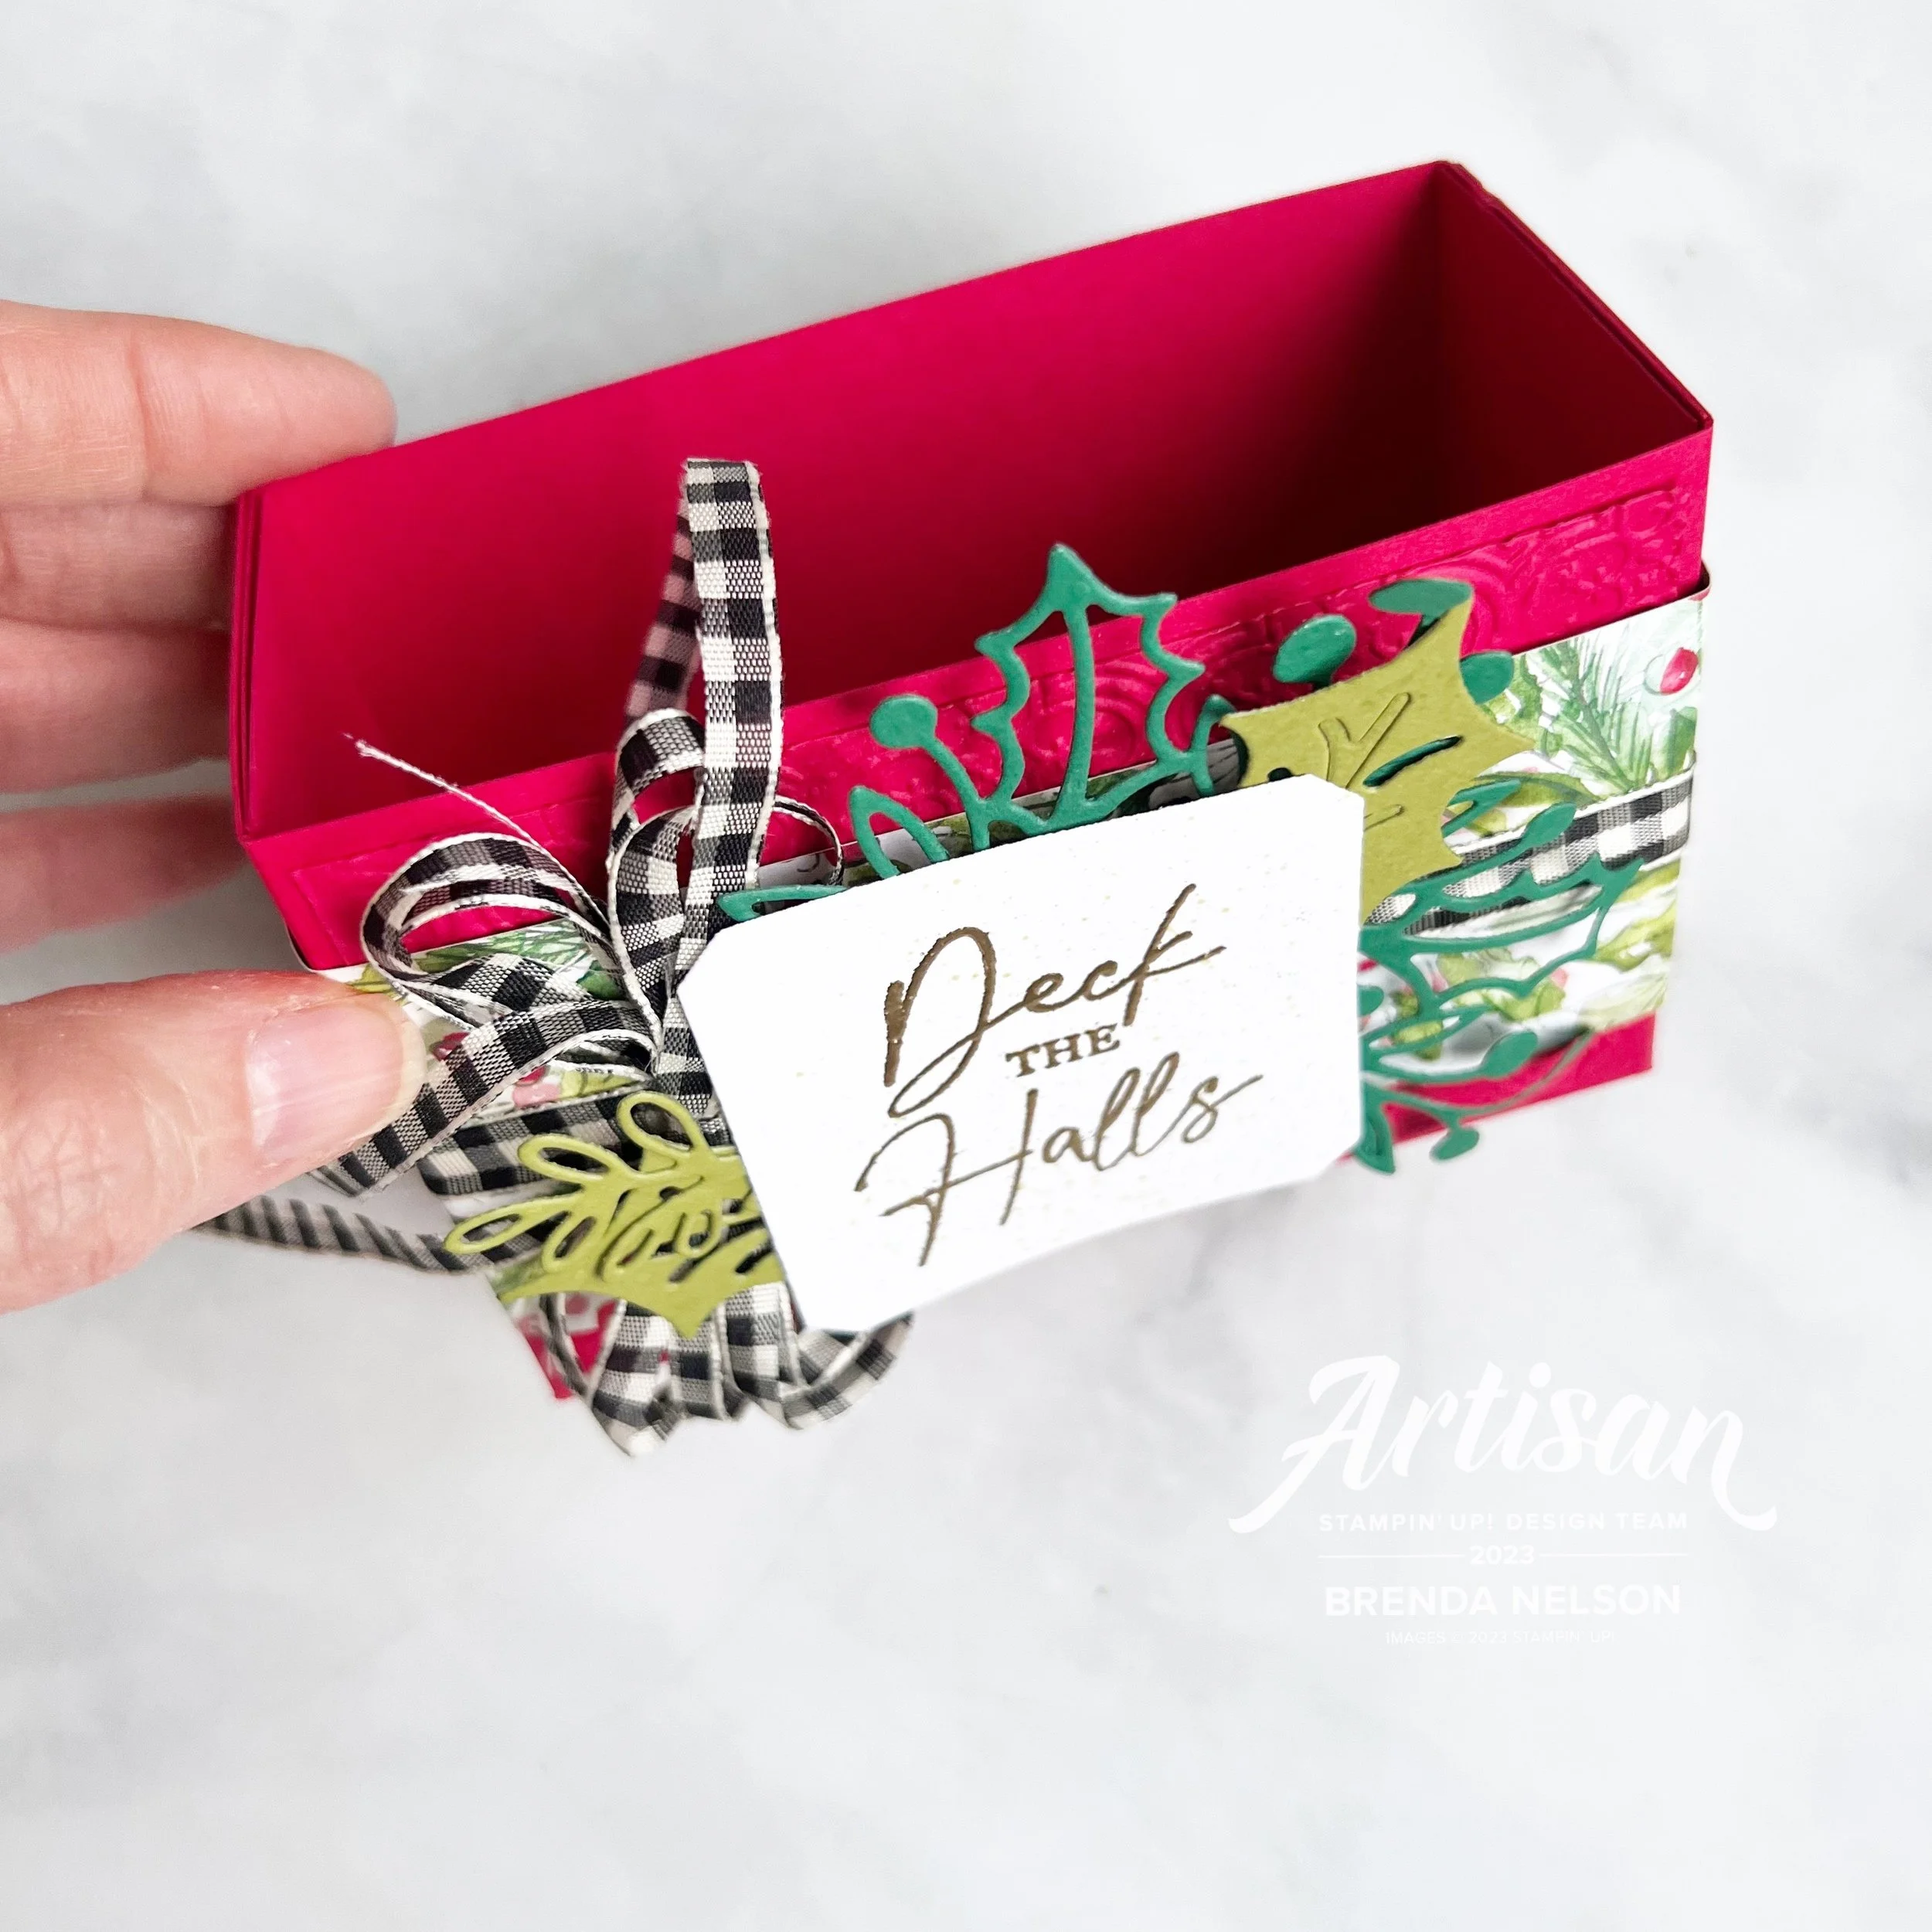
As you can see, the box is big enough to fit several card and envelopes. Even a cello bag with a holiday treat inside works! The possibilities are really endless.

Deck the Halls is embossed in gold and cut out with one of the shapes from the Christmas Classics Dies. I added some greenery and sprigs behind the sentiment as well in Shaded Spruce and Old Olive card stock.

It is such a beautiful project that doesn’t take that long to put together!

Here is a template for you to follow if you would like to create a box of your own. Start by trimming your card stock to 10 1/2 x 8.

Score @ 1, 3, 7.5 and 9.5 inches on the LONG SIDE

Score @ 3 and 5 on the SHORT SIDE

Trim away the shaded areas as shown:

I used Tear’n Tape to secure my box together and to wrap around the DSP belly band to a bit to hold the ribbon in place too.


You could even use the front of the box as card inspiration!

I cannot wait to see what project Melanie is going to share for her 12th day.

Thank you for following along with us!

If my projects have inspired you, please consider shopping my online store! It allows me to continue to do what I love!

12 Days of Christmas--Day 11!

Hello friends! We are down to just the last 2 days of 12 Days of Christmas! It has really flown by and I hope you are feeling festive and inspired by our projects!

For Day 10, I decided to share another scrapbooking page with you! I want all my crafty friends, whether you make cards, projects or scrapbook to find something to inspire you during this 12 Days of Christmas Blog Hop that Melanie and I are putting on for you!

This fun and colorful layout is perfect for a couple of holiday photos—I can’t wait to add some! I am going to feel so ahead post Christmas when I can just print and add some pictures!

I started with a base of Coastal Cabana and added a layer of Basic White over top with a couple strips of paper from Merry Bold & Bright. I love this color combination of Pool Party, Starry Sky, Granny Apple Green, Lemon Lime Twist and Shaded Spruce!

I did a little blending with Pool Party ink in the top left and bottom right corners of my Starry Sky photo mats. I then stamped some little stars from the Merry & Bright stamp set over top of the blended area. It creates such a nice background.

The Christmas bulbs are stamped in Pool Party and Shaded Spruce with the toppers cut from the Holographic Specialty Paper. This paper is absolutely perfect for these bulbs!

The sentiment is from the Merry & Bright stamp set and I added a little bit of the Parakeet Party Twine in behind the sentiment. A couple of the Ombre Matte Decorative Dots were the perfect little touch to this area.

I love how this stamp set has two different bulb designs and also includes a die for the filament inside and a string! So clever. These bulbs are stamped in Shaded Spruce and Starry Sky and you might notice the tops are a bit different—I love that the die set includes two options as well!

I stamped out HAPPY MERRY AND BRIGHT in Coastal Cabana, Shaded Spruce and Granny Apple Green and then trimmed them down. I added a couple more Ombre Dots to this area as well.

I love this page and I hope it has given you some ideas on how to use the Merry & Bright bundle beyond cards! Now head on over to Melanie to see what she has to share with us today!

If this page has inspired you and you are in the need of supplies, please consider shopping my online store! Every purchase helps me continue to do what I love!

12 Days of Christmas--Day 10!

Day 10 already! This means the month of November is really zipping past! I hope you have been enjoying everything so far!

Today I am going to switch things up a bit and share a holiday layout or scrapbook page with you. I am happy to have this page completed so all I need to do is add a holiday photo to it!

I started with a base of Mossy Meadow and added a panel of Basic White that I trimmed to 11 1/2 x 11 1/2. In Crumb Cake ink that I stamped off, I added the large image from the Joy of Noel stamp set to the background, framing the photo mat. I also gave a spray of Crumb Cake ink with my Stampin’ Blend marker.

I added a really generous 6 x 11 1/2 piece of DSP from a recent Online Exclusive and smaller strip of the argyle pattern in 1/2 x 11 1/2 to create a division between the DSP and the Basic White.

The 5x7 photo mat is Crumb Cake with a small strip of Mossy Meadow card stock on the left.

I stamped in Memento ink several of the large holiday sprigs from Joy of Noel and used my favorite coloring technique—lazy watercoloring with Old Olive, Mossy Meadow and Cherry Cobbler inks. I die cut them using the coordinating dies and then added them as accents throughout my page.

I also die cut a few leaf/sprig shapes from the Classic Christmas Dies and added those in as well.

My favorite part of the layout is the NOEL—I started by die cutting two Deckled Circles in Mossy Meadow. On the smaller top layer I stamped the sweater like image from Joy of Noel along the top and bottom of the circle.

I die cut the NOEL and then using my Versamark, I covered just the bottom half of each letter and then covered them in Gold Embossing Powder. I love how it elevated these letters! The touch of gold is perfect for this page.

I also used my Old Olive Stampin’ Blend to color some of the Black & Very Vanilla Ribbon (after trimming it in half so it wasn’t as wide).


I added a little ‘Merry’ to this side of the page using the Christmas Classics stamp set and Cherry Cobbler ink. A bit of Gold Elegant Trim and some gold pearls from the Blooming Pearls was perfect for this little area.

I hope the page inspires you to do some holiday scrapbooking for yourself. And if you can get a few pages done before the holidays begin, it will be so easy to add a photo after the season!

I am excited to see what Melanie is sharing today, so make sure to click on this image to go and visit her blog! Thank you for stopping by and if you are in need of supplies, please consider shopping my online store so I can continue to do what I love!


12 Days of Christmas--Day 9!

Hello! I am so excited about my cute projects to share today for Day 9 of 12 Days of Christmas! I hope you have been enjoying all of the fun things that Melanie and I are sharing with you!

This is the season to send cards but its also the season of gift cards!

My project today is a fun cheery way to give a gift card. I have 3 teens in my house and lots of teenage nieces and nephews, so gift cards are a popular choice. I also make a cute little box for our holiday table each year that I place a gift card inside, so these little guys are going to be decorating my table for sure!

I used our Scallop Gift Card Boxes from the Annual Catalogue for these 2 cute projects, along with the Sending Cheer Bundle and Merry Bold & Bright DSP—you could even include the card I previously shared with your gift card box!


I wrapped a belly band of the star DSP around the top box and made a super cute mini bow to adorn the box. To make a mini bow you need 1 piece of 6x6 DSP that you cut into 1/2 strips and fold into a figure 8 shape. I used our defunct mini stapler to keep the loops together.

You stack them in the shape of a cross or tee, using a mini dimensional to keep them together. You then need one 1/2x3 inch strip attached end to end for the middle. I have a really great reel on my blog from last holiday season that shows you step by step how to make bow. Go check it out @stampwithbrenda

The gingerbread men on both boxes are stamped in Pecan Pie. I used the envelope stamp from the Sending Cheer stamp set on both projects as well. On the top it presents like a tag in Poppy Parade and on the bottom box as its intended, the worlds cutest envelope in Coastal Cabana.

On the bottom box I cut a layer in Basic White and ran it through the 3D Basics Folder for a little texture. The belly band on this project is the fun stripped DSP. I also colored in the little hearts on the gingerbread mans tummy with a Flirty Flamingo Stampin’ Write Marker.

I love these little boxes, they are so festive and fun! I hope you will consider making some too for your family or friends! They will definitely take your gift box level up!

I can’t wait to see what Melanie has designed for us today! Please make sure to go and check out her project!

12 Days of Christmas--Day 8!

Hi friends! So happy you are here and hop you have been following along each day so far!

My card for sharing today is super cute, if I don’t say so myself! It features the Sending Cheer Bundle and the Merry Bold & Bright DSP for a super fun cheery Holiday Card!

The base and first layer are Poppy Parade and then I added a square of the ‘Falalalala’ DSP and a torn strip of the star pattern from the Merry Bright & Bold collection. This is a fun way to create a bit of a peek a boo element and use some of our fabulous DSP #usethatstash!

The tag is cut from the Sending Cheer Dies in Coastal Cabana and I added a bit of the White Iridescent Ribbon (cut in half) through the tab. Its secured with a little bow of Linen Thread.


I found the best color for stamping the gingerbread man was Pecan Pie. I am so happy we have this awesome color!

The present is also stamped but the ribbon/bow is actually a die cut in Granny Apple Green card stock.

The sentiment is in Daffodil Delight and then just hand trimmed to fit the card. I few Iridescent Adhesive Backed Disks and this fun little card was complete!

I am excited to see what Melanie has crafted up to share today! Please feel free to leave us both encouraging comments!

If this adorable card has inspired you, please consider shopping my online store! It really helps me love what I do!